Choosing a tile panel what to pay attention to
Before choosing and purchasing a finished product, it is necessary to determine the basic parameters designed to improve the situation in the bathroom and visually make the space wider.
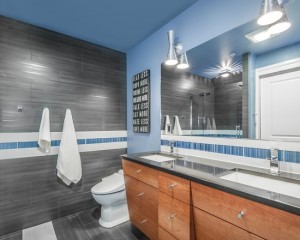
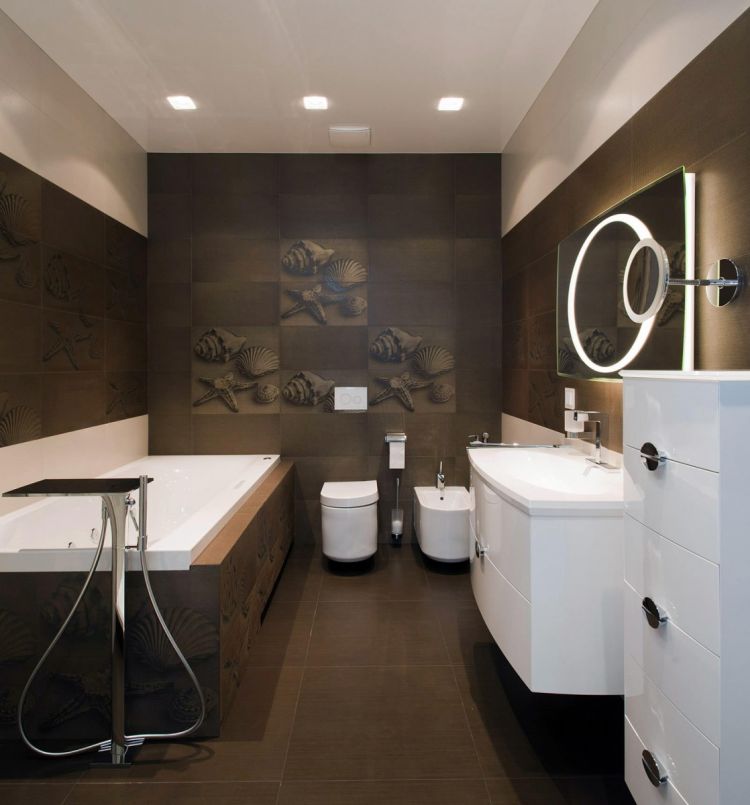
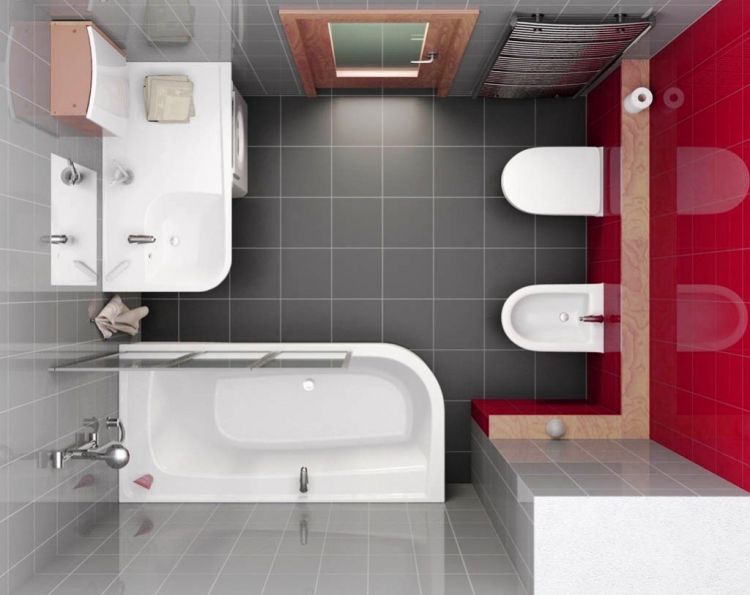
In particular, it is worth paying attention to the colors and sizes that we need to achieve the desired goals. In the conditions of modern apartments, bathrooms have a relatively small area, respectively, the size and shape of the plates play an important role, because the panel will become an individual element in the bathroom
If it is planned to place the tile on the wall located on the opposite side of the door (it is usually the largest), then the picture should occupy no more than 2/3 of this area. The composition of small sizes is also attractive, but its area, in order to achieve the proper aesthetic effect, should be no more than half of the entire wall area. The panel, which has a long horizontal side, contributes to the expansion of the room, and the design, which is stretched vertically, visually increases its height. Sometimes a bathroom panel tile can occupy the entire wall, in particular, if a photo panel or a special mosaic is used. The fact is that many owners of houses and apartments want to cover the entire wall with such a pattern so that the composition looks holistic and natural. This panel is made to order. If it is necessary to place the panel in a niche, the dimensions of the structure must ensure its full placement and the remaining free space for the frame.

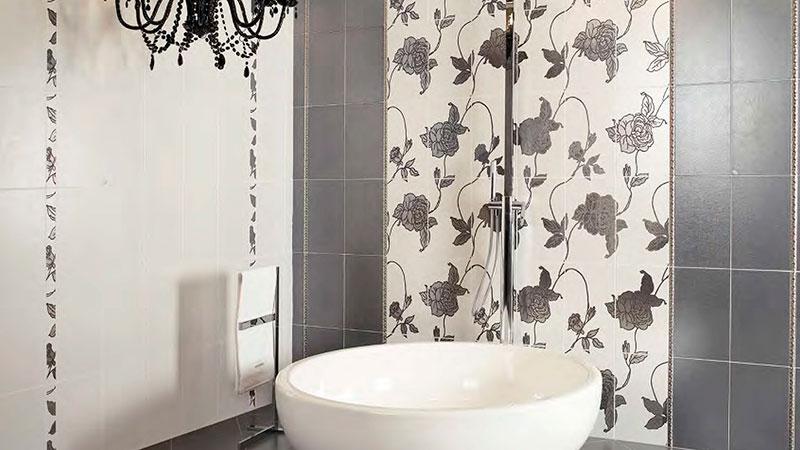
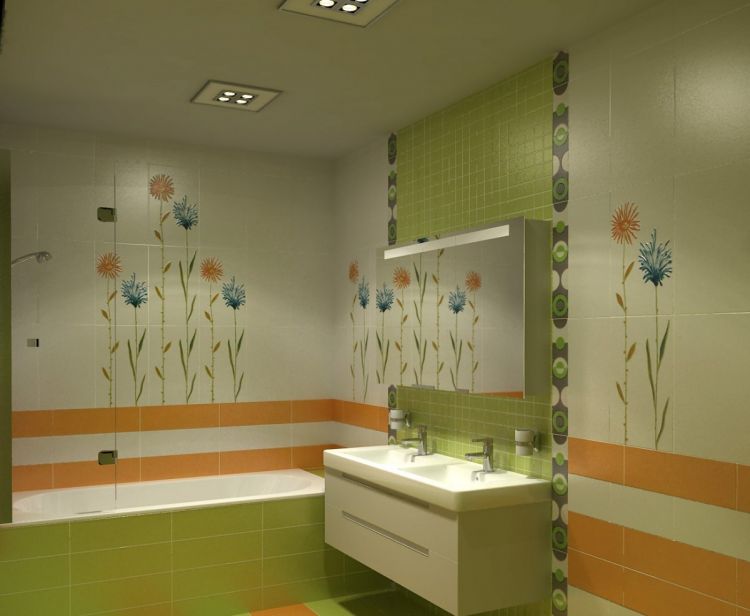
A large panel with flowers in a modern bathroom in gray tones

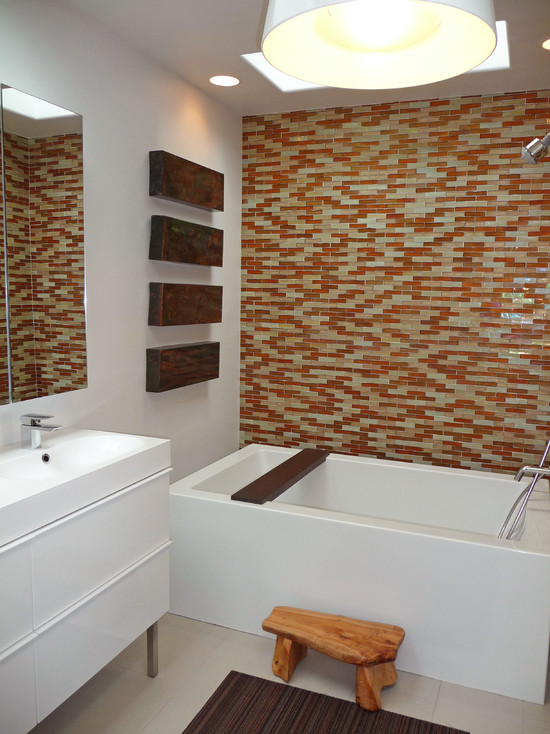
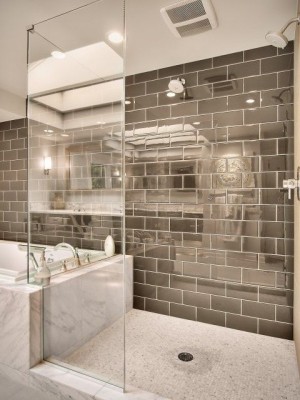
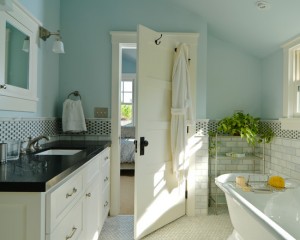
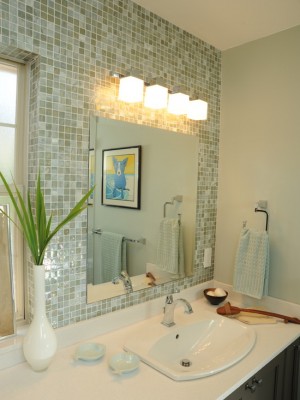
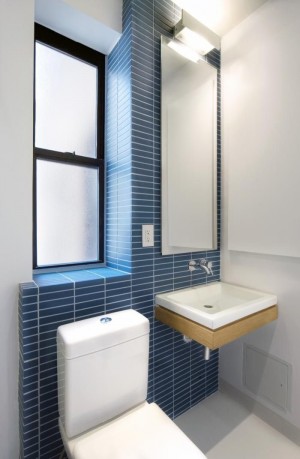
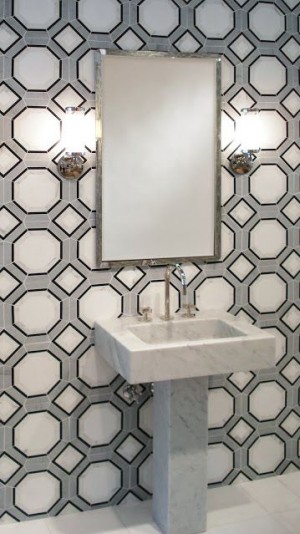
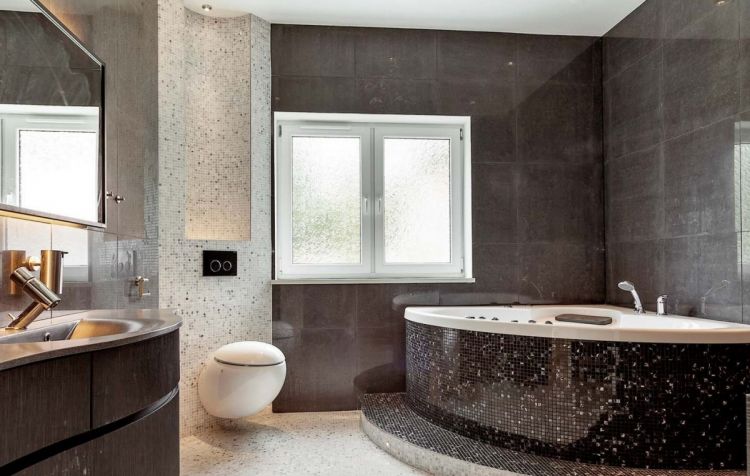
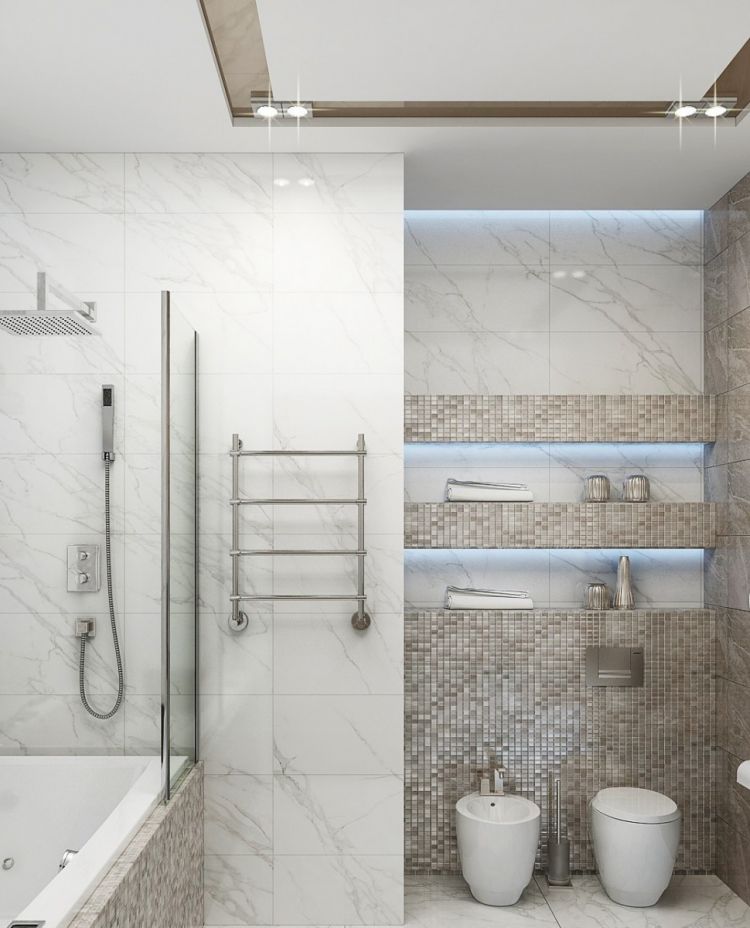
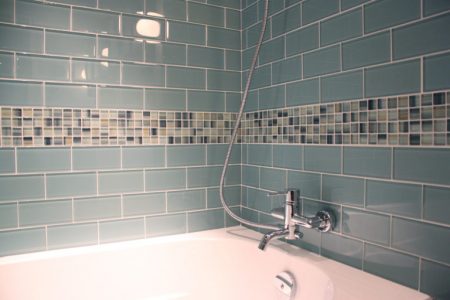
Mosaic on one of the bathroom walls
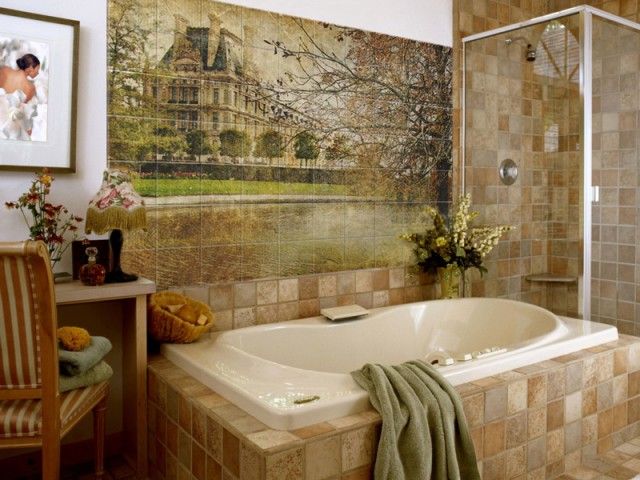
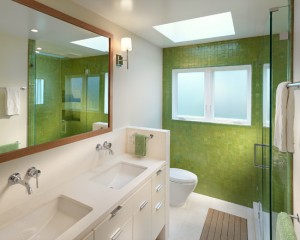
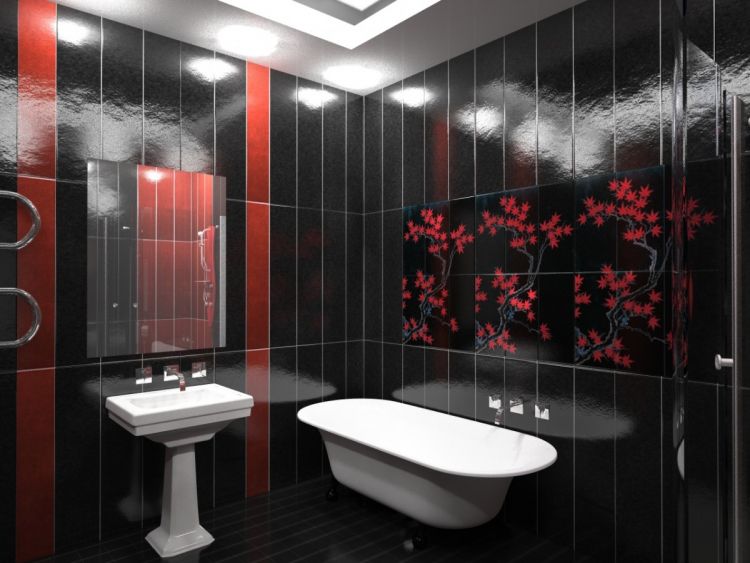
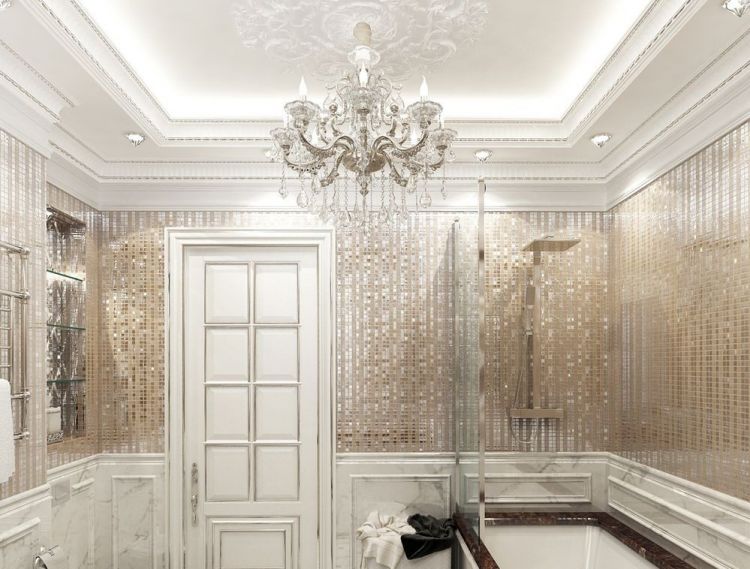
Photopanel of tiles in the bathroom
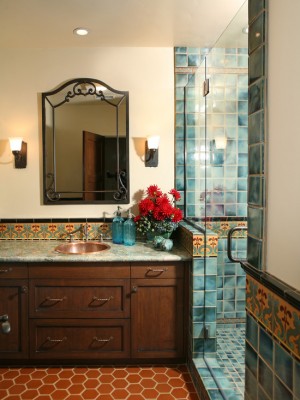
Features of color solutions for panels for tiles
Compositions in which there is a complete coincidence of the background and the color of the walls look organic. Lighter images contribute to a visual increase in space, warmer elements create an intimate atmosphere. Bright solutions look interesting, since even modern minimalism gladly accepts them into the interior, and at the same time, the appearance of the structures remains original. But choosing such an unusual, it is necessary to respect the integrity of the composition and not get out of it.
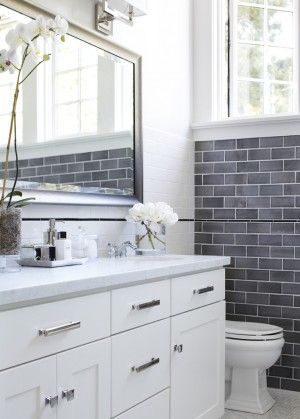
The contrast of colors and the choice of the right solutions is what you should pay special attention to. At the same time, not only walls, but also plumbing, furniture, frieze should fit into the color.

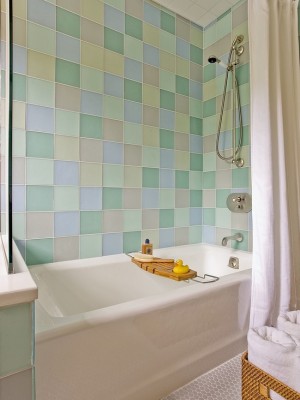
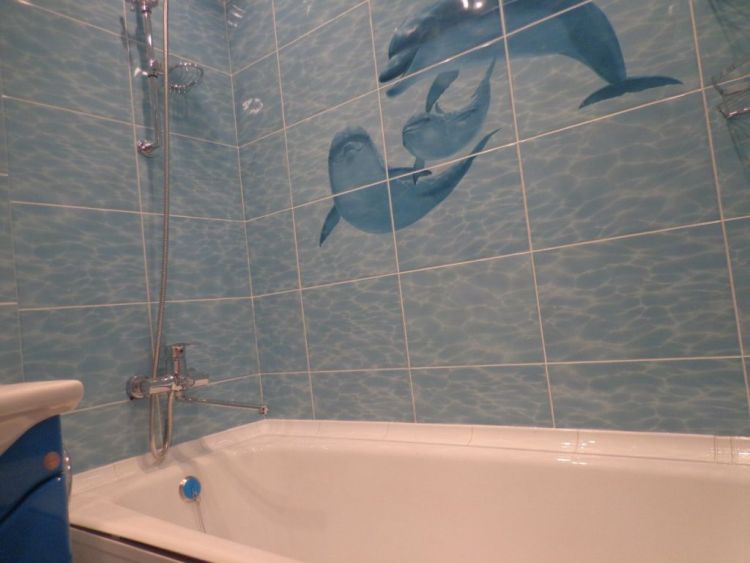
A beautiful nautical-themed mosaic panel is a good option for a bathroom
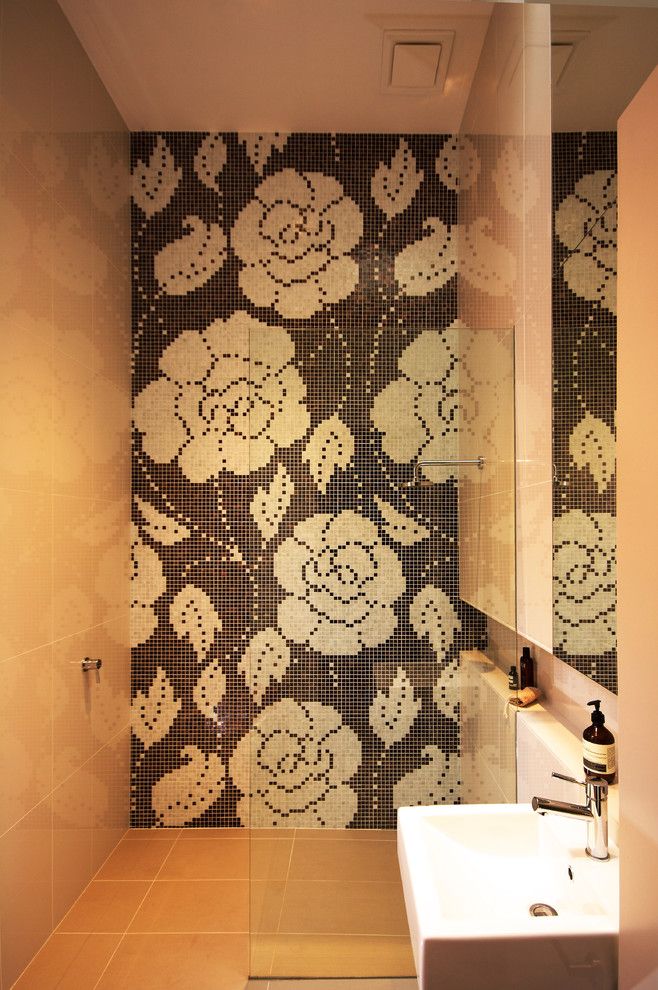
Large mosaic panel with flowers on the entire wall in the shower room
Tile layout drawings
Having chosen a specific method of laying the cladding, it is absolutely not necessary to use tiles of the same color and texture - using diverse products, you can create spectacular patterns on the finishing surfaces. To your attention there are several options for such prints.
Lines. A universal pattern that allows not only to decorate the interior of the bathroom, but also to divide the room into several functional zones. The easiest option is to lay out the demarcation lines with tiles a few tones brighter than the facing background. Linear layout can also be used to create bathroom borders.
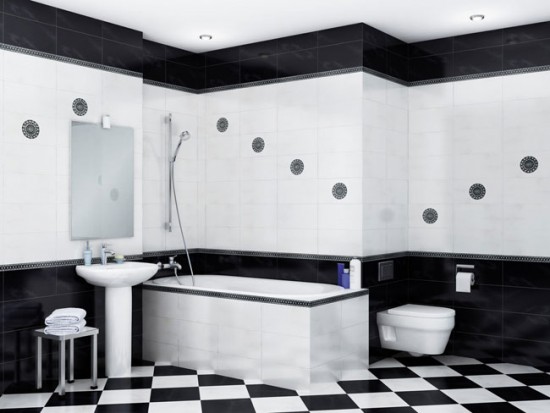
Chess. Another versatile print that will fit in all bathrooms. It is very easy to create: you just need to alternately lay tiles in two contrasting shades.
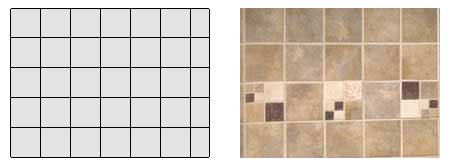
Carpet. A great option for spacious rooms where most of the space is free and not crowded with plumbing or furniture. The carpet is created by laying multi-colored inserts of 4/8/16 tiles in different parts of the room.
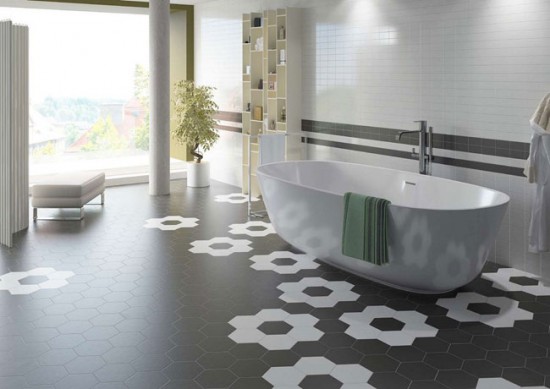
Ornament.The drawing is similar to the previous one, but in this case, not geometric inserts are laid out, but multi-format patterns.
Advice. Creating such a pattern is not complete without the extra consumption of tiles, since the products need to be cut to give them the desired shape. Therefore, it is better to add another 10-15% of the stock to the amount of tiles calculated for the area of \u200b\u200byour bathroom.
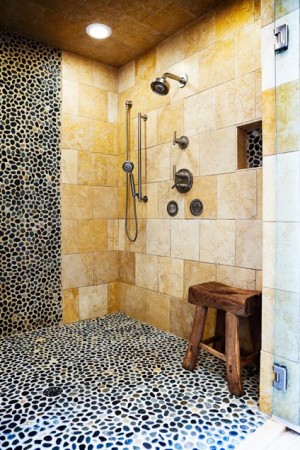
Kaleidoscope. Radial drawings from small multi-colored tiles, usually no more than 15 x 15 cm in size. The number of shades can be different - from two or three similar tones to dozens of different colors.
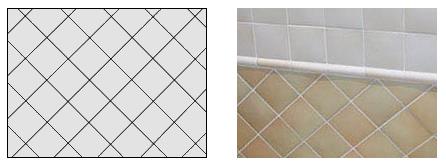
Diagonal way
This is where the most difficult and painstaking work lies ahead.
There are several benefits:
- makes the space visually wider;
- masks wall defects (irregularities, roughness) due to improper layout of the room;
- you can make a unique and interesting ornament or pattern on the surface.
In addition, there are also disadvantages:
- it is undesirable to have even a slight difference in the size of the tiles;
- there is a lot of construction waste left.
With the “diagonal” version, the initial row begins to be laid from slabs cut along the diagonal line, due to this, the number of building materials unsuitable for further work increases.
The tile joints must be perpendicular to each other and sloped to the wall surface at a rate of forty-five degrees. The accuracy of laying tiles in the bathroom is made by a level and a square.
Other options for laying tiles in the bathroom repeat the most popular methods, but the tiles are used in two colors.

Diagonal masonry
Popular tile laying methods
There are a huge number of options for laying tiles, it all depends on the wishes of the owner of the house. But there are a few main ones:
Classical. The basic laying procedure is distinguished by a simple technique and a small amount of waste during work.
Classic or basic styling
On the run. One of the favorite styling options for builders. It allows you to hide such a disadvantage as different-sized tiles, with obvious deviations in size. Laying technique: the first row is laid as usual, each tile of the second row should start from the middle of the tile of the previous row.
The original use of the "run-up"
Diagonally. The first row begins with a specially cut tile in the shape of a triangle (diagonal cut). The next row is laid in a rhombus, so that the seams between the tiles are located strictly at an angle of 45 ° with respect to the walls.
Corner installation
Chess. This version of surface decor can be made in the classic or diagonal technique. But its main difference is the use of 2 colors (most often a contrasting shade - for example, black and white). Above a tile of one color, a tile of a different tone is placed, thus creating a “chessboard” pattern.
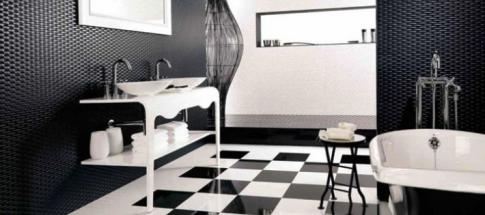
"Chess" solution always looks spectacular
The subtleties of tile layout in the bathroom
Whichever layout option you choose, the place where you start gluing the tiles to the wall is of decisive importance. The ideal solution would be to use the central wall of the bathroom as a similar platform. This will be the largest and freest wall, on which there is no furniture, shelves and mirrors. Usually it is located directly above the bath.
Having determined the center of the “main” wall, you can start laying, and it can be carried out not only directly on the central axis, but also on both sides of it. First lay the whole tile above the bath (except for the diagonal pattern), and then continue laying up. It is necessary to calculate the number of tiles in all horizontal rows so that the walls have the same size cuts.
When carrying out complex modular laying, it will be better to start with placing the pattern on the floor, so you can avoid mistakes when transferring it to the wall.
Start laying floor tiles from the most exposed wall in the bathroom. In this case, it is first necessary to carry out the lining of the walls and only then the floor.
In this article, we tried to introduce you to the most beautiful and popular cladding schemes, but it is not possible to list all the methods, since there are a great many of them. However, having basic knowledge, you can come up with your own original version, and then the layout of the tiles in the bathroom will not only decorate the bathroom, but also become the “highlight” of your home.
Photo gallery - tile layout in the bathroom:


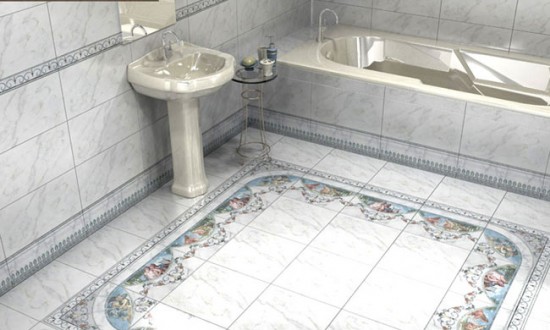
A variety of ornamental variations on bathroom tiles
Thematic areas for decorating bathroom surfaces are often associated with the water element. This can be a stylization of images of fish, shellfish, algae, exotic inhabitants of the deep sea, as well as raindrops, fireworks splashes. But this does not become a dogma, because floral ornaments, fluttering butterflies or mysterious abstractions, solved in pastel gentle tints, will help to give a small space a feeling of freshness.
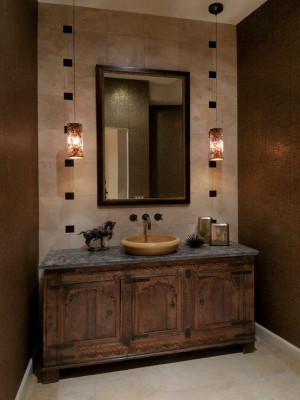
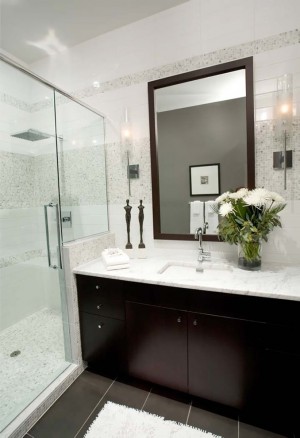
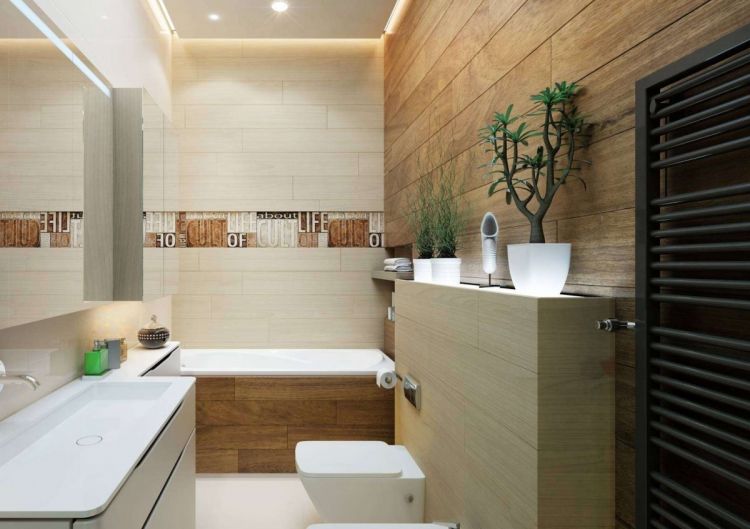
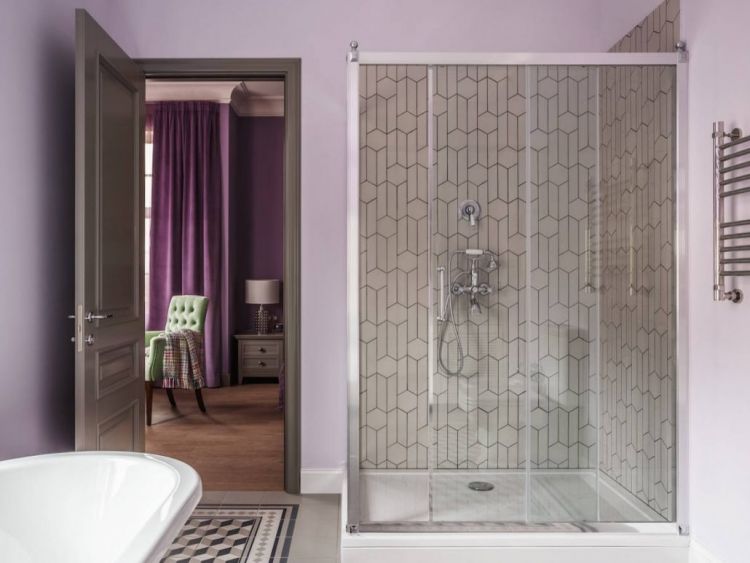
 Interior design option with ceramic tiles in the bathroom
The floor is also able to play, creating the right mood, for example, recreating the picture of the seabed with mother-of-pearl sand, gracefully curving algae, swimming fish
Increasing attention is drawn to tiles with transparent upper planes, decorated under them in any plot direction. Elaborately designed backlighting adds depth to the image, evoking mystical flashes of color that captivate the eye.
Such structural constructions can be accentuated on walls that are not directly in contact with moisture.
Types of laying
It is conditionally possible to divide the laying methods into three separate components:

Wrong laying from the corner. In this case, one whole tile is installed in the corner, where it is connected to another wall. The whole row and the wall are laid out from it, and the last tile in the row is cut to the size of the remaining space. Thus, in many rooms, ugly thin trims are obtained on one edge of the wall.

Laying from the center. The first plate is positioned so that its center corresponds to the center of the wall. Next, the row unfolds until the two ends of the wall have the same unfilled spaces. The same trims are inserted into them, which looks much more harmonious.
Correct layout. The row is again laid from the center, as in the second option. But one slab in a filled row without cuttings is removed, and the entire line is aligned in the center of the wall. The remaining identical segments are filled with cut slabs.

Drawing a picture on a tile
- The wall to be decorated must be thoroughly washed. Use detergents that will clean all kinds of dirt. You can degrease the surface with alcohol. Next, the surface should be rubbed a little with silicon carbide paper. This will increase the bonding ability, after the primer is applied. If the tile has not yet been placed on the wall, then lay out a few details and imagine how much space the future masterpiece will occupy.
- The easiest way is to use a ready-made stencil, it is moistened with water and applied to the tile. You just need to fill the empty space with paint. You can use aerosol cans. If there are no stencils or you have not found a suitable one, then draw a sketch with a pencil. After that, you simply color your drawing with the appropriate colors. Acrylic paint dries very quickly, keep this in mind.
- Wait until one layer dries well, only then apply another shade. If paint gets on an unwanted area, immediately wipe the area with a cotton swab.
-
If the pattern was applied to individual sections of the tile, be sure to fire it.To do this, you can use an ordinary oven. Preheat the oven to 150 degrees and leave your art for fifteen minutes. The product remains in the oven until completely cooled. Wall paintings should be covered with a protective varnish.
- Section: DIY 11-02-2015, 12:58
We recommend to see
Bathroom tiles. How to make the right choice?
Almost no construction can do without ceramic tiles today, but this building material is especially relevant when finishing a bathroom. What kind of tile is preferable to choose for
Ceramic tiles in the home interior
Ceramic tiles have appeared in the home interior for a long time.
Previously, it was used mainly in the bathroom and in the kitchen.
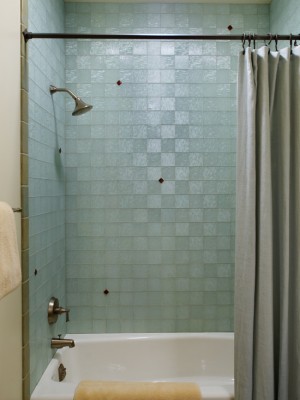
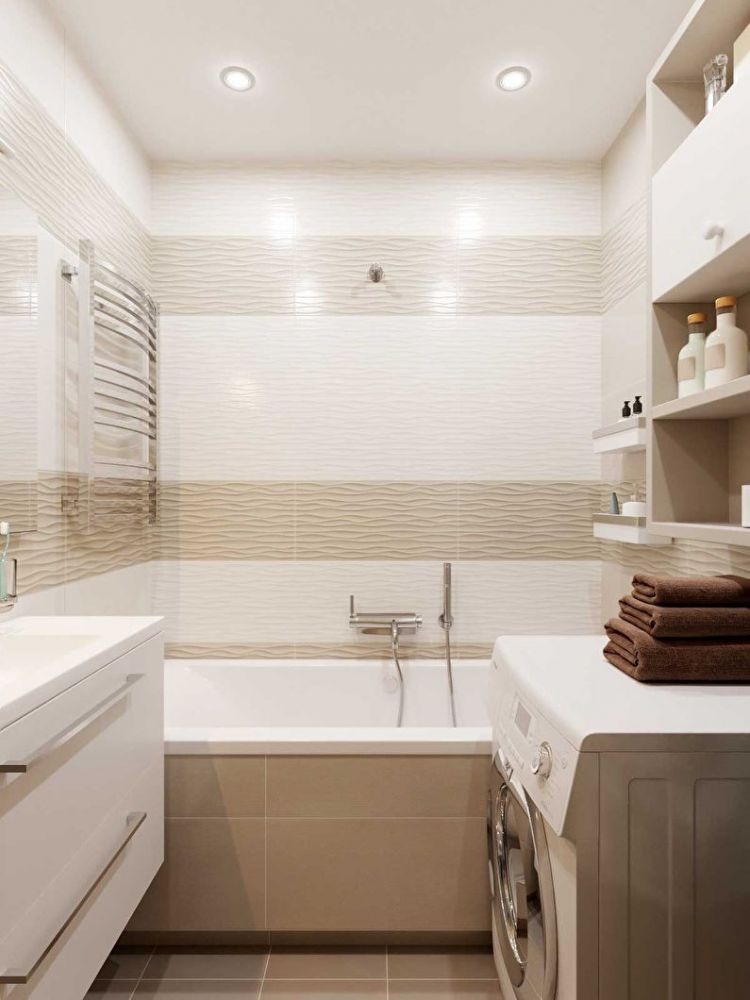
Ceramic tiles in the bathroom
Tiles in the bathroom
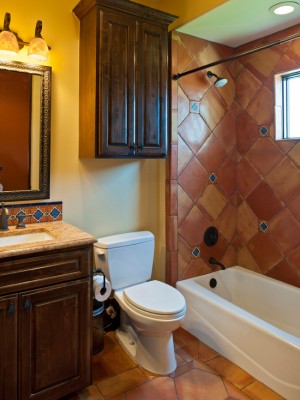
When renovating a bathroom, it is important to consider that this place serves to relax and relieve stress after a working day. Therefore, the situation here should help to tune in to peace and harmony.
Himself a painter - stencils in the interior
Wall paintings, ornaments and stained glass are considered to be decoration worthy of temples, public buildings and premium residential interiors.
However, contrary to popular belief, this type of interior decor
Categories
- fixtures
- hostess
- Building Tricks
-
DIY
- DIY tools
- Note to summer resident
- We decorate the house with our own hands
- Homemade devices
- We create toys with our own hands
- Motorist
- DIY furniture
- Do-it-yourself abyss
- Advice
What are they reading
- Arthritis: definition, treatment and prevention
-
Fox's tail
-
How to grow decorative lilacs in the country
-
Restoration of teeth
-
Repair on the loggia
-
tower house
-
Business card of my house
-
Favorite vacation spot
-
Here is such a wonderful and wonderful harvest
-
Gardening exhibition
Which way to choose and why
In the first version of the “wrong” laying, uneven segments will appear at one end of the wall. At the same time, since the cutouts are located only in one corner, the wall will look strange and geometrically incorrect.
This method is resorted to only by inexperienced craftsmen who do not want to cut the plates once again. The customer is left to admire the annoying shape of the wall for decades until he makes repairs.
The third option is the most preferable, since it is he who will leave large and beautiful pieces of tiles on the sides of the wall.
In most cases, such laying will be perceived as an even layout of tiles along the entire length of the wall and will not irritate the eye.
The second option is less preferred. In cases where the wall does not fit the width of the tile, segments of 2-5 centimeters in size may remain on the sides. They will look terrible, even compared to the first styling method.
Resort to this method only in the most extreme cases. Usually, the alignment from the center is well suited for ducts in bathtubs reserved for internal plumbing communications.
A similar method is often used to create hidden hatches and cabinets in shower rooms.
Method 1. Seam to seam
Perhaps the easiest way to install, in which the rows of tiles are parallel to the walls of the bath. In this case, the vertical direction accuracy is measured by a plumb line, and horizontally by a triangle. In a similar way, you can lay both square and rectangular tiles. Separately, it should be noted that this method allows you to save material, and the process of laying tiles becomes as simple as possible. In addition, the “seam to seam” method allows you to harmoniously decorate the room with various ornamental borders.
When laying, you should not rely on the accuracy of your eye, be sure to use special plastic crosses.
How is the process of laying tiles
Having carefully studied the different options for finishing bathroom tiles, we will proceed to consider the laying process itself, we will take the floor covering in the bathroom as a sample.
We will assume that the tile has been selected, all related fittings have been purchased, the necessary measurements have been taken.
- We clean the floor: remove the flooring from linoleum, parquet, tiles, including glue or mortar, from the surface that has served its time.
We tap the floor and, having caught a muffled echo, we dismantle the outdated screed, since there are voids under it and the base may fail sooner or later. - Then we prepare the surface for laying the tiles.
-
If you have a horizontal with significant tubercles, then you need to level the surface. To do this, we mix a solution of cement and sand.
- After the screed dries, apply a primer on it and again wait until it also dries.
- We isolate the surface from moisture penetration, this is done by applying bituminous paste or a special mixture is used for this, which protects the plaster from moisture
- Reapply the primer to improve adhesion to the coating to be applied.
- If there are small irregularities on the floor, then it is better to use a specialized self-leveling mixture (leveling mass), which corrects horizontal fluctuations from 3 mm to 1 cm 50 mm. In this case, there is no need to prime the floor.
The above bathroom tiling options helped you choose a certain way.
- Laying tiles should begin, heading from the outermost wall to the doorway.
It is necessary to decide where the bath, shower cubicle, laundry machine will be located, under them we will hide tiles with cut edges.
We start laying the tiles from the corner that will remain open (here we need a whole material) towards the wall where the plumbing equipment will be installed, here you can lay the cut tiles. - We perform the following steps necessary for this:
- we set two tiles in the corners to the required level and fix them on the alabaster mortar (it has the property of drying out in a short time and then it is very easy to remove);
- we moisten the back surface of the plate sufficiently;
-
we cover the surface of the tile with glue diluted to the desired consistency using a special spatula (with teeth);
- we lay, docking with the beacon tiles, and keep a small distance between the plates, inserting crosses of identical size;
- the laid tile is well pressed to the floor;
- we verify how well the slab has settled, for this a rule or other necessary devices are useful, as well as a small level that checks the horizontal surface;
- excess glue, which appeared after the sediment of the plate, is removed;
- we clean the joint between the plates with a spatula;
- re-align the horizontal surface;
- repeat all the steps until the end of the row, then remove the beacons and adapt them already to the adhesive solution.
- Then, when the tile is laid and the glue has dried, you need to start grouting the joints:
- with a rag you need to remove the remaining glue from the surface of the tiles;
- with a rubber spatula, fill the joints with a trowel diluted to the desired consistency;
- then, when the grout dries, remove the excess.
As it turned out, the laying process is quite simple, but it requires precision and concentration. Reasonably selected technology can guarantee the shelf life of the tile coating for many years. Best wishes!
Bathroom tile design options
The bathroom is one of the most visited places in the house. Therefore, the interior design of this room should please our eyes. One of the important elements in the design is the tiled tiles that decorate the floor and walls in this room.Let's look at some design options for laying tiles in the bathroom.
bathroom tile design
- Seam to seam is the easiest way to lay tiles. all rows of tiles are parallel to the walls of the room. This option is suitable for laying both rectangular and square tiles. At the same time, you can significantly save on material, and yourself
"In dressing" - this laying looks like ordinary brickwork, so only rectangular tiles are used for it. You should not use two contrasting colors with this installation method, as visually such a surface may appear uneven. Moreover, the laying of tiles should be done only horizontally.
"Diagonal laying" is a rather laborious and costly way of laying tiles. But it helps to visually expand the space, as well as visually “correct” not quite parallel walls.
“Chessboard” is a variation of the “seam-to-seam” tile installation in the bathroom, however, in this case, two-color tiles are used, for example, white and brown.
"Module" - for laying tiles in this way, tiles of at least three different sizes are used. Then the drawing will be dynamic and original. It can be an ornament, and an abstraction, and a plain surface with bright splashes.
Laying tiles in the bathroom
After, in principle, it becomes clear which layout option the owners would like to see in their bathroom, you can begin to develop repair plans.
Creating a layout project
To make it easier to imagine how the room will look after the repair, you should make your own design project. It is done like this:
- Using a ruler and a pencil on a sheet of paper, you should depict the wall of the bath on a scale (the most convenient is 1 to 10, that is, a meter of the wall will take 10 cm in the figure).
- Now you can place decorative details, borders and other elements on each of the painted walls. Such a project development will allow you to visually see how the finished cladding will look like. After all, on paper, details are easy to remove with an eraser, but when performing cladding, it will be much more difficult to make changes.
- For those who are familiar with the work of graphic editors, it will be easier to develop a layout project on a computer. Well, when developing projects, professionals use special programs that allow you to see the future coverage in 3D quality.
Counting the number of tiles
Knowing the layout method, it will be easy enough to calculate how many tiles will need to be purchased. To calculate, you will first need to make measurements. You should measure the length and height of the walls, as well as the dimensions of the surfaces on which it will not fit (for example, the size of the door leaf).
To calculate the number of tiles, you can use special calculators that are available on the websites of construction companies and tile stores. You can also make calculations manually. To do this, you need to know not only the surface area to be faced, but also the area of \u200b\u200bone tile. Counting the number of tiles of different colors must be done separately.

Laying tiles
Before proceeding directly to laying the tiles, you will need to do a good job of preparing the surfaces - the floor and walls. For this:
- Remove the old coating and weakly adhering plaster mortar.
- Make the alignment of the walls and floor, achieving the most even surface.
- Apply soil.
- Apply waterproofing mastics.
Then you can proceed to the marking of the walls in accordance with the developed layout plan. Glue the tiles on a special glue, which is prepared from a dry mixture. After the lining is completed and the glue has completely dried, the joints are grouted. So, there are different options for laying tiles in the bathroom. Which one to choose is up to the owners to decide.
However, when choosing options, it is worth listening to the recommendations of designers. For example, if the bathroom is small, then you should use layout methods and color combinations that help visually expand the room. When designing spacious bathrooms, there are fewer restrictions, but even here certain rules should be followed. For example, do not use more than three contrasting colors when decorating, so as not to create excessive variegation.
The classic way of laying step by step instructions
materials
The first step is to choose materials (tiles, glue, grout) and tools (level, square, trowel). Then you can get to work. The installation process can be conditionally divided into 6 stages:
- Surface preparation.
- Carrying out the necessary measurements.
- Preparation of the adhesive composition.
- Laying tiles.
- Applying grout.
- Cleaning.
More about each stage.
How to prepare the surface
The technology of laying tiles in the bathroom provides for checking the "readiness of surfaces" for work. It is necessary to install a plumb line near the ceiling at a distance of about 3 cm from the wall and check if the surfaces are even. If you find obvious differences, then you need to eliminate these defects with a cement mortar. It is worth starting decorative finishing after the working area has completely dried.
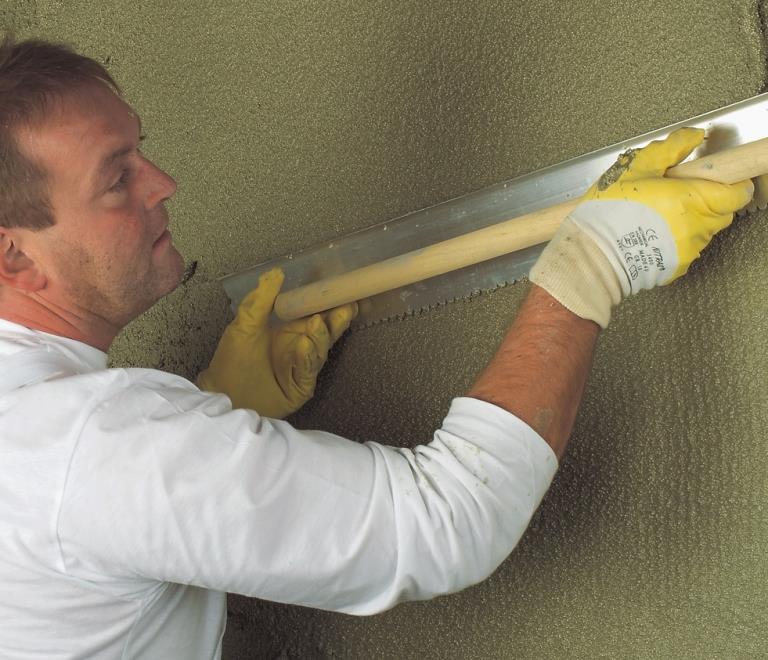
Surface preparation: leveling the walls
How and where measurements are taken
The next step is to measure the premises. It is necessary to use a tape measure to find out the length and width of each wall.
When calculating the required number of tiles, you need to take a margin of at least 15% for undercutting. The easiest way to calculate: multiply the length by the width of the wall and get the square that needs finishing.
A more accurate way is to calculate the number of tiles in a row and the total number of rows:
- To do this, you need to divide the width of the wall by the width of one tile. This way you will calculate the number of tiles in a row.
- Next, you need to divide the height of the wall by the height of one tile and find out the number of rows.
- In conclusion, the number of rows is multiplied by the number of tiles in a row and we get the total number of required material.
It is important to leave some consumables in case one or more tiles are damaged during operation. Tiles from the same manufacturer, even from the same collection, may differ by more than one tone in different batches.
If you decided to use decorative elements (borders, decors, panels) according to the design project, think over in advance where they will be placed.
If it is not necessary to lay a whole tile in a row, then cut it with a tile cutter, having outlined the line in advance. Row marking can be done using a plumb line. If you are sure that the surface is perfectly flat, then you can lay it without preliminary marking.
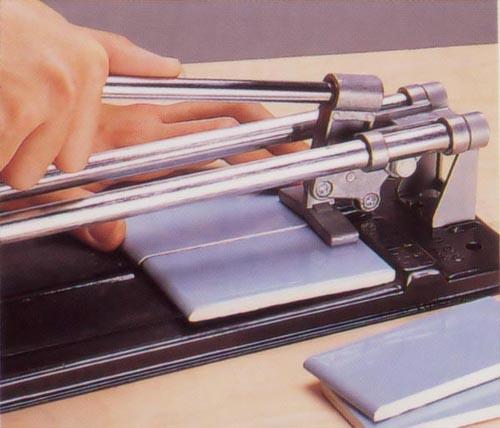
Working with a tile cutter
Adhesive preparation
Next, dilute the adhesive composition. Rules for the preparation of glue are indicated on the package. In addition to special glue, you can use a simple cement mortar or adhesive mastic.
Ceramic tile laying technique
The technology is quite simple:
- The beginning of laying tiles in the bathroom is the application of adhesive (or cement) mortar to a small section of the wall.
- Next, firmly press the tile against the wall, moving it slightly to the left and right for a tighter grip.
- After the first tile is firmly in place, proceed to laying the second.
- Make sure that the tiles do not “move out” by checking the evenness of the laying with a plumb line.
- Adjust the width of the tile joints with plastic crosses.
A tile cutter is an expensive tool. If you are unable to purchase it, rent it.
Applying grout and cleaning surfaces
Proper laying of tiles in the bathroom is impossible without applying grout to the seams. Dilute the solution according to the instructions and apply it on the tile with a special rubber “trowel” around the entire perimeter of the work surface. After the grout dries, you need to start cleaning work. Use a sponge and warm water to remove the grout from the surface of the tile without affecting the seams. After a month, you can process the seams between the tiles with a special sealant.
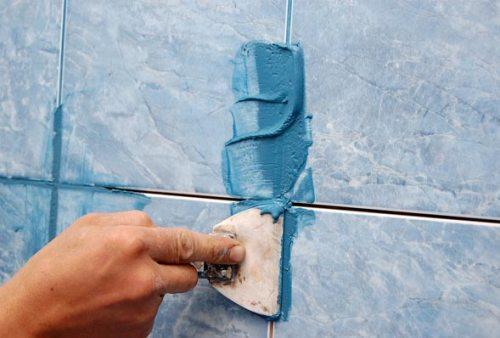
Applying grout to the seams
If you are doing repairs yourself for the first time, then choose the simplest pattern for installation, and it is better to decorate the wall with a special decor. If you still want a more intricate pattern, then you should seek the help of professionals.