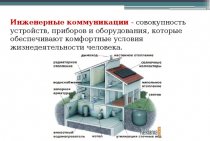
Shutdown of the coolant supply
Let's move on to practice.
Before removing the radiator, you need to turn off the heating and drain the water. How to do it?
I will analyze the shutdown of heating in an apartment building. For autonomous heating systems, it is difficult to give any general recommendations because of their individuality.
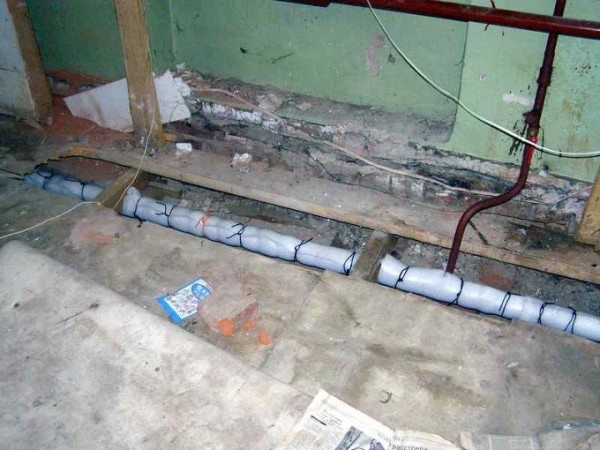
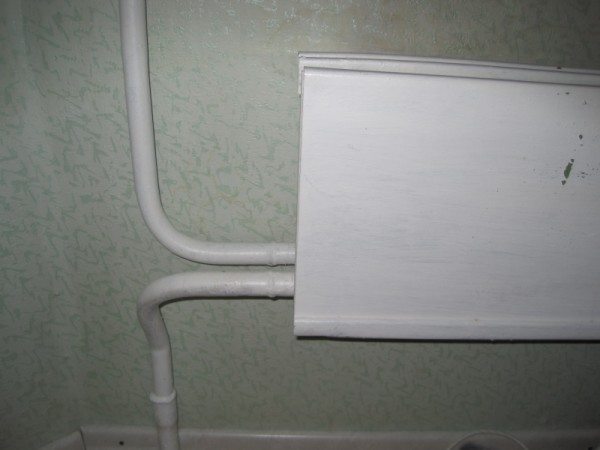
The simplest scenario is to turn off the water with valves, ball valves or throttles installed on the connections. It is enough to close the shut-off valves on both connections - and you can disassemble the connections on the radiator plugs, after substituting a basin or other container for draining water under them.
A jumper must be installed between the connections with shut-off valves. Without it, a closed throttle or valve will stop circulation in the entire riser. Very soon, neighbors will come to you and begin to question your high moral qualities aloud.
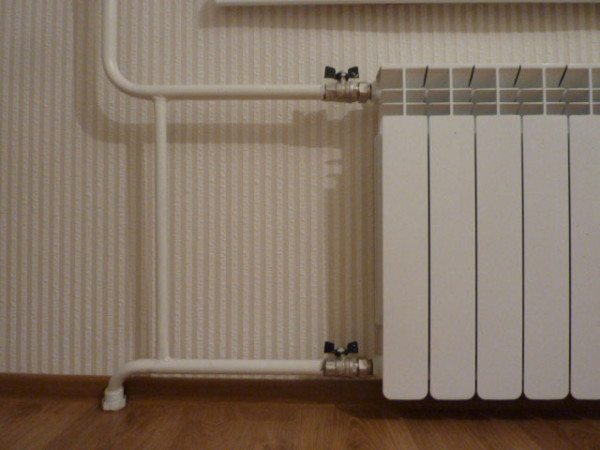
Correct connection: shut-off ball valves on the inlets and a jumper between them.
If the eyeliners are devoid of valves, you will have to look for and dump the riser. Here it is worth making a small lyrical digression.
In multi-apartment buildings with standing wiring, two filling arrangements are used:
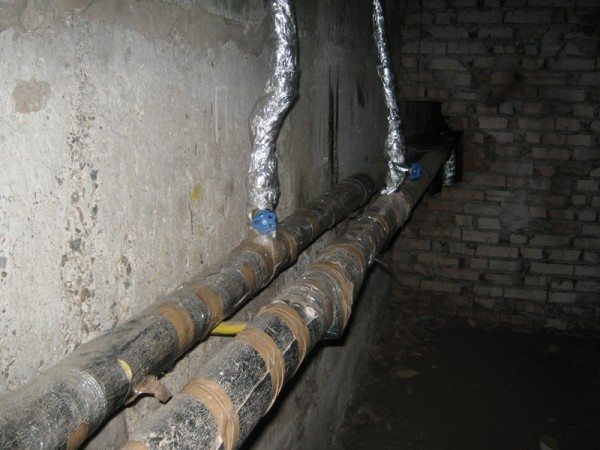
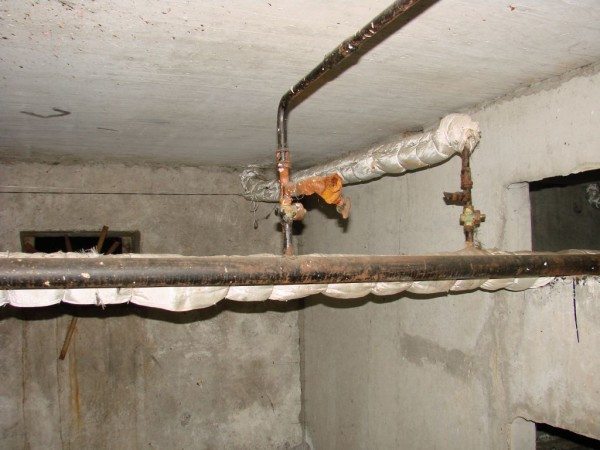
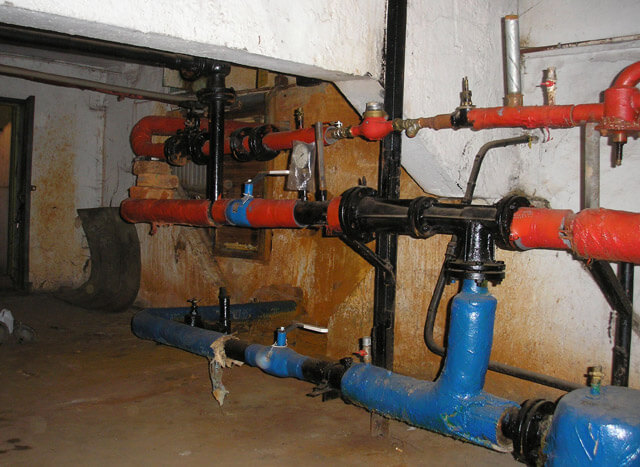
Top bottling implies a feed placed in the attic. Risers connect it to a backfill located in the basement or underground. Each riser functions independently of the others and is turned off at two points - below and above;

Pair of heating circuits with top filling.
In a house with bottom bottling, the supply and return wiring is made in the technical basement. The risers are alternately connected to both bottlings and are connected in pairs by jumpers on the top floor of the house. Accordingly, two risers will have to be turned off - supply and return.
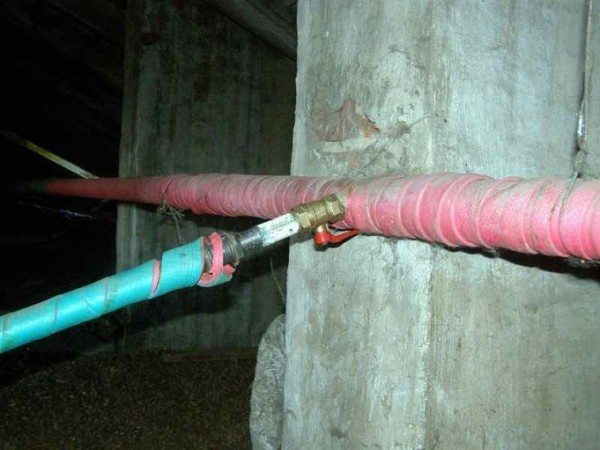
To determine the type of wiring, look into the basement. If two horizontal pipes in thermal insulation are laid along the perimeter of the house, you have a lower filling, one is an upper one.
Lower bottling: along the perimeter of the house, both the return and the supply are laid.
First, find your stand. In the basement, it is easiest to navigate along the flights of stairs between the entrance and the landing of the first floor, in the attic - through the windows of the apartments. Further actions depend on the type of bottling.
Top filling
In the case of top filling, the shutdown procedure will be as follows:
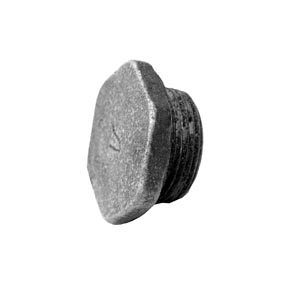
- Turn off the valve in the attic. Do not unscrew the plug;
The removal of the riser from the bottling of the supply in the attic looks something like this.
- Shut off the valve in the basement;
Riser and bottling return in the basement.
- Unscrew the plug one or two turns and wait for the pressure of the water jet hitting the thread to drop. So you make sure that the shut-off valves are in full working order;
- Unscrew the plug completely. The water hanging in the riser will pour out after you open the piping to the radiator.
bottom filling
Here is an instruction for turning off the heating riser in a house with a bottom bottling with your own hands:
- Block your riser and two adjacent to it;
- Unscrew the plug one or two turns;
If instead of a plug on the riser there is a vent, the task will be greatly simplified.
- Slowly open the valves on adjacent risers. So you will identify the riser associated with yours;
- Fully open the valve you do not need. Block your riser;
- Unscrew the plugs on your and associated risers.
Can you see everyone
Why are we talking about different ways to dismantle radiators?
How do they connect differently?
- fittings used. Traditionally, for the installation of Soviet-style cast-iron radiators, a bunch of squeegee (a pipe with a long thread) and lock nuts were used, now batteries are more often connected by Americans - quick-disconnect fittings with union nuts;
In the photo - the connection of an aluminum sectional radiator by an American.
Connection on the slopes.
The location of the connections relative to the radiator. Connection can be one-way or two-way
This is important when mounting on sleds: one of the radiator plugs will have a left-hand thread.
A special case
- In many houses built in the 80-90s, convectors are used as heating devices. The convector is a coil made of a steel pipe of the same diameter as the riser, with fins that increase heat transfer. A typical connection between a convector and a steel pipe is a butt weld.
The heater is connected to the riser by welded seams.
Non-standard situations
An unpleasant situation can happen when, when dismantling cast-iron batteries, the bottom of the cork breaks off and the thread remains inside.
Proceed as follows:
- the collector is warmed up;
- put a chisel to the part in the direction of its twisting and try to turn it with a hammer;
- as soon as the edge of the thread sticks out, it is turned out with pliers.
Often you have to remove old rusty batteries in which the threaded connection is corroded or even perforated.
In this situation, you need to do the following:
- "arm" with a coupling made of brass or cast iron of the desired diameter;
- cut off the thread from the eyeliner, but leave the first five turns;
- drive the thread with a die;
- wind the thread with sanitary flax soaked in paint (on an organic solvent), which dries quickly;
- screw the prepared coupling;
- now the wound thread is screwed into the coupling, and the problem is solved.
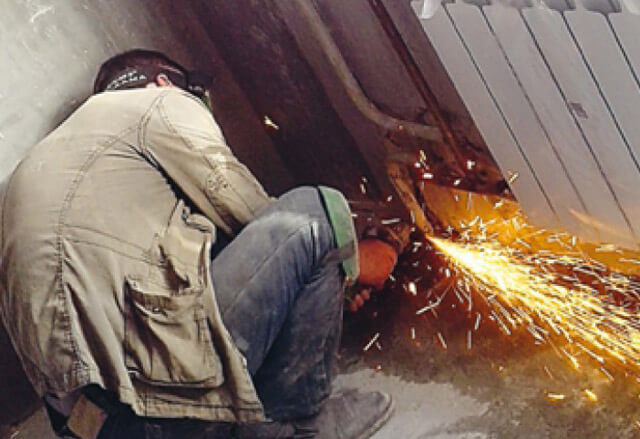
What to do when the battery is welding
Convectors were usually fastened with a welded seam. To dismantle them, it is advisable to arm yourself with a grinder with a disc for cutting steel. You can, in extreme cases, take a hacksaw for metal, but it will be much harder to work. The line just cut off
The main and very important condition for this is that this must be done strictly at a right angle.
To install a new battery, you will need to make a new thread. It is not difficult as it seems at first glance, but, of course, cutting off the battery is much faster.
Step by step instructions on how to make a new thread:
With the help of a grinder or a regular file, a gentle chamfer is removed at the end of the pipe;
To facilitate the process, a lubricant is applied to the place where the pipe will be cut (the one used for the sewing machine is suitable);
The die is carefully put forward by the holder;
Now you need to clamp the eyeliner with a pipe wrench. This is mandatory, otherwise, when cutting, you can tear off the riser from the batteries, which are attached to it with the help of American women (in the next apartment)
The consequences, of course, will be dire.
Next, the thread is cut. We must not forget to hold the eyeliner or riser. The main thing at the same time is not to rush, to do everything carefully, not to pinch. Usually it is enough to make five turns.
Drives
How to remove a radiator connected to the piping with spurs?
- Use a pipe wrench No. 1 - No. 2 to lock nuts on the eyeliner. The lock nuts are always right-handed, regardless of their location relative to the radiator;
- Drive the locknuts to the end of the threads of the spigots. If layers of paint and rust interfere with this, preheat the eyeliner with a building hair dryer, blowtorch or impromptu gas burner from a spray can and nozzle to it;
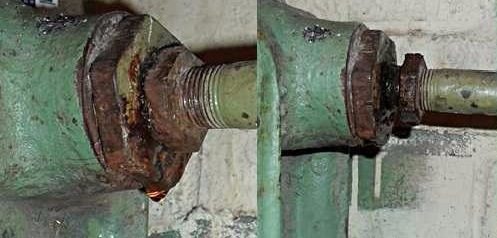
On the left is the initial position, on the right is the lock nut driven along the thread.
- Remove the remnants of compressed winding from the threads (usually old threads are wound with red lead impregnated sanitary flax). This can be done with a flathead screwdriver or a knife;
- Stronte and drive the radiator plugs after the lock nuts. With a one-sided connection, both through-hole plugs are with a right-hand thread, but with a diagonal connection, one of the through-hole plugs is left-handed.The letter “l” on the plane of the second plug, located on the same side of the radiator, indicates the reverse course of the thread.
The letter "L" indicates a left-hand thread.
Use a #3-#4 pipe wrench to loosen the cast iron plug. If it does not start, warm up the collector of the first section. Further on, thermal expansion will play on your side: the diameter of the collector will increase slightly, and the thread will break off with little effort.

When unscrewing the left plug, an unpleasant surprise awaits you: by rotating it, you will simultaneously screw the horn into the radiator. If there is a threaded connection on the side of the inlet, do not unscrew the radiator plug, but unscrew it from the coupling or corner. It will go into the hole in the cork, and then, after dismantling the heating battery, it will turn out without any effort.
What should I do if the bottom of the cast-iron plug breaks off, and the thread remains inside the section?
- Warm up the collector;
- Putting a chisel to the cast-iron part tangentially in the course of its unscrewing, turn it several turns with hammer blows;
- When the edge of the thread appears from the collector, turn it out with pliers.
It is not uncommon for the long thread at the end of the liner near the locknut to be corroded with rust or decorated with a fistula. What to do in this case?
We will need:
Brass or cast iron coupling of the appropriate diameter;
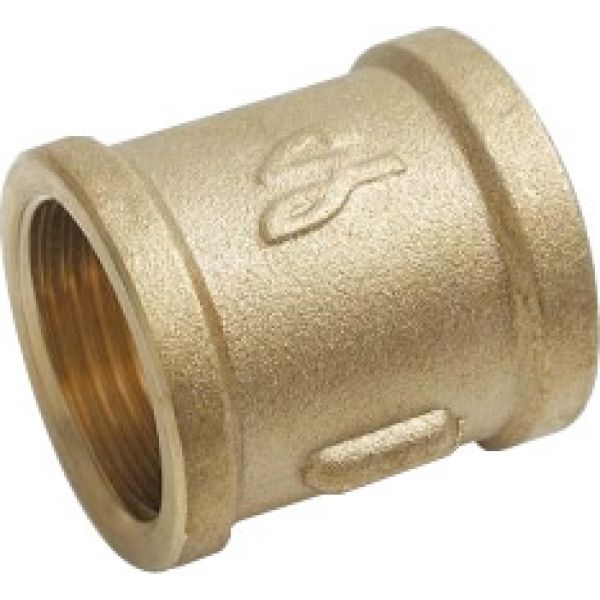
Brass coupling. Size is 1/2 inch.
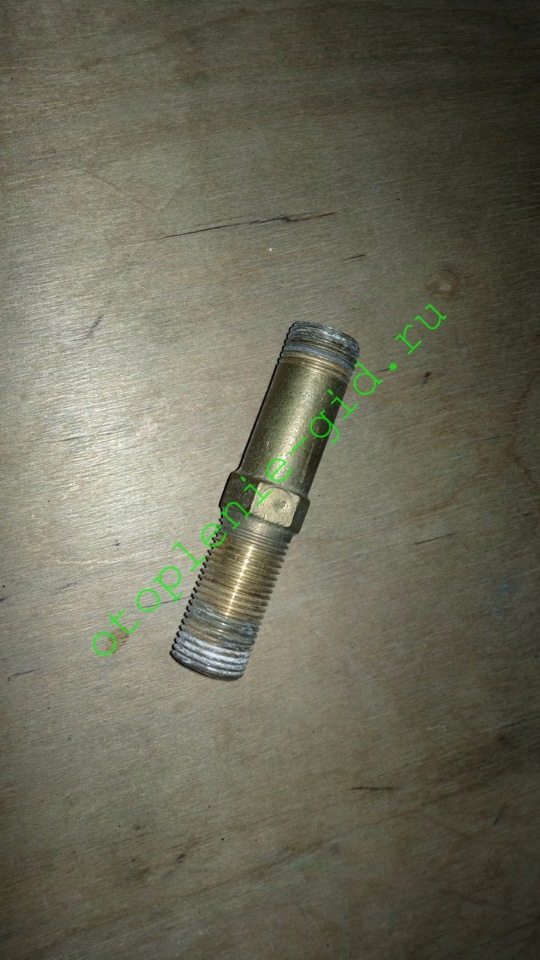
Short drive with long and short threads. Better brass. Yes, its price is two to three times higher than that of a steel part, but this is offset by an almost unlimited service life.
The way to repair the eyeliner is extremely simple:
- We cut off the thread from the eyeliner, leaving only the first five threads;
- We drive the thread with a die;
- We wind up;

- We wind the coupling;
- We screw the wound short thread of the drive into the coupling.
Cast iron battery
In many apartments of old houses, it is the cast-iron battery that needs to be removed, so the first thing you have to do is contact the housing office or the house manager. This is necessary because you have to drain the water from the heating system, and this can only be done by an appropriate specialist.
After you have agreed to run the system on a certain day, you need to prepare the tool. You will need:
- pipe wrench number 3, in order to unscrew the lock nuts and futorki (special nuts that connect a larger diameter pipe to a smaller pipe);
- pipe cutter or grinder for cutting pipes;
- hacksaw for metal;
- hammer;
- chisel;
- metal brush to remove rust;
- blowtorch or industrial hair dryer;
- basin for water;
- rag.
After all the tools are prepared, and the water is drained from the system, we proceed to dismantle.
- It should be remembered that if there is no water in the system, this does not mean that the battery is completely dry. For this we need a basin and rags. With their help, remove the remaining water from the radiator after dismantling.
- As a rule, old radiators are covered with more than one layer of oil paint. And not only the radiators themselves, but the entire fasteners. To remove the paint, use a blowtorch or hair dryer. We need to burn off the old paint on all joints.
- After that, with a metal brush, we finally clean the connections.
- Now, using a pipe wrench, unscrew all the nuts. It is this period of operation that is the dirtiest, since the remains of rusty water will pour out of the radiator. You should be ready for this.
- It may turn out that even after firing the old paint, unscrewing the nuts on the supply pipes will not work. Especially if the radiator has not been cleaned for 10 years or more. In this case, you will have to use a pipe cutter or a grinder and cut off the supply pipes immediately in front of the radiator.
- The cast-iron battery is held on the wall by special brackets. You need to lift it up and take it off. If the battery consists of 3-5 sections, you can carry out a similar procedure yourself.If there are more sections, you will need help: cast-iron radiators are very heavy.
How to temporarily remove a heating radiator
This article is about how to temporarily remove a heating radiator. to replace it or paint the wall behind it. Removing the radiator is not at all difficult, as it might seem at first glance, we will talk about this in the article. First of all, you must understand the consequences of a failed attempt to remove the radiator: if you do not know how to remove the radiator correctly, you may later leak and ruin the flooring.
However, if you pay attention to our tips, then you will eliminate all problems at once, during the process of removing the radiator.
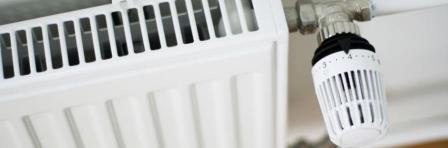
First of all, we must show you the main elements of the radiator: at the top right - a control valve, at the bottom left - a shut-off valve (for adjusting the water supply), at the top left - a Mayevsky tap for bleeding air from a heating radiator.
With the help of a control valve, you can adjust the flow of incoming water into the radiator, by opening or closing the valve, you will adjust the temperature of its heating by adding and subtracting it accordingly. With the help of a shut-off valve, you can adjust how much water will come out. Most often, such a valve is used to balance all radiators and it is installed on each.
 First of all, close the valve. Adjusting is blocked by hands, and locking with a hex key.
TIP: When you close the shut-off valve, remember how many turns you have made, so that later you open the same amount.
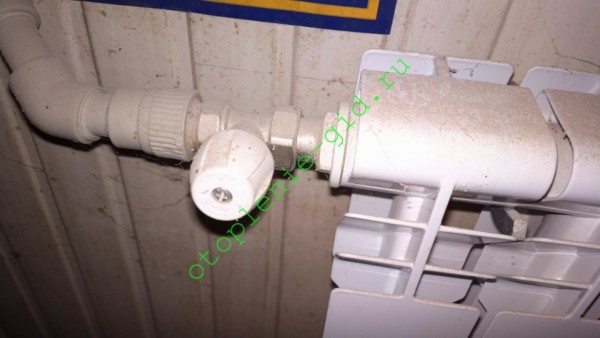
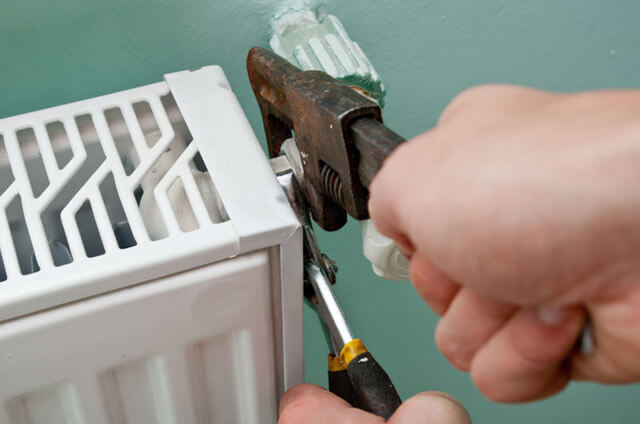
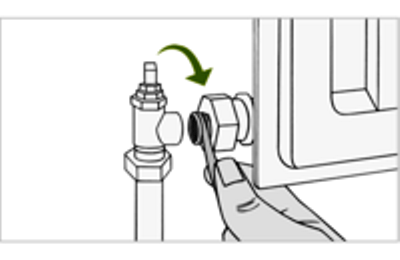
 Now you need to disconnect the radiator from the valves. To do this, you will need a wrench or gas wrench. The crane device consists of an American (removable coupling). Unscrew the American nut to separate the radiator from the valve.
TIP: In order not to damage the flooring, place unnecessary rags under the radiator.
Turn off the valve...
 We unscrew the control valve in the same way ... For reliability, use the second key to hold the American fitting while unscrewing the nut.
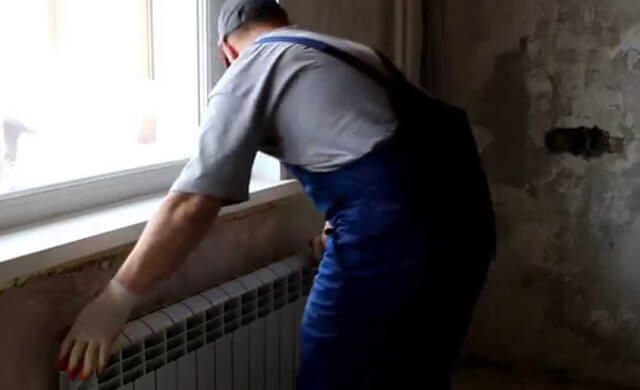
 The last step is to remove the radiator from the brackets. The best advice we can give you is to have someone else remove the radiator, as the water radiator is very heavy. This operation requires at least two people.
ADVICE. if you will be painting the wall behind the radiator, seal the valves in bags or paper.
 During the process of painting or gluing the wall, lay the radiator so that it does not get scratched. When you're done painting, hang your purchased new radiator or old one on the brackets.
With the radiator hanging in place, connect the faucet and radiator together with a zip tie. Twisting the shut-off valve, remember the number of turns that you had to scroll to block it and open exactly the same amount.
Open the control valve for the coolant supply, while you need to open the Mayevsky valve so that air escapes through it and the radiator fills with water. After water drips from the Mayevsky tap, shut it off, this will mean that the radiator has been filled with coolant.
 Thanks for reading our article on how to temporarily remove a heating radiator. and our other articles. Don't forget to Love our projects and share them with your friends using social widgets.
Radiator connection diagrams, work efficiency
Depending on the device of the heating system, there are various schemes for connecting heating devices to it. If you look at the section, then each radiator has an upper and lower full passage channels through which the coolant is supplied and leaves.
Each section has its own channel, connected to two common ones, the task of which is to pass hot water through itself, to receive part of the thermal energy.The overall efficiency of the device depends on the amount of hot liquid that has had time to pass through the channels of the sections and the heat capacity of the material from which the heating elements are made.
The amount of coolant passing through the channels of individual sections directly depends on the connection scheme of the heater.
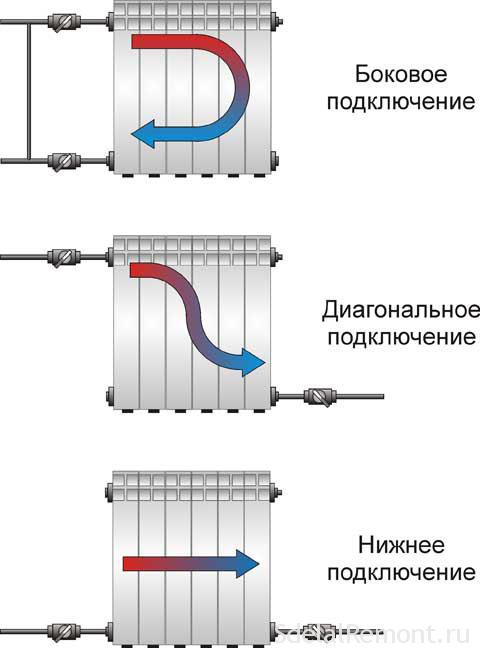
Side connection
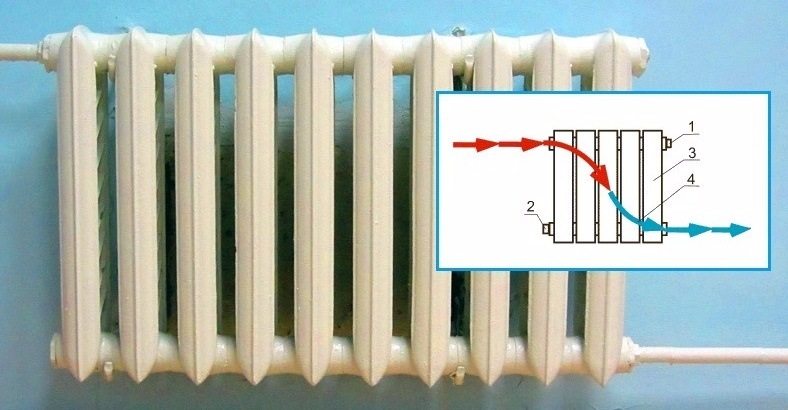
With such a scheme for installing heating batteries in an apartment, the coolant can be supplied from above or below. When the supply is from above, water passes through the upper common channel, descends through the vertical channels of individual sections to the lower one, and leaves in the same direction from which it came.
Theoretically, the coolant should pass through the vertical channels of the sections, heat up the radiator completely. In practice, the fluid moves along the least hydraulic resistance.
The farther the section is from the entrance, the less coolant will pass through it. With a large number of sections, the latter will heat up much worse, or even remain cold at all with low pressure.
With the side method of installing the installation of heating radiators in the apartment and supply from below, history repeats itself. The efficiency of the heater here will be even worse - hot water must rise up the channels, a gravitational load is added to the hydraulic resistance.
The side connection scheme is most often used for riser wiring in apartment buildings.
Bottom connection
With this scheme, the coolant is supplied from below, passes through the sections, and exits through the same lower channel. It uses the principle of convection - hot water always rises, cold water falls.
It's supposed to be so theoretically. In practice, most of the hot water passes from the supply inlet to the outlet, the lower part of the battery heats up well, and the coolant flows weakly to the top. The efficiency of the heater with the bottom connection of both streams is 15-20% lower than with the side piping scheme.
The bottom connection is good because when the battery is aired, the rest of the battery heats up properly.
Diagonal connection
The classic method of tying batteries is diagonal. With the correct installation of heating radiators in an apartment in a diagonal way, the sections heat up evenly, and the efficiency of using thermal energy increases.
With the diagonal piping method, hot liquid enters through the upper common passage hole, descends through the channels of each section and exits the lower passage channel on the other side. Here the liquid descends from top to bottom, hydraulic losses are minimal.
This method also has disadvantages. The battery is aired, this must be monitored, the air must be bled through the Mayevsky tap. The second is that dead zones with cold water can form at the bottom at low pressure.
Turning off the heating and draining the water from the heating radiator
The first step when dismantling the radiator is to turn off the heating system and drain the coolant
And it doesn’t matter if the problem is solved, how to remove a cast iron or aluminum battery: the algorithm of actions is the same
With individual heating, everything is simple. The heating unit is turned off and water is drained from the system. This is done in different ways, the method depends on which boiler and what opportunities for draining the coolant are peeped.
But most often you need to understand how to remove an old cast-iron battery clogged with scale in an apartment. With central heating, the most not tricky way is to shut off the coolant with the help of shutoff valves.
After that, you can start working with connections. Be sure to substitute the container under the drain of water from the radiator. This method is suitable when a jumper is mounted between the supply and return pipes. If not, then the circulation of the coolant will stop throughout the riser. And this means that the neighbors will have cold radiators.
Dismantling process

After carrying out the preparatory work to block the flow of the coolant, the water remaining inside the pipes of the blocked section is drained. Then you can proceed directly to dismantling, which is carried out in the following order:
- At the bottom of the radiator, at the point where the pipes are connected, 2 plugs are completely screwed in with a Phillips screwdriver.
- Using an adjustable wrench, unscrew the fastener connecting the inlet pipe to the battery. You will have to make some effort, but the work should be done carefully so as not to damage the thread.
- The lock nut is first unscrewed by hand by about half, controlling the ejection of water by hand. It is necessary to ensure that the coolant flows in a small stream, and does not whip in all directions.
- A container is installed under the water, and previously screwed plugs are unscrewed.
- The radiator is slightly raised on one side, providing maximum water flow from it.
- The battery is removed from the mounting brackets on the wall, for which it gradually rises up and moves towards itself.
- All battery mounting parts are being dismantled.
When carrying out dismantling work, the following important nuances should be considered:
- Inside the radiator, after overlapping, there is a sufficient volume of water that can flood the neighbors from below. Work must be carried out carefully, avoiding spillage on the floor.
- It is advisable to time the dismantling of the battery for the summer period, when heating is not required, so as not to disturb the neighbors, and to carry out all work slowly and carefully.
- To prevent damage to the taps and threads, it is recommended to install a wooden block under the battery before starting dismantling, eliminating the risk of it falling.
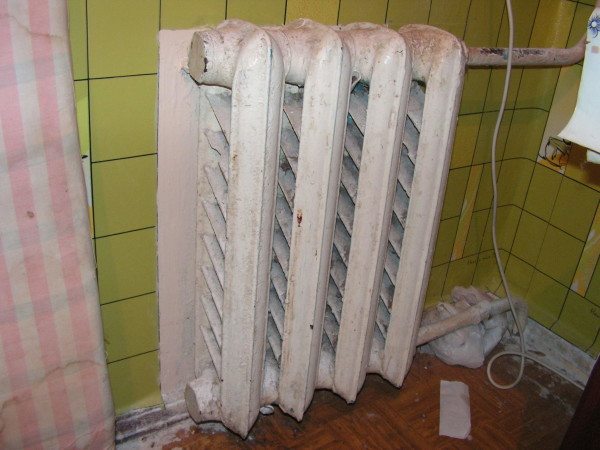
The old heating battery is easy to remove with your own hands
It is important that the shutdown of the system is provided by a specialist, and the dismantling itself is carried out carefully, in compliance with the recommendations and safety measures.
This article is about how to remove a heating radiator. Depending on the way it is connected to the inlets and the type of fittings, different tools and technical solutions may be needed. We have to get to know them.
Tools
Be sure to get the following materials:
- torque wrenches;
- bypass;
- Bulgarian:
- adjustable wrench;
- gas key;
- Roulette;
- Drill;
- Pencil;
- soldering iron;
- Level;
- Lever pipe wrench.
In addition, the presence of a Mayevsky crane, without which no plumbing work can do, will not interfere. Be sure to have plugs that are suitable in size to the junctions of batteries and radiators, as well as to install additional taps. In a compartment with plugs, it is recommended to stock up immediately with gaskets.
If, in addition to dismantling, it is planned to replace batteries and pipes, then it is necessary to stock up on new sections of pipes, and it will not hurt to buy bimetallic heating batteries Rifar, or some other analogues. In the same case, you will need the presence of "American" taps or simpler options. A polypropylene tap is very useful, with its help it will be easy to achieve heating performance with the radiator removed. The PPR limit switch will be necessary for carrying out work in the neighbors' space. In case of unsuccessful communication with them, you will also need a lerk.
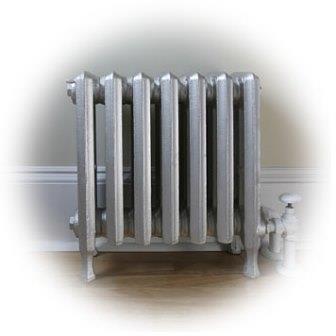
Among other things, the cost of cast-iron batteries is much lower than analogues, while heat transfer can be envied by these very analogues. Also, cast iron batteries are characterized by low hydraulic pressure. Such batteries are very reliable and do not require any specific skills to operate.
The only drawback of these units is an extremely unpresentable appearance. However, manufacturers today know a lot about the style of radiators and are trying to give the cast-iron counterpart the most attractive appearance, especially since modern technologies allow this.
The replacement of a cast-iron battery cannot do without a lever pipe wrench, with which the lock nuts and flanges are removed. If this work is not possible, you have to act with the help of a pipe cutter. In this case, cutting must be done in front of the same nut. The following disassembly steps include:
- Disconnecting the heater from the system;
- Removing the heater from the fixture;
- Heater disassembly and cleaning.
Very often, removal is carried out not only for replacement, but also for cleaning the radiator. So, cast-iron radiators are very difficult to disassemble, but it is simply necessary to clean them of rust so that they work like newly bought ones. Before you start disassembling the battery, you need to prepare the tools:
- Blowtorch;
- Tow;
- Pipe wrench;
- Brush;
- Gaskets;
- Chisel;
- Bulgarian;
- Nipples;
- Hammer;
- Battery key.
It is necessary to start disassembling the battery by heating the plugs with a blowtorch, after which they can be easily removed. After that, the nipple is cut between the sections with the help of a grinder, so it becomes possible to detach the sections. Next, these nipples are removed with a hammer, and the battery is cleaned.
The reverse process is much more difficult - it is no longer possible to unscrew the heating battery with a wrench. First you need to assemble the sections and group them, then the sections are connected using a combination of gaskets, silicone and nipples, the latter being selected relative to the direction of the thread - this must be taken into account. Do not forget about flushing the newly assembled radiator.
When the assembly process is completed, it is necessary to secure the removed radiator. This procedure involves either fastening to previously installed brackets, or to new ones, especially when they were previously poorly installed. In this case, the first holes must be covered and puttied. New holes are drilled according to the measurements made. Again, the holes are filled with nipples and brackets.
The best sealing can be achieved by securing all joints with tow. Moreover, cast-iron batteries are connected to the pipes by means of overdrives. Be sure to make sure that the plugs are turned out. This is the algorithm for dismantling a cast-iron battery. For convenience, it is recommended to purchase 300 mm heating batteries.
Results
Dismantling radiators is not such a difficult process if you know the theory of how to do it correctly. In any case, planned work must be carried out outside the heating season. Touching the heating system in the dead of winter is a forced necessity.
In order for the performance of the heating system not to suffer, it is necessary to take all the necessary preventive measures in time. Therefore, it is better to take care of new radiators or clean old ones before the heating season. This applies to any work related to heating, both in private households and in apartments.
It goes without saying that replacing batteries in an apartment or house cannot do without dismantling old heaters. This difficult work must be done, otherwise the installation of new radiators will not be possible. There is a lot of information on how to remove the heating battery, however, first of all, you should think about the people around you, especially when it comes to an apartment building. It is impossible to replace radiators for no reason at all. To do this, it is necessary to obtain destruction, as well as coordinate the procedure with utilities.
In addition, the replacement of heating batteries, or rather its preparatory stage, cannot be carried out independently, since the central heating should be blocked exclusively by utility specialists.However, not only Gorvodokanal should be aware of the ongoing work, it is worth notifying other housing offices. Silence can lead to far from the most joyful consequences. Independent shutdown of central heating, information about which will not be in housing offices, will lead to a fine, the payment of which will fall on the shoulders of the violator.
Successful negotiations with the neighbors will make it possible to achieve the best option for carrying out the work, since their agreement will allow a complete replacement of pipes from the decoupling of the neighbors from below to the decoupling of the neighbors from above. Such an outcome of the negotiations will save time, as well as the fastest work. However, with a negative outcome of the negotiations, there will be nothing left but to cut the pipes directly at the risers. In a word, dismantling batteries is a great opportunity to change old pipes to polypropylene counterparts. Among their advantages are ease of installation and dismantling, as well as low weight, but high strength.
After all the preliminary work has been carried out, the services have shut off the heating, it is possible to dismantle the old battery. However, this applies to an apartment building. In a private house, things are different and much simpler. In this case, it is necessary to carry out the overlap without notifying anyone about it, and you can proceed to remove the batteries and then replace them with Global heating batteries, or some other brands.