Solid fuel garage heating
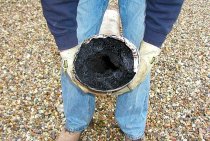
Economic heating of the garage in winter is easiest to organize using solid fuel equipment. Firewood is quite cheap, it is very easy to heat it, simple and relatively safe. And for their burning, you can build a stove of any type
If you need to organize home-made heating in the garage as cheaply and quickly as possible, it is best to turn your attention to a potbelly stove. The potbelly stove is the simplest heating unit
Structurally, it consists of two parts - a combustion chamber and a chimney. There is an ash pan door and a loading door at the front. The chimney is removed from the back. You can create a potbelly stove for organizing heating in the garage from a variety of materials:
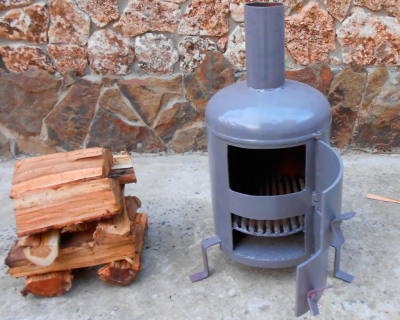
A simple potbelly stove is usually the most commonly used garage heating unit, due to its unpretentiousness and cheap fuel.
- From an old gas cylinder;
- From a steel can;
- From an old barrel;
- From sheet metal.
There are dozens and even hundreds of drawing options, so there will be no problems with assembly.
The most economical way to organize autonomous heating in a garage is to use a Buleryan solid fuel stove. This oven is convection, it is characterized by a very high performance and can be used to heat any technical premises. Buleryan can be purchased ready-made or assemble it yourself. When creating garage heating with your own hands, remember that Buleryans are pyrolysis - this ensures maximum heat transfer and long-term burning.
It is not difficult to make heating in the garage with your own hands - it is enough to have at your disposal the right equipment or tools for its manufacture. For example, we can assemble a fireplace-type stove in the garage. Having found the drawings, nothing will prevent you from making a home-made Buleryan or installing a fireplace stove with a water circuit - this option is useful when creating heating in large areas.
If you want to heat the garage as economically as possible, use ready-made factory equipment - solid fuel boilers, including those of the pyrolysis type, will be waiting for you here. In addition to them, it remains to lay pipes and mount batteries, for example, heating registers from large diameter pipes. Factory equipment for heating systems has a higher efficiency, which will affect the economy.
Requirements for a homemade device
Most of those who want to try their hand at making a heater on their own are unlikely to strive for too difficult work.
And the purchase of a large number of various technical elements and assemblies, whose cost is quite comparable to the price of the finished product, is hardly economically justified. Thus, the future device should be:
- easy to install;
- productive;
- economical in electricity consumption;
- safe;
- profitable, that is, the cost of its production should be minimal;
- convenient;
- compact.
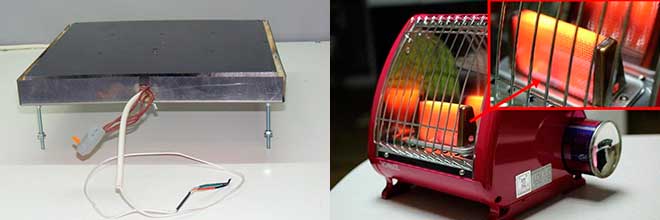
Considering the existing heaters produced by the industry, we can conclude that all these requirements are met by devices operating on the principle of infrared radiation. More precisely, the so-called thermal films. The material generates thermal energy, which is transferred to objects, which, in turn, heat up the environment. This method of heating is considered the most efficient, since the generated heat is not wasted. Accordingly, the efficiency of such a device is very high.
Advantages of homemade heaters
Do-it-yourself heater for summer cottages and home-made heating appliances for the home have one indisputable advantage over factory counterparts. The first are made from improvised means, and therefore their cost is low. On the other hand, home-made equipment must be made in strict accordance with the rules for the safe operation of electrical and gas appliances. Today, you can make your own IR heaters, which are considered the most efficient and inexpensive. If you need a device of increased power, then you can make an oil cooler at home. There are schemes for the manufacture of home convectors, portable stoves for tents.
The need for comfortable warmth increases in the off-season and with the onset of cold weather. But not all homeowners have the opportunity to purchase reliable factory-made heating equipment, the cost of which is often overpriced. In this case, an alternative option is a home-made heater from available materials, which can easily cope with the task.
Advantages of homemade devices
Home-made appliances for heating a city apartment, a country house or a summer residence have significant advantages over factory products. They are as follows:
- Possibility of manufacturing from affordable and cheap materials, which leads to a reduction in the cost of the finished device.
- Simple and compact design that can be used in a variety of environments.
- Ease of use and transportation.
- High efficiency with silent operation of structural elements.
- Self build quality.
Today, infrared heaters are available for self-manufacturing, which are the safest and most efficient in operation. If more powerful equipment is required, then you can assemble an oil cooler, an alcohol heater, a heat gun, a battery and gas device.
We make an oil heater with our own hands
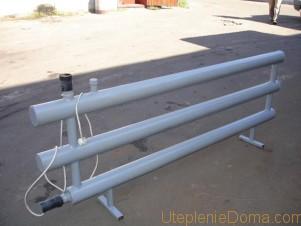
Homemade register with heating element and air vent.
Firstly, the container for the future radiator must be absolutely sealed. Otherwise, the coolant will flow out, which will lead to overheating of the heating element (heater). Therefore, you need to master some techniques for proper metal welding. We talked about them in an article about welding pipes for heating.
Secondly, mineral oil should act as a coolant here, if possible, transformer oil. It should fill the tank of the heater by 85%. The rest of the space is left under the air. It is necessary to prevent water hammer. Thirdly, in the case of using a cast-iron tank for a heater, a steel heating element is used. For a stainless steel tank, a copper heating element is suitable. Magnesium anodes cannot be used in this system.
- old, cast-iron radiator or steel pipes with a diameter of 15 cm, pipes with a diameter of 7 cm;
- heating element;
- transformer oil;
- thermostat;
- two-core cord with a plug at the end;
- pump up to 2.5 kW.
You will have to work with a welding machine, a drill, a set of drills and electrodes. Pliers will come in handy. Making an oil heater
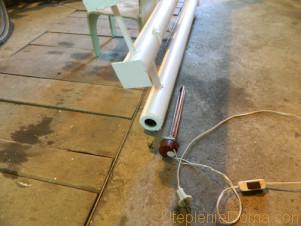
Ten is inserted into the lower end.
do-it-yourself apartments begin with the preparation of the tank. If an old, cast-iron battery was taken, it must be disassembled into sections and thoroughly cleaned from dirt and rust, be sure to degrease the inner surface. If you need a heater with increased power, then a welded structure is prepared from prepared pipes, where pipes of larger diameter are located horizontally.
Pipes of smaller diameter are jumpers between the main ones. The coolant will circulate through them. It must be remembered that in the lower pipe it is necessary to set aside a hole for mounting the heating element.If there are several heating elements, they are located on opposite sides of the tank and should not touch. Leave a hole for the pump. The heating element is securely fixed with bolts. A hole for it can be made with a grinder or autogenous.
If a do-it-yourself heater for a room turns out to be voluminous and natural circulation of the coolant in it is impossible, they resort to using a pump. It is located at the bottom of the equipment. The pump must not come into contact with the heating element.
After the installation of structural elements, the equipment is checked for tightness. If the result is satisfactory, then the coolant is poured. The drain hole is securely sealed with a stopper. The equipment is connected to the mains in parallel. The scheme is supplemented with a bimetallic thermostat from an ordinary iron. Before the first start-up, the installation is grounded. Homemade oil heaters for the home: the video will explain in detail about their device and installation rules:
Option 2 candle soot device
It should be made for those people who cannot find graphite in their home or do not want to mess with it. The sequence of creating an IR heater with your own hands is as follows:
- Take two pieces of glass. The dimensions of each piece must be the same. These parameters can be as follows: length 5-7 cm, width - 2-3 cm.
- The material is cleaned of any dirt. If necessary, it is washed and then dried. It also needs to be degreased and cooled. You can lower the temperature of the glass by placing it in the refrigerator.
- A conductive layer is applied to the glass. To do this, light a paraffin candle and place the glass over it so that it is covered with a dense layer of soot. It is desirable that this layer be thin. Soot will be a conductive material that contains unburned carbon particles.
- They take a rag and wipe off a few millimeters of soot with it from all sides of the rectangle.
- Pieces of copper or aluminum foil are placed on the sides of the glass with a length of 3 cm. One end of the material should be on the soot, the other should protrude several centimeters beyond the edge of the glass. The pieces of foil will be the terminals to which the ends of the cable will be connected.
- Another glass is placed on top of the smoked glass with pieces of foil. Before installation, it is treated with steam.
- Each end of the structure is sealed with epoxy resin or covered with a layer of sealant.
- The resistance of the heating element of the future IR heater is measured and its power is calculated. It is the product of the resistance and the square of the current. The formula is: N = R x I², where R and I are resistance and current, respectively.
- If the power does not exceed the permissible norms (for example, for apartments with old wiring it should not exceed 3 kW), then proceed with the installation on a wooden base. If the power does not suit, then the structure is dismantled and recycled. Similar actions must be done during a possible repair. To change the resistance, you need to change the width of the soot strip. The larger it is, the less resistance. Heating is also reduced.
- In a board with a length that exceeds the length of the made heating element, a groove must be made. Its width should be equal to the width of the glass structure. Depth - 0.5 cm.
- The heating element is mounted on the base. To do this, it is inserted into the groove.
- A wire with a voltage regulator and a plug is connected to the terminals.
The number of such heating elements can be large. They can be connected both in series and in parallel. The method depends on the person who can also repair his device.
What are the requirements for a garage heater
Since the garage room is not large and rarely has a ventilation system, the assembled heater for the garage with your own hands must meet certain safety requirements when operating in enclosed spaces.
Heater requirements:
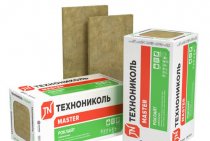
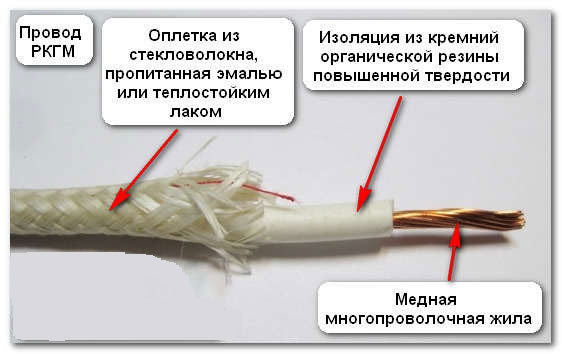
Fiberglass for heater
- First of all, the operation of such a design should completely eliminate the risk of fire or explosion.
- During operation, the heater must not emit toxic substances and odors hazardous to human health.
- The heater must not reduce air humidity and burn oxygen.
- A home-made device should quickly heat the garage room to a certain temperature.
- The temperature regime must be maintained by the heater for the required time.
- Due to the small area of \u200b\u200bthe garage, a home-made device should not take up much space and be compact and convenient to move.
- And of course, the manufacture of a home-made heater at a cost should be much less than its factory counterpart.
- The wiring in the garage must be in good condition, and the meter must be equipped with a fuse.
- If the electrical outlet is far from the intended location of the heater, then you should purchase an extension cord - carrying.
- In no case should you leave the heater turned on for a long time unattended, for example, all night in order to go into a warm garage in the morning. You can stay without a garage, and without a car.
This will make it possible to maintain heat in the garage for a long time in accordance with the weather conditions outside the walls of the garage, while saving electricity. As a similar element, you can use thermostats from household appliances, old irons, kettles, electric stoves or washing machines and similar devices.
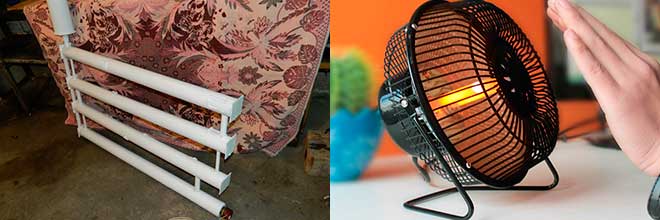
Idea 2 Mini-heater from a can
Another original model of a homemade electric heater, which is suitable for local heating in a garage or room. All you need to build is:
- coffee can;
- transformer 220/12 Volt;
- diode bridge;
- cooler;
- nichrome wire;
- textolite, with an area approximately the same as the diameter of the can;
- drill with a thin drill;
- soldering iron;
- cord for connecting to the network;
- push button switch.
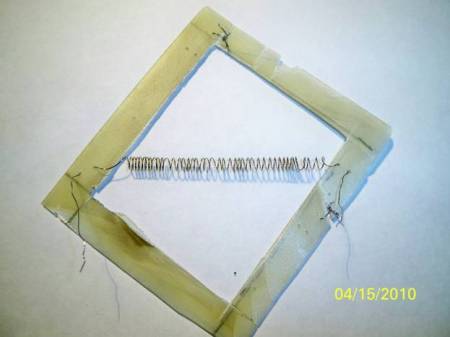
This instruction is even simpler and you can make an electric heater from a jar with your own hands in 1-2 hours. To begin with, you need to remove the foil from the textolite and cut out the middle in it, as shown in the photo below:
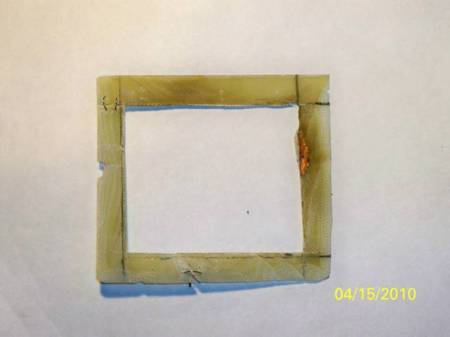
After that, using a drill, you need to make holes diagonally. By the way, for this you can make a homemade mini drill according to our instructions. We fix the nichrome wire into the holes, after which we solder the wires.
We connect a transformer, a diode bridge, a cooler, a nichrome wire and a switch into one circuit.
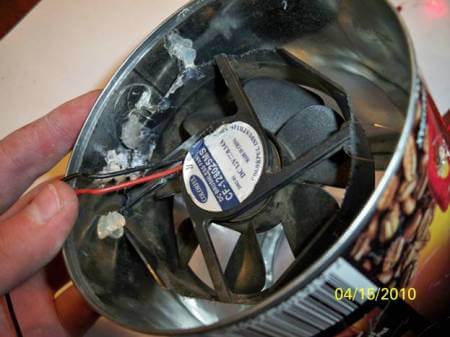
We mount the fan in a jar using glue, after which we fasten the textolite as shown in the photo:
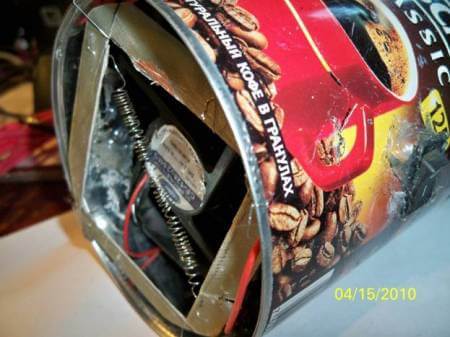
We put all the elements of a home-made electric heater in the jar, drill holes in the lid and check the operation of the device!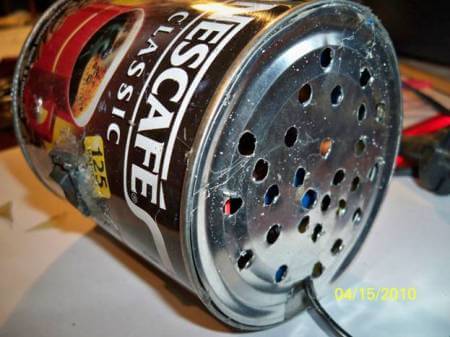
If you want to make a more powerful spiral device, we recommend watching the video tutorial below:
Overview of a homemade electric heater with a power of less than 2 kW
Assembling a homemade infrared heater
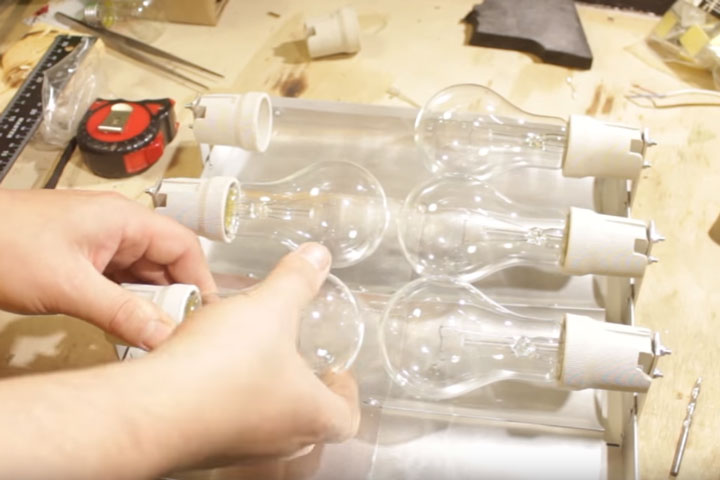
Based on all this, you need to assemble our heater from light bulbs. Let's move on to practice.
If your work area that you want to heat is 3-4m2, then assemble a 300W heater.

This will require 6 lamps with a power of 150W. That is, three consecutive pairs that will give 100W each.
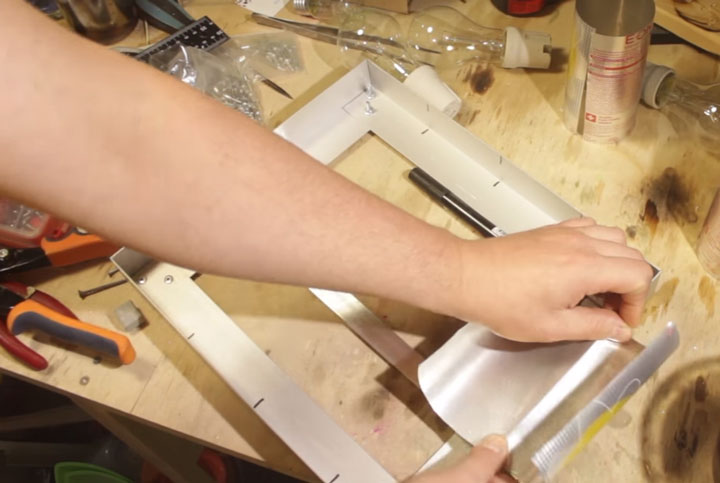
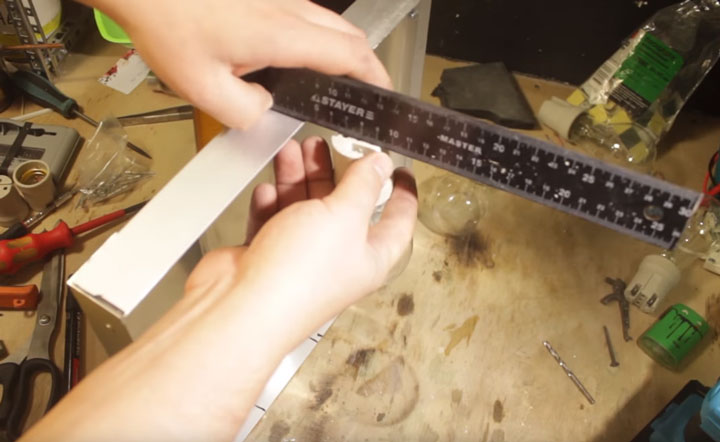
They are assembled on a frame made of metal or aluminum corner.
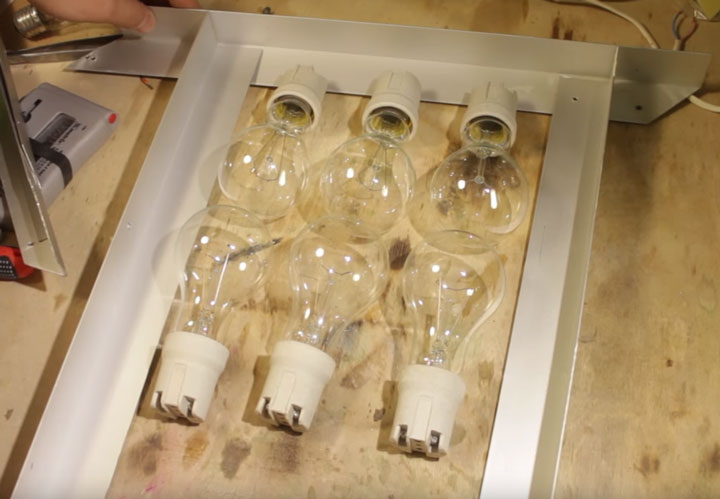
Sources of light and heat in the frame should be arranged according to the diagram below.
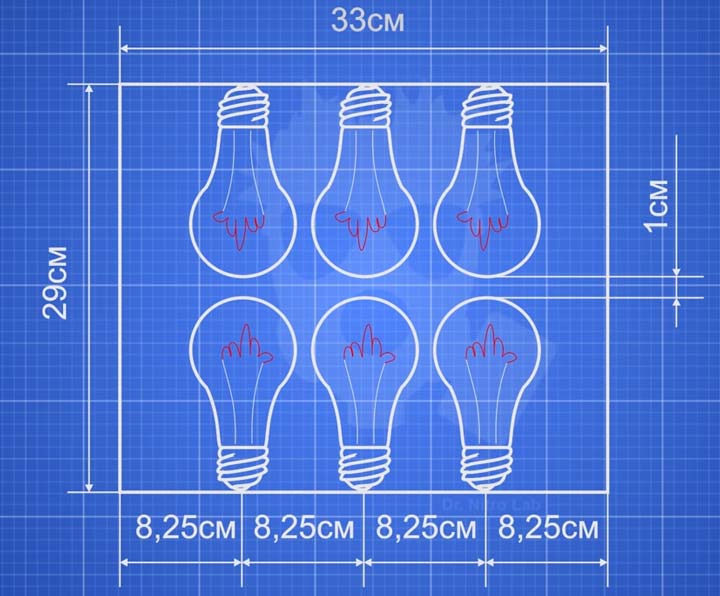
At the same time, select the distance between adjacent bulbs so that you can easily replace a burned-out copy with a new one. Even after a hundred years.
A gap between the flasks of 1 cm will be enough for this. The parts of the frame are connected to each other with bolts or rivets.
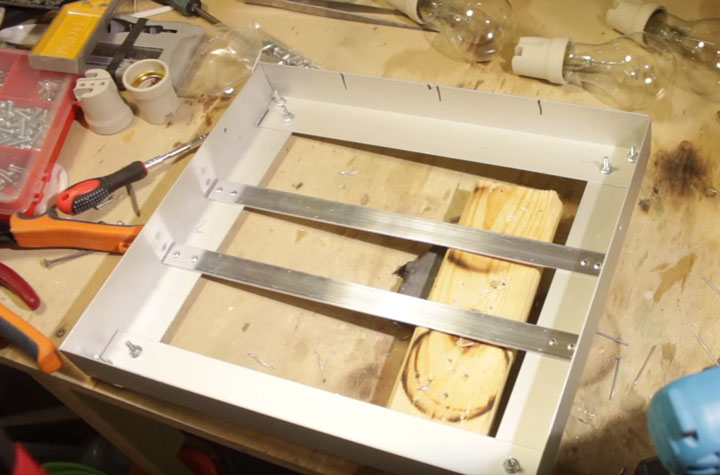
Further, inside it, you will need to fix two aluminum strips on which a reflector or reflector will sit. These strips will give rigidity to the entire structure.
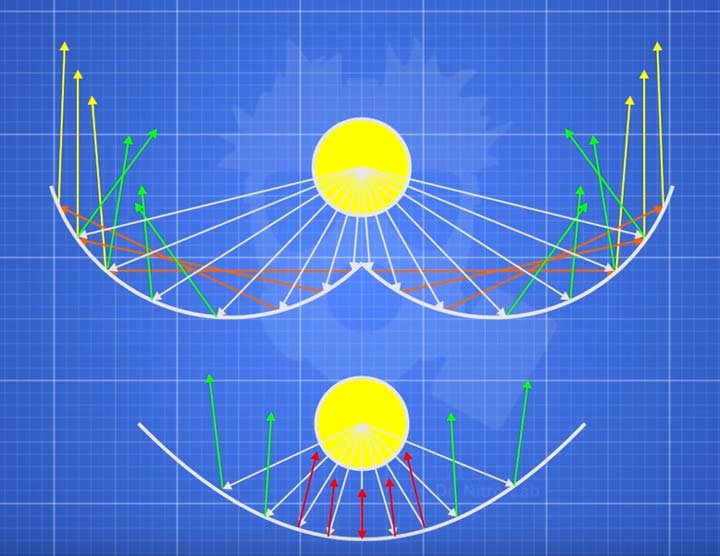
Now the most important thing is to correctly make a reflector. The usual parabolic shape is not very effective.
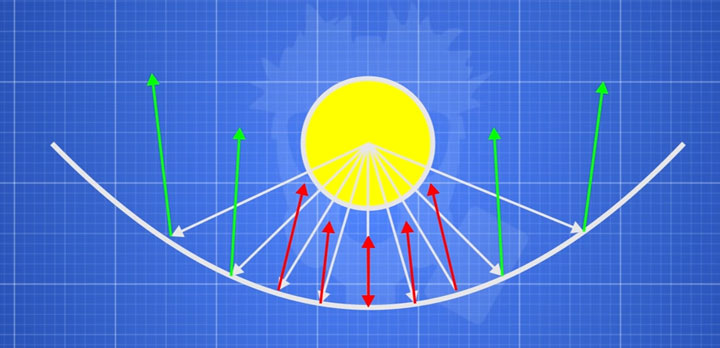
Models in the form of a biparabola cope much better with their duties.
Here the whole difference is in the reflection of the rays, which in the second case, for the most part, do not bounce back into the lamp, but go out.
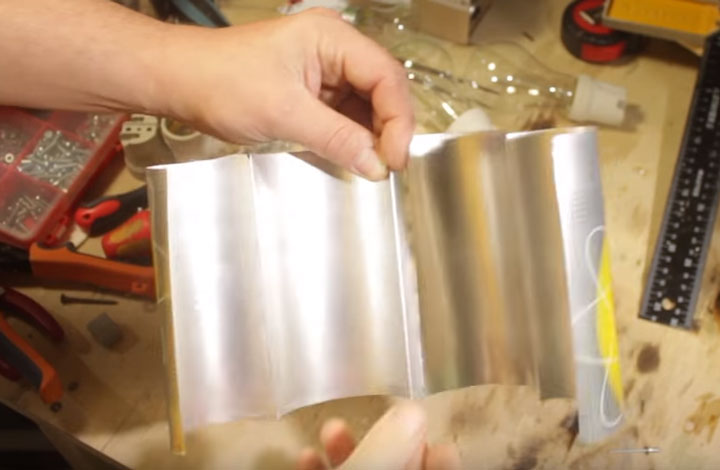
As a material for manufacturing, aluminum cans are ideal. Cut off the bottom and top of the jar.
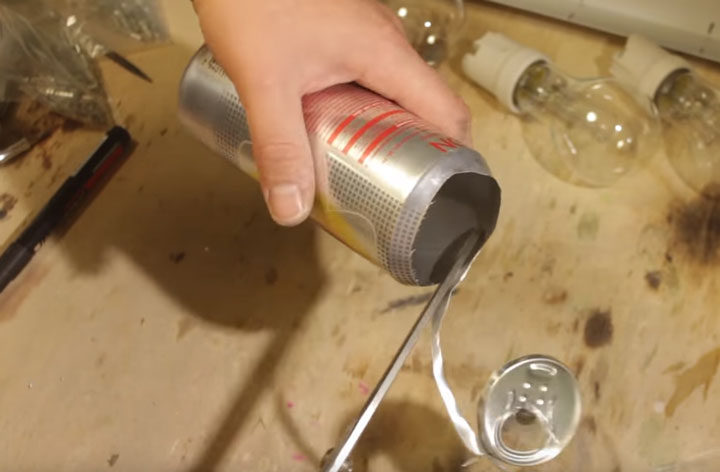
And unfold the walls and bend in the middle. At the same time, from one edge, leave a margin of 1 cm for another bend. After all, you somehow need to connect the halves of two cans together.
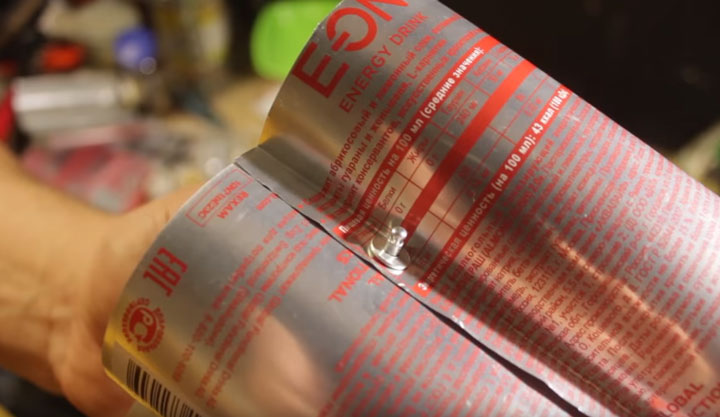
1 of 2
Fasten them together with rivets. In order not to tear thin aluminum in this process, first put washers on both sides.
As a result, you should get a solid reflector from 4 cans.
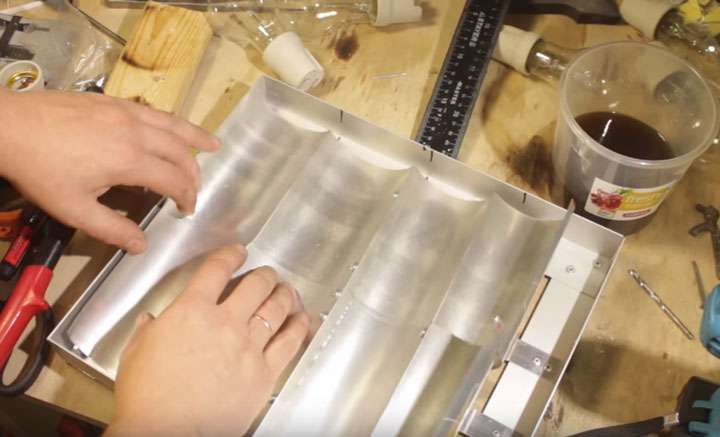
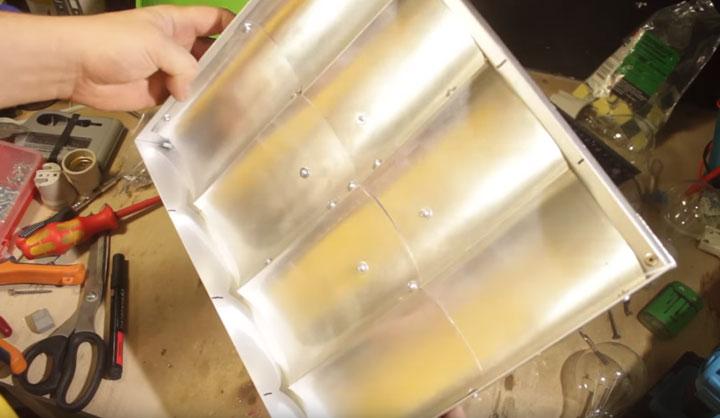
Next, put the reflector on the frame and also put rivets. First in the center on the side, and then along the edges.
Well, about the two strips in the middle of the frame, do not forget.
Now you need to insert the bulbs themselves into this design. At the same time, do not allow them to touch the reflector. From it there should be a minimum indent of 1.5-2 cm.
Here again, aluminum comes to the rescue. Namely, thin strips nine centimeters long.
Do not make a mistake when marking the places where the cartridge is fastened to the strip, otherwise you will not be able to bring the power wires inside.

Fasten the strips to the frame and install cartridges on them.

After that, you can screw the bulbs themselves.
All that's left is to connect the wires.
Making an infrared heater with your own hands
Modern IR emitters for home heating are reliable, practical and have good efficiency. Such devices emit infrared radiation, which, without interacting with air, contributes to the rapid heating of various surfaces in the room. Thus, they efficiently convert electricity into heat energy.
The most affordable option for home assembly is an economical film heater, which is based on a heating film.
For work, you will need to prepare the following materials and tools:
- two identical pieces of glass
- aluminum foil,
- sealant,
- paraffin candle,
- epoxy adhesive,
- electrical cord with plug
- candle holder,
- soot cleaning sticks,
- sponge for cleaning glass surfaces.
Do-it-yourself infrared heater is assembled according to the following scheme:
- Glass is thoroughly cleaned of dirt and degreased.
- A conductive base for the heater is assembled. With a candle, soot is applied on the back of the glass blanks, which acts as a kind of current conductor. Before starting the procedure, the workpieces are slightly cooled.
- Along the perimeter of the blanks, the surface is cleaned of soot with chopsticks to obtain an even edging 0.5 cm wide.
- Strips are cut from the foil with a width equal to the area of the conductive glass base. They will be used as conductive electrodes.
- One blank is placed on a flat surface with the smoked side up, and glue is applied in a thin layer around the perimeter. Foil strips are superimposed on the glued surface with a slight shift beyond the edges of the workpiece.
- From above it is covered with a second workpiece, respectively, with the smoked side down, it is pressed to set the glue. All joints are carefully treated with sealant.
- Checking the power of the finished structure. If the power indicator does not exceed 100 W per 1 sq. m of the room, then the connection of the heater to the network is carried out using a conductive wire and a plug.
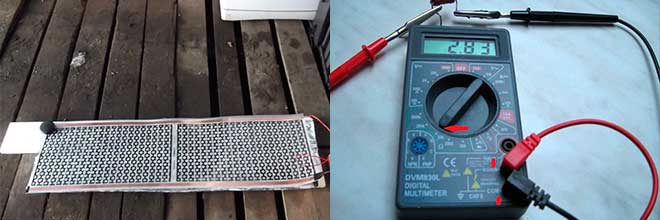
A multimeter measures the resistance of the conductive base of the heater.To calculate the power, a simple formula is used: N \u003d U × U / R, where
N - power, U - mains voltage (220 volts), R - resistance.
For example, R is 20 ohms, then N = 220 × 220/20. The result is 2420 watts. This power is enough to heat a room of 25 square meters. m.
Efficient infrared emitter
Any infrared emitter that is used to heat a room is characterized by efficiency and high efficiency. All this is achieved thanks to the unique principle of operation. Waves in the infrared spectrum do not interact with the air, but increase the surface temperature of objects in the room.
Those subsequently transfer heat energy to the air. Thus, the maximum of radiant energy transforms into thermal energy. It is precisely because of the high efficiency and efficiency, and also because of the low cost of structural elements, that infrared heaters are increasingly being made independently by ordinary people.
IR emitter based on graphite dust. Homemade room heaters,

operating in the infrared spectrum, can be made from the following elements:
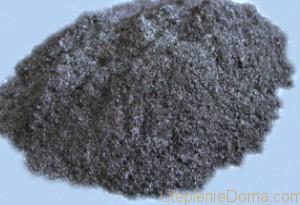
- powdered graphite;
- epoxy adhesive;
- two pieces of transparent plastic or glass of the same size;
- wire with a plug;
- copper terminals;
- thermostat (optional)
- wooden frame, commensurate with pieces of plastic;
- tassel.
First, prepare the work surface. For this, two pieces of glass of the same size are taken, for example, 1 m by 1 m. The material is cleaned of contaminants: paint residue, greasy hand marks. This is where alcohol comes in handy. After drying, the surfaces proceed to the preparation of the heating element.
The heating element here is graphite dust. It is a conductor of electric current with high resistance. When connected to the mains, graphite dust will begin to heat up. Having gained a sufficient temperature, it will begin to emit infrared waves and we get a do-it-yourself IR heater for the house. But first, our conductor needs to be fixed on the work surface. To do this, mix the carbon powder with the adhesive until a homogeneous mass is formed.
Homemade room heater.
Using a brush, we make paths from a mixture of graphite and epoxy onto the surface of previously cleaned glasses. This is done in a zigzag pattern. The loops of each zigzag should not reach the edge of the glass by 5 cm, while the graphite strip should end and begin on one side. In this case, it is not necessary to make indents from the edge of the glass. Terminals for connecting electricity will be attached to these places.
We put the glasses on top of each other with those sides on which graphite is applied, and fasten them with glue. For greater reliability, the resulting workpiece is placed in a wooden frame. Copper terminals and a wire are attached to the exit points of the graphite conductor on different sides of the glass to connect the device to the mains. Next, home-made heaters for the room must be dried for 1 day. You can connect a thermostat in a chain. This will simplify the operation of the equipment.
What are the advantages of the resulting device? It is made from improvised means, and therefore, it has a low cost. It heats up no higher than 60 ° C, and therefore it is impossible to burn yourself on its surface. The glass surface can be decorated at your discretion with a film with a variety of patterns, which will not violate the integrity of the interior composition. Do you want to make homemade gas heaters for your home? The video will help solve this problem.
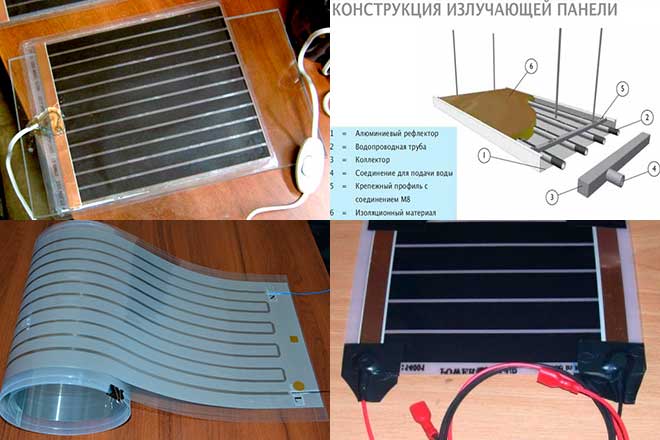
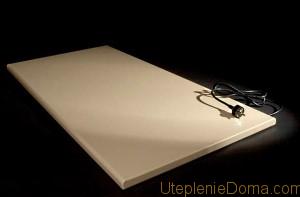
Film infrared heating device. For full heating of a medium-sized room, it is recommended to use ready-made film materials capable of emitting IR waves. They are present in abundance in today's market.
Required structural elements:
- IR film 500 mm by 1250 mm (two sheets);
Homemade film heater for the apartment.
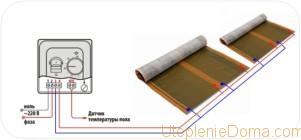
Preparing the wall surface for a home-made heater for an apartment begins with fixing the thermal insulation. Its thickness should be at least 5 cm. To do this, the protective film is removed from the self-adhesive layer and the polystyrene is attached to the surface with the foil up. In this case, the material must be pressed tightly against the wall. An hour after the end of work, you can proceed to the next step.
Sheets of IR film are interconnected in series. Glue is applied to the back of the material with a spatula. All this is attached to the previously mounted polystyrene. It will take 2 hours to securely fix the heater. Next, a cord with a plug and a thermostat are attached to the film. The final step is decoration. To do this, the prepared fabric is attached over the film using decorative corners.
The exact gas consumption for heating the cottage can be determined based on the calculations indicated here.
Optimal power for heating
To assemble a lamp heater, it is best to use 150W models
Just note that after the introduction of the law prohibiting the production of conventional incandescent lamps over 100W, they began to be sold under the name "heat emitters"
With their serial connection scheme, even two copies, you can immediately feel the radiated heat. At the same time, they do not blind their eyes.
The current in such a circuit at the same voltage will be 420mA. This means that two lamps consume a total of about 100W, and most of it goes to heating.
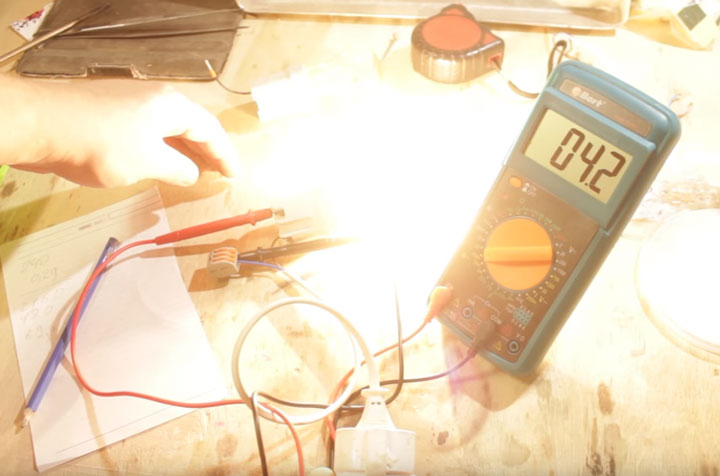
You can compare how much power infrared heaters are sold, and what area they are designed for. The ratio for conventional models is 100W per 1m2.
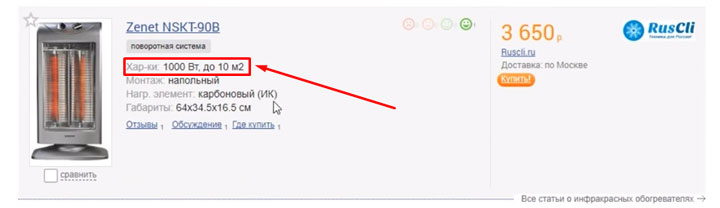
Oil coolers have almost the same performance.
That is, in any case, watts turn into heat. Only specialized infrared models will have a more directional radiation to a specific point or zone, and your homemade product will have a wider angle.
By the way, these 100 W / m2 are taken from the SNiP for rooms insulated according to all standards. This is the optimal power for all heaters in central Russia.
For northern latitudes, including for cold, uninsulated garages, the values \u200b\u200bwill already be larger. If, for example, the heat loss in the garage is 1000 W / h, and you heat it by 300 W, then your temperature will never rise.
But if the ideal heat loss is close to zero, then 100W will be enough to create a bath inside.
Also, this power depends on the height of the ceilings (average calculated - up to 3m).
Infrared device option 3
Its manufacture requires the use of graphite. In addition to it, you need to prepare:
- A flat box, for example from shoe polish.
- Clean river sand.
- Fork.
- Two wires.
- Pliers.
- A sheet of tin with dimensions not exceeding the similar characteristics of the box.
The production of an IR heater includes the following steps:
- Removal of cream residue from the box and washing it. It should look like a mirror.
- Grinding graphite and mixing it with sand. Proportions: one to one.
- Placing the prepared mixture in a container. Only half of the box is filled with the mixture.
- Cutting out a circle or square from a sheet of tin. The blank must correspond to the shape of the box and fit in the middle of the box.
- Fastening to a tin circle of one of the wires. For this, pliers are used. Next comes the installation of tin with pliers.
- Cutting a small hole in the side wall. It is necessary for the output of the wire.
- Further filling of the box with graphite and sand. The mixture is poured so that a domed top is formed.
- Blockage of the structure with a lid. The latter is strongly pressed, compressing the graphite with sand. Due to this, excess pressure is formed in the middle.
- Connecting the second wire to the box body.
- Mounting the plug or terminals for the battery.They are installed at the ends of the wires.
The made IR-device is very easy to use and can be suitable for any premises. especially for the garage. It is small and its installation is very easy. It is able to work for a long time, because there is practically nothing to burn out in it. Thanks to this, there will be no need for frequent repairs.
To control the IR heater, you need to change the position of the cover. The closer it is to the base, the greater the pressure inside becomes and the more the entire structure heats up. To weaken the power, the cover is unscrewed or lifted higher.
Over time, its content "coagulates". Therefore, the power is reduced. A small repair to restore power involves loosening the graphite. You can also shake the heater.
Which is warmer, convector or infrared heater Infrared electric heater Convective infrared heater Infrared gas heater
Basic requirements for a homemade heater
Any type of heating equipment for the home, regardless of design features and manufacturing complexity, must meet the basic requirements:
- Ease and availability of assembly.
- Safety and reliability in operation.
- Economy in energy consumption.
- High performance and working power.
- Affordable cost of structural elements and materials.
- Ergonomics and ease of transport.
- Durability and practicality.
Among the existing heaters, the most efficient and productive are: infrared, quartz and ceramic emitters, electric convector.
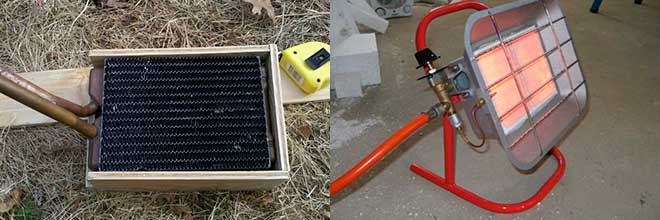
Halogen lamp heater
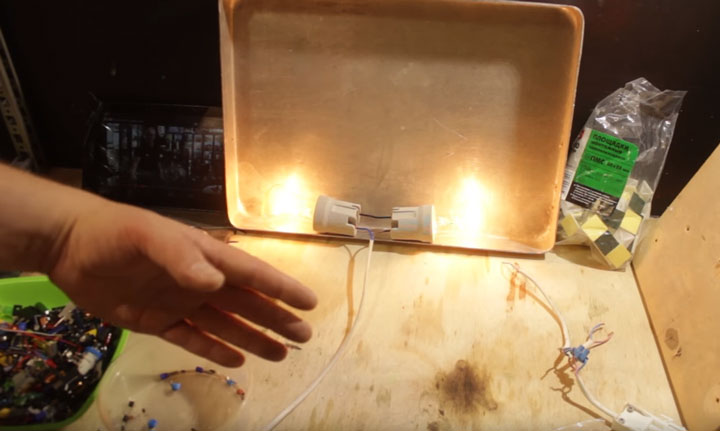
The simplest stove is assembled on the basis of just one 1 kW halogen lamp.
For this you will need three things:
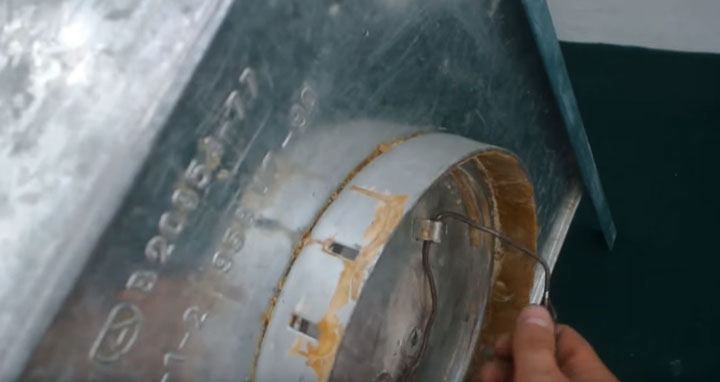
sealed metal container or galvanized barrel, can, etc.
brick
1000W halogen
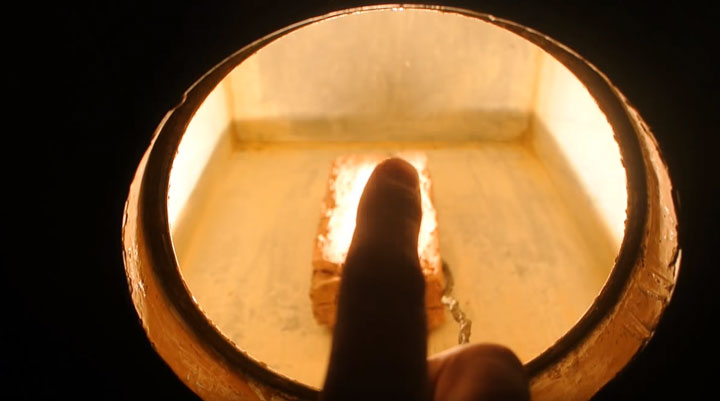
You place this lamp inside the container on a brick and close it, so to speak, “blower”.
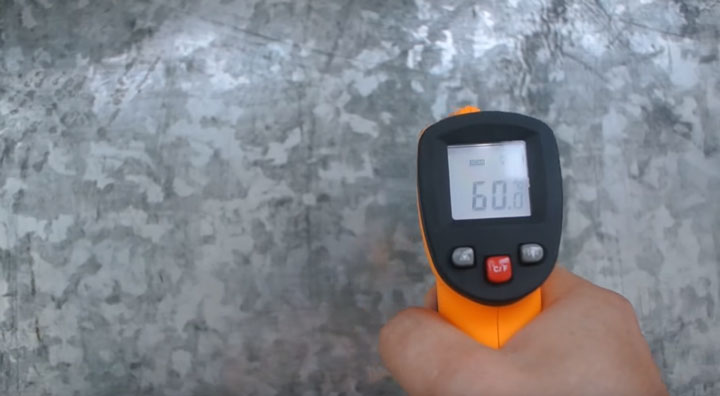
The heating temperature of the surface of the walls with a container size of 400 * 400 * 600mm will reach up to 80 degrees. The maximum temperature of underfloor heating does not exceed 30C.
Eighty is definitely too much, so it's better to take one 500W halogen or turn on two in series at 1kW. In this case, the heating of the walls of the stove will be optimal - 60 degrees.
To fix the lamp, use a special ceramic cartridge holder.
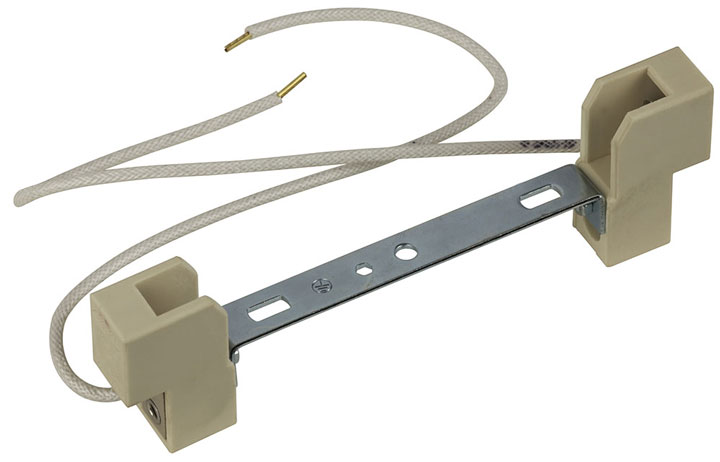
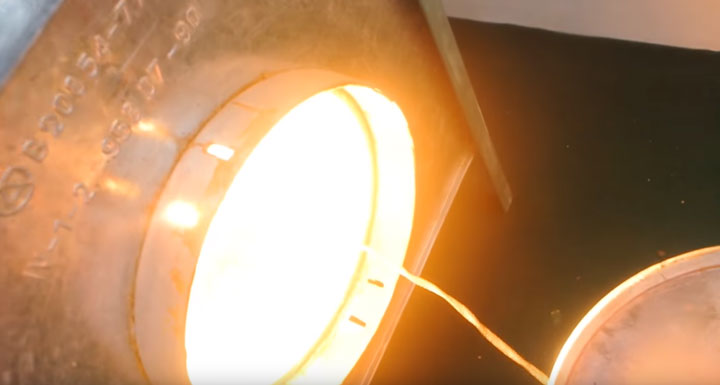
It's ceramic. The brick on which this “beast” lies is heated up to 300 degrees!
As you understand, the wires for connection must be thermal.
If you open the "blower" of such a heater, then the picture from the inside will resemble a miniature nuclear reactor, with one single fuel cell - a halogen gas lying on a brick.
And because of the low power, it's all connected through a regular outlet with a plug. You will be shocked at how much heat such a design can radiate.
On it, by the way, it is very convenient to dry clothes and shoes.
There is just one big BUT. This is the life of such a light bulb in a confined space without normal cooling conditions. I can assure you that he will greatly disappoint you.