The choice of polypropylene pipes
There are several types of polypropylene pipes on the modern market.
In order for you to get a durable and efficient floor heating system, you should pay special attention to the choice of polypropylene brand.
single layer
RRN designation. This type of polymer is made from the so-called homopolypropylene. PPH-polypropylene pipelines are intended for ventilation systems and cold water supply systems.

RRV designation. Such single-layer pipes are made from a polypropylene block copolymer. They are characterized by increased resistance to pressure and temperature, so they can be used for underfloor heating.
RPS designation. Flame retardant polymer variant designed for use near open flames. It is similar in characteristics to PRV-polypropylene, but has a higher cost.
multilayer
Such pipe options are reinforced with a reinforcing layer located between two polymer layers.
Reinforcement is a thin sheet of aluminum or fiberglass with a thickness of not more than 1 mm.
Thanks to him, pipelines made of multilayer polypropylene are able to function at a coolant temperature of up to + 95 ... + 100 C (for a short time - up to 110 C).
Video Soldering polypropylene pipes
Secrets of the treatment of joint pain from our regular reader.
Hello!
My name is Gennady Alekseevich. I am a baker with over 20 years of experience. I am engaged in both repair and construction of Russian stoves and fireplaces. I always perform the work very efficiently and carefully, which negatively affects the condition of the joints. As I got older, the pain got worse and worse, to the point where I could no longer work. Having tried a lot of both medicinal and folk methods of treatment, I realized how serious my disease was, since there was no positive effect. Until I came across one tool, which I want to tell you about.
It is a unique blend of the rarest and most powerful natural healing substances. This tool has proven its effectiveness not only to patients, but also to science, which has recognized it as an effective drug. Pain in the joints and back go away in 10-15 days, studies have shown. The main thing is to strictly follow the instructions in the methodology. You can order the product in the original packaging, with a quality guarantee, at
Many of us have faced heating problems: components are leaking, the need to replace the heating system in a private house, and so on. However, sooner or later we come to the conclusion that the most efficient heating system is the one that includes a warm floor. It is not only productive, but also very pleasant. Despite the terrible winter outside the window, you can safely move barefoot around the house, while feeling warm and cozy. What do I need to do? Install a warm floor with your own hands. Moreover, now there are enough various photo and video materials on this topic on the Web, so there will be no problems with the instructions.
Completion of floor work
All circuits must be connected to the collector system. One end is fixed in the supply manifold, and the other in the opposite. After that, you need to make sure that the system is in working condition. To do this, you need to fill the system with water, separately for each circuit. At the same time, all taps and all valves must be open so as not to impede the exit of air.
Warm water must be pumped at a pressure that is one and a half times higher than the operating pressure, but not lower than 6 bar. After half an hour, you need to raise the pressure to the previous level. You need to do this procedure three times. After restoring pressure for the third time, leave the system for 24 hours.If during this time the pressure has dropped by no more than 2 bar, the installation has been carried out correctly.
To check how the system will behave at maximum temperature, you need to heat the water to 80 degrees. This will make it possible to verify the tightness of all circuits and connections and make sure that the warm floor is laid correctly. After complete cooling, it can be poured with concrete
It is important to remember that during these works the system must be under working pressure. It is imperative to add a plasticizer for underfloor heating to the solution, which will help improve the quality of the screed
You can use the system only after the screed has completely dried, not earlier than a month later.
Underfloor heating made of polypropylene pipes is popular because of its many positive properties. For do-it-yourself underfloor heating, it is more efficient to use these particular elements. Steel pipes are a relic.
Mounting technique
In a separate category, polypropylene pipes are distinguished for organizing underfloor heating. Their characteristics allow laying in a concrete screed without fear that the system will break. The basis for such a statement is the method of laying pipes, in which the joints are above the floor surface, and only integral pipeline parts are silted with a mixture.
The sequence of installation when laying a warm water floor is represented by the following activities:
It is reasonable to carry out a complete calculation of the material that will be required and things and draw up a scheme for laying PP pipes
When calculating the number of products, the shape of the installation is taken into account (serpentine, spiral and other good for this room).
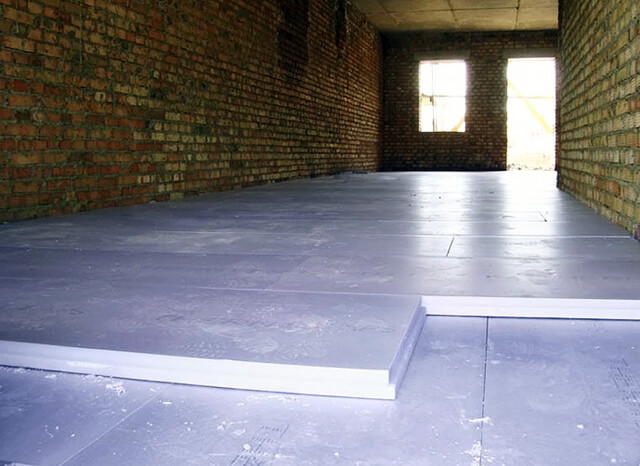
The surface of the primary screed is cleaned of debris caused by construction work.
Gradually, the waterproofing barrier is laid, after which the material for thermal insulation is installed.
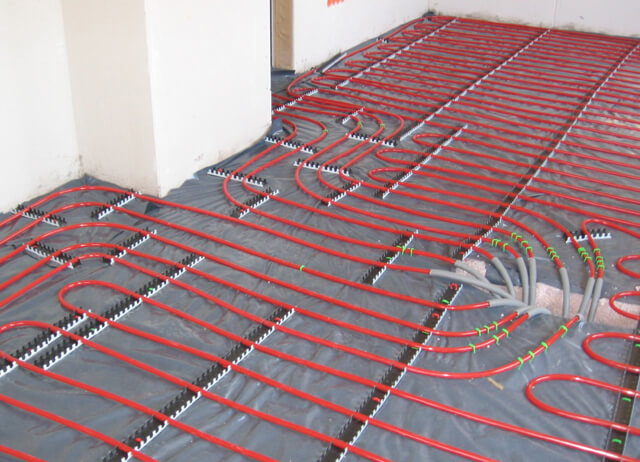
In the form of a base, a metal mesh is laid over the entire area of \u200b\u200bthe room covered by the heating circuit. Products are specifically fixed to it with the help of PVC clamps or metal wire.
Connect all heating circuits to a pre-formed manifold
They test the system with much higher than working parameters. Raise the temperature slowly to operating temperature.
After checking, pour the final screed and lay the floor covering.
Screed underfloor heating
The main thing! If there are signs of a pipe break under the screed, you can select a local area of the floor surface where the pipe was damaged, using the installation scheme, open the surface. Dry the affected area and carry out repair activities.
The above information suggests that the use of polypropylene products during the installation of autonomous space heating systems is a reasonable and correct decision. Compliance with the installation rules and high-quality soldering at the joints of the elements for profiles ensures a very long period of trouble-free operation. The technical specifics of polypropylene components, which determine their reliability, allow you to place communications in the voids of the walls and under the concrete screed.
One of the types of laying PP pipes is presented in the material below.
Video 1. The process of installing plastic heating pipes.
https://www.youtube.com/watch?v=wn1Tq7-p4Vw
Good to know 'target="_blank">')
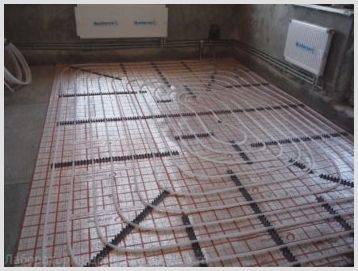
Design and execution of underfloor heating
Such a system saves usable space, as it is located under any floor covering or cement screed. A warm floor made of polypropylene pipes with your own hands can be arranged by pouring them with concrete or other plasticizer. At the same time, the coolant circulates through them and evenly distributes heat, starting from the bottom throughout the room.
Appearance of the underfloor heating system
In this case, the source of heat can be a boiler or other types of heating.Temperature sensors provide timely shutdown of the system immediately after the set temperature is reached, which saves energy.
Do-it-yourself installation of a warm floor is carried out in several stages:
- project preparation;
- laying and connecting pipes;
- checking and monitoring the system performance;
- arrangement of the screed;
- finishing coating.
Let's consider in more detail all the stages.
It is impossible to make a warm floor without preparing a project, which is needed to calculate the need for materials, the heated area, the temperature that can ensure the operation of the system, the location of the boiler and other nuances, including the diameter and length of the pipes. For the efficient functioning of heating, it would be more correct to entrust all calculations to professionals.
Installation of the system begins with the installation of a collector cabinet, necessary for connecting the circuits to the base line, through which warm water is supplied and chilled water is taken.
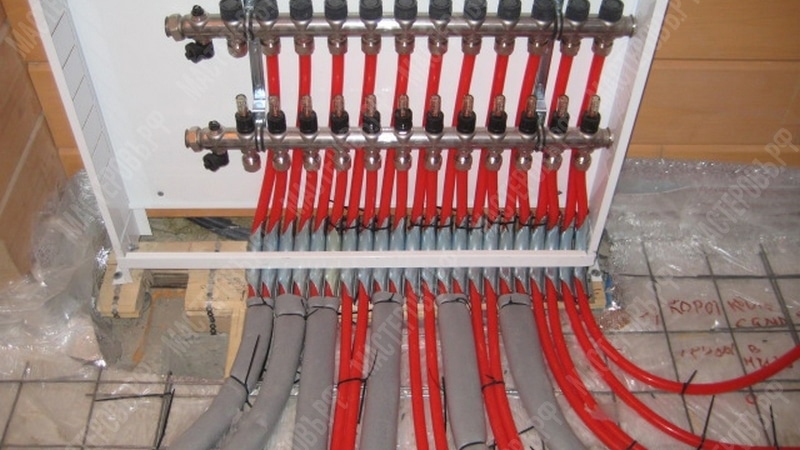
Distribution manifold cabinet
The cabinet is installed above the floor level in order for the pipes to go down, while ensuring the removal of air and the normal functioning of the system.
One of the key points when installing a heated floor is waterproofing, which can protect the room from water leaks. Film materials, such as polyethylene, are often used for this purpose.
In order to reduce heat losses, thermal insulation is installed that can cope with heavy loads and has a high thermal resistance. For this purpose, a foil coating is used, which has excellent mechanical strength, a small degree of compression and evenly distributes heat over the floor surface. A reinforcing metal mesh is used to fasten pipes and fix the screed.
Pipe calculation
There are two methods for calculating the required number of pipes. First you need to decide on the laying scheme. There are only two of them: a snake and a snail. Sometimes they are combined. There are double and single stacking.
There are several points to be observed:
- The optimal total length of pipes for a water-heated floor is up to 50 meters. If desired, it can be extended up to 80 meters, but in this case the system may not work efficiently.
- Between the turns should take a step no more than 30 centimeters. This is usually sufficient for effective heating. In places with high heat loss, for example, near windows, it can be laid in increments of 10-15 centimeters.
- With double laying (double serpentine), heat is distributed evenly throughout the system. Otherwise, the first half should be laid at the windows as in places with high heat loss. This is due to the fact that hot water cools as it moves.
- It should be remembered that polypropylene is a material with little flexibility. When laying, you need to take this into account and not make too “sharp” turns.
When calculating the number of pipes, two methods are used - thread and graph paper. The calculation for a thread is made simply: a thread is placed on the floor in the places where the pipes will go in the future and then measured.
When calculating on graph paper, a plan of the room in which they will be installed is first drawn, a diagram is drawn on it and the required length of the pipes is calculated.
When calculating the number of pipes, 10% must be added to the final calculations for a possible overrun.
Installation
Installation of the heating system takes place in several stages.
Lining
For effective heating, the floor must be prepared before laying.
If there is no base as such, first a rough screed is made from a sand-cement mortar. If concrete slabs act as the base, they are leveled, covering all the cracks and ensuring that there is no level difference above 1 cm.
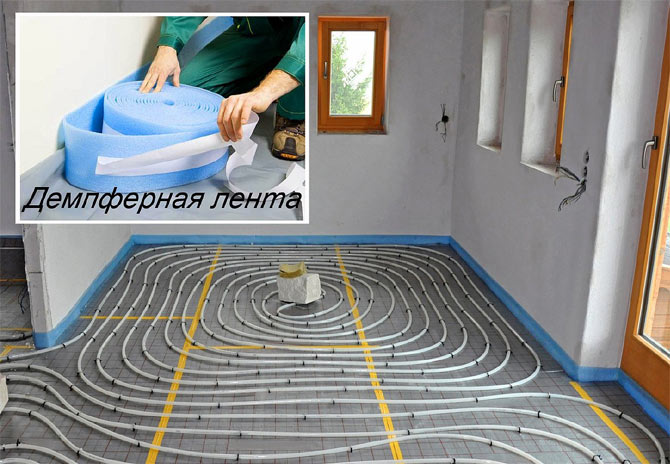
The rough screed is cleaned of dirt and dust, after which a layer of waterproofing is laid. The material for this is usually a thick film.Experts recommend putting the film on the walls at a distance of 10-20 centimeters. In a room with high humidity, in country houses this is a must. The film is overlapped by 10–20 centimeters and glued with mounting tape at the joints.
A damper tape is glued around the perimeter of the room. Its edges should be about 20 mm higher than the future screed. After the screed has dried, the edges of the tape are usually cut off.
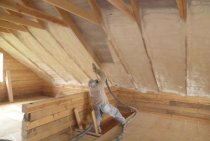
Then thermal insulation is laid so that the warm floors heat the room most efficiently. There are different heat-insulating materials, both rolled and in the form of plates; the choice of coating depends on personal preferences, price, thickness. All gaps between them should be sealed with mounting foam to eliminate the possibility of heat leakage. The thickness of the thermal insulation when mounted on a cold floor or ground should be from 5 centimeters, otherwise 3 centimeters is enough.
If the thermal insulation material is not foiled, a foil film is placed on top of it. At the joints, it should be glued with aluminum tape.
Upon completion, the floor is ready for laying the heating circuit.
Pipe laying
When working with polypropylene indoors, it is required to maintain the operating temperature above 5°C.
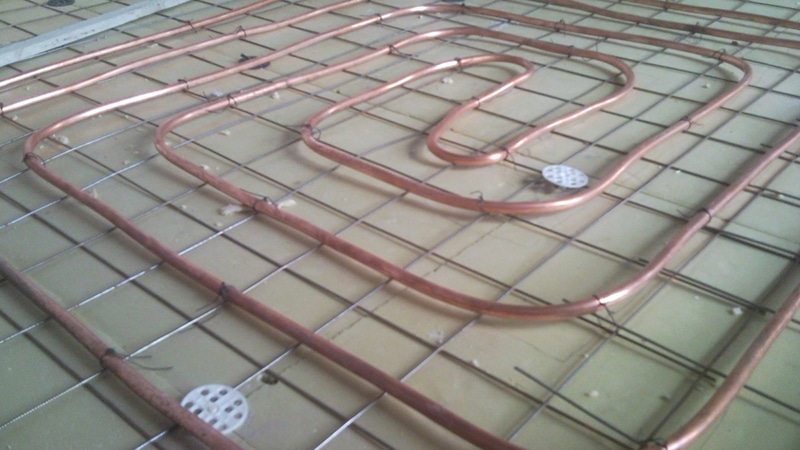
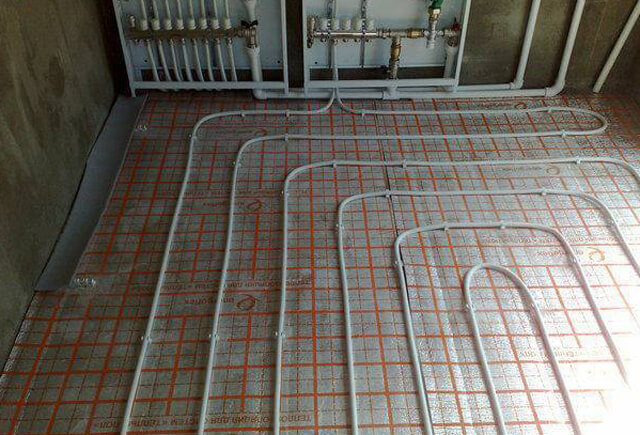
There are two ways to fasten the pipe: using dowels through thermal insulation and fastening to a reinforced mesh. The preferred option is to attach to the grid as more reliable. Plus, the mesh allows you to strengthen the screed layer, which will cover the heating system.
The mesh for fastening is placed on a heat-insulating substrate. Then pipes for a warm water floor are laid along it according to the previously selected scheme and fastened with plastic clamps or wire. The fastening must not be tightened too much - this can lead to deformation of the pipes during operation and reduce their service life. At the junction between them, they are fastened with a special welding machine. It comes in several varieties and is easy to work with.
Laying begins with a collector. First, one end is attached to it, and after laying pipes throughout the room, the second is connected.
Testing
After laying and fixing the pipes, they are connected to the collector and tested. To test the heating equipment, water is supplied, while at the same time etching the air. In this case, the water pressure must be higher than the working one, but not more than 6 bar.
After a day, the pressure is checked, and if it has dropped by no more than 2 bar, then you can proceed to the coating. If the pressure is less, then a gasket error has occurred.
Final stage
After successful testing, they begin laying the concrete screed. If the room is small, you can additionally use another reinforcing mesh, which is placed on top.
A special mixture with a plasticizer is prepared for a concrete screed; in the absence of an additional reinforcing mesh, it is also recommended to add fiber from polypropylene fibers. The screed is laid at a temperature of 5C. It is worth remembering that the screed needs 28 days to dry completely.
Switching on is carried out after the screed has hardened. Before the first start, the pipes should be de-aired.
After the screed has dried, you can start laying the flooring. The choice of floor covering is carried out among materials with special markings. Tile is the ideal material for underfloor heating.
Underfloor heating is a rather interesting design with a lot of advantages, so there is nothing surprising in its popularity. There are several design options for underfloor heating, and each of them has its own characteristics. A fairly common underfloor heating scheme is a system using polypropylene pipes. How to make warm floors from polypropylene pipes on your own, and will be discussed in this article.
Pipe laying
For laying polypropylene pipes in a screed, it is recommended to use the "spiral" scheme.In this way, it is possible to ensure a more uniform heating of the surface and facilitate installation. The pipes will be laid with a large radius, which is not the case when using the "snake" scheme.
To fix the water circuit, a metal mesh is laid on the prepared base. It will also strengthen the screed layer, which will last a longer period. Pipes are attached to the grid using metal wire or plastic clamps.
The installation of these elements should be done every 0.8 m. The fasteners should not be overtightened so as not to cause deformation of the pipes. They can also be fixed directly to the thermal insulation using dowels.
Warm floor features of this heating system
Let's start with the fact that floor heating can be used as the main heating option in a residential area or act as an additional source of heat. Depending on the technological characteristics of the residential building, which heating option to use in the case of underfloor heating is up to you. For an apartment in an apartment building, underfloor heating may be an exception. In some cases, residents try to increase comfort in the bathroom or in other technological rooms with the help of a heated tiled surface.
Important! It should be recalled that there is an existing ban on the installation and installation of warm water floors in residential premises of apartment buildings. The reason for this situation lies in the unpreparedness of the engineering structures of a residential building for the installation of a complex heating system, which are water floors.
In a situation when it comes to installing a heating system "warm floors" in a private house, there are no prohibitions and obstacles for the implementation of the project. It is possible to carry out the installation and installation of underfloor heating of any area in various combinations.
For those who nevertheless decided to install underfloor heating in their homes, it is important to know about the necessary equipment and consumables. Pipes for any water heating system are the main working element
It is through them that prepared water circulates, transferring thermal energy to heating sources. These can be radiators or, in the case of water floors, a heated concrete screed, a type-setting wooden floor structure. The transfer of thermal energy from the heat carrier of the floor surface is carried out through water heating circuits. What material the water loop pipe is made of depends on the speed of installation of the underfloor pipeline and the quality of the heating of the floor surface.
Preparation for laying underfloor heating
Before laying a warm floor from polypropylene pipes with your own hands, you need to prepare. All preparatory work is aimed at ensuring that the warm floor functions normally and heats the room, and not the underground space.
Preparation includes several stages:
- First, the base must be covered with a layer of waterproofing. As a rule, a thick polyethylene film is used for this. It is laid on the floor so that the overlap on the walls is at least 10 cm. Waterproofing prevents the penetration of moisture into the system.
- The next step is to install thermal insulation. Often, the heat-insulating material is extruded polystyrene foam, which can withstand mechanical loads well and has excellent moisture resistance.
- Thermal insulation material is laid in a checkerboard pattern. If there are irregularities on the rough screed, there will be gaps between the expanded polystyrene plates, which are filled with polyurethane foam. It is also used to fill the space between walls and thermal insulation.
- If the base is too uneven, it is worth considering leveling it. The fact is that the presence of high-altitude differences in the floor causes an increase in hydraulic resistance in the system, due to which its efficiency decreases.
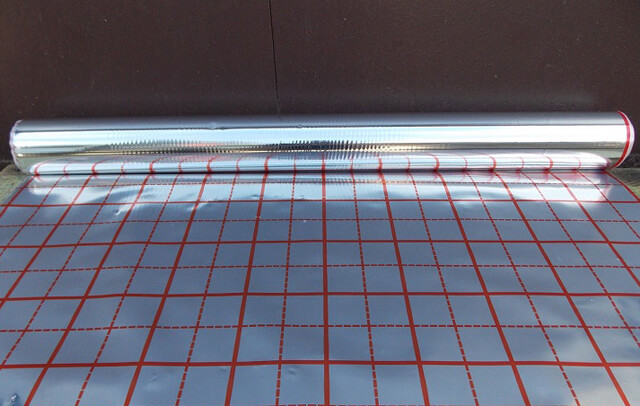
- To achieve maximum insulation efficiency, penofol should be laid on top of the main layer of thermal insulation. On one of its sides there is a thin aluminum foil, due to which the reflected heat will enter the room and heat the air. To connect penofol, construction tape is used.
The correct implementation of each stage of preparation will allow in the future to equip a high-quality water-heated floor made of polypropylene pipes, which performs its functions well.
Calculation of the necessary materials
Before you make a warm floor from polypropylene pipes, you need to calculate the amount of material needed, which will directly depend on the circuit laying scheme used. As a rule, the installation of polypropylene pipes is usually carried out according to the "snail" scheme - it is not very simple, but the efficiency of such a design will be higher.
Regardless of the scheme chosen, the pipes will form an irregular geometric shape with many bends and turns.
Calculating the exact length of the pipes in this case is difficult, and two methods are used for this:
- Calculation of the length of pipes for the project. The room is transferred to a sheet of paper with scaling. The heating circuit diagram is also applied to paper and then measured with a ruler.
- Calculation of the length of pipes using a long thread. To use this method, you will need a long cord that must be laid over the intended location of the pipes. Then it is enough to measure the cord.
When calculating pipes, it is imperative to add 10% to the final result so that there is definitely enough material.
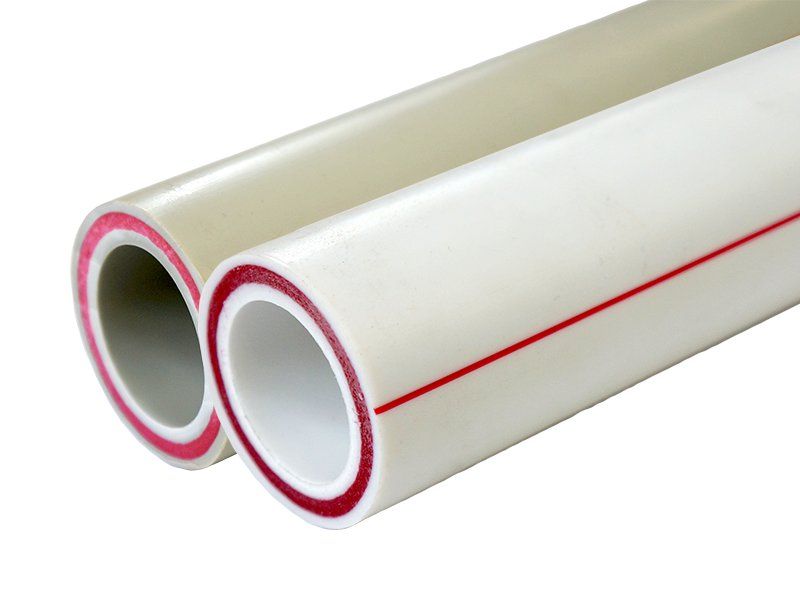
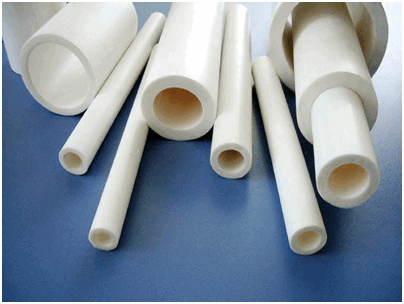
Varieties of polypropylene pipelines
Polypropylene pipes are popular for underfloor heating, water supply systems and other engineering networks in the house. They can be single layer or multilayer. Each option has its own scope.
Polypropylene pipes for water supply and heating systems
Single layer
Main varieties:
- RRN. Pipelines are made of homopolypropylene. Not used for underfloor heating, but widely used for water supply, ventilation systems;
- RRV. Manufactured from polypropylene block copolymer. Differ in the high durability and firmness;
- PPR. For production, a random copolymer polypropylene is used. Pipes made of this material are able to effectively distribute the generated load along their walls;
- PPs. Pipes of this type are hardly flammable. They are able to work effectively at temperatures that do not exceed +95°C.
Multilayer
There are several types of multilayer pipes, which are reinforced with a reinforcing layer of the following materials:
- aluminum. A thin reinforcing sheet is applied to the outer surface of the pipeline. When connecting several elements, the aluminum layer is cut off by 1 mm. There are also variations where reinforcement is carried out inside - between the walls. Polypropylene pipes with aluminum reinforcement are able to work effectively at a temperature of +95°C (for a short time at +110°C);
- fiberglass. The reinforcing layer is placed between the polypropylene sheets. These pipelines are effective in underfloor heating;
- composite. A mixture of aluminum and fiberglass fibers is placed between two layers of polypropylene.
Features of the use of polypropylene pipes for underfloor heating equipment
 Plain polypropylene pipes are commonly used for water supply and sewerage pipelines. For underfloor heating, using a simple polypropylene pipeline is dangerous from the point of view of the mismatch of the product with thermal and hydraulic loads. Warm floors are best created on the basis of reinforced pipes. Such a product has all the necessary characteristics inherent in this method of heating. The channel is three-layer.Between the inner and outer layer of polypropylene there is a reinforcing layer made of aluminum foil or woven synthetic threads (glass fiber).
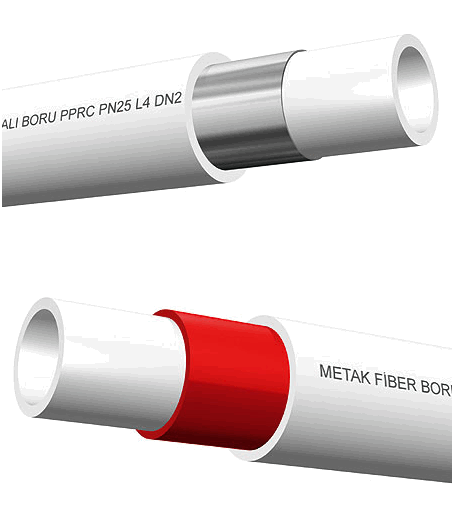
The photo shows two options for the manufacture of pipes, with an aluminum layer and with fiberglass in the middle.
The presence of a reinforcing layer allows the pipeline, embedded in a concrete screed, to withstand temperatures up to 950C and water pressure up to 10 atm.
Existing marking of pipes made of polypropylene
In order to avoid mistakes already during the installation process, you should deal with the existing markings for polypropylene products. Today, manufacturing companies offer the following types of polypropylene pipes on the market:
- PN10, marking that is on ordinary products with a homogeneous polymer structure. These consumables are used to equip conventional water supply systems at a working water temperature of 200C and with a working pressure of up to 10 atm. The diameter of such a pipe usually varies between 20-110 mm.
- PN16, marking corresponding to a homogeneous product that can be used for the installation of warm water floors. The permissible temperature parameter of the coolant should not exceed 800C. Allowed working pressure - 10 atm. The outer diameters are similar to those of the PN10 type, however, in this case, there is an increased thickness of the pipe walls.
- PN20, marking for a homogeneous pipe, in which hot water circulation with a temperature of up to 950C is allowed. Here, a working pressure of not more than 6 atm is already allowed. Pipes are produced with diameters of 20-110 mm.
- PN20 AL (PN20 GF), marking for polypropylene, in which there is a reinforced layer of aluminum or glass fibers. In all other respects, these products correspond to pipes marked PN20. The main difference from other consumables is the lower coefficient of thermal expansion (CTLR).