Which batteries are better cast iron or aluminum
Cast iron radiators need no introduction, which cannot be said about heaters made of aluminum. To determine which of these types of devices is better, we will describe the advantages and disadvantages of each of them.
The advantages of cast iron batteries include:
- Corrosion resistance of the material. According to experts, cast iron is not afraid of abrasive substances such as sand and other debris. It also does not break down under the influence of acids;
- Such devices are characterized by low cost, have a high thermal output;
- Such products can last up to 50 years.
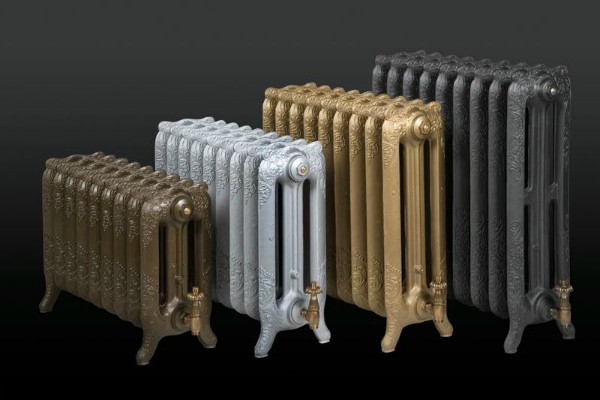 Modern cast iron radiators
Despite a significant number of advantages, the described devices also have disadvantages. The main disadvantages of cast iron heaters:
- Possibility of obtaining water hammer and disruption of the system;
- Insufficient thermal conductivity of the material;
- Ugly appearance, although modern analogues are very attractive, but their price is high.
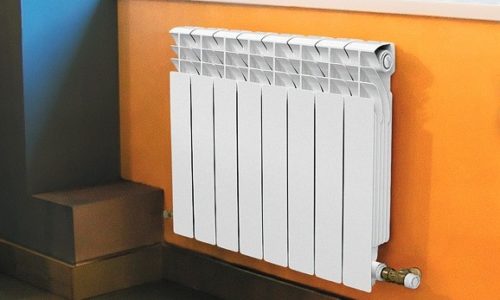
To date, aluminum heating radiators are very popular among consumers. They have small dimensions and weight in comparison with analogues. When using aluminum radiators, it becomes possible to automatically control heating.
The disadvantages of the described devices include low resistance to corrosion, limited strength of products. The service life of such devices will depend on the degree of purification of the coolant. The optimum level of acidity should be between 7 and 8 pH.
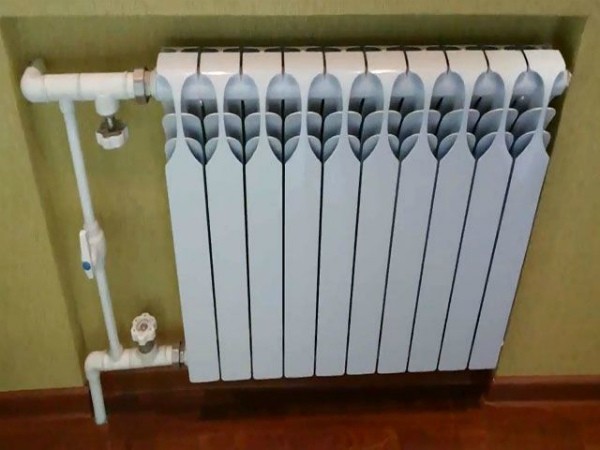 Aluminum radiator
There is no single answer to the question of which batteries are better. Here everyone chooses according to personal preferences. Recently, more and more users are leaning towards aluminum radiators, because such devices are much lighter and more compact than their counterparts.
When using such devices, it becomes possible to automatically control heating. At the same time, cast-iron batteries have a long service life, suffer less from poor-quality coolant, and are not afraid of corrosion.
Exceptional case - repair of heating radiators
Bimetallic radiators, in addition to a higher level of efficiency, are much easier to operate and repair than monometallic systems. Installation, testing and start-up, carried out in accordance with the requirements of the manufacturer, guarantee the efficient uninterrupted operation of bimetallic heating systems for a long time. The need to repair heating radiators occurs mainly in low-quality models, the individual elements of which are connected by spot welding.
However, by investing in such heating systems, you will eliminate the risk of any malfunctions and provide your home with a reliable source of heat.
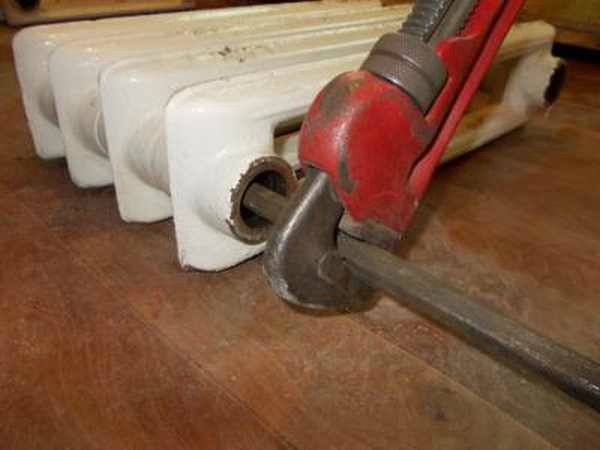
How to disassemble
To disassemble cast iron radiators, we need the following tool:
- Bulgarian;
- Chisel and hammer;
- Pipe wrench of the required size;
- Hacksaw for cutting metal;
- Metal brush.
The dismantling of radiators is usually carried out in the summer, during the shutdown of the heating system. Before starting work, drain the water from the pipelines, unscrew the nuts in the places where the radiators are attached. If it is impossible to unscrew the control nuts, then the supply lines are cut off with a grinder.
 Sometimes disassembling a cast-iron radiator can be very difficult.
To disassemble the cast-iron radiator, we install the device on the shield, unscrew the blind plugs and unscrew the thread that fastens the individual sections of the radiators.To unscrew the necessary nipples, we determine the length of the key with a special mark in chalk.
While unscrewing the battery, insert the key alternately into each of the sections. A gap of no more than 5 millimeters must be observed between the nipples in the upper and lower parts of the heater. If you do not follow this rule, the radiator may warp, which will lead to jamming of the thread.
When disassembling old batteries with stuck threads, the attachment points of the sections are treated with a blowtorch or autogenous. In the future, a key is inserted into the docking points and the nipple is turned half a turn. Sticky futors and plugs are unscrewed in a similar way.
Sometimes corrosion damages the nipple so much that it cannot be turned with a wrench. In this case, the joints of the sections are cut with a grinder or a hacksaw for metal. The remaining nipples are heated and turned out, the threads are cleaned with a metal brush.
https://youtube.com/watch?v=NuzgRmgMKSA%3F
In this article we will not consider the issue of choosing heating radiators, we will focus immediately on bimetallic.
bimetallic or aluminum
- turn off the heating
- drain water from the system
- substituting something supporting under the old battery, and a water tank on the floor at the intended place of the cut, cut off the old radiator;
- remove it from the hinges;
- we cut metal pipes at the same distance and cut the thread;
- we wind the tees, from which both the bypass and the battery will go further;
- since I needed to turn on the heating if possible (it’s not summer outside), I first assembled the bypass. It is possible to fill the system and turn on the heating (fig. on the right);
- then we mount ball valves on the tees that shut off the supply to the battery itself;
- we fasten “American” to the taps;
- hang the battery on the wall;
- we measure the length, cut off the metal-plastic from the “American women” to the radiator itself: from below - to the near edge of the battery, from above - to the far one (the pipe will go above it);
- we screw in the remaining holes of the battery from below - a plug, from above - an air vent (I prefer automatic. The seller gave a compact one instead of the already familiar “barrel”);
- connecting a bimetallic battery, open its taps and close the bypass tap;
- when the battery is filled with water, press the air vent float with a paper clip to help the air escape;
- ???
- PROFIT
Pipes ... How much of you rubbish has merged into Russian fingers
The problem of cold batteries worries many owners of apartments and houses if the radiators are old. From age, they become clogged with such specific rubbish - black powder, which is so heavy that it does not wash out with water down the system, but settles “where necessary”, that is, at the bottom of the batteries and along the entire length of the pipes. Although I flushed the heating system with caustic soda after installing a new boiler, practice shows that the dirt from the batteries does not dissolve in this rather aggressive solution. Therefore, part with old batteries without regret!
Why I chose bimetallic batteries and not aluminum
Arriving at a specialized plumbing store (Aqualink), I laid out my “drawing” (sketch) and began to assemble this entire “constructor”. A person from the queue advised against taking an aluminum baratea for a private house, they say, water will “eat it up” over time. Instead, I recommended buying a bimetallic radiator (outwardly, they are absolutely identical). It is, of course, more expensive (10 sections cost me 8,000 against 4,600 for a “light”), but I will be calm. I have been wondering for a long time: should I take Chinese? And I want to (because it is half the price), and pricks (who knows, it will suddenly leak over time?). I took Italian. Together with all the tee corners, the purchase cost me 12000+ wooden ones. Plus, you still need a threading machine, because metal-plastic needs to be docked with old heating pipes. I borrowed this thing (Rotenberger) from a plumber friend for a day. Naturally, thanking him for his concern.But saved on wages.
How to unscrew the last piece of pipe so that the penultimate one does not start to unscrew
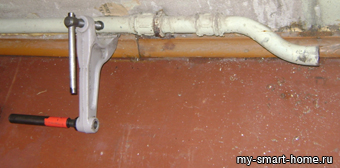 If you want to unscrew the last (extreme) piece of the old composite heating pipe (or plumbing), but do not want the penultimate one to start unscrewing, proceed as follows:
I took a clamp from a threading machine (Rothenberger, see above), fixed it on the pipe so that it rested on the floor (you can wall), tapped (as an option: heat it with a blowtorch) and easily unscrewed the one I needed (more precisely, now already unnecessary) piece of pipe.
Basic installation rules
Scheme of the device of a bimetallic radiator.
Installation of bimetallic heating batteries requires the following basic rules:
- The distance from the walls to the radiators should be 3-5 cm.
- The distance between the radiator and the floor should be 7-20 cm, and between the window sill and the radiator - 8-12 cm. This will help improve convection.
- It is not recommended to remove the protective film from the radiators until all work is completed. Otherwise, damage to the enamel of the radiators is possible. If it was not possible to avoid enamel chips, then it is recommended to cover the damaged areas with white enamel or replace the damaged sections.
- When tightening the battery connectors, you need to consider the applied forces, as if you tighten too much, you can strip the threads. This can lead to leakage, as well as insufficiently strong connection of the mounting elements.
Before starting the installation of any elements of the heating system, including batteries, it is necessary to find out if water is running into the heating system and if so, then take measures to shut off the water supply.
Radiator connection diagram.
The procedure for installing heating batteries is as follows:
- mark the places where the brackets will be installed;
- fasten the brackets to the wall with dowels or cement mortar;
- install the battery on the brackets so that the horizontal collectors are located on the hooks of the bracket, as a result of which the brackets will be between the radiator sections;
- connect the battery to the supply elements of the heating system, which end with a valve, faucet or thermostat.
Heating batteries during installation do not allow the following actions:
- the location of the sections is not vertical;
- the location of the radiators relative to the wall, floor and window sill at a distance that does not meet the requirements.
Proper installation of bimetallic radiators requires a responsible approach that will ensure the correct operation of the entire heating system. Therefore, approach responsibly to the performance of these works.
How to paint
If it is not possible to change old cast iron batteries for more modern heating devices, many repaint radiators in the desired color. The whole process of painting work can be divided into several stages:
- Selection of paint;
- Surface cleaning;
- Applying paint;
- Product drying.
For the treatment of such surfaces, it is recommended to use alkyd dyes, heat-resistant varnish with the addition of bronze or aluminum powder. In addition, water-based paint can be used for such work, in which various pigments can be added to obtain the desired color.
At the initial stage of work, a working tool is prepared, the surface of the heating devices is cleaned. This can be done with a metal brush, coarse-grained sandpaper or a grinder equipped with a special nozzle. To facilitate the work, special solutions are used that help destroy the old coating.
The cleaning liquid is applied to the surface with a brush. After keeping a certain time indicated on the solvent package, the old paint layer will begin to wrinkle and peel off. The coating can be removed with a small metal spatula.The final cleaning of the battery is carried out using a metal brush.
https://youtube.com/watch?v=8YFNRkgDNhg%3F
At the next stage of work, the radiator is carefully cleaned with sandpaper and primed, which will help to better fix the paint. The best type of primer is the GF021 brand; it is suitable for any type of dye.
Next, a layer of paint is applied using a paint brush. The composition is applied gently from top to bottom. For better painting, the dye is applied in several layers. In this case, it is necessary to withstand a break between the stages of applying the coloring composition.
Assembly of bimetallic radiators
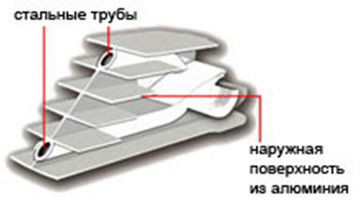
Scheme of a bimetallic radiator.
Before mounting a bimetallic heating radiator, it must be assembled. To do this, you will need the following materials and tools:
From the radiator tap, you need to unscrew the part with a threaded connection, winding is wound onto the thread. For these purposes, it is best to use tow in combination with a special Unipak paste that can withstand high temperatures. The paste helps to achieve high tightness of threaded connections of bimetallic radiators. Instead of tow with paste, you can use fum tape or tow with paint.
Before winding the tow, you need to apply paste or paint to the threaded part of the part, evenly distributing it over the entire thread. After that, they take a pre-prepared bundle of tow and wind it along the thread. Next, a valve union nut is put on the wrapped part and screwed into the cork of bimetallic radiators. First you can tighten by hand, and then with a wrench. In the same way, the Mayevsky crane and plugs are screwed into the rest of the plugs.
Special rubber gaskets can be installed on the plugs of bimetallic radiators, which can be purchased separately. Another, more reliable option is winding from tow with a special paste. After that, screw the plugs into the radiator
It should be noted that two plugs have a left-hand thread, and two have a right-hand thread.
The union nuts of the radiator valves have O-rings, so they do not require winding. This O-ring will lie in the chamfer on the threads of the taps, the connection in this case will be tight.
When the plugs in the batteries are screwed in, the radiator taps are screwed on. Now you can start soldering branch pipes with one side to the radiator tap, the other to the tee
Here you should pay attention to the length of the branch pipes, taking into account the distance from the floor and the fact that part of the pipe will go into the inner diameter of the part to be connected
During soldering, it is necessary to ensure that the direction of the tee coincides with the direction of the radiator valve.
To do it right, you can place the faucet and pipe on a flat surface and make pencil marks on all the details. During soldering, it is necessary to ensure that all pencil marks match.
The next step is to screw the radiator valves directly to the radiator. This is necessary to determine the distance to the bypass section of the supply pipe in a single-pipe heating system. After that, the bimetallic radiators are directly attached to the brackets and checked by level. All radiators after assembly are mounted in the same way. After that, they are tied to the boiler and to each other using a pipeline. The assembly and installation of bimetallic radiators can be considered complete. The main condition for such work is the accuracy of markings. The radiator must be installed carefully, the connections must not be skewed.
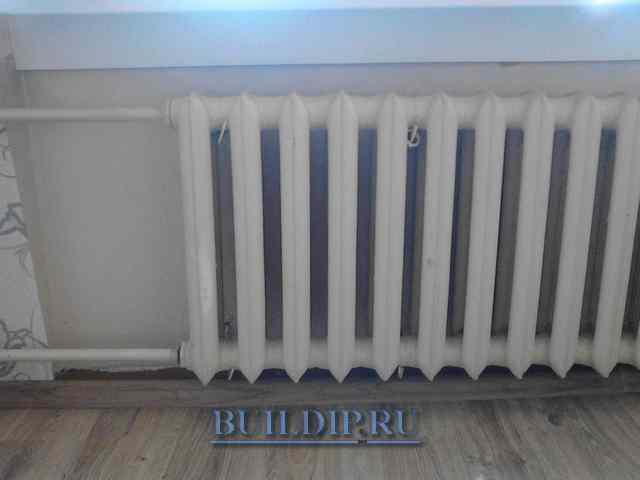
Heating element for cast iron battery
The heating element, mounted in a cast-iron battery, allows you to warm up the room when it is not possible to start the heating system in the usual way. The heating element itself is nothing more than a metal pipe with a spiral sealed in the middle.When installing a heating element in a cast-iron radiator, you can achieve optimal temperature indicators in a small area: a garage, kitchen, greenhouse or any other outbuilding.
 heating element for radiator
The main advantages of electric heaters:
- Possibility of installation in a battery made of cast iron and other materials;
- Automatic regulation of water heating temperature;
- Using a heater as the main source of heat;
- Ease of installation.
Installation of the described device can be performed by anyone. The package of heating elements includes mechanisms for temperature control, means of protection against overload. It is enough to install the heater in the radiator nest and connect it to the power source. Before operating the heating element, the heating system must be completely filled with water or another type of coolant.
The heater in the radiator must be in a horizontal position. It usually works in two modes. If the device is used in the system as the main source of heating, then the room will warm up to the set temperature, and a special thermostat will maintain the temperature at the set parameters.
 Connecting to a cast iron battery
If the heating element is used in a country house or in an auxiliary room, then the main task of the heater will be considered to be the minimum heating of the system to protect it from freezing. In this case, the device is set to minimum power.
Technical features of cast iron batteries
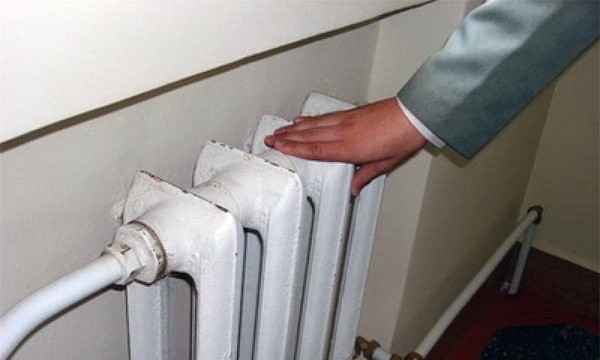
Modern cast-iron batteries are in many ways similar in their technical characteristics to more expensive and innovative devices made of bimetal, aluminum and steel. The working pressure inside the cast iron batteries is eight atmospheres. As for the optimal location of these units, it is best to place them in the space under the window openings, which will increase the heat transfer performance.
In order to maximize the amount of heat transferred, the correct solution is to periodically flush the inside of the batteries to clean it of rust and other harmful substances. This will increase the productivity of the equipment, and at the same time extend the life of cast iron radiators.
Preparing for installation
Scheme of connection of aluminum radiators.
Before proceeding with the installation of bimetallic radiators, it is necessary to determine their location, in other words, draw up a diagram of the heating system, and also consider what additional actions you may have to take. For example, you may need to install or replace faucets, or replace pipes. In this case, you should stock up on all accessories and tools in advance.
Of the tools you may need:
- radiator key;
- pipe cutter;
- wrench;
- gas key;
- welding kit.
Diagonal radiator connection diagram.
Installation of radiators will also require additional parts, the exact list of which you can find at the point of sale of radiators.
An example list of these materials looks like this:
- couplings (smooth and curved);
- fasteners for radiators;
- linen.
For bimetallic radiators, diagonal mounting is considered the most optimal.
The procedure for replacing the heating battery
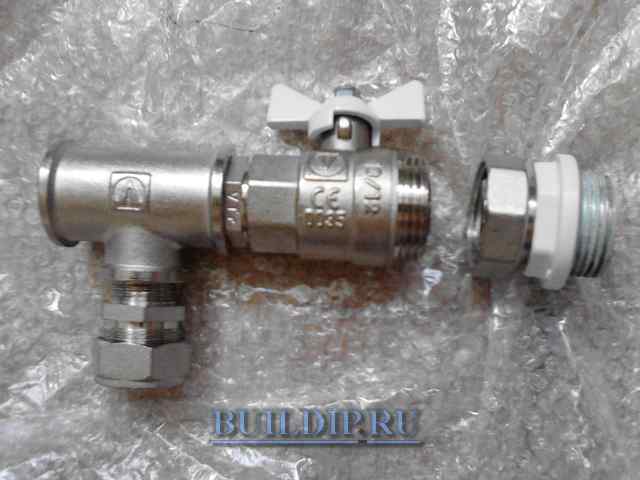
To replace the battery we need:

a set of nuts and plugs to the radiator;
connecting elements in two copies: a tee, a coupling, a tap with an euro nut (American);
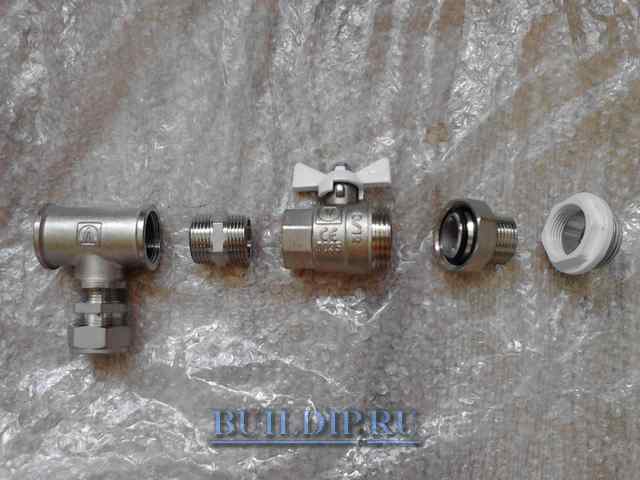
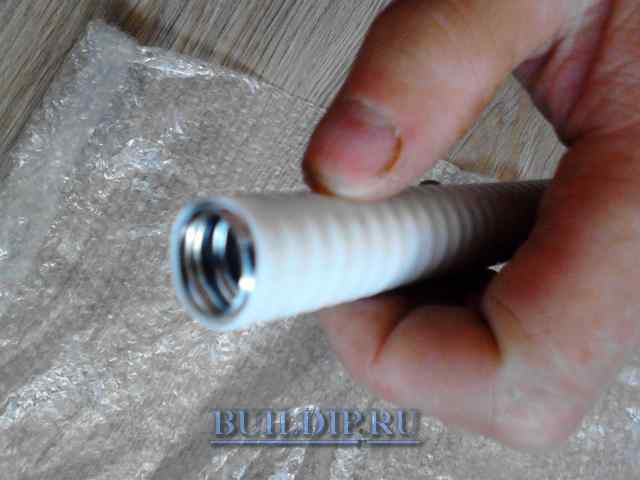
- piece of corrugated galvanized pipe 60-70 cm long;
- a pair of brackets for hanging the radiator.
Since the pipes of the heating system most often go with a diameter of 3/4 inches, we buy a set of nuts - plugs for the radiator just for this size. We take taps, couplings and tees in the size of 3/4 inches.The tee connector going to the jumper should be 1/2 inch in size (the coolant flow through the radiator must be greater than through the jumper), respectively, the galvanized pipe should also be 1/2 inch in size.
If you are using a different type of heating pipe, you may need different fittings.
Step 1. Draining the coolant and dismantling the cast iron battery
We begin work by blocking the heating riser and draining the water. We dismantle the old radiator; for this, it is necessary to unscrew the nuts connecting the radiator to the pipes, and remove it from the hanging hooks.
Unscrew the nuts carefully, without damaging the threads on the pipes.
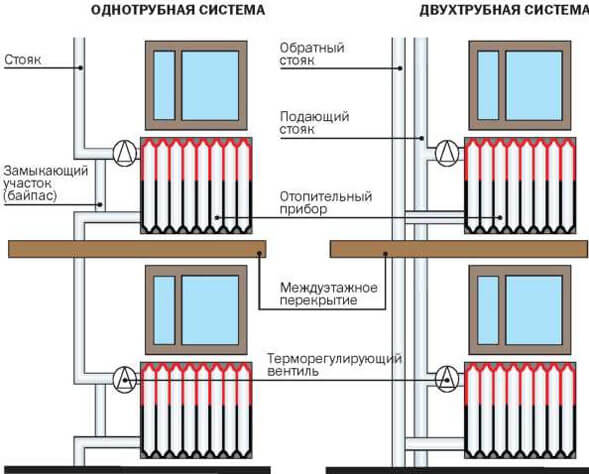
Installation of a bimetallic radiator is carried out with the installation of a jumper between the "supply" and "return" pipes. This will allow in the future to remove the battery without draining the water, and to regulate the temperature regime by blocking the flow of coolant passing through the radiator.
Step 2. We prepare the elements for connecting the new radiator with pipes
We assemble the fittings together, connect the euro nut to the radiator nut, use flax or fum tape at the joints.
Similarly, we assemble the second set of elements (it must be borne in mind that in the first case the tee will look down, in the second - up) and twist everything with pipes.
Step 3. Prepare and install the battery
According to its design features, the bimetallic radiator has four holes (two inlet and outlet) for various connection schemes. We screw the plugs from the kit into those radiator holes that we don’t need (the nuts and plugs in the kit have o-rings, so the use of fum tape is not necessary here).
Be careful, one of the plugs is equipped with a Mayevsky valve for air release, it should be installed in the upper part of the radiator.
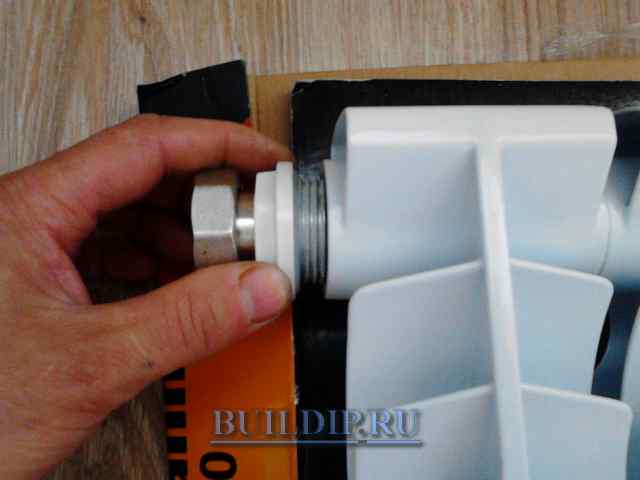
We screw nuts with an American into the holes for the inlet and outlet of the coolant.
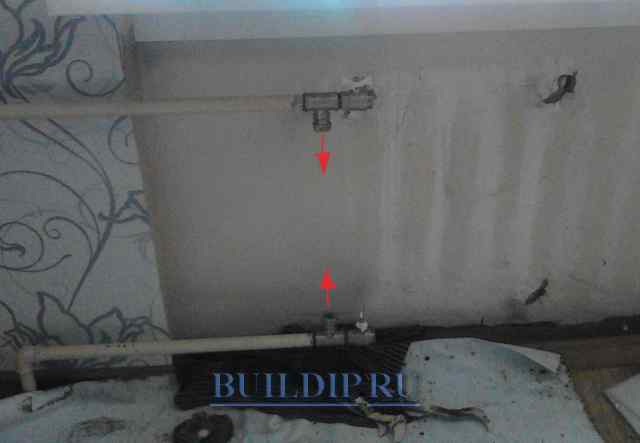
We pre-hang the battery on the pipes, connecting the euro nuts to the taps, while setting the battery level, put marks on the wall with a pencil to drill holes for the hooks.
We remove the battery. Using a perforator, we drill holes, hammer dowels into them, screw in hooks. We install the radiator again by hanging it and screwing it to suitable pipelines. We check the level and fit of the radiator to the hooks, if necessary, adjust the hooks, achieving a snug fit of the radiator to all brackets. After that, we finally pack all the threaded connections.
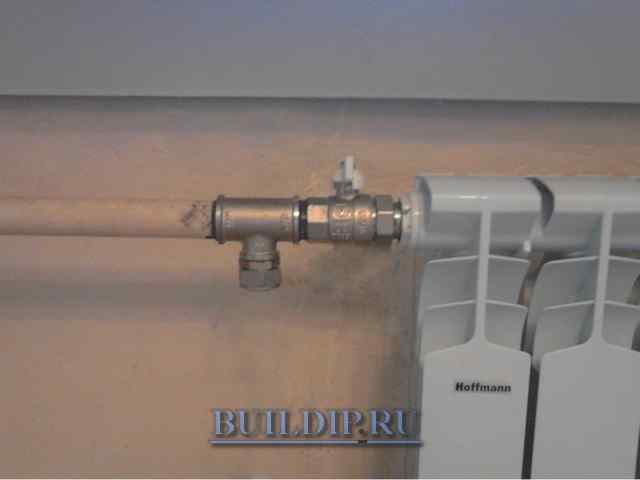
Step 4. Install the jumper
We accurately measure the distance between the tees of the upper and lower pipes and cut off a piece of galvanized pipe of the required length. We slightly roll the ends of the pipe with a file so that there are no sharp ends that can cut off the silicone gasket in the fitting.
We clean the ends of the pipe from plastic to a length corresponding to the entry of the galvanized pipe into the tee (1.5 - 2 cm).
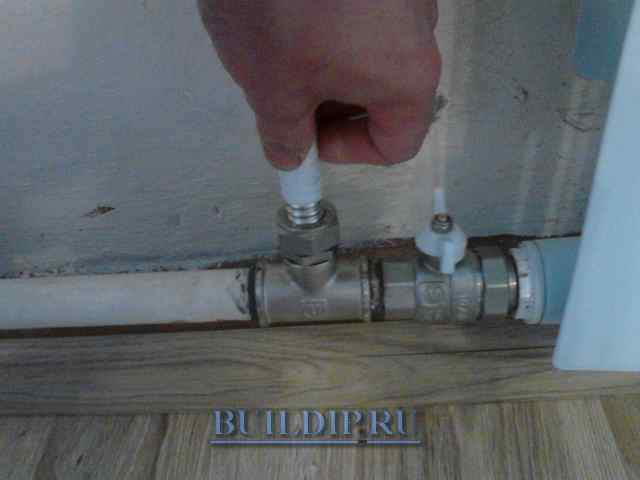
We loosen the fittings of the tees (without unscrewing them completely) and insert the ends of the pipe into them.
Since the pipe is flexible, we align it by bending it. Finally tighten the fittings.
We fill the system with water, open both radiator taps. After filling, we release the air accumulated in the radiator using a valve. The replacement of the heating battery in the apartment is completed.
When choosing a home heating system, many factors are taken into account: the cost of equipment, safety, installation and maintenance features. Consider the repair of an oil heater on a specific example
Consider the repair of an oil heater on a specific example.
For heating houses and apartments, various types of equipment are used, including electrical appliances of various modifications. These are convectors.
When choosing a heating system for any building, it is important to understand the principles of operation and the features of the equipment in question. This will allow you to select the most
Let's talk today about comfort and warmth in the house, whether it is a private house, apartment or cottage.

Good evening, comrades! A question arose. Now the kitchen and bathroom renovation is coming in the mother-in-law's apartment. And on the sly, I would like to move the radiators from the old cast iron to the new bimetal. Now the question is, how many sections should the new ones be? Photo of the old ones is attached
P.s. Do I need to put stopcocks in front of them or not? And what regulators can be put?


How to rinse at home
In country houses, the heating system often loses its effectiveness. This happens through poor heat transfer, as well as as a result of debris settling on the walls of the batteries. The coolant heated to a high temperature acts on the inside of the radiators, scale and rust settle here. The presence of blockages leads to poor-quality heating of the building.
The main reasons for flushing batteries are:
- Uneven heating of the radiator over the entire plane, when the upper part of the sections is hot, but the bottom of the tank remains cold;
- Warming up the heating system to the required temperature takes longer than usual;
- Increase in fuel consumption.
For independent flushing of heating devices, aluminum or cast iron radiators, you need to drain the water and unscrew the radiator from the system. Removal of blockages or flushing occurs with the participation of clean water with the addition of acetic acid, special cleaners or caustic soda.
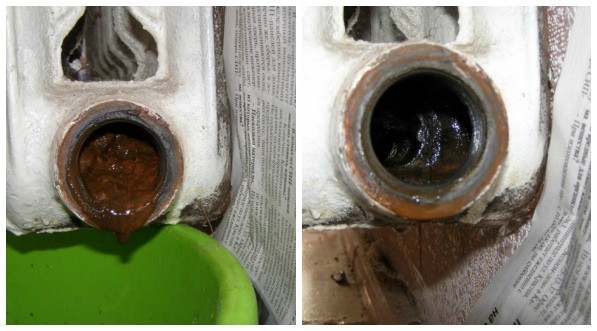 Battery before flushing and after
It is advisable to work in the bathroom to prevent spilling liquid on the floor. At the same time, a mesh is installed in the drain hole of the bathroom to select large contaminants. Pre-laid rags will help prevent damage to the coating of the container.
At the initial stage of work in cast-iron radiators, all the plugs are unscrewed, and water heated to a boil is poured into the holes obtained. Next, shake the heater and drain the liquid with debris particles.
Next time, water with the selected cleaning agent is poured into the radiator. After that, close all the plugs, knock on the device with a wooden hammer, shake and pour out the water. Such operations are carried out until a clean liquid flows out of the holes.
How to correctly calculate the required number of sections for a new radiator
First you need to make some calculations in order to know how many heating radiators you need to install in the room. And, most importantly, when they are being replaced, you need to know which radiators should be installed in the room. Professional builders have a formula:
I=S*100/P.
When you need to replace the radiators, all calculations are made on it.
In this formula:
I is the number of radiator sections.
S is the area of the room in m2.
P is the standard heat output of one section of the radiator.
To perform the calculation, you need to know the last indicator exactly. It is different for all types of radiators. So, for cast iron P = 145 W, for metal - 185 W, for aluminum - 190 W. The manufacturer indicates these numbers on the packaging.
Thus, if a room has an area of 15 m2, then for its full heating, say, with cast-iron batteries, 10 sections are needed.
I = 15 * 100 / 145
I = 10, 34.
Although, in fairness, it is worth noting that this calculation is still somewhat arbitrary, since it does not take into account
- Is the room insulated?
- There are many windows in it and what;
- It is located on the ground or top floor;
- What is the height of the ceilings;
- Is it angular?
To minimize heating costs, especially for private houses and apartments where metering devices are installed, it is better to replace not only batteries, but, of course, pipes. It is also advisable to carry out work on high-quality insulation of housing and install good 2-3 chamber double-glazed windows.
Assembly of bimetallic and cast iron radiators
- What fittings may be required to assemble batteries
- Assembly of bimetallic radiators
- Assembly of cast iron radiators
Before the assembly of heating radiators and their installation begins, it is necessary to purchase all the materials and tools necessary for this. Calculate the number of required sections, distribute this number among the rooms. Having purchased all the materials and tools, you can proceed with the assembly and installation.
When buying a heating device, you should pay attention to the power and type of heater. Naturally, you will need the radiators themselves
They will additionally need certain details: plugs, plugs, dowels, brackets and a Mayevsky crane. Brackets can be used if the walls of your house are concrete or brick, that is, from hard materials that can be drilled and inserted with dowels
Naturally, you will need the radiators themselves. They will additionally need certain details: plugs, plugs, dowels, brackets and a Mayevsky crane. Brackets can be used if the walls of your house are concrete or brick, that is, from hard materials that can be drilled and inserted with dowels.
The plugs in the set can have threads of different sizes. Two plugs in the radiators are pass-through - the supply and return pipes are connected through them. One of the other two plugs is muffled, Mayevsky's tap is screwed into the other.