Design features of the heater radiator Chery Amulet
The principle of operation of the interior heating system in most modern cars has remained unchanged for almost a century - this is the heating of the air entering the car through a coolant, which is the coolant. Such a scheme has proven its effectiveness: although the efficiency of such a stove is low, from the point of view of energy costs, this method is the best, since it uses the free thermal energy of antifreeze heated to temperatures of about 100 degrees in a car engine.
Chery Amulet is no exception in this regard, it also uses a liquid heating system, and a metal radiator acts as a heat exchanger, which is considered its main component.
Modern trends in the automotive industry are such that when it comes to choosing between cheapness and reliability, designers often make a choice in favor of the first factor. In particular, most automakers prefer cheap aluminum radiators, refusing copper counterparts, which were quite common in the last century.
The reason here is clear: less weight and cost (although the gain in weight in this case is minimal). For car owners, such savings look doubtful: copper radiators can be repaired (soldered) even in garage conditions, and damage to aluminum heat exchangers is not only impossible to repair on their own, but not every car service will undertake such repairs, the cost of which may exceed the price of a new radiator.
 New heater radiator Chery Amulet
The furnace radiator is a reduced copy of the cooling radiator. It consists of a series of round or oval tubes interspersed with transverse metal plates. The latter serve as stiffeners and at the same time significantly improve the heat transfer of the radiator.
Chery Amulet uses round tube radiators, again because they are cheaper than flat (oval) ones. But due to the smaller cross-sectional area, their heat transfer rate is worse, and even when the liquid in the system freezes (and this is not excluded in severe frosts), the risk of being torn apart is much higher.
Chery Amulet stove device
The basis of the heater is a radiator, in which the air supplied by gravity from the air intakes is heated. To create sufficient air pressure to heat the passenger compartment, an electric fan is used to force air into the stove and the air duct system under pressure.
Coolant is used as a coolant, which, as a result of passing through the channels of the power unit, heats up to a temperature of about 100 degrees (and even higher, since antifreeze circulates in the cooling system under pressure, which prevents the liquid from boiling). After the engine, the coolant is sent directly to the furnace radiator, which consists of metal tubes and fins. With a much higher thermal conductivity, the radiator cells heat up quickly, transferring heat to the air passing by. Such heat exchange, although carried out with large heat losses, is considered the most efficient, since here the only energy loss is considered to be the operation of the fan motor.
 Chery Amulet stove electric motor
In fact, the radiator is often referred to when talking about the stove. Unfortunately, over time, the heat transfer of the radiator deteriorates noticeably - there are natural reasons for this. But a drop in temperature in the cabin can also be caused as a result of breakdowns of the standard heater. In such cases, the Chery Amulet stove is being repaired.This procedure is quite complicated, and it is recommended to perform it on your own only for those car owners who have sufficient experience in performing such repairs.
The main malfunctions of the Chery Amulet heater radiator
However, the loss of tightness of the heat exchanger most often occurs for other reasons - due to through corrosion or damage as a result of mechanical stress - for example, during repair work. Usually, a Chery Amulet stove radiator leak manifests itself as a gradual drop in the coolant level in the system. This symptom is also typical for many other malfunctions, since a leak can form anywhere, but if there are wet spots in the cabin under the rugs, and even more so puddles with a characteristic smell of antifreeze, you can be sure that it is the stove that is leaking.
Another and much more common problem is the gradual clogging of the radiator (both tubes and the space between the plates), which leads to a deterioration in heat transfer. The more the radiator cells are clogged, the less the air entering the cabin heats up, and if this problem is not critical in summer, then in winter you will simply start to freeze.
 Comparison of dirty and clean radiators
Diagnosing a clogged heat exchanger is not so easy, since the deterioration in the efficiency of the stove can be caused by other reasons. But if the coolant level remains unchanged, and the heating system is working worse - most likely, the reason lies precisely in the clogged radiator. Scale on the inner surface of the tubes can reach such dimensions that it will almost completely block their lumen, preventing the circulation of antifreeze. In such advanced cases, cleaning the radiator does not make sense - no chemistry can cope with deposits. If the clogging is not so critical, you can try to perform this procedure, but you should definitely check the throughput of the heat exchanger - if it turns out to be unsatisfactory as a result, replacing the Chery Amulet stove radiator cannot be avoided, otherwise the problem will manifest itself again, and very soon.
17.2. Removal, dismantling and installation of the instrument panel
You will need: keys "for 8", "for 10", a screwdriver with a Phillips blade.
1. Disconnect a wire from the minus plug of the storage battery.
2. Remove the steering wheel (see "Removing and installing the steering wheel").

3. Remove the steering column covers (see "Removing and installing steering column covers").
4. Remove a combination of devices (see. "Removal and installation of a combination of devices").
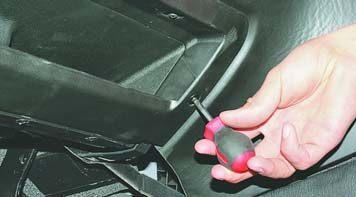
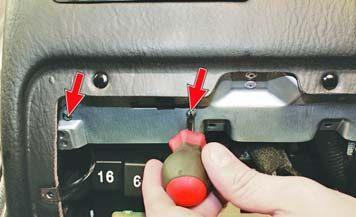
5. Turn out screws of fastening of the shelf for small things located under a steering column …
|
Note 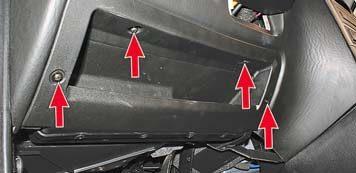 This is how the shelf mounting screws are located. This is how the shelf mounting screws are located. |

|
|
|
6. ... and remove the shelf. |
7. Turn out two screws of fastening of the assembly block to a framework of the panel of devices. |
|
|
|
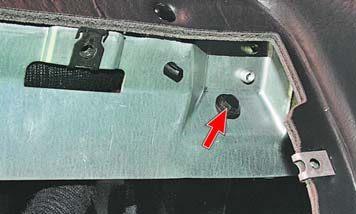
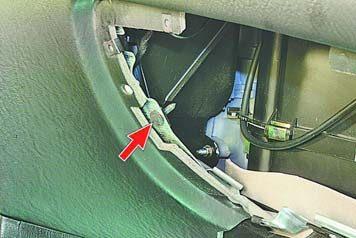
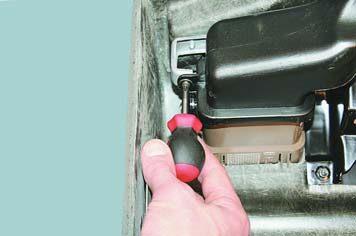
8. Turn out a bolt of fastening of a framework to an arm of a heater. |
9. Turn out two screws of fastening of the internal panel to a framework of the panel of devices. |
|

|
|
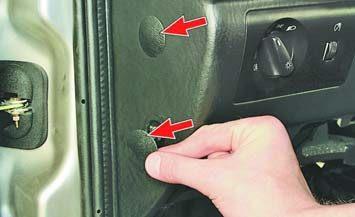
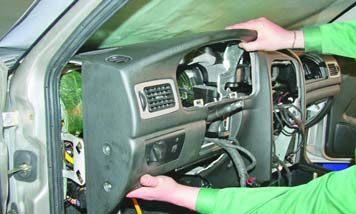
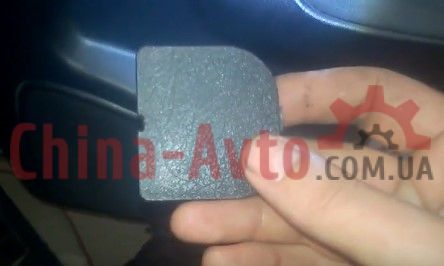
10. Remove the two decorative plugs located on the left side of the instrument panel ... |
11. ... and unscrew the two bolts of the side fastening of the instrument panel to the body bracket. |
12. Similarly turn out two bolts on the right side of fastening of the panel of devices.
|
|
|
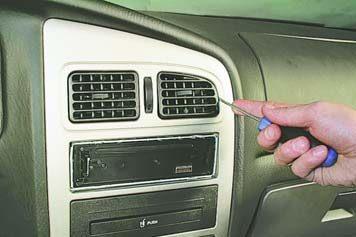
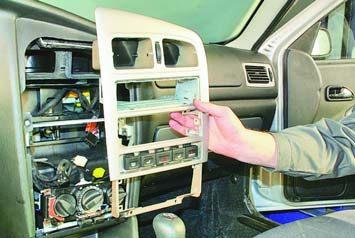
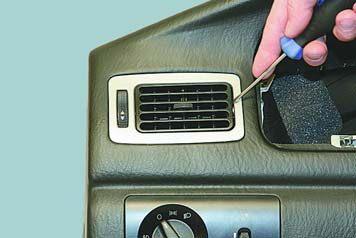
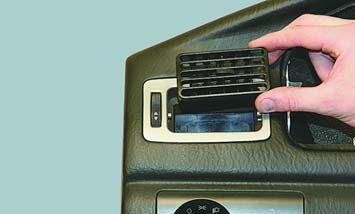
13. Pry with a screwdriver and remove the edge of the right deflector of the central air supply nozzle ... |
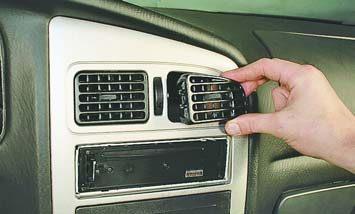
14. ... and remove it. |
|
|
|
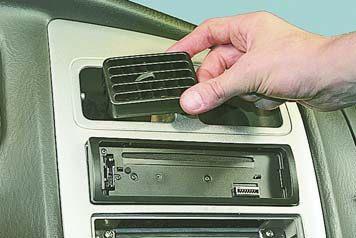
15. Similarly, remove the left deflector of the central air supply nozzle. |
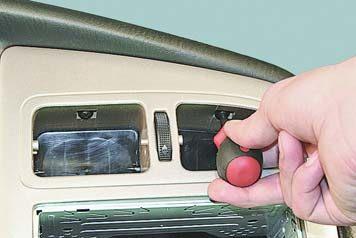
16. Turn out two screws of the top fastening of an overlay of the central console. |
|
|
|
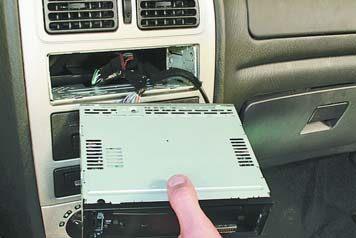
17. Remove the radio from the center console of the instrument panel and disconnect the wiring harness pads and the antenna plug from it. |
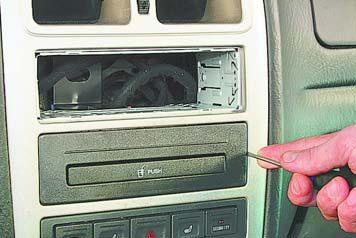
18. Pry with a screwdriver and remove the cup holder frame. |
|

|
|
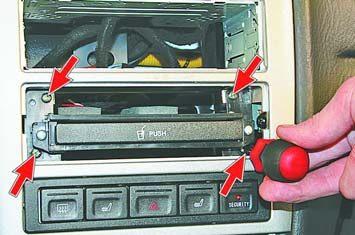
19. Turn out four screws of fastening of a coaster … |
20. ... and remove it from the instrument panel. |
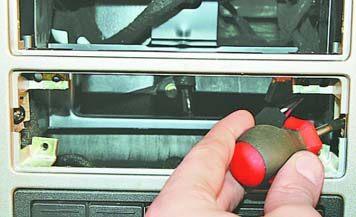
21. Turn out two screws of average fastening of an overlay of the central console.
22. Disconnect the wire blocks from the switch outputs.
|
|
|
23. Turn out two screws of fastening of a forward part of facing of a tunnel of a floor to the console of the panel of devices and remove facing of a tunnel of a floor (see. "Removal and installation of floor tunnel lining"). |
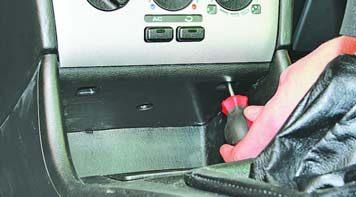
24. Prying off the overlay of the heating (air conditioning) and interior ventilation control unit with a screwdriver ... |
|
|
|
25. ... remove the trim. |
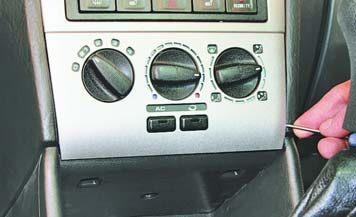
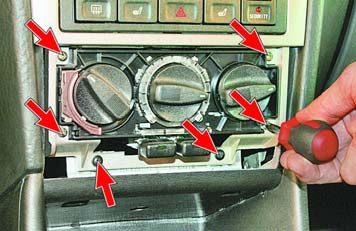
26. Remove the four screws securing the control unit for the heating (air conditioning) and interior ventilation system to the panel and two screws for the lower fastening of the center console lining ... |
|
|
|
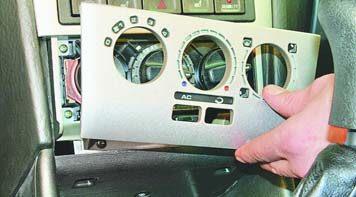
27. ... and remove the center console trim. |
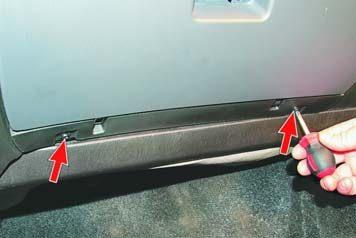
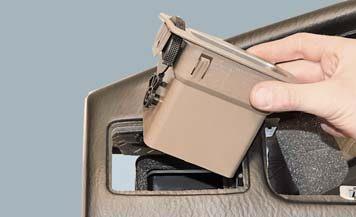
28. Turn out two screws of the lower fastening of a ware box. |
|
|
|
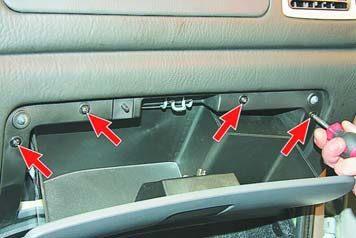
29. Open a ware box and turn out four screws of the top fastening of a frame to the panel of devices. |
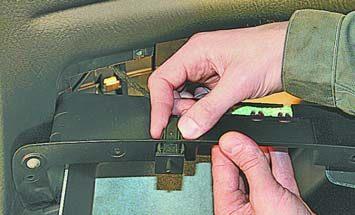
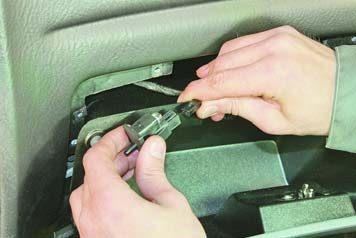
30. Squeeze the two latches located on the sides of the glove box light ... |
|
|
|
31. ... remove the lamp from the frame, disconnect the wiring harness block from the lamp output and remove the glove box. |
32. Remove the front passenger airbag (see "Removing and installing the front passenger airbag"). |
|
|
|
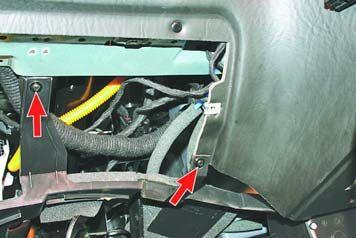
33. Turn out a bolt of fastening of a framework of the panel of devices to an arm of a heater. |
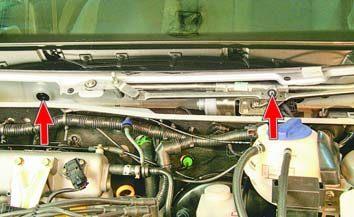
34. Under the windshield frame, unscrew the two nuts securing the instrument panel to the bulkhead ... |
|
|
|
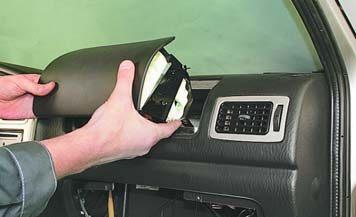
35. ... and remove the instrument panel. |
36. Turn out six screws of fastening of an air duct to a framework of the panel of devices … |
|
Note 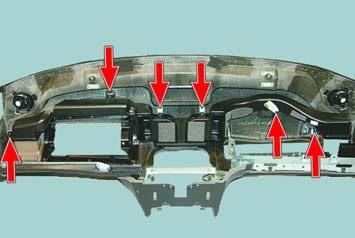 This is how the screws for attaching the air duct to the instrument panel frame are located. This is how the screws for attaching the air duct to the instrument panel frame are located. |
|
|
|
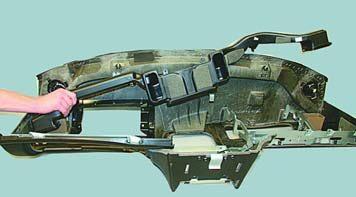
37. ... and remove the air duct. |
38. Pry with a screwdriver and remove one edge of the deflector of the side air supply nozzle from the left side of the instrument panel ... |
|
|
|
39. ... and remove it. |
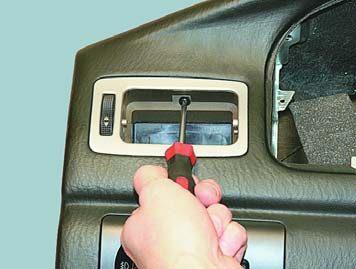
40. Remove the mounting screw ... |
|
|
|
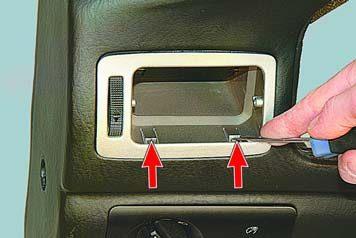
41. ... press the two latches ... |
42. ... and remove the air supply nozzle from the left side of the instrument panel. |
43. Similarly, remove the nozzle on the right side.
44. Install the instrument panel and all removed parts in the reverse order of removal.
- home
- Manuals for operation and repair for cars
- Motorcycle service and repair manuals
Step-by-step replacement of the stove radiator detailed instructions
To perform all the work, you will need a set of keys and a screwdriver. In some situations, you may need the help of a second person.
To replace the radiator of the Chery Amulet stove, we perform the following steps:
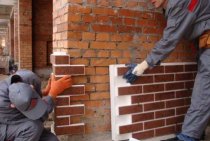
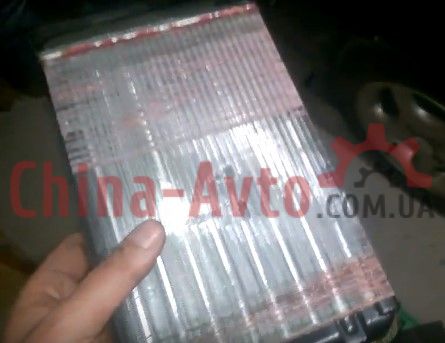
- We are preparing a new component.
- The kit includes a foam pad.
- There is also a piece of foam rubber for pasting the edges of the radiator.
- This is done to prevent cold air from being sucked in.
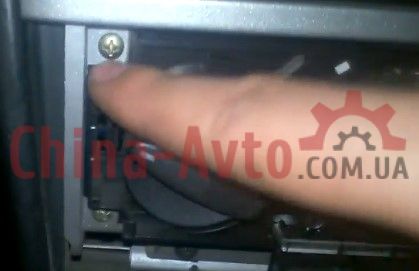
- Unscrew the steering wheel and casing.

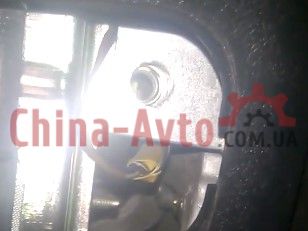
- To unscrew the steering wheel, you need to pick out the plugs.
- Then unscrew the bolts under them.
The plugs look like this.
- There are three lugs on it, with which it is fixed in the steering wheel.
- To remove the plug for removing the Chery Amulet steering wheel, you can slightly pry it with a flat screwdriver.
- Then push to the side where there is no groove for opening.
- The main thing is not to break off the fixing ears.
- We unscrew the two bolts under the "star".
- We remove the airbag.
- There are many different connectors out there.
- To disconnect the wires, you need to find the necessary parts at the bottom.
- We find here such a clip.
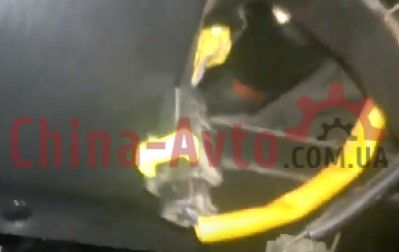
- Raise the latch up and disconnect the Chery Amulet airbag wires.
- After that, you need to pry with a screwdriver here.
- This will allow you to remove the relay.
- Next, proceeds to unscrew the steering wheel itself.
- To do this, unscrew the nut 24.
- The dashboard trim needs to be removed.

- To do this, unscrew the screw that fixes it.
- We remove the axle shelf.
- We dismantle the reflectors Chery Amulet.
- They are installed on grooves.
- To remove it, you need to press this part with a screwdriver and pull it towards you.
- It is advisable to put something under the screwdriver so as not to damage the paintwork.
- Unscrew the screws under the reflectors.
- In the same way we pick up this frame.
- There is a place for a screwdriver, where the ear is located, which should be pressed.
- Unscrew 4 bolts around the edges.
- This is necessary in order to gain access to the following mounts.
- We remove the frame near the toggle switches.
- Under it, from below, there should be 2 bolts - they should be unscrewed.
- Also unscrew the 4 bolts on the front.
- After that, part of the Chery Amulet panel is removed.
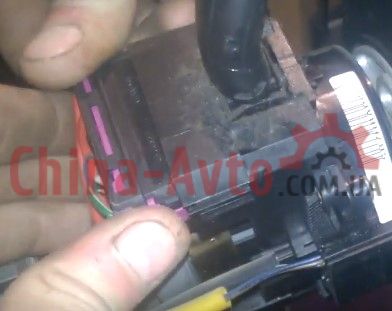
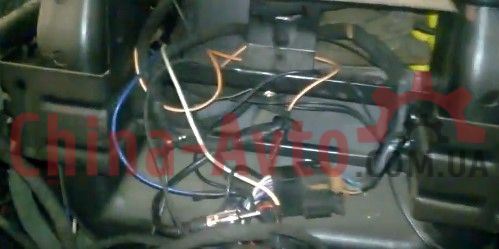
- You can see a lot of wires.
- In order not to confuse them in the future, we designate pairs with the help of price tags and corresponding inscriptions.
- To remove the dashboard trim, unscrew the bolt.
- And we pull the bottom of the structure towards ourselves so that the brackets come out of the grooves.
- We unscrew the glovebox.

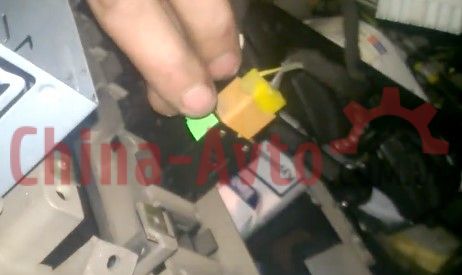
- Then we unscrew the airbag from its inner part.
- The connector is removed first.

- To do this, just pull the latch (usually orange) towards you.
- We remove the side plugs on the torpedo Chery Amulet.
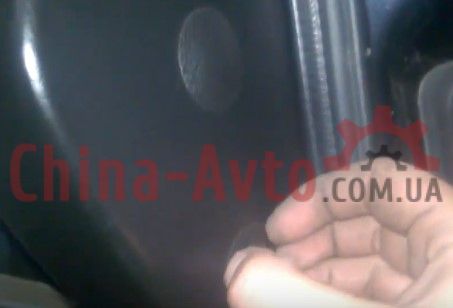
- It is also necessary to unscrew from each side such torpedo mounting bolts.
- Now you should unscrew the fixing bolts in the engine compartment.
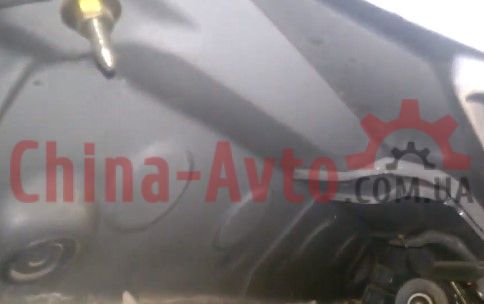
- Next, unscrew the bolt securing the torpedo to the frame.
- We are trying to remove the torpedo.
- She rests on the "beard".
- To move the “beard”, we unscrew one screw and two nuts from behind, located under the cover.
- We move the “beard” back of the click with a little effort.
- After that, we remove the Chery Amulet torpedo - there should be no problems.
- Unscrew another frame.
- We unravel the wires and remove the unscrewed part.
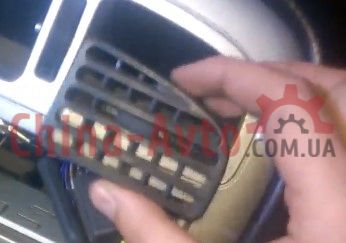
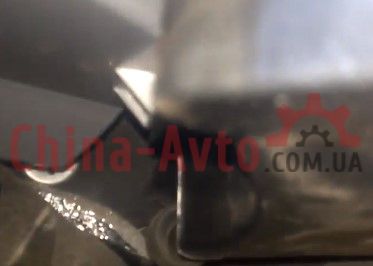
- We remove the air duct.
- It is fixed with screws.
- We remove the rivets.
- Disconnect the clips - one from the bottom, the second from the top.
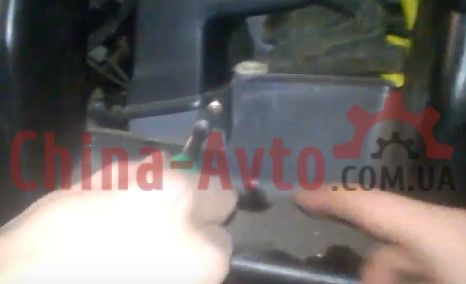
- It is necessary to unscrew one more bolt at the bottom of the Chery Amulet stove.
- Opposite the mounts, only at the back, there are two more clips.
- We disconnect them.
- We proceed to disconnect the hoses.
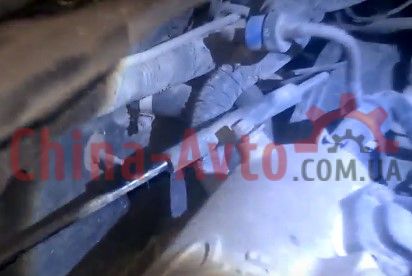
- Also in the engine compartment, it is necessary to unscrew another nut that fixes the furnace.
- At the bottom of the engine compartment there was another bolt, which also needs to be unscrewed.
- We take out the oven.
- We remove the rubber band.
- There is also a small hose.
- In the process of dismantling the Chery Amulet stove, it flew off, but under the hood you can see where to connect it.
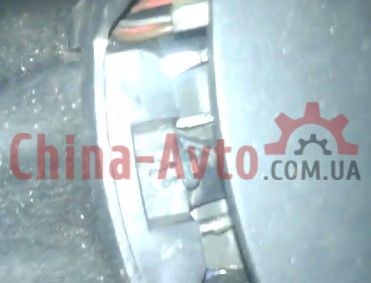
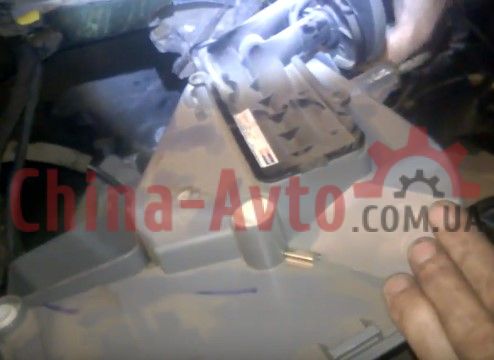
- Remove the heater core.
- To do this, unscrew these bolts.
- This is what the old radiator looks like.
- Traces of coolant streaks are noticeable.
- The back cover will need to be removed and rearranged to a new part.
- We clean the surfaces inside the stove itself from the resulting pollution.
- We put the plastic cover from the old radiator on the new one.

- We install the radiator in place.
- We are reassembling Cherie Amulet.
In general, it may take from 5 to 10 hours to disassemble the car and dismantle the stove. Assembly is usually a little faster.
This must be taken into account before starting work.
Reasons for the inoperability of the Chery Amulet stove
Twenty years ago, heater radiators were made of both copper and aluminum. Today, in order to save money, almost all automakers have switched to using cheaper aluminum, which has one very significant drawback: it is practically not solderable, that is, it is not repairable, unlike its copper counterpart. Therefore, if through defects are obtained and a leak forms, such a product, if it can be repaired, will cost almost the same as a new radiator.
Currently, two-row and three-row heaters are most widely used. The latter are considered more efficient, since they allow better heating of the air supplied to the passenger compartment. Heat dissipation of two-row radiators can be increased by using special swirlers that force air flows to contact the metal surface of the radiator more closely.
The tubes themselves can be round or flat. Flattened tubes have a slightly larger surface area, so they are more efficient, but are more difficult to manufacture and therefore more expensive. Chery Amulet uses a two-row radiator with round tubes - cheap, but not very efficient (catalogue number - A11-08107023).And the reliability of the stove is not too high, as many owners of this "Chinese" claim.
Among the main malfunctions of the Chery Amulet stove are the following:
- clogging of tubes from the inside and honeycombs from the outside;
- coolant leaks at the junctions of the pipes;
- leaks formed as a result of mechanical damage to the radiator tubes or the formation of through corrosion;
- natural wear.
With a critical clogging of the radiator, its heat transfer, as well as throughput, significantly deteriorates, which leads to a deterioration in the heating of the air supplied to the passenger compartment. With the formation of leaks, the second factor takes place - the pressure drop of antifreeze in the system.
These breakdowns can be diagnosed by the following signs:
- the appearance in the cabin of a “sweetish” smell characteristic of antifreeze;
- the formation of puddles on the floor in the area of the passenger seat;
- deterioration of interior heating up to the supply of cold air.
In all these cases, an operation is required to remove the Chery Amulet stove in order to replace it or carry out repair and restoration work.
 Heater housing Chery Amulet
Possible malfunctions
Whether to repair the stove adjustment on Chery Amulet or not depends on the specific situation. Sometimes, by performing an incorrect dismantling, you can permanently damage the device, so the only way out of the situation is to buy a new unit. The only problem is that the cost of a new control unit is about 5 thousand rubles. Not everyone understands why they pay such money, and they are trying to find an alternative way out of this situation. If we talk about malfunctions, then it is worth highlighting several possible problems.
- Backlight failure. It is made in the form of a white plastic lining on top of the block, which is not difficult to notice when removed. There are several bulbs inside the backlight. It is recommended that you first make sure that the wiring is in good condition, and then replace the bulbs themselves if they simply burn out and fail. This is not difficult to do, but you should carefully remove the light bulbs so as not to damage the cartridge and base.
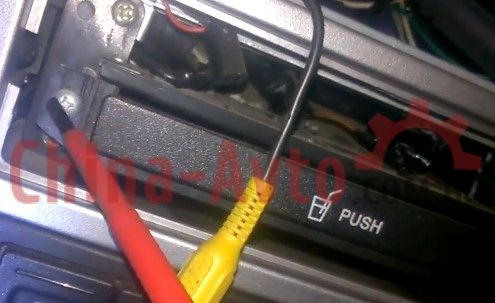
- Breakage of the fastenings of the damper adjustment cables. This is an actual problem for those who have repeatedly removed the center console and the control unit itself. It uses a rather fragile plastic at the same time as a very hard metal. It is metal, with a rather rigid fixation of the cables, that begins to provoke the formation of cracks and breaks in the plastic components of the control unit. From the factory, a metal bracket is used to attach the cables. Its rigidity leads to problems with the cables, due to which it becomes impossible to adjust the dampers as a result. Here, the cable in the yellow casing is responsible for the direction of the air supply, and the upper black one allows you to adjust the intensity of the airflow. There is also a blue cable that is responsible for the temperature. If the plastic tracks for fixing the cables are broken, the easiest solution is to use metal clamps for them.
- Breakage of levers. The levers themselves, which are connected to the cables, are quite strong, made of metal. And to be more precise, it is made of duralumin alloy, which is a type of aluminum. But they can also break. Some try to re-solder or weld the levers, although in practice the result is unsatisfactory. It is better to completely replace the elements. To do this, the cable mounts are removed and the levers themselves are removed. Be sure to remember where which cable was located, and in what sequence it was connected. Yellow goes on the bottom, black goes on top. Blue goes separately.
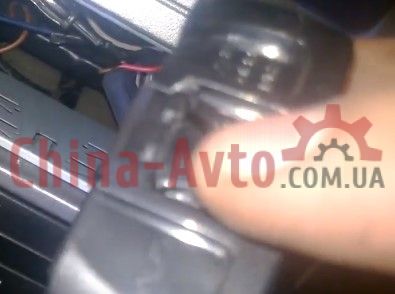
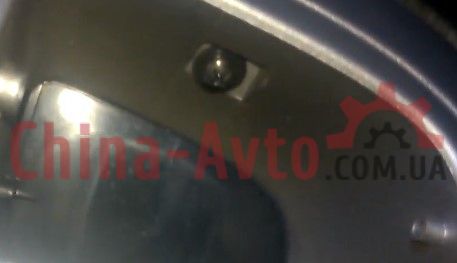
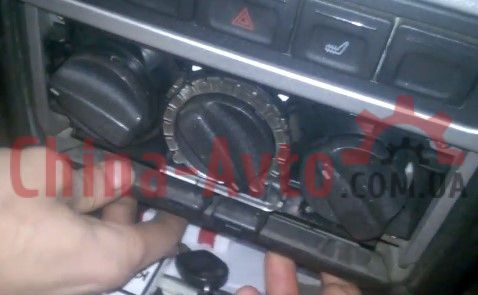
- Krutilki. The twists themselves usually break when they are rotated too hard. Especially this plastic becomes vulnerable at low temperatures. The material freezes, becomes brittle and can break when pressed hard.To remove the black outer knob, it is necessary to press the plastic latch through the hole in the regulator, as a result of which the element will disengage and be removed. Next, press on the back side with a screwdriver, and the second part of the twister, made of green plastic, will come out of the grooves. The spinner gear, made of white plastic, is dismantled by squeezing the petals from the inside of the control unit. After that, the levers themselves are dismantled. Otherwise, you should not try to remove them, since a breakdown will most likely occur. You will probably have to buy new parts here. There is also a clip on the lower gear, which is squeezed out with a screwdriver, and the element simply flies out of its seat.
The assembly of the node is carried out in the reverse order. Whether to attempt to repair the heater unit or not depends on the specific situation. Sometimes breakdowns turn out to be critical, the plastic is completely deformed, the cables break or the levers break. Then the problem is solved solely by replacing the components, or the entire control unit assembly. Only the far from modest cost of a new block, which for such a budget car is very, very expensive, stops to perform a complete replacement. Therefore, you can look for options in the secondary market, turn to car disassembly, or spare no expense and order a new unit.
Before disassembling the control unit, make sure that the electrical circuit is in good condition, that the contacts and wires are intact. Also check the fuses. Mechanical failures of the control unit cannot be considered serious and dangerous malfunctions. Their elimination can be done with your own hands, saving a lot of money on replacing the element.