It is almost impossible to perfectly evenly putty the surface of the walls. In any case, traces of a spatula, cavities, tubercles, and uneven transitions of the solution may remain on the surface. To even out these defects, there is a special procedure: sanding or sanding the walls after puttying. To find out how the putty on the walls is polished, you need to familiarize yourself with the list of tools necessary to complete the work.

What might be needed for grinding?
- Abrasive mesh of several types and sandpaper.
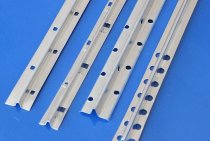
- Beam for grinding.
- Sanding sponge.
- Lamp or spotlight.
- Stepladder or scaffold.
- Small spatula.
- Headgear, goggles, respirator.
Advice! To make the sanding process less time-consuming in the future, use a trowel of maximum width when filling surfaces. It will leave fewer stripes behind.
abrasive mesh
The advantage of the abrasive mesh is in its structure. When working, dust passes through the holes and does not clog on it, as happens with sandpaper. The mesh is changed as it wears out, which is easy to determine by its external condition: it may begin to tear or if the grinding process has become less effective. Most often, the mesh sizes match the size of the sanding bar, so you can simply place the mesh on it and get to work. The skin for starting putty should be with a standard size of 80-100, and for finishing - 220-240. The cost of the mesh is slightly higher than the price of sandpaper.

Sandpaper
Sandpaper is constantly clogged with dust during operation and needs to be changed more often than the mesh. In hardware stores, sandpaper is sold in rolls, large pieces and small rollers. If you decide to opt for it, you should immediately decide how to cut sandpaper with a minimum of waste in order to attach it to a bar. You can buy ready-made cut pieces of sandpaper, but such a purchase will cost more. It is recommended to use 60-100 grit sandpaper. Since the sandpaper with a grain size of less than 60 is coarse, and with a grain size of more than 100, it will quickly become clogged with construction debris.

Overalls and protective equipment
Since the process of sanding a putty surface is quite dusty, you need to stock up on protective equipment. Must have:
- respirator to prevent dust from entering the lungs;
- protective glasses;
- headdress;
- it is best to wear clothes that can be easily shaken out later so that excess debris does not subsequently enter the washing machine;
- you also need to wear gloves: you can use rubber or cotton. The good thing about rubber gloves is that they keep dust out, which can make your hands rougher.

How to get the job done right
Even if you make repairs yourself, sanding the walls will not take you much time. This procedure is much simpler than plastering or puttying surfaces, but no less laborious.
Application of grinders
Repair professionals use special grinders. They allow you to significantly speed up the process of grinding the putty and make the grout better than a conventional abrasive mesh with a bar. The unit is a metal or wooden plate on which sandpaper is attached with clamps. According to the principle of operation of the machine are:
- orbital eccentric;

- flat vibration;

- tape.

Using the former does not allow you to handle the corners well enough. The use of the latter is universal. And the latter can be rationally exploited with a thick layer of putty.
Buying a grinder will cost a tidy sum, so it is not necessary to purchase it for home repairs.
Advice! Grinding the wall can be started no earlier than at the end of the day, after putting putty on it.
Grinding process
After the putty has completely hardened and dried, you can start sanding. It is very easy to start stripping: install the abrasive mesh on the bar and fix it. Your working tool is completely ready for use. It is best to start sanding the walls from the corner and work in the opposite direction. Most often, when grinding from ceiling to floor, they try to make strips about one meter wide.
Advice! Be sure to use a strong power spotlight or pendant lamp. So you can immediately see all the shortcomings and correct them. The spotlight is installed on the side of the wall. So the light will fall on it at an acute angle, and all defects will give a shadow and will be immediately noticeable.
Rub with smooth movements with a little pressure so as not to scratch the surface of the putty. In particular, this applies to sandpaper, as it is rougher than abrasive skins. Movements should not be chaotic, but consistent: up and down, left and right. In the process, be careful not to sand the same area several times. The main thing is not to overdo it. Finishing putty lends itself well to processing and with strong pressure you can erase it to concrete or drywall. So drops can turn out, and the wall will become uneven again. Therefore, if you see that no defects are observed, proceed to the next fragment of the surface.

Advice! When grinding the starting base, one should not achieve an absolutely smooth surface, since the finishing putty is still to be applied. As for the finish surface, you need to work hard here, especially if painting is supposed to finish. Acrylic paints highlight even the smallest flaws, especially if you plan to decorate the walls with light shades.
Separate nuances
There are cases when, when the solution dries, too large pits come across. In this situation, you should not waste time and effort on cleaning the putty around them with an abrasive sandpaper. Visually, it may seem that the wall has become even, but if you apply a level, it turns out that a large depression has appeared on the surface. Therefore, it is best not to touch this place yet, and after you sand the rest of the wall, carefully prime and putty it. For this, it is best to use a rubber spatula. It is quite flexible and will allow you to apply putty flush with the wall.
Upon completion of the work, you should use the level to find out if there are any problem areas on the surface that need to be puttied or sanded. The level should be firmly pressed against the wall.
Advice! Surface priming should be done strictly after grinding, and not before it. If you prime the wall before sanding, it will be possible to correct defects only if it is completely re-putty.
Before proceeding with the priming of the walls, it is necessary to brush off construction dust from them. To do this, take a maklovitsa with a long and soft pile. The primer should dry for 2-3 hours and after that you can paint the surfaces or paste them with wallpaper.