No repair can be imagined without puttying work. Thanks to them, an absolutely flat surface is obtained for subsequent finishing. To date, the most promising type of finishing work is painting. And even most modern facing materials are made with the prospect of further staining. Thanks to this, the interior of your apartment will always look unique. Therefore, the puttying of walls for painting should be done as ideally as possible. When doing repairs with your own hands, you need to familiarize yourself with all the nuances of puttying work.

A set of tools to get the job done
To prepare and apply putty on the walls with your own hands, you will need:
- dry putty;
- bucket, for preparing a solution;
- maklovitsa, for applying a primer;
- construction mixer or puncher / drill with a whisk attachment;
- 3 metal spatulas: it is better to choose a wide one for applying the solution to the surface, a narrow one for supplying the solution, and an angular one for the correct formation of the angle;
- reinforcing tape;
- grout block with mesh;
- cotton or rubber gloves;
- lamp for lighting.

How to prepare the surface for putty?
The technological process of puttying a wall for painting does not differ from the work of preparing it for wallpaper. But there is one important point: the wall or ceiling must be puttied very well, because even the slightest defects on the plane can be seen under the paint. It is on how well the surface is puttied that the final result of the painting work depends. Puttying the walls for painting hides all the bumps, roughness and seams. It is necessary to putty for painting both a regular ceiling and a suspended plasterboard ceiling.
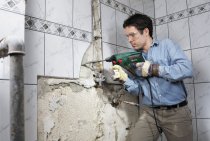
Do-it-yourself putty work must begin with the dismantling of the old coating. To do this, the surface is cleaned of whitewash, paint and possible irregularities on it. Carefully treat old stains from dampness, fungus and rust. After removing old wallpaper, peeling putty may remain. It must be removed to avoid the destruction of the new putty.

Cracks in the ceiling and walls are embroidered, primed and puttied. You can expand the crack with a spatula, making it wider.

After puttying, a special reinforcing tape is glued to it, so that in the future the crack does not appear again. The tape is plastered.

After complete drying, the surfaces are sanded with a grout block with a mesh.

If the ceiling or walls have very large visible irregularities, they must be sewn up with drywall sheets and also puttied.
How to apply finishing putty?
After the surface is leveled with the starting putty and it dries, it's time to apply the finishing putty. It is diluted according to the instructions, mixed and applied with a thin layer of 1-2 mm on the wall with a wide spatula. Since all wall defects have already been removed with the starting mixture, it is much easier and faster to apply the finishing mixture.

In order to mix the solution, it is necessary to collect a small amount of water in a bucket, pour the dry mixture into it according to the instructions and stir the solution with a mixer. Its consistency should be similar to sour cream of medium density.
The spatula should be held at an 80° angle. So the putty will lie down evenly, thinly and without stripes. After that, remove the remaining mass from the spatula and apply it again. A small spatula can be useful for filling corners or hard-to-reach places, such as behind pipes. To make the surface smoother, you can apply 2 layers of finishing putty.
When making repairs with your own hands, keep in mind that drywall is much easier to putty.It is enough to putty the seams and holes from the dowels with the starting putty, wait for it to dry and the surface is ready for applying the base for painting.
After everything is completely dry, you can start sanding the surface with a trowel block with a fine mesh. Do not press too hard on the block, so as not to scratch the putty. Stock up on a respirator or gauze bandage, special plastic glasses and put on a hat. When grouting, a large amount of dust is formed, which enters the eyes and respiratory tract of a person.

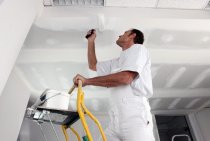
After the walls and ceiling are sanded, you need to take a strong power lamp and carefully examine the entire surface for possible missed irregularities. If they are, clean them up. Then you should take a maklovitsa or soft cloth and brush off the dust from the surface. If you do not do this, when priming, visible streaks from the primer and spools may form. After priming the walls and ceiling, let them dry for 2-3 hours and you can start painting.
A little about finishing putty
All putties for painting contain modifying components. They make the mass pliable and more plastic.
If you are doing repairs with your own hands and you are faced with the question of which putty to choose, check out the qualities that a good dry mix should have:
- it should be easily applied to the starting base, not reach for the spatula and lie down without the formation of lumps;
- when applied with a layer of no more than 3 mm, defects in the starting putty should not be visible;
- putty should not flow down the wall;
- after drying, cracks and shells should not form;
- the color of the puttied wall should be an even white shade.
When choosing a dry mix, the hygroscopicity of the mix should also be taken into account. If it is intended to apply the mixture on an uneven surface, it should be primed. Please note that gypsum does not tolerate moisture.
For an inexperienced person, the whole process may seem complicated, but once you get started, you will immediately realize that you yourself can easily make repairs yourself.