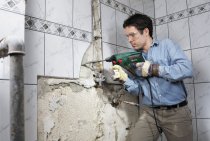
During the renovation of the apartment, the owners have to face many difficulties. And one of them is curved walls and corners, especially in old houses built in the Soviet era. This is due to many reasons: the imperfection of technology and materials, the tight deadlines for construction, the large plan, the low level of qualification of workers (many houses were built by students from construction teams) and the age of the high-rise buildings themselves. Therefore, almost every resident of Khrushchev asked himself the question: how to putty the corners so that they become even? It's actually not as difficult as it seems. It takes a little patience and practice.

Correcting uneven outer corners
Curves can be any corners. But the unevenness of the protruding surfaces especially spoils the appearance. So alignment of external corners should be given special attention.

Without the necessary qualifications, it is rather difficult to bring out a perfectly even convergence of two walls at an angle of 90 °. The task is facilitated by the use of special overlays-corners, which are installed on the surface to be treated. There are several types of corner pads:
- Galvanized metal or aluminum. They are thin and light, have a perforated edge, which allows them to be completely drowned in the solution. Due to this, they are well connected to surfaces and become invisible.
- Plastic corners. They have an external resemblance to metal, but are made of durable plastic. They are very popular due to the fact that they are not subject to oxidation and corrosion. However, they are thicker than metal, so you need to apply a larger layer of putty.
- Flexible pads. They are used when finishing curved elements, for example, for semicircular arches. Such overlays bend well, but the corner at the same time turns out to be strictly 90 °.

Unfortunately, you will have to deal with obtuse and sharp corners without overlays: in the original designer dwellings, work is carried out only with a spatula. In this case, puttying the corner of the wall will require more skill and labor from the owner.
The sequence of applying putty
The work is carried out in several stages:
- First, measure the overlay-corner along the height of the wall and cut it off.
- A level or the overlay itself is applied to the corner to determine how uneven it is. Recesses and protrusions are marked with a pencil.
- If it is even, then the corner can be planted immediately on finishing putty.
- If the corner area has significant irregularities, then the overlay is glued to a rather thick layer of starting putty.
- The building mixture is diluted according to the instructions or taken ready-made.
- Putty is applied with uniform slaps on both sides of the wall. If there are recesses, then the amount of the mixture is increased, and if protrusions are present, then reduced.
- An overlay is glued to the raw putty and it is pressed a little so that the mixture protrudes a little through the perforation. The building level is used for leveling.
- Thoroughly coat the corner with putty.
- After the starting mixture has dried, the finishing mixture is applied on top so that the overlay is completely hidden.
- When the last layer dries, the surface is carefully sanded with fine sandpaper.

Working with an inside corner
In the case of internal corners, the procedure will be slightly different. Some difficulties may be caused by the lack of special overlays for this type of corners. How to putty the corners of the walls in this case? The whole process can be divided into several stages:
- The degree of curvature of the angle is determined. Usually 90° are respected during construction and the fluctuations are negligible. However, vertical deviations may occur. In this case, a thick layer of putty will be needed to hide defects.
- If there is a very strong curvature, then a layer of plaster is first applied.If there are large protrusions on the walls, then they are cut or sanded.
- The plaster mixture is applied to the cavities, the excess is cut off by the rule, the solution is allowed to dry and seize.
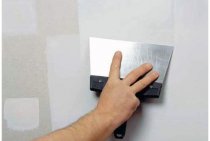
- After the preliminary layer has completely dried, putty is put into the corners using a wide spatula. The tool is moved along the wall so that the mixture is applied over the entire depth of the cavity, then taking it to the side. Thus, they move from top to bottom or in the opposite direction. First, one side is processed, and after the putty dries, they move on to the second.
- If necessary (with a large curvature, the presence of furrows or scratches), after setting, the operation is repeated.

Advice! To process the inner corner, you can use a special corner spatula. The plates on it are connected at an angle of 90 °, which greatly simplifies the work. It is also more convenient and faster for them to equal putty, because the excess is easily cut off by the edge.
Final stage
The puttying process ends with grouting and grinding.

At this stage, it is necessary to achieve the final evenness and smoothness of all surfaces and the clarity of lines, remove unnecessary drops and influxes. For grinding large areas, a special grinder is used, but it is not suitable for processing corners - such places will have to be processed manually using a special hand grater or a piece of fine-grained sandpaper. The walls are grouted in the direction from the corner to avoid chipping the putty layer. The result is smooth sides and a sharp edge. The final grout for the smoothness of the walls is done with an abrasive fine-grained sponge.