The bathroom is the wettest room in the apartment. Even special curtains and absorbent mats cannot fully protect surfaces from water ingress, so walls and floors in the bathroom need special protection. By taking care of waterproofing for the bathroom, you will not allow moisture to penetrate under the finish to the concrete floor slabs and prevent their premature destruction, leading to the need for major repairs. In addition, high-quality waterproofing of the bathroom will save you from serious financial losses in the event of a pipe break or leak, from which the neighbors below could suffer. Making waterproofing is not so difficult - you can do all the work yourself.

Waterproofing methods
To ensure the protection of the floor from water in the bathroom, you can use special waterproofing materials. They can be divided into two large groups:
- coating;
- pasting.

Coating waterproofing
It is a plastic material that forms a waterproof coating after application. Coating materials include:
- mastics based on bitumen or polymers with various fillers;
- polyurethane and cement-polymer mixtures;
- liquid acrylic water-based waterproofing.
Advantages of waterproofing for a wash-type bathroom:
- universality;
- ease and speed of application;
- the ability to protect almost any surface, such as uneven or vertical.

Disadvantages of bitumen-based mastics:
- instability to temperature extremes, leading to cracking;
- bad smell.
Polymer and polyurethane mixtures have practically no drawbacks, besides they have a very aesthetic appearance and are even more convenient to apply compared to bituminous compositions.

Gluing waterproofing
It is produced in rolls or sheets and, in fact, is the same bitumen with filler applied to fiberglass or polyester. This type of waterproofing includes:
- ruberoid;
- isoplast;
- ecoflex;
- isoelast and other similar materials.

Advantages of pasting waterproofing materials:
- reliability and durability;
- they can be walked on immediately after installation.
Minuses:
- great care is required in carrying out the work;
- the complexity of the process;
- exactingness to the surface - differences should not exceed 2 mm.
Foundation preparation
Waterproofing the floor in the bathroom with your own hands begins with preparatory work. What needs to be done at this stage?
- The floor surface must be cleaned to a concrete base.
- Regardless of which method of applying waterproofing for the bathroom is chosen, the material must be laid on a flat base. Small depressions can be filled with cement mortar, but in some cases it will be necessary to make a leveling screed.
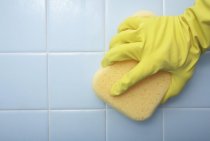
- The leveled floor is carefully swept and washed.
- The surface must be primed. The primer will not only ensure good adhesion of the insulating materials to the base, but also enhance the waterproofing of the coating.
Important! When choosing a primer, pay attention to its compatibility with the type of waterproofing.
After the final drying of the primer, you can start applying or laying waterproofing materials.
Coating hydrobarrier device
How to make the waterproofing of the floor in the bathroom, made by yourself, turn out to be of high quality and durable? The algorithm of actions will be as follows:
- The lower corners of the room, where the walls meet the floor, are smeared with a layer of bituminous mastic.
- Then, a rubber-based waterproof tape is glued to the joints around the entire perimeter.
- The entire surface of the floor is covered with a continuous layer of mastic. In this case, it is necessary to capture a part of the wall adjacent to the floor to a height of 30–50 cm. It is convenient to use a wide brush or roller to apply the material.

Important! The waterproofing coating is applied in 2-3 layers. After applying each layer, breaks should be taken to dry it, each of which should last at least a day.
After the mastic dries, the surface is primed again, and then a screed is made.

Laying tiles on a cement-adhesive mixture without a screed is possible only when using coating materials based on acrylic or cement.
Waterproofing by gluing
Waterproofing in the bathroom by gluing will cost more than using only bituminous mastic. Yes, and it will be more difficult to do it yourself. However, this method has many fans among builders.
Roll waterproofing materials can be divided into two types:
- Built-up. For their installation, a gas burner is required, the use of which in an apartment is undesirable.
- Self-adhesive. They fit quite simply, but it is necessary to do everything carefully, it will no longer be possible to re-glue in case of an incorrect location.

Tip: Before laying the roll waterproofing for the bathroom, it is recommended to glue all joints with waterproof tape or coat with mastic. For additional reliability, you can apply a thin layer of mastic on the entire surface of the floor with a call to the walls.
Work progress:
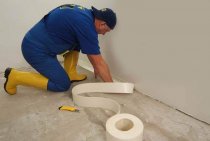
- Laying of material is carried out with an overlap. Each subsequent sheet should overlap the previous one by one-fifth of the width. In this case, it is necessary to overlap the walls by approximately 15–20 cm. After cutting the sheet of the required size, the protective film is removed from it. The material is laid on the floor and rolled with a heavy roller. The procedure is repeated for each subsequent sheet.

- The welded roll materials are preheated with a burner, rolling out gradually.
- When laying rolled waterproofing, the greatest difficulty is caused by places where you have to bypass pipes and various communications. The holes for them should be made a little smaller than the required size to get a kind of bumpers. Special rubber seals are also used. All places of such joints are additionally smeared with mastic and reinforced with waterproof tape.

After laying, you can immediately start pouring the final screed under the tile.
Tip: after laying the tiles, all seams can be treated with sealant before grouting for additional protection - this will allow you to create a multi-layer waterproofing for the bathroom floor with your own hands.
Where else in the bathroom is waterproofing needed?
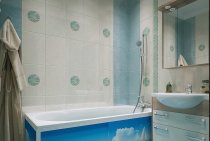
For high-quality waterproofing of the bathroom, it is necessary to pay attention to the walls, which also often get water. Gradually, moisture will begin to penetrate inside the partitions, leading to undesirable consequences. The most problematic places that need high-quality protection are:
- the space around the sink;
- walls adjacent to the bath or shower;
- area near the toilet in a combined bathroom.

The application of waterproofing materials is carried out similarly to the treatment of the floor in the bathroom. It is not recommended to use bitumen-based materials for walls. It is fluid and plastic, therefore it is poorly suited for vertical surfaces and is not able to provide high-quality adhesion of the tile to the wall. It is better to use cement-polymer mixtures.
Tip: In order for ceramic tiles to better adhere to the wall, you can partially drown a reinforcing mesh in a layer of waterproofing material, which will help ensure good adhesion.
Bathroom waterproofing can be done with your own hands. It does not require special skills and special tools, but it will help protect structures from the damaging effects of moisture and avoid serious financial costs in the future.