It is believed that quality leveling plaster walls only possible when using beacons. Indeed, this method of plastering, with proper execution, allows you to get a perfectly flat surface, but its use is not always justified. If the walls do not have a significant slope and they do not need to be leveled, but it is only necessary to remove defects in the form of protrusions and recesses, you can simplify and reduce the cost of the process by abandoning the beacons and using the "under the rule" leveling method. Let's find out how to properly align the walls without beacons and how realistic it is to do it yourself.

When can you plaster without beacons
The method of plastering walls without the use of beacons - the so-called visual alignment - relevant in the following situations:
- The wall has no horizontal or vertical deviations, but there are potholes, protrusions, shells and other defects on its surface.
- The plane of the wall is flat, but there is a slope in one or more corners.
- The main plane of the wall and its lower part, where the wall adjoins the floor, do not require alignment, and its upper part, adjacent to the ceiling, is littered or “went in waves”.
- The wall has defects and a slight slope that is not visible to the naked eye.

Advantages of leveling walls without beacons:
- Saving time. Since it is not required to use beacons when leveling walls in this way, there is no need to additionally prepare a solution for them and wait until it fixes the landmarks. In addition, a small layer of mortar dries faster.
- When using beacons, the plaster layer cannot be less than the thickness of the beacon profile. If beacons are not used, the thickness of the applied layer is minimal, which significantly reduces the consumption of the solution.

It should be borne in mind that it is quite difficult to achieve the desired result and make the walls perfectly even without beacons with your own hands, which can be considered a key drawback of the technology.
The main nuances of the process will help you find out the videos presented on the site.
Tools and materials
For work, you will need special tools and materials. You need to get the following tools:
- mixer for kneading or drill with a nozzle;
- a large rule 2 m long;
- hammer;
- file;
- grater;
- bucket;
- spatula 8–10 cm and 45 cm;
- primer brush.

You will definitely need the following materials:
- gypsum plaster;
- water.
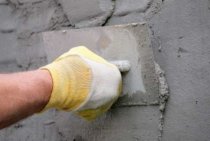
For thin layers, we recommend using gypsum mixtures. They have more high adhesion (the ability to stick to the wall) and they are more convenient to apply and smear on the wall. When using a gypsum mixture, it is much easier for craftsmen without experience to get a good result the first time.
Wall preparation
Preparation involves removing old finishes, loose parts, dirt and dust. Depending on the materials for each type of surface, certain work needs to be carried out:
- In brickwork, it is better to deepen the seams by 1–2 cm.
- On the concrete surface, you need to make notches, for which a file and a hammer are suitable.
- Large protrusions must be knocked down, because they will have to spend a larger amount of plaster, cracks must be repaired.
- It is possible to apply the mortar on wooden walls only after installation on them wooden shingles at an angle or a plaster mesh with cells no more than 4 cm. In the presence of mold, the surface must be treated with antiseptics.
Important! Regardless of the material, it is necessary to treat the walls with a primer, after removing oil stains, dirt and dust.
- At the junction of surfaces to the floor, you will need to remove all debris, so that it will be possible to collect and reuse the solution.
- After applying and drying the primer, using the rule, you need to determine the areas with recesses and mark them with a pencil. This also applies to the floor plinth and ceiling areas.

The order of work when plastering on beacons
Dry before starting the process gypsum mixture is diluted according to the instructions in such a way that it was enough for about 20 minutes of work. After 25–30 minutes, the gypsum mortar will begin to set and can no longer be used.
If you need to level a wall with defects without deviations from the vertical and horizontal plane, you must perform the following steps:
- The recesses are filled with plaster in excess, with going beyond the boundaries of the marked areas.
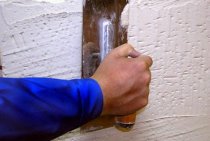
- The solution is stretched by the rule, which is placed in a vertical position. Thus, the recesses are filled with plaster, and on the protrusions its layer remains minimal. If the solution was not enough, it must be added.

- Actions are repeated until the next corner.
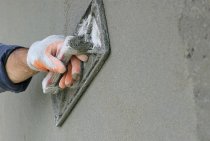
- After setting the solution with a clean 45 cm spatula, the sags are cut off and the irregularities are corrected.
- A new solution is diluted, slightly more liquid than for the first layer, applied to the wall and stretched over the surface, but in a different direction, the rule is held horizontally.

If there is a slope in the corner or in the area of \u200b\u200bthe ceiling or floor plinth, you can proceed as follows:
- Apply mortar to a small area of the sunken part of the wall.
- Based on the rule on the main flat plane of the wall, stretch it along the mortar, cutting off the excess.
- Wait until the tubercle of the solution dries. Thus, you will get a kind of beacon that you can rely on, leveling the problem area. If the zone of the wall that will be leveled has a large length, several such beacons can be made from the solution.
The technology with control beacons made of plaster is used when one part of the wall is even, and the other has deviations in level, or when the main plane of the wall does not require adjustment in level, and the corners are “sunk”.
The cost of leveling walls without beacons
The work will cost less than finishing the walls along the lighthouses with gypsum mortar. In Moscow and the Moscow Region, the cost for visual alignment under the rule is 300–350 rubles on average. for 1 sq. m., and in St. Petersburg from 280 rubles. for 1 sq. m..
Plastering surfaces in this way will allow the owners to create a basis for applying a decorative layer, with which you can make your apartment more beautiful and comfortable.