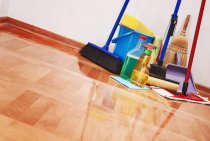
The final stage of every renovation is the laying of the flooring, which brings a sense of completion and is an important design element in itself. Thanks to fashion trends, natural parquet has again become one of the most popular finishing materials. Often, having calculated the cost of laying parquet by professionals and having received an impressive figure, the owners decide that it is better to do the flooring with their own hands. Moreover, when following detailed instructions, every interested “amateur” will cope with this task.

Price
The high prices for turnkey parquet laying are justified by the fact that this process is more time-consuming than complex, and requires a significant amount of time, as well as accuracy. To obtain a high-quality, pleasing floor for many years, you need to consistently and carefully carry out each of the stages of work.
Laying strip parquet for glue and nails will cost from 550 to 890 rubles / m2 in Moscow and from 420 to 780 rubles / m2 in St. Petersburg. Solid board flooring - from 675 to 900 rubles / m2 in the capital and from 460 to 860 rubles / m2 in St. Petersburg. The price will depend on the laying method (“herringbone”, “deck”, “squares”), planks covering, base material (screed, plywood).

Preparatory work
At the first stage, the following preparatory activities are carried out:
- Room preparation. Before laying the parquet in the apartment, all other finishing work is completed, cleaning is carried out and the required temperature (18–23 °C) and humidity (45–50%) are maintained.
Important! The laying of the flooring should not coincide with the beginning or end of the heating period, so that there is no sudden change in temperature and humidity during the process.
- Preparation of parquet planks. It consists in their acclimatization: before laying the boards, open packages should spend about 2 weeks indoors. This is necessary to equalize the temperature and humidity of the room and wood, otherwise the planks will subsequently be deformed.
Note! The number of parquet elements is calculated with a mandatory margin of 2-15%, depending on the laying method and type of coating.
- Checking the quality of the base and differences in surface heights (permissible value - 1 mm per 1 sq. M), since parquet flooring on a floor with defects will lead to its creaking.
Parquet is a rather capricious coating, demanding on the base, which must be properly prepared in one of the following ways.
- Moisture resistant plywood screed from 12 mm thick. The material will protect the parquet from deformation and provide a solid and stable base for it. The gap between the sheets should be 5 mm.

- Parquet flooring is allowed directly on the screed, provided that it is filled with high quality and the moisture content of the base is not more than 3%. Otherwise, the finish coating will quickly become unusable.

- Installation lag followed by laying thick (from 18 mm) plywood. This method allows you to avoid time-consuming and wet work on the arrangement of the screed, it is easy to adjust the level and slope of the floor.

If the parquet is installed on plank floorpreparation is simplified.

You also need to purchase a styling tool. The required list does not contain any highly specialized devices. It includes:
- hacksaw;
- tamper;
- padding bar;
- roulette;
- square;
- wedges.
Main stage of work
Depending on the type of parquet, the laying technology is selected from several options, each of which has its pros and cons. The most used are the following methods:
- Installation of parquet in a floating way.It implies the connection of planks with a tongue-and-groove system only between themselves, without fastening to the base. Under the coating laid in this way, soundproofing material (as an option - cork) is necessarily underlain to avoid squeaking. This laying technology allows the tree to be transferred without the consequences of fluctuations in temperature and humidity, if necessary. parquet flooring is easy to repair. But it is suitable only for small rooms and deck laying (it is impossible to create a pattern in this way).

- Fixing parquet with glue. A more reliable method, but at the same time more time-consuming and costly. In addition, such a floor is not repairable. Well suited for large rooms, but with a room length of more than 8 m, a technical seam is necessarily made, which is closed with a special bar fixed to the parquet. The adhesive is generously applied to the base with a notched trowel, then parquet planks are laid on the base floor, additionally connected by a tenon-groove system.

- Mounting on glue with fastening with nails (self-tapping screws). To lay the parquet yourself in this way, the planks must be glued to the base and additionally connected to each other using nails or self-tapping screws. This provides maximum strength. Such a floor is practically not subjected to deformation, since it is fixed in all planes, but it is also impossible to repair it.

Important! Between the parquet and the wall, with any method of laying, there should be a uniform gap, the size of which depends on the size of the room (for each meter of floor width - 1.5 mm).
Types of laying
Before starting work, you need to calculate and draw a suitable variant of the parquet layout and subsequently clearly follow the scheme.
Advice! One of the ways to reduce the cost of laying parquet is to lay cheaper varieties of material or waste remaining during the laying out of patterns under large-sized stationary furniture and in closed niches.
For many years, several types of block parquet laying have been popular, which require different qualifications of the master.
Run-up (deck method)
The boards are fastened in such a way that each subsequent row of planks is shifted relative to the previous one by a certain amount. The run-up step can be any - 1/2, 1/3 or with a chaotic shift, which affects the symmetry of the pattern. You can also vary the density of the pattern, which is single, double or triple. The initial row is laid out with whole planks, and in the second and subsequent rows, the first plank is cut to a given depth. This method is the most economical and simple, ideal for laying strip parquet on your own.

Laying diagonally with the deck method is often used by designers to visually expand the space.

Herringbone
The next common way is laying herringbone boards. A practical and beautiful method that exists in two versions, differing in appearance and complexity of execution:
- English tree. Represents the parquet boards laid by a zigzag. This laying method is also economical, because it does not involve a large amount of waste, and is available for independent work.

- French tree. Thanks to the oblique trimming of the joined elements, it looks more stylish and spectacular, which is clearly demonstrated by the following photo. It is a difficult option to perform, as it requires some skill and is no longer suitable for do-it-yourself installation.

Both options for herringbone laying can be either straight or diagonal. In the first case, you will first have to center (for example, using a stretched cord) and lay out a “beacon” Christmas tree (photo below), from which subsequent work continues.

Network
Braided (mosaic) parquet flooring is an effective way of decorating large rooms. It is an interweaving of planks of several types of wood in various combinations with accent inserts. Installation of a mosaic floor requires great skill and high precision, which significantly increases the cost of its creation.

Just as in the previous versions, you can lay the braid across the room and diagonally. The second option looks more stylish, but at the same time increases material consumption. An additional complexity of such work lies in the fact that the drawing is laid out in layers, from the periphery to the center and does not “forgive” mistakes.
squares
Another way to complex and expensive, but spectacular design, giving extra chic to the parquet floor - laying out squares (diamonds) using several types of wood. This method includes three of its varieties: a simple square ("Vietnamese"), a complex one ("well") and deployed.

Important! When choosing a parquet for this type of installation, it should be taken into account that the square pattern must fit into the dimensions of the room completely, i.e. the dimensions of the planks are the determining parameter.
When choosing the type of flooring installation, it is recommended to calculate at the stage of developing a design project how much the whole complex of works to create a “dream floor” costs in order to clearly represent the necessary costs or stop at options available for self-assembly.
It is much easier to lay panel parquet. Its modules, the top layer of which is an already laid out pattern, are mounted directly on logs or glued to a plywood base.
Final stage
After the laying of the coating is completed and the time required for the adhesive to set and dry (when applied), the time comes for the final stage: sanding, puttying cracks and varnishing.

If a material with a full factory finish is used (i.e., a finishing coating has already been applied to the parquet - oil or varnish), then all that remains is to install a plinth that hides the gaps and gives the room a finished look.
To understand more about how to properly lay parquet with your own hands, the video will help.