Armstrong ceilings are a suspended cellular structure made of mineral, metal or mirror plates. Armstrong World Industries, an American floor and ceiling manufacturer, is becoming a household name when it comes to suspended tile ceilings. Most often, such ceilings are found in non-residential office or industrial premises. The easy installation of an armstrong ceiling makes it a popular suspended ceiling structure, especially in large areas.

Advantages and disadvantages of Armstrong ceiling
This type of suspended ceiling has a lot of advantages, including:
- Ease of installation. In a short time it is possible to assemble a ceiling covering on large areas of any room. And every amateur can make an Armstrong ceiling with his own hands.
- Lightweight suspended structure. The light weight of the plates and parts simplifies the installation of ceilings with your own hands and eliminates the load on the walls.
- Low cost. Affordability is one of the most attractive points in choosing Armstrong ceiling structures, especially their budget option - mineral fiber boards.
- Functionality. Armstrong design will aesthetically hide all wires, cables and ventilation ducts, as well as ceiling errors, while leaving the possibility of quick access to the necessary communications. You can disassemble and assemble the ceiling an unlimited number of times.
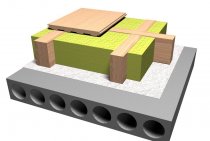
- Heat and sound insulation. The structure of the modules made of mineral or basalt fiber, polycarbonate, metal or wood and the air gap between the suspension and the plates provide additional noise protection and heat retention.

Despite the impressive list of advantages, the Armstrong ceiling has some disadvantages. Among them:
- Low moisture resistance. This applies to mineral and organic boards, where any leakage from above or constant dampness will lead to a violation of the integrity and appearance of the modules.
- Reducing the height of the ceiling. The Armstrong design hides an average of 25 cm in height, and the installation of fixtures can make the ceiling a few precious centimeters lower.
- Limited design. Plates are produced most often in geometric shapes - squares 60 x 60 cm or rectangles 120 x 60 cm.
- Questionable safety of some types of modules. Until recently, asbestos, which is unsafe for health, was part of the mineral fiber. When buying Armstrong plates, close attention should be paid to the choice of the manufacturer and the characteristics of the product certificate.

Structural elements of a suspended ceiling
The basis of the construction is mineral fiber boards, the dimensions of which come in two versions - 60 x 60 cm and 120 x 60 cm. The thickness of the plates can vary from 8 to 25 mm.
According to the shape of the edges, the following types of plates are distinguished:
- Board - universal plates, have smooth edges and are suitable for all types of suspension systems;
- Microlook - plates with a narrow stepped edge for systems 1.5 cm wide;
- Tegular - elements with a wide step for a 24 mm wide bar.

The ceiling frame includes the following components:
- bearing profile;
- transverse;
- angular;
- adjustable suspensions (knitting needles with an eyelet and a hook and a "butterfly" spring).
Calculation of material for the ceiling
To make a calculation of the components necessary for installation, you can use online calculators, which are often posted on manufacturers' websites. You can entrust the calculation of the material to the specialists who will perform the installation. In the event that you plan to install this type of ceiling with your own hands, the consumption of components can be calculated independently using special correction factors.
Calculation algorithm:
- The required number of modules can be calculated by multiplying the area of the room by a factor of 2.78.
- The number of guide rails will equal the area value multiplied by 0.23.
- The required number of transverse rails 1.2 m long and longitudinal 0.6 m long can be found by multiplying the area by 1.4.
- The number of corner profiles is determined by dividing the perimeter of the room by 3.
- You can calculate the number of suspensions by multiplying the area by 0.7.

Armstrong ceiling installation
The ease of installation of armstrong ceilings does not imply the obligatory possession of special skills, it is easy to install it yourself, but still you should pay attention to some points.
Necessary tools for work:
- level;
- dowels;
- self-tapping screws;
- pencil;
- drill;
- pliers;
- hammer;
- screwdriver.
Ceiling installation sequence
- Marking the ceiling for mounting the profile. Using a level, a line is drawn on the wall for installing the carrier profile, and then lines are marked on the ceiling for mounting the transverse rails.
- Installation of the corner profile. An angular profile is mounted to the walls along the perimeter of the room with dowels or self-tapping screws every 0.5 m.
- Installation of support rails measuring 3.7 m. Every 1.2 m, the rails are installed parallel to the wall or at an angle (for diagonal installation). With the help of locks, the slats are fastened together.
- Hanger installation. Suspensions are mounted on self-tapping screws simultaneously with the carrier rails. They must be fixed, stepping back from the wall 0.6 m in increments of 1.2 m. Then the suspensions are adjusted in height and connected to the rails.
- Installation of profiles with a length of 1.2 m. Perpendicular to the carrier rails at a distance of 0.6 m from the wall and with a step of 0.6 m, rails of 1.2 m are installed.
- Installation of rails 0.6 m long. They are mounted parallel to the supporting profiles every 1.2 m.
Important! The cells of the crate should be in the shape of a perfect square 60 x 60 cm. Even small errors in their size can lead to the fact that the flow modules will not fit into them: they will not fit in or simply fall out.
- Installation of lamps. After the installation of the frame is completed, the fixtures are placed. If these are raster or modular types of fixtures, they can be arranged in an arbitrary order instead of modules.
Tip: in places where the fixtures are installed on the crate, an additional suspension should be installed.
Types of fixtures for modules:
- Raster: represent an independent module 60x60 cm.
- Overhead.
- Luminescent.
- LED.
- Point.
- Installation of modules. This is the final stage of do-it-yourself false ceiling installation. The laying of modules should start from the center of the room. This arrangement of the plates is explained by the fact that there should be plates along the edges, which may have to be cut.

The module is inserted at an angle into the space of the crate and carefully, trying not to damage it, is lowered onto the rails of the cell.
Tip: experienced craftsmen recommend not to rush to immediately lay the ceiling tiles, but leave the frame ready for a few days. Under the influence of gravity, the suspensions can shift somewhat and require adjustment.
Additional Recommendations
- Modules need to be installed only at the end of all construction and repair work.
- The temperature in the working room should be between 15 and 30°C, and the air humidity should not exceed 70%.
- It is necessary to paint the slabs, if necessary, before they are laid in the crate.
- It is advisable to use gloves during installation of the modules. The plates are very easily soiled, traces may remain on them.
- During installation, the fragility of the plates must be taken into account.

Following the above tips, it will not be difficult to mount an Armstrong-type ceiling with your own hands, and the undeniable advantages make it a worthy competitor in the list of suspended false ceilings.