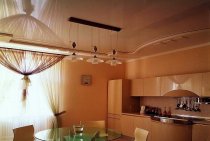
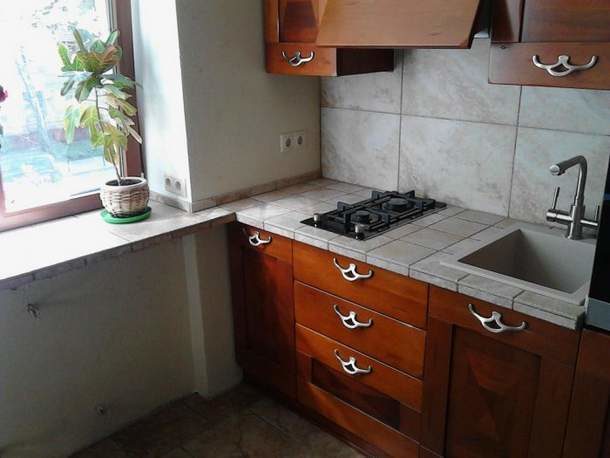
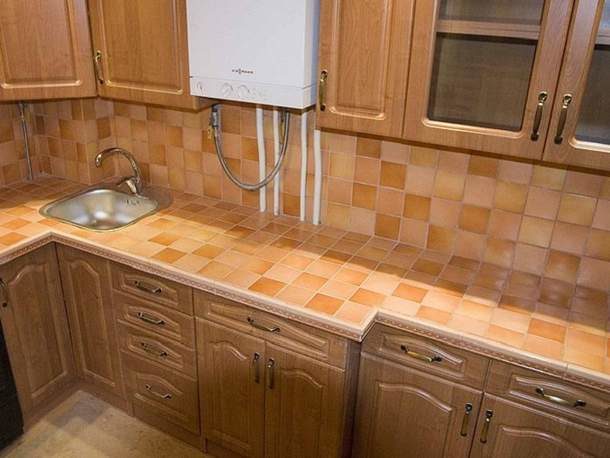
Purchasing kitchen furniture is expensive. Therefore, it is a shame when, after several years of operation, it loses its attractive appearance, problems appear in the functioning of its individual elements. It is a pity to throw away old cabinets, bedside tables, tables and chairs, and it is unprofitable to buy new ones. Repair of kitchen furniture can not only extend the life of these items, but also significantly transform them, adding charm and originality.

Do it yourself or order furniture repair at home?
Before proceeding with the restoration of kitchen furniture, you need to evaluate the scope of work and decide whether to do everything yourself or hire specialists.
You can repeatedly restore kitchen sets made of natural wood. Such furniture is not subject to significant deformations. Most often, wooden surfaces during operation are covered with scratches, chips and scuffs. The elimination of these flaws with their own hands is available even to a novice master.

It is more difficult with cabinet furniture made of MDF or chipboard with individual parts made of plastic, glass and metal. Alteration of swollen or lost geometry body elements of bedside tables or cabinets can be an overwhelming task, which means that the manufacture of new parts will have to be entrusted to specialists. But with the cosmetic repairs of the facade or countertops, adjusting or installing new hinges on the doors, you can handle it yourself.

Therefore, we have 2 ways:
- Do your own furniture repairs. This option is suitable when you need to fix minor defects, you do not need to manufacture complex replacement parts, and also in a situation where you want to do without spending money. This way will not only save money, but also bring your creative ideas to life.
- Contact a company that offers furniture restoration services. Such a solution makes sense when damaged or lost-looking elements of the headset cannot be repaired, a complete replacement of individual blocks, such as facades, countertops, is required. In this case, you will have to spend money, but compared to buying new furniture, such a service will be inexpensive. The cost of replacing facades starts from 2200 rubles. per sq. m., countertops - from 4200 rubles. for m.p.

During the repair process, it is useful to check and tighten all threaded connections: furniture assemblers often do not stretch them well enough, which leads to further loosening and distortion of the structure. And also lubricate all hinges and hinges to eliminate unpleasant squeaks and ensure easy operation of these elements.
Door repair
A frequent defect of cabinet furniture is the poor operation of cabinet doors and bedside tables: they warp, do not want to close, open spontaneously. The reasons are different: incorrect adjustment, defective hinges or magnetic latch, distortion of the entire structure, swelling or delamination of the material.
Note: changing the geometry of cabinets is often associated with the poor condition of the back wall. A fiberboard sheet nailed there plays the role of a kind of fixative. If necessary, it is changed by cutting out the desired fragment in size and attaching it with nails or small screws.
If the case is in the loop, then its replacement is not always required: in most cases, adjustment helps. For this purpose, two screws are provided in the design of the device: one is responsible for adhering the door to the body, the second regulates its position in the frontal plane, moving it to the right or left.

The loop torn out “with meat” can be installed in place using screws of a larger diameter. Another option is to drill holes, put wooden dowels in them on carpentry glue, and screw fastening screws into them.

If the hinge breaks, it is changed.Installation in old sockets is simple: mounting screws are screwed into existing holes. It is more difficult if the hinge is installed in a new place or the door is changed. Assembly occurs in the following order:
- Nests with a diameter of 35 mm are outlined and cut with a cutter for dish-shaped hinges.
- A hinge plate is inserted into the socket located in the door perpendicular to the end and fixed with a pair of self-tapping screws.
- The second plate is placed in the body, fixed with screws through special holes in the tides.
- By screwing in two adjusting screws, they achieve the desired position of the door.
The details of adjusting the loops are shown in the video.
Spontaneous opening of doors occurs when there is a malfunction of the magnetic strip. In some cases, it helps to clean the magnet and the iron plate it attracts from dirt, adjusting their mutual position strictly opposite each other. If these measures did not help, then the element is changed.
And one more video: a little trick that will solve the problem of adjusting a locker with worn out hinges without replacing them.
Sanding wooden elements
In many apartments there is wooden furniture, often inherited from grandparents. In terms of workmanship and artistic value, it surpasses the case, but over the years of service, the surface is covered with numerous scratches, chips and stains. The easiest way to cosmetic repairs is grinding.
You will need the following tools: scraper, sandpaper or grinder. The scraper technique is not difficult: the scraper is held with both hands and progressively moved in the direction of the wood fibers. The disadvantages of rough grinding are eliminated with fine sandpaper.

The restored surface is treated with a primer. It will protect the wood from moisture and provide good adhesion to the varnish. The varnish will give the furniture a gloss, protect it from the appearance of mold or fungus stains. It is applied similarly to paint, with a brush.

Cosmetic repair of cabinet furniture
Minor chips, scuffs or scratches are eliminated by simple manipulations:
- The edges of the chips are trimmed with a chisel, after which the damage is filled with wax. When it hardens, the excess material is removed, the surface is polished and painted over with a suitable color felt-tip pen or a special furniture marker. The varnish applied on top will protect the restored area.
If possible, it is better to buy furniture wax in the right shade, which will help mask any defects on the furniture.

- The procedure for repair in the presence of scratches is similar: a layer of wax, grinding, painting, applying a varnish coating. Coloring is not required when using colored furniture wax.

- Scuffs are painted over using a soft cloth on which dye from a felt-tip pen is applied.
- Cracks are filled with PVA glue using a syringe with a thin needle, and then tightened with clamps.
The following video shows how furniture wax crayons can easily mask chips on chipboard furniture.
And this video shows the technology of repairing large chips on the surface of the countertop using an enamel felt-tip pen, super-hard wax and acrylic varnish.
Edge replacement
A common occurrence is a peeled end edge. Having found an edge that is suitable in color, they prepare the tool necessary for repair: scissors, iron, paint knife. For smoothing, you need a roller or cloth.

- Cut blanks with allowances 1-2 cm long.
- Having moved the countertop upside down, apply the edge and smooth it with an iron. The heat will melt the glue.
- The glued workpiece is pressed against the end and smoothed with a cloth or a piece of felt, directing movements along.
- The excess edge is removed with scissors and a carpenter's knife.
- The joints at the corners are sanded with fine sandpaper.

Facade repair
Front parts of kitchen sets most often need updating. There are many options: restoration of the old coating, painting, use of self-adhesive film, decoupage. If desired, you can give the furniture a completely new, unique and original look.

Cover restoration
To restore the varnish coating with small amounts of damage, a mixture of linseed oil and alcohol will help. She wipes the damaged area, after which the cloth is polished. It will facilitate the process of using a mixture of GOI paste with kerosene.
In case of large-scale damage, the varnish is washed off with the help of special solvents. The softened composition is removed with a spatula, after which the surface is dried, sanded and varnished again.
Self-adhesive film repair
A self-adhesive film will give the headset a unique look.

Repairing facades with a film is simple:
- The surface is prepared: the fittings are removed, the facade is polished, degreased and primed.
- A piece of film is cut off with allowances of 2 cm on each side.
- The protective layer is removed from an area of 10-15 cm, the film is glued from the edge and at the same time smoothed out with a piece of cloth.
- Further, gradually unwinding the roll, you need to fix the entire fragment on the facade, avoiding, if possible, the appearance of air bubbles.
- When pasting ends and rounded areas, it is recommended to slightly heat the film with a hair dryer so that it is more elastic.

- If it was not possible to avoid their formation, the bubbles are pierced with a needle or gently incised to release air. It remains to smooth the film.
- Excess material is trimmed neatly.
More details - on the video.
The use of self-adhesive film when repairing often completely transforms kitchen furniture.

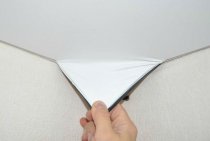
Removing old film from furniture
A small detachment of the old self-adhesive film is eliminated with PVA glue. The most difficult thing is to get to every hard-to-reach place.

But with large-scale damage, you will have to act radically: remove the film layer completely. This is done as follows:
- All accessories are removed. For convenience, it is worth dismantling the facade parts and working with them in comfortable conditions.
- The film is heated with a building hair dryer, then removed with gloved hands.
- The surface is cleaned of adhesive residues, degreased, and then ready for further finishing: sticking a new layer of film or painting.
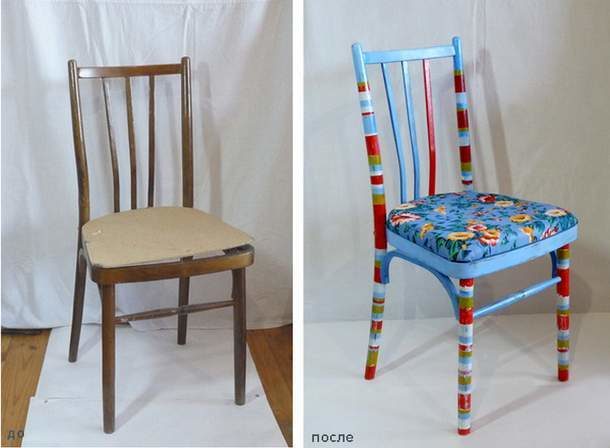
Furniture painting
It is often easier to paint the facade than to restore the old varnish coating. At the same time, you can radically change the design of the kitchen.

Competent painting includes the following operations:
- Dismantling the headset: removing fittings, hinges and drawers.
- Surface preparation: cleaning from dirt, grinding, dust removal, degreasing, priming. The latter is performed several times with breaks of 6–8 hours: this will reliably protect the material from external influences and ensure high adhesion of the paint.

If it is planned to paint with different colors, the part of the surface on which a different shade will be applied is pasted over with masking tape. The same is done with elements that need to be protected from paint ingress during the repair process.
It is best to paint with aerosol cans or an airbrush: it is easier to ensure the uniformity of color, there will be no brush marks or roller marks visible.

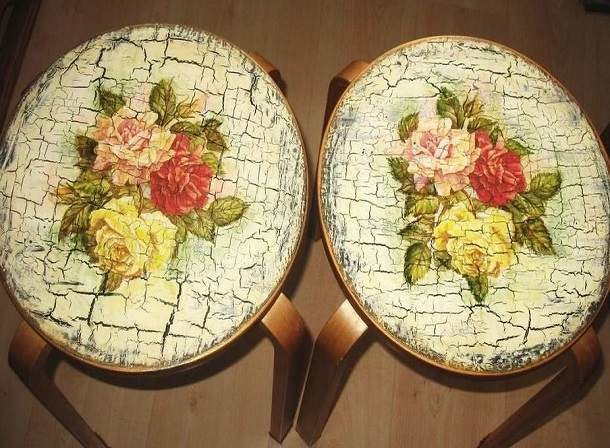
Decoupage
This technique is a kind of application made from various materials. Most often they use drawings cut from napkins or magazines.

It is recommended to stratify the paper so that the application protrudes less above the general level of the facade. Then the algorithm of actions is as follows:
- We prepare the surface: remove the handles and other fittings, clean the paintwork, grind and close up the defects.
- To achieve transparency of the varnish layer, mix white acrylic varnish and white paint.
- We paint the background in the direction of the wood fibers.
- The prepared drawing, cut out and thinned, is placed symmetrically with respect to the facade and covered with a layer of PVA.

- After letting the glue dry, we process the surface with fine sandpaper, after which we apply a transparent varnish composition.
- After sanding the dried varnish, cover with a new layer. And so on until the desired result is obtained.
A detailed master class on decoupage furniture from laminated chipboard - in the next video.
Another option for decoupage is the formation of ornaments using putty:
- We mix PVA glue and oil putty to the consistency of thick sour cream.
- We make a stencil of the future drawing from thick paper or cardboard.
- We fix the stencil on the facade, then apply the prepared solution with a spatula.

- After drying, we grind the ornament and varnish it: first transparent, and then matte.

Decoupage can transform the most nondescript furniture. There are a great many options for the materials and technologies used. It all depends on the imagination and artistic taste of the master.

Restoration of countertops made of chipboard or wood
It is quite easy to restore the sections of the countertop that are swollen from moisture or chips. The repair procedure will be as follows:
- We remove the exfoliated pieces of material.
- Dry thoroughly and sand the surface.
- We mix PVA glue with sawdust so that a thick mass is obtained.
- We fill the recesses with the resulting mixture, put the load and leave it for 24 hours.
- We apply a protective coating to the surface.

Burnt-out countertop restoration
Such damage is not uncommon for the surface of kitchen cabinets and tables. Replacing the countertop is a radical measure, but you can try to do without it, eliminating the damage yourself.

- With a pencil, we trace the boundaries of the defect with an allowance of 2 cm on an undamaged surface.
- We remove the burnt section of chipboard. For this operation, a milling cutter is used. They sequentially remove layers of material: first along the intended line to one depth, then with a longer cutter - the next layer. And so - until the complete removal of the defective material. The result is a stepped depression that looks like a miniature diamond and coal quarry.
- We make cloves along the cutout contour with a milling cutter for better adhesion of the patch material to the base. It will also help make the transition smoother.
- Fill the hole with wood putty. We cut off a piece of the desired size, knead it with our hands until it is soft and carefully tamp it into the cutout. You need to work quickly, as the putty dries in a matter of minutes.
- Excess material protruding beyond the plane of the tabletop is removed with a tool with a smooth edge. Some masters use an old plastic card for this. To speed up the process, a milling cutter with special grinding nozzles is used.
- We polish the smooth surface with the help of GOI paste with a nozzle with a soft coating. This will give the patch a shine.
- It remains only to paint the restored place, repeating the color and texture of the main part of the countertop.
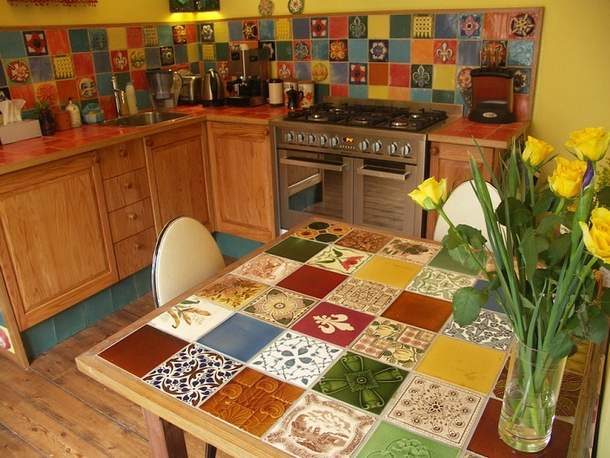
Making a tile countertop
What to do if the countertop is swollen or warped from moisture? The easiest option is to replace it with a new one, but there is no guarantee that it will not share the fate of the old one. The tile coating is more reliable, and it is not difficult to carry out such a modernization of the kitchen set.
-

- Tile worktop
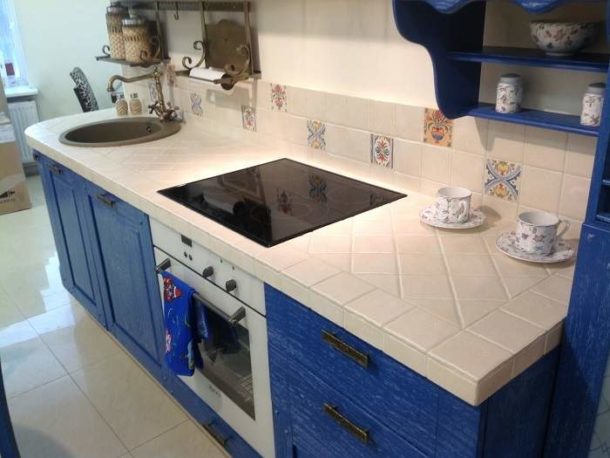
-
- Do-it-yourself tile worktop
-
- Kitchen table with tiled surface
-
- Countertop and apron from the same tile
Work order:
- The basis of the new countertop is made of expanded polystyrene sheets, fixed with liquid nails.
- Protective elements are attached to the same composition. Metal plinths are best suited for these purposes: angular, connecting the surface of the tabletop and the wall, end and thin, serving as a border for tiles.
- Tile adhesive is applied to the new base surface of the countertop.

- Tiles are laid out. Its height should correspond to thin skirting boards around the perimeter of the countertop.
- After the glue has dried, the joints are grouted. It is recommended to use silicone-based waterproof compounds. This will prevent moisture from entering the structure.

The result is a smooth and durable surface that is not afraid of water.
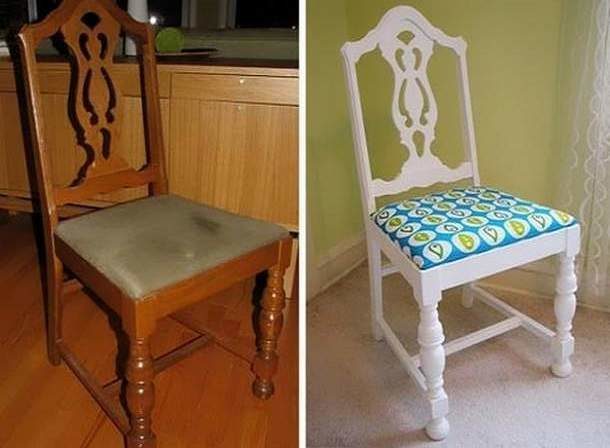
Chair repair
Damaged covers of old kitchen chairs are restored by the above methods. The exception is furniture with soft seats: dragging them without skill is quite problematic, although possible. But there is an easy option: make a cover. In this case, the constriction is not required, and the appearance problem will be solved.
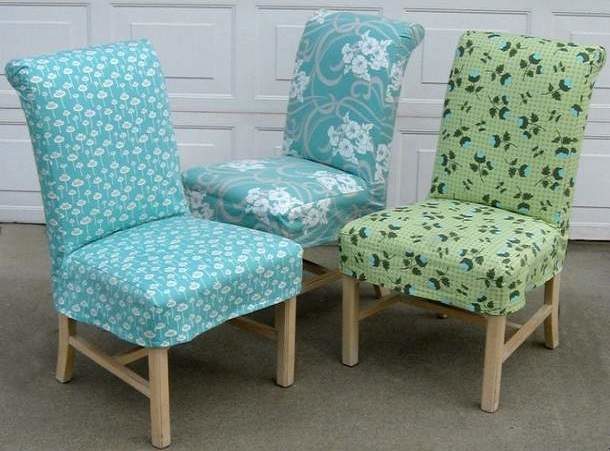
Loose parts are strengthened with wood glue. In exceptional cases, self-tapping screws are used with mandatory drilling of holes for them. Coloring and decoupage transform an old unsightly chair into an original and beautiful piece of furniture.
Do not throw away old kitchen furniture that has lost its external gloss. With a little imagination, you can give it a completely new look, adding originality to the interior of your home.