Due to the fact that the choice of building materials is constantly increasing, it became possible to use drywall in the bathroom. The material specially designed for wet rooms is somewhat different from conventional GKL and is called moisture resistant (GKLV). Moisture-resistant drywall in the bathroom will help significantly speed up the repair work, as well as provide the opportunity to choose the shape of the room in accordance with your own preferences.

Basic information about moisture resistant drywall
GKLV is very easy to distinguish from ordinary drywall, since the upper shell of the material is made of special green paper. It acquires its moisture-resistant properties as a result of processing with special substances that protect the material from moisture and the formation of fungus.
Benefits of using GKLV in the bathroom:
- Environmental Safety.
- Light weight and easy handling.
- The ability to turn any dreams and projects into reality.
- Sheets always have standard sizes, which allows you to calculate the required amount with absolute accuracy.
- Moisture-resistant drywall is intended for those rooms in which the humidity exceeds the norms allowed for ordinary plasterboards.

But at the same time, it is important to remember: even when installing a material that is moisture resistant, it is necessary to make hydro and vapor barrier.
Based on all these characteristics, we can conclude that the walls of drywall in the bathroom will be reliable and will last for a long time.
Preparatory work
First of all, when installing a moisture-resistant material with your own hands, you need to take into account some features.
- Necessary provide good ventilation in the bathroomby installing an electric fan.
- When creating a base from a profile, it is worth installing reinforcements in those places where mechanical damage is most likely.
- After the plasterboard finish is completed, it is necessary to pay close attention to the waterproofing layer.

Most often, for the installation of drywall, a frame is made from a profile specially designed for this purpose. But you can attach the material directly to the wall. In this case, you must first prepare the surface:
- It is desirable that the wall is perfectly flat. The allowable difference should not exceed 5 millimeters.
- In case of significant surface imperfections, it is necessary to level it with plaster.
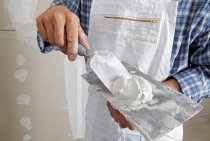
- For plastering, only cement-based mortar is used, to which special water-repellent substances must be added.
- After the solution has dried, it must be treated with a primer, which also has hydroprotective properties.

Important! When installing the material with your own hands, you need to make sure that the base is completely dry, which will take at least two days.
Do-it-yourself installation of drywall in the bathroom
Drywall in the bathroom can be laid in two ways: with pre-installation of the crate from the profile and by direct attachment to the wall.
In order to perform the correct installation of the material with your own hands, you must clearly follow the instructions.
Glue mounting
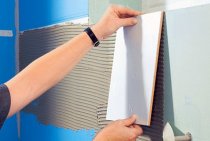
First, consider the installation of moisture-resistant drywall without installing a frame, when it is simply glued to the wall:
- The preliminary preparation of the wall is carried out, that is, the repair of all damage and subsequent processing with a special waterproofing primer.
- Drywall is treated with a moisture-proof primer on all sides, including the ends.
- On a sheet of drywall in small piles, the distance between which should be 25–40 cm, a special glue (“Perflix”) is applied. For greater reliability, you can spread the adhesive over the entire surface with a notched trowel.
- The sheet is carefully applied to the wall and pressed, then leveled.

The first sheet will serve as a guide, so it is advisable to fix it with at least two screws.
- After this, all seams must be treated with the same glue, which will replace the putty and fasten the sheets together, and then with a waterproofing compound.
- Upon completion of the process, it is necessary to treat the entire surface with a moisture-resistant putty. After that, you can paint the wall or install tiles.
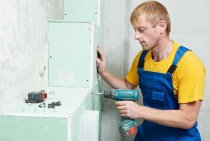
Mounting on a profile
When installing drywall on a frame from a profile, the possibilities of the material expand. Under it, you can hide wires, heat-insulating materials, with its help you can change the shape of the room, make various niches or shelves that will be very useful in the bathroom.
When installing drywall with your own hands on a frame made of metal profile you need to follow certain rules:
- When mounting the frame, it is important to remember that places with maximum load must be further strengthened.
- For the bathroom, the distance between the profiles must be made smaller than in other rooms. This applies to both horizontal and vertical directions.
- At the joints of the GKLV with the floor and ceiling, as well as in the corners and places where the pipes exit, it is necessary to lay a sealing tape and process it with a sealant or mastic with water-repellent properties.
- After assembling the frame, it is worth taking care of all passing communications. Pipes can be insulated with mineral wool to prevent condensation, and electrical wires are placed in a special corrugation.
- If you want to make shelves and niches, you need to take measurements with increased accuracy, since the aesthetics of these decorative additions depend on this.
- After the drywall fastening is completed, you can start sealing the seams and fastening points with a waterproofing compound and moisture-resistant putty.

How to make a drywall bathroom countertop
Drywall in the bathroom can be used not only as a facing material for walls and ceilings, but also for the manufacture of countertops under the sink or bath screen.
Making some elements with your own hands is not only for the sake of saving money. A drywall countertop will help save space, which is a powerful argument for a small bathroom. As an addition, you can also make shelves in it that will help you use the space to good use.

In order to be able to create an aesthetic and beautiful element of the interior, you must first make a drawing with all dimensions.
Work progress
Direct manufacture of countertops under the sink with your own hands:
- First of all, it is necessary to carry out all measurements with maximum accuracy so that the countertop fits perfectly into the allotted space. Pay special attention to the cutout for the sink.
- Further, in accordance with all dimensions, a frame is made from the profile. You can also use wood slats, but in this case, impregnation with special waterproofing compounds will be required.
- First, a cutout for the sink is marked on a drywall sheet, then the necessary cutout is made using a jigsaw.
- Brackets are used as the main fastening, which are firmly fixed on the wall. A drywall form with a cutout for the sink is attached to them, a sheet of the same size is fixed at the bottom of the frame.

- The ends are sheathed with drywall.If you want to give the edges a curved shape, you need to fix a special arched profile and bend the drywall part with frequent cuts, which will then be filled with moisture-resistant putty.
- The entire surface must be treated using a special primer with water-repellent properties, and then apply a layer of putty.
The finished countertop is coated in two layers with a liquid waterproofing mixture. As a finish, it is best to use small tiles or mosaics.
Making an original countertop under the sink with your own hands, using drywall as the main material, is not difficult at all. A little patience and accuracy, and everything will definitely work out.