Operating procedure
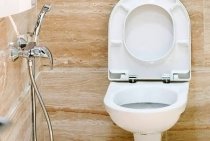
Starting a toilet repair, first of all, it is necessary to turn off the water supply to the tank, fix the seat, or remove it altogether. The modern market is full of various means for gluing any materials and surfaces.
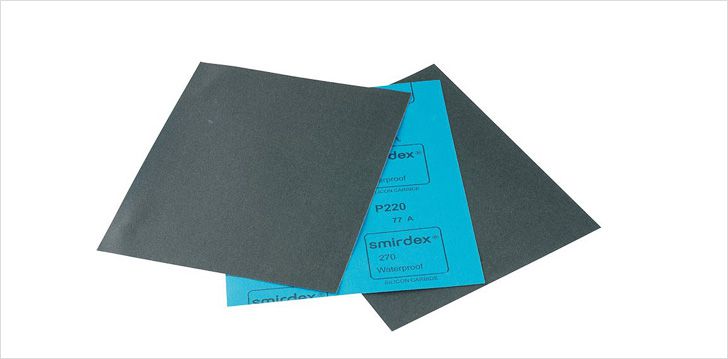 Fine sandpaper
First of all, the damaged surface should be sanded with fine sandpaper. This applies to light cracks. In the case of enhanced stripping of a complex cleavage, gaps may form along the edges, which will be difficult to glue together, and the strength of such a seam is not guaranteed. Therefore, such faults should be treated very carefully and only slightly. Then you need to brush off or blow out dust and small debris with a hairdryer and be sure to degrease the surface with acetone or gasoline. After that, the treated surface should be dried from moisture. Now you need to carefully apply a thin layer of waterproof glue around the edges, and after a while, press hard on the surfaces to be glued. The harder you press, the more secure the seam will be. After the glue has completely dried, the connection should be strengthened. To do this, it is necessary to grind it with an emery cloth, degrease it and dry it properly. After that, apply a layer of adhesive and attach an amplifier - it can be a metal or plastic strip. After gluing the hardener, it is necessary to clean it with a special grout for seams ceramic tiles.
The same procedures are performed if it is necessary to glue the toilet lid, with the only difference being that it is recommended to fix it in a horizontal position to facilitate gluing.
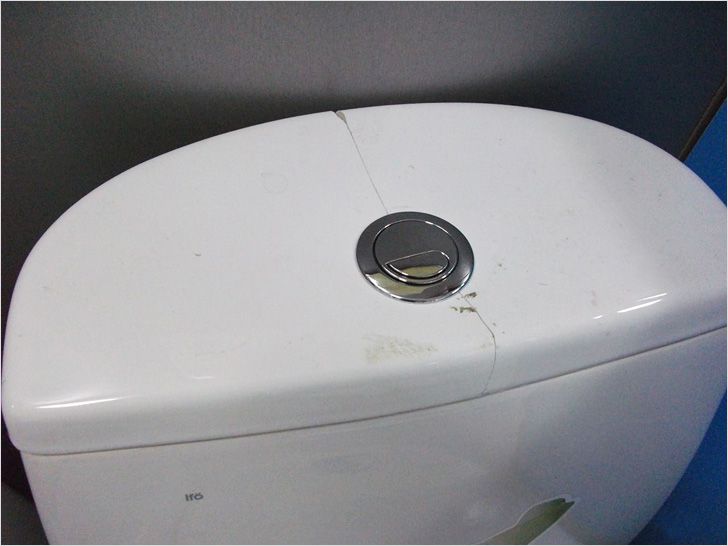
 A piece broke off at the mount of the tank
If not just a crack has formed on the toilet bowl, but a piece has broken off that does not affect the tightness of the toilet bowl, the repaired surface should be cleaned of small debris, degreased with acetone or gasoline and dried thoroughly from moisture. After that, it is necessary to apply glue to the cleavage site and press the broken fragment. To securely fix the repaired surface, you must use a tourniquet. The instructions that came with the adhesive have the necessary information about the fixing time.
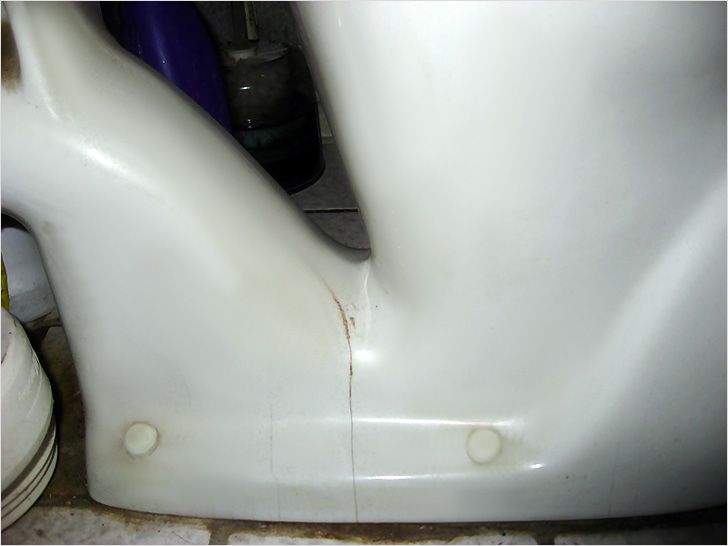
If it is necessary to glue the toilet bowl, it is better to use resin and hardener - they should be mixed according to the manufacturer's instructions. Then be sure to turn off the water supply to the tank, wipe it and dry it.
It is very important that the bonding area is completely dry. After complete removal of moisture, it is necessary to degrease the surface to be glued with acetone or gasoline.
After that, a resin mixed with a hardener is applied to the repaired area and carefully fixed. To do this, you can use adhesive tape, sticking it on the outside. After the adhesive has completely dried, it is necessary to sand the seams with a fine sandpaper to avoid contamination.
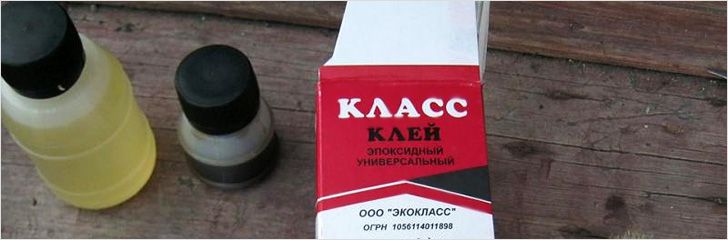 Epoxy adhesive
If a crack has formed on the toilet, affecting its tightness, then it is necessary not only to seal it, but also not to allow it to increase in size.
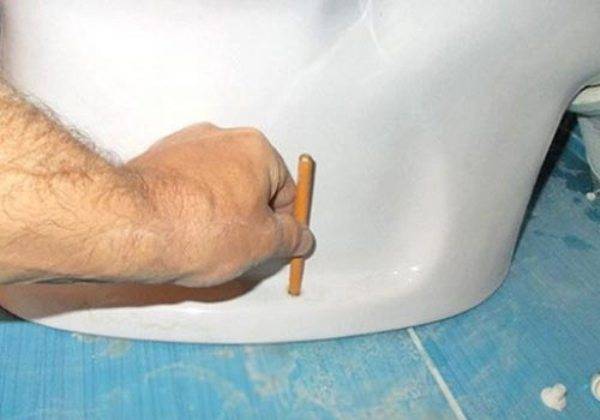
First you need to drill two holes on the tile with a thin drill bit from two ends of the crack. Thanks to this, it will stop lengthening. After that, using a grinder with a disk on a stone, you should deepen the entire crack by about half the thickness of the toilet bowl wall. This must be done very carefully, since overheating of the surface can only worsen its condition and cracks may appear in other places. The recess made and the drilled holes must be filled with a mixture of resin and hardener, the excess removed, and after drying, sand the seam.
It should be remembered that sealing the surface of the toilet bowl is considered a temporary measure, especially if the tightness has been broken. However, if the seam does not bother, a toilet repaired with epoxy resin can last a very long time.
How to install a toilet on a tile.
Often we are asked: "Is it possible to install a toilet on a tile?". Yes, you can. But this task is not an easy one and, depending on the chosen technique, requires due professionalism or time.
We will describe several ways in which a toilet bowl is traditionally installed on a tiled floor. And you yourself choose the most suitable for yourself.
To get started, you should stock up on the following materials and tools (some of them may not be needed, depending on the chosen method of installing the toilet on the tile):
- corrugated pipe; - a flexible hose for wiring cold water to the toilet; - ball valve to control the access of water to the toilet; - drills for concrete and ceramic tiles; - drill or perforator; - adjustable wrench; - screwdrivers; - hammer; - pencil; - core.
Method 1. Installing the toilet on a tile with bolts.
As part of this method, the installation of a toilet bowl on a tiled floor is carried out by bolting. The advantage of this method is that the toilet is easy to dismantle without damaging the product itself or the cladding, and it is also easy to put it back or replace it with a similar model in case some kind of trouble happened to the old one.
Scheme of work.
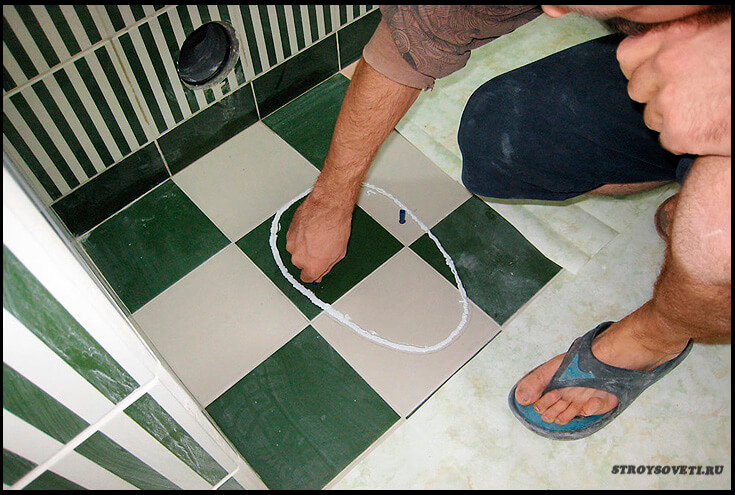
 The toilet is placed in the place where it is planned to be mounted and with a pencil, through the bolt holes, marks are made on the tile. Marks must be placed strictly in the center of the holes so that the bolts after drilling lie exactly in the holes.
Next, the toilet is removed and in the places marked with a pencil, holes are drilled in the tiled floor to accommodate the dowels. For drilling tiles and concrete, various drills are used.
Attention! How to properly drill a tile on a wall or floor so that it does not crack is described in detail in our article - “How to drill a tile”. After the holes are drilled, they are cleaned of dust and filled with silicone, which will perform the task of waterproofing.
Then dowels are inserted into the holes and a toilet bowl is placed. A silicone sealant is applied along the contour of the toilet bowl, which will prevent moisture from entering under the product. Then it's up to the small - we insert the bushings into the drilled holes and tighten the screws
After the holes are drilled, they are cleaned of dust and filled with silicone, which will perform the task of waterproofing. Then dowels are inserted into the holes and a toilet bowl is placed. A silicone sealant is applied along the contour of the toilet bowl, which will prevent moisture from entering under the product. Further, the matter is small - we insert bushings into the drilled holes and tighten the screws.
If excess silicone has come out from under the base of the toilet, we remove them with a rubber spatula.
Preparatory work
After all the necessary tools and materials are prepared, everything superfluous is taken out of the bathroom, making room for the toilet bowl.
The first thing to do is to put the fixture on the intended location and mark its contours. In addition, you will need to apply marks corresponding to the mounting holes. Next, the plumbing is pushed aside, and the drilling sites are treated with a center punch, causing microscopic chips on the surface of the tile.
Drilling ceramics should be done in two steps. First, a tile drill is used, and after making a hole in the tile, the tool is changed to one that is designed to work on concrete. The cavities prepared for fasteners are protected from moisture by filling them with silicone sealant.
On this, the preparation for installing a toilet bowl with an oblique or horizontal outlet is considered complete. If you plan to install a device with a vertical drain, then prepare the inlet of the sewer system in advance and clean it from dust and dirt.
Best Answers
White Oleg:
If you mean floor tiles - don't even bother with "liquid nails" - they become very hard when cured, and the toilet seat is far from always even.. And of course, no epoxy! Use white silicone. Set the toilet in place, circle the sole along the floor with a felt-tip pen, remove it, apply a silicone snake inside the contour, only along the contour, it is not necessary in the middle, and install the toilet bowl. Remove excess extruded silicone with a dry cloth. In a day it will be very firmly glued - strong enough for permanent, repeated use :))) ) Remove the toilet bowl - no problem either - cut off the silicone between the tile and the sole with the blade of a clerical knife - and remove the toilet bowl .. . There are no holes in the tiles, no traces of the old toilet bowl at all ...
Karb O'Foss :
And anchor fasteners, not provided? Epoxy is better, you can't go wrong.
Renat Abdulin:
I think not, so something more reliable is needed
deathcore:
Yes. There are special liquid nails for plumbing!
Azerbaijani in Law:
Just like silicone breasts won't hold up if they're duct-taped.
Michael:
toilet bowls have different bases
TRAMP:
Will survive! I have it sealed with sealant. (DEADLY)
Yar:
There are liquid nails that can withstand 75 kg per cm.
Subscriber63:
Actually, no, anchors are intended for this, and with liquid nails - you stupidly throw away money (((((and what about liquid nails for plumbing, they were invented to lure people, they say they need to be bought, so that there would be some kind of variety, but on in fact, it is not so, their only use is moisture insulation, well, or glue all sorts of hooks, and the toilet bowl, here you are mistaken ((((((((((((((((((((( ((
Sorry, move over bitch!
The toilet will stand, and those asses that flop on it are unlikely))))
Chuck Casemerczak:
With dismantling, then you'll get fucked. You never know when you come drunk, you break it by accident. There is a toilet fixture for a specific model. Somehow I found in the garbage dump a completely brand new Czech toilet with a tightly glued split tank. Pulling this off is unrealistic. It's a pity. That's how good things suffer because of stupidity.
Alexander Kudryavtsev OLD . Answer:
They keep me. Surfaces must be carefully prepared
Heinrich Mont:
What are you all doing sitting on the toilets? Why are you making them so secure? Or are you trying to lay out the excreted feces with a figure eight? Or a heart? Or an inscription? He sat down, shat, wiped his anus - and that's all business. Yes, washed away...
::p:::w:::i:::o:::::::::::$:::e::
If you're going to glue, don't bother with dismantling. Then calmly cut off any glue with a hacksaw blade for metal. Place thin spacers in advance to make sure the canvas will go there.
Uncle from the Future...
For 7 years now I have not drilled the floor, only on colorless silicone ... And if the toilet sways on the floor / then put pieces of plastic on the back before gluing .... It is very convenient to use tile wedges for this ...
Sergey:
They will last six months or a year if you stick it very carefully, then most likely it will loosen and peel off. Maybe, of course, you can pick up very good super-strong liquid nails that will last forever, but I wouldn’t really hope for it. If, if it is not possible to put standard fasteners, fasten them to at least a couple of self-tapping screws with washers, they will not allow the toilet bowl to loosen and the seam around the perimeter to pass with silicone, so that moisture does not get there during cleaning.
Eugene Orlaty:
Maybe silicone.
natalia to:
withstand if glued on extra strong or super strong, you can choose here: .mirgermetikov /collection/klei-zhidkie-gvozdi
max marson:
Oh sure.
Nikolai Ostrovsky:
Will keep fine. In addition to liquid nails, there are other reliable adhesives. I always choose good glue and order in 2-sklad.
Expert answers
Grohman:
Gouge the tile, there should be a wooden board to it, nail it then put a new tile !!!
pszek:
Collect some Styrofoam in some container (not plastic) pour a little bit of acetone or thinner. Styrofoam will dissolve before your eyes.With this, smear the bottom of the toilet bowl and the place of gluing, put it on and let it stand for half an hour. Guarantee "forever-tear off will be possible only with tiles!
Mikhail Sidorov:
Lubricate with Vetonit, but you will have to drill and screw it. For reliability.
Sasha:
Liquid nails. It's better to screw in the bolts.
Trigger:
Usually they put it on a sanitary sealant - in principle, it also turns out a good glue, but for reliability pushes it’s better to talk all the same
Evgeny Levichev:
Buy poxypol (this is the name of the glue), degrease the gluing points with acetone or similar solvents, then, according to the instructions attached to the glue, mix the components. Apply glue to the surfaces to be glued, install the toilet in its place. But keep in mind, anything can happen in life, and any good glue complicates dismantling.
User deleted:
the toilet can be glued with silicone sealant
bibigon:
sealant, why glue? it was in Soviet times that it was also concreted into the floor, but this is a rut, it is stable if the floor is even.
Pavel Galchin:
Clay Mome...
nnn:
Perforate holes in the floor and plant on liquid nails. will keep capital.
Georgy Zaitsev:
continuous or pointwise
Sergey Matvienko:
Put the toilet back where it was. It wakes up more reliably if you screw it on the screws.
Konstantin Sukhorukov:
A couple of times they glued the toilets with Poxipol glue - it holds excellently. "Craftsmen" rolled a warm floor under the toilet, so it was scary to drill - I had to glue ...
Violet:
Liquid Nails
Psychedelic Kote Under Drugs:
better for bronze bolts
Vladimir Karandashov:
It must be placed on the sealant and fixed with dowels.
bibigon:
no need to glue, put it all, you can use silicone
Anatoly Yakovlev:
For ordinary sealant.
offline:
if you don’t drill it into silicone, liquid nails, in my opinion, are not very suitable for moisture. rooms, and by themselves, when they dry, they are fragile and brittle, and the toilet bowl you have, at least a little, but when used, will “walk” .... blah - blah - blah .... in short, glue on silicone))
Online magazine Tips for hosts:
I would not recommend attaching a toilet bowl to glue. It sits on screws, which are sold complete with decorative caps. Two screws with tenth key heads, two washers, two plugs (dowels) 12 mm thick and two caps (usually white). And if glue, then epoxy, two-component, moisture resistant.
Drill holes for the dowels with a small hammer drill with a 2-3 kJ impact, very carefully. If there is no skill, first without a hit, we pass the tile with a diamond drill, and then we work with the usual
We turn on the blow after the tile is drilled. Works for 15 minutes and the bulldozer does not turn off.
But how much you carry with glue, how much it will seize and what quality it will give. . Question.
run:
When you start to shit, it will break it from the pressure along with you
Alexander:
why glue it on?
Alexander Kudryavtsev OLD . Answer:
Silicone sealant for wet areas…. BUT! replacing the toilet in which case it will be problematic ...
hysterical bird:
we were recently glued to silicone and the bolts were changed,
Causes of cracks
 Tank lid cracked
Quite often, cabinets with household chemicals, tools and other things hang over the toilets, dropping which can damage the surface of the sanitary ware. It makes sense to close the toilet lid every time to avoid getting objects into the device that could puncture the bowl. At the same time, it should be remembered that it is impossible to lower the toilet lid sharply and strongly, since these actions can also inadvertently damage it.
In addition, it must be remembered that ceramics do not tolerate temperature changes. Due to the sharp expansion of the material, internal pressure increases in it, resulting in a crack. Do not pour boiling water into the toilet and direct the hose into it when draining very hot water from the radiators.
 cracks
Another reason for the appearance of chips can be improper installation of a plumbing fixture.During assembly, it is necessary to ensure that the bolts are tightened evenly, but not to apply excessive physical force. Otherwise, the appearance of cracks is inevitable, and after a while, even if for a long time, both the tank and the toilet bowl itself may burst.
If a crack or chip still appears, you can try to glue the toilet bowl on your own, without resorting to the help of a specialist. First of all, you need to know that toilet bowls are produced by various companies using various technologies from faience, steel or porcelain.
Ceramic toilet bowls are the most popular because they have standard parameters for installation and fasteners. Metal toilet bowls are mainly installed in public places, in summer cottages or in case of a special design decision.
Do-it-yourself fixing the toilet bowl to the floor with glue
Before starting the installation of the toilet bowl, the location of the device is marked on the floor. The marker also marks the centers of the holes available on the sole of the toilet bowl and intended for fixing plumbing. After that, fixing the toilet bowl to the floor on the dowels with your own hands can be considered complete. If for some reason their quality does not suit you, replace the fasteners with your own. Fasteners, in most cases, come with the toilet, but if you have a different situation, you can purchase them at any specialized store.
Experts in this field recommend putting the toilet on a special gasket, which you can make yourself from a sheet of old linoleum, rubber is also perfect for such purposes. To make a gasket, you need to put the product on a sheet of material, and then circle its leg with a marker, pen or pencil. After that, cut the gasket according to the markup. We “try on” the toilet bowl on the place prepared for the equipment and draw it around the contour.
Another way of attaching the toilet to the floor - landing on glue - provides a high level of bonding strength. But in this case, the quick dismantling of the product, if necessary, is excluded. Therefore, the method of installation on glue is used where installation involves the long-term operation of plumbing without the prospect of replacing it.
Important! As mentioned above, the adhesive for attaching the toilet to the floor can be prepared independently. To do this, warm up to + 50 ° C 20 parts of epoxy, then add 4 parts of solvent and 7 hardener to it
Mix them, and then pour 40 parts of cement.
Previously, a very popular way to fix the toilet was to wall it up with concrete - a small recess was made in the floor, plumbing was installed there and its lower part was smeared with mortar. Very often, products mounted in this way can be found in old multi-storey buildings (if the residents did not replace the toilet bowl). And they do it themselves in order to save on installation services.
You can fix the toilet bowl to the floor on a tile or other even and solid base using a standard set of fasteners. This method can only be used if there are no large drops and irregularities on the floor surface. Floor tiles can be sanded to make them rougher.
Installation of a wall-hung toilet is only possible on anchor fasteners, otherwise it will fall off along with the tiles. This mounting option is used in practice more often than others. We drive dowels into the holes prepared in the floor. We install the toilet and carefully screw it. It must be remembered that excessively strong tightening of the ceramic from which the device is made can be damaged. Experts advise lubricating the screws with grease or graphite before work, so that later, if necessary, they can be easily unscrewed.
The most common way to install a toilet on the toilet floor is by dowels and bolts.This is a practical and relatively simple method, but it has two problems. First - you need to drill a tile
This event requires special care and accuracy - any mistake will lead to damage to the flooring. The second problem of fixing plumbing with dowels is that this installation method is designed for relatively light products.