What mistakes are made when laying
The wrong tile
Going to purchase tiles, people are more often guided by two factors that affect the final choice - design and pricing. But having decided on the purchase, they do not check the tiles for identity. This is a gross mistake that can result in uneven joints between tiles, tiles of different sizes and shades. Before buying, you need to check the dimensions of the tiles. It is better to take several tiles of the same batch from different boxes and compare them with each other. Ceramic material must be the same among themselves along the perimeter, the height of the product.
Purchase of glazed ceramics
The bathroom is a place where there should be increased security. Leaving after a shower, a person should not slide on the floor, as on an ice rink. Because glazed tiles are not suitable, it is worth buying non-glazed material. Safety must be paramount, because a fall on a ceramic floor can result in serious injury to a person.
Choosing the wrong tile mix
Laying tiles on the bathroom floor requires the correct selection of mixtures for fixing the tiles. With the current choice of material, the need for cement mortar for laying has disappeared, manufacturers offer good mixtures that will facilitate the process of laying tiles on the floor. For the bathroom and toilet, they buy a primer, glue and grout exclusively for floor coverings. The base of the bathroom and toilet is constantly subjected to heavy loads, therefore it is necessary to lay the tiles on an adhesive of increased fixation.
Particular attention is paid to the preparation of the mixture. Do not deviate from the instructions on the packaging of the mixture, the proportions must be strictly observed when preparing the adhesive emulsion
To do this, you need to carefully study all the recommendations of manufacturers. The glue should be homogeneous, without lumps.
Poorly prepared base.
How to lay tiles if the original base is uneven? Many try to solve the problem with a large amount of glue. This is a fatal mistake that guarantees a curved floor with height differences. The fact is that leveling the surface by laying tiles with a large amount of glue will entail landslides of the adhesive base and the likelihood that the tile will simply “float” reaches almost 100%.
Therefore, before laying, attention must be paid to leveling the surface. Correctly laying tiles on the floor in the bathroom is possible only on a well-prepared plane
Measurement error made
Trying to lay tiles without careful measurements is to find all the work to fail. Without a corner, a rubber mallet and a water level, it is impossible to lay a tiled floor evenly without a laser level.
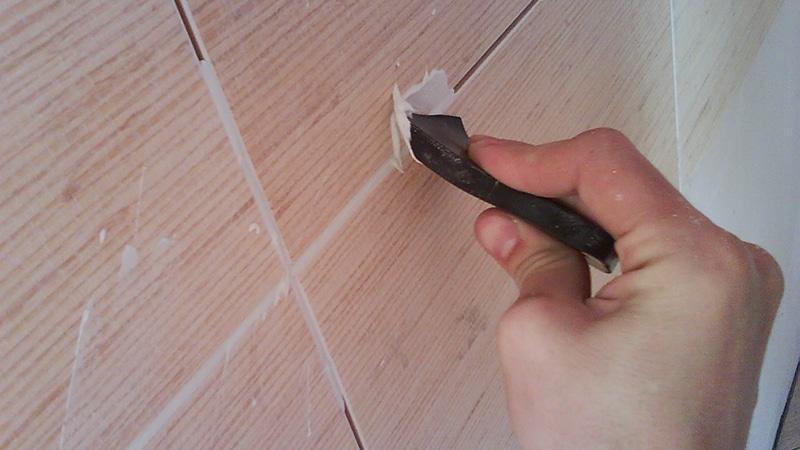
The laid row of tiles must be checked with a level, the defects are leveled with a rubber mallet. Why a rubber mallet and not an ordinary one? The ceramic coating can simply burst or chip when using an ordinary hammer, so a rubber hammer should always be at hand.
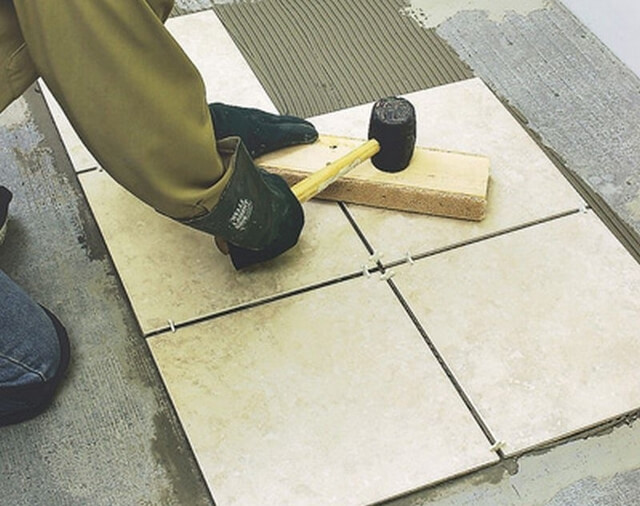 Leveling tiles with a rubber mallet
Bathroom tile basics
 In order for the tiles to last as long as possible, it is necessary to follow a certain order of laying tiles in the bathroom. Laying tiles on the floor is easier. Therefore, if there is little experience, then it is better to start with the floor.
If laying is planned parallel to the walls, then it is better to start from a visible angle for more decorative qualities of the finished surface. Diagonal laying is usually done from the middle of the room
Particular attention should be paid to tile joints, since the decorative properties of the surface depend on their size.
Adjustment of the sizes of seams is carried out by means of plastic crosses. It is necessary to ensure that air does not form under the tile, which can lead to the destruction of the material. Be sure to check the level. Trimming tiles is done using a tile cutter or grinder.
Consider the sequence of laying tiles in the bathroom on the walls. Here the situation is more complicated, since you have to work on a vertical surface. In this case, there are also certain rules for laying tiles in the bathroom.
First, you need to start laying from a visible angle. Secondly, laying is carried out from a profile nailed to the wall and aligned horizontally. It is fastened at such a height from the floor that only whole tiles are laid under the ceiling.
After the glue dries, the bottom row is reported. To apply glue here, you can use a notched trowel that will allow you to adjust the layer. Too much adhesive can cause tiles to slip or fall off.
Sometimes you have to make slopes of tiles in the bathroom, for example, for niches for sewer pipes. In this case, you should come up with spacers, since when gluing tiles on the upper slope, it may fall off. To decorate the joints, external and internal corners for tiles in the bathroom are used.
The final step is grouting the joints with a mixture of the appropriate color. The excess mixture is removed with a sponge, and then the entire tile is wiped clean.
Thus, it is clear that the technology of laying tiles in the bathroom is quite complicated. But with a certain amount of diligence, it is quite feasible on our own
It is very important to strictly follow the laying rules and use only high-quality building materials.
Additional Information:
Reasons for the deformation of the tiles in the bathroom on the walls and floor
Bringing tile joints in order when laying tiles on the floor
How to clad aerated concrete with clinker tiles
How to choose the optimal layout
Before choosing a tile, it is worth drawing a sketch by hand to determine the type of cladding. To do this, you need to draw a detailed plan of the room with all sizes and furnishings:
- carefully measure the floor and walls, openings, indicate the parameters on paper;
- draw up a drawing of the bathroom and be sure to display the location of the doorway, window (if any), all niches and ledges;
- indicate the location of plumbing fixtures, sockets, switches, pipeline outlets.
Now that the plan is ready, you can choose the optimal layout scheme using colored pencil sketches. Such a sketch will help determine the best location of decorative elements, places for cutting tiles, problem areas. Be sure to take into account the degree of complexity of the work, if you plan to do the cladding yourself.
Diagonal way
- the most complex and laborious.
This method has a number of advantages:
- visually expands the area;
- if mistakes are made in the layout and the walls are non-perpendicular or non-parallel, it hides this drawback;
- gives a beautiful and original drawing.
And also cons:
- even slight deviations in the size of the tiles are not allowed;
- more waste.
With the "diagonal" method, the first row begins to be laid from the cut tiles diagonally, which increases the percentage of waste.
The tile joints are located perpendicular to each other and at an angle of 45 degrees to the walls. Checking the accuracy of laying tiles in the bathroom is carried out with a level and a square.
The following options for laying tiles in the bathroom are a two-color combination of already known methods.
Ways of laying ceramic tiles advantages and disadvantages
Laying tiles in the bathroom is carried out according to various schemes, each of which can emphasize the advantages of ceramic coating and allow you to use the geometry of the room with maximum benefit.Below are the most popular styling models with an assessment of their practicality.
direct method
The most simple to implement and cost-effective. Tiles are laid in even stripes parallel to the plane of the floor and walls. Suitable for both square and rectangular tiles. The second option, depending on the location, can contribute to a visual increase in space.
This order of laying tiles in the bathroom is often used among beginners in this field.
Off the beaten track
Such a laying scheme is similar to the installation of brickwork, when the tiles are laid in a checkerboard pattern with a shift of subsequent rows relative to the previous ones by 1/2 of the length. This option looks especially advantageous when laying tiles in the shape of a rectangle, the sides of which are in a ratio of 2 to 1. The advantages are similar to the direct layout method, with the difference that there will be more waste.
Laying apart is ideal for rectangular tiles, called "boar", as the result is a surface that mimics real brickwork.
Diagonally
This laying method is characterized by the location of the fragments at an angle of 45 degrees relative to the line of junction of the floor and walls. This technique looks very impressive, especially on large-scale surfaces, but is more difficult to work with. An expanded panorama with lines crossing diagonally appears before your eyes. For a limited space, this method is not suitable, as it will optically reduce the area of \u200b\u200bthe room. Among the shortcomings, one can note the increased complexity of the work and the significant labor costs associated with the need to trim the tiles. Diagonal laying is associated with a large level of waste, and therefore is quite expensive.
The performance of work on diagonal laying will require a sufficient level of skill from the worker. For beginner finishers, such a scheme may be too complicated.
Modular
The modular scheme was invented to create an unusual styling. Drawings that are distinguished by originality and modern design can be obtained through the use of tiles of different sizes, but with multiple edges. The main difficulty lies in the correct calculation of the required amount of finishing material. To this end, a schematic layout plan is created to scale. Be sure to take into account the level of thickness of the seams.
The modular scheme is in many ways similar to the stacking method, but the calculations for its creation must be as accurate as possible.
How to lay tiles in the bathroom
To properly lay the tile, you will need to follow a number of recommendations:
- It is necessary to start laying tiles on the wall from the second row, the count is from the floor. The first row of tiles at the initial stage remains empty; during installation, it is worth focusing on the markings.
- The adhesive is applied to the base, not to the tiles. For convenience, use a notched trowel, it will create the desired texture.
- Do not press too hard on the tile during installation, if you overdo it, the ceramics may not withstand and crack or break.
- Excess glue is removed with a foam sponge.
- To ensure that the seams between the tiles in the bathroom are the same in width, use special crosses. The optimal width is a few millimeters.
- Check each new row for horizontality. Even the slightest deviation later can lead to masonry distortions. This can happen due to slightly different sizes of tiles, which periodically happens with domestic ceramics.
- When facing corners and ledges in the bathroom, you will need to cut the tiles using a grinder or tile cutter.
- If you need to make notches, you can simply gently break them out with pliers until you get a hole of the required size.
You can see in more detail how to lay tiles on the walls of the bathroom with your own hands on the instructional video.
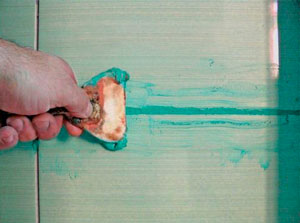
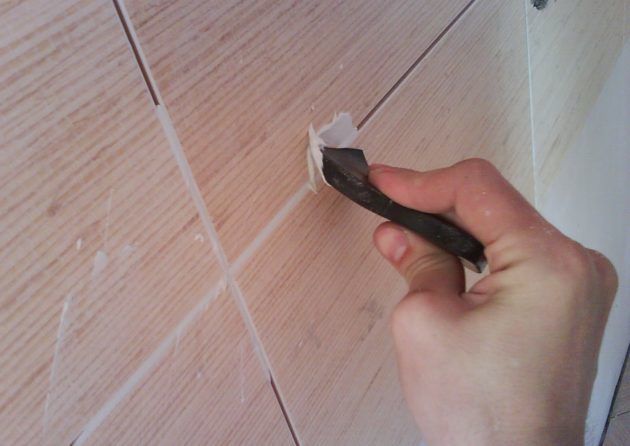
Seam processing
Having figured out how to properly lay the tiles in the bathroom, you can proceed to consider the next most important step - grouting the tile joints. How to process ceramic products yourself? You need to start the grouting process one day after laying the last tile.
With a sponge, the remaining glue is removed from the tile. The grout solution is prepared in accordance with the instructions. Apply it inside the seams with a rubber spatula. The tile mortar hardens within half an hour. Then it is wiped with a damp sponge.
 Processing seams on tiles
In order to avoid the formation of mold and fungus in the future, the finished seams are treated with a special mixture. Wide seams are rubbed with a mixture of sand, to which it is recommended to add latex. Latex will protect the seams from cracking, eliminating the need to replace the tile. It also performs a decorative function in the bathroom, the design of which will become unique.
The use of latex does not require dilution of the dry mixture with water. It is enough to mix them and leave for a while. The finished grout is applied with a brush or cloth. After drying, the seams are washed again with a dampened sponge.
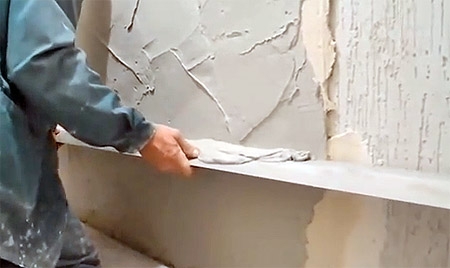
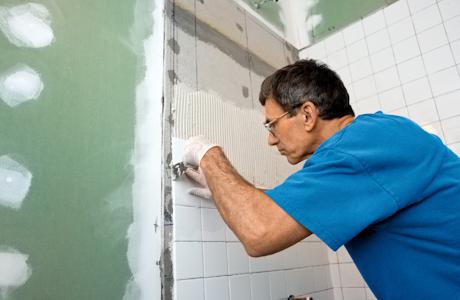
Wall preparation
The preparation of the walls comes down to their plastering and leveling. The tile must be laid absolutely flush with the wall. If the seams between the bricks are deep, they are sealed with mortar. First you need to decide on the verticality of the walls. If the wall has a deviation from the vertical of more than four centimeters, it does not make sense to level it with plaster. Such walls are sheathed with plasterboard sheets.
Plaster leveling
First you need to remove the plaster that has lagged behind the wall and plaster all the cracks. The only tool that can do this job, even out all the flaws, is a rule that is at least two meters long. It is the rule that all excess solution is cut off. If there is no rule, then you can use a flat metal corner or a square pipe of a suitable length instead. The applied solution must be removed as a rule without sparing.
Proper preparation of the base
The success of the event depends not only on the quality of the purchased materials, but also on how thoroughly the preparatory work has been carried out. Laying should be carried out on the wall, cleaned of the old coating. Walls and floors must have a perfectly clean and even surface. Otherwise, the tile will eventually swell, crack, and then completely fall off.
The old tile is beaten off with a chisel and a hammer. You can use a puncher, but it makes a lot of noise. The paint is peeled off with a spatula or drill.
The floor is leveled in two ways:
- concrete mixture;
- leveling compound.
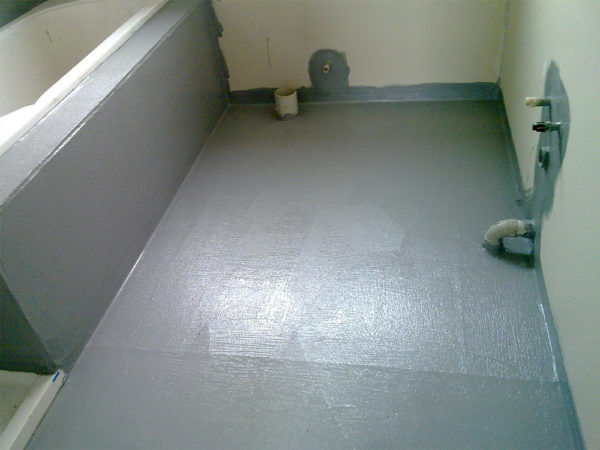 Leveling the floor under the tiles in the bathroom
The latter option is more expensive, easier to perform and allows you to get a perfectly flat surface.
If there are significant irregularities on the walls, they are eliminated with a concrete mixture or putty. However, it is easier to close them with moisture-resistant drywall
When using it, you will have to pay special attention to sealing the seams. To prevent moisture from penetrating inside, they are additionally varnished
The primer helps to increase the moisture-resistant qualities of the material and increase adhesion. She is recommended to cover not only drywall, but also a concrete or brick base.
Docking materials
Technological docking of laminate and ceramics can be carried out using the following products:
- the use of a flexible PVC profile allows you to connect curvilinear bends;
- a flexible metal profile is used to connect curved zones and straight seams;
- an aluminum threshold is used to process the mating surfaces under the door leaf;
- the use of a box threshold increases sound insulation and seals the joints;
- with the help of a transitional PVC profile, coatings with a large height difference are finished;
- when using a cork compensator, an even mating surface is obtained between the laminate and the tile;
- using a T-shaped profile from the array, straight seams are made.
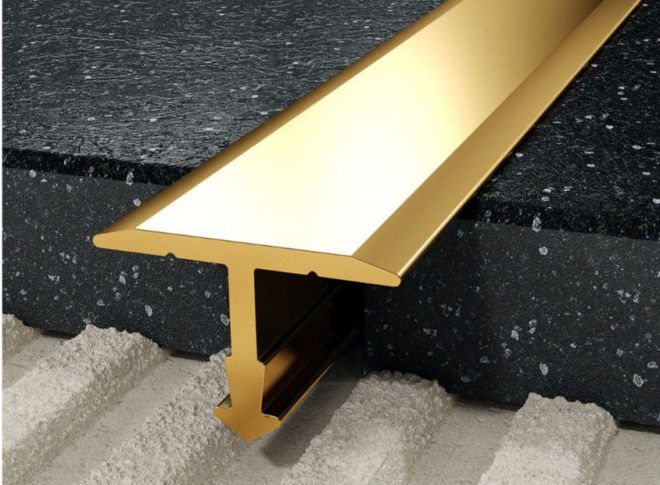 T-profile
Layout types
There are many types of tiling on the floor and walls of the bathroom, from the simplest to the incredibly complex. Each option has its own advantages and disadvantages. Consider the most popular types of tile layout.
Straight
The easiest and most popular option for laying tiles in the bathroom. The tile is located strictly parallel to the floor and walls, row by row. For a similar layout, a simple rectangular or square shape is suitable.
Off the beaten track
Otherwise, a similar design is called brick or masonry. In order for such a decor to look harmonious, it is worth choosing the right proportions of the tile. The ideal ratio of width to length is 1 to 2. How beautifully you can lay tiles in the bathroom, imitating brickwork, is shown in the photo below.
Diagonal
One of the most difficult ways to lay tiles in the bathroom, requiring experience. When choosing such a masonry, it must be borne in mind that due to the constant cutting of the tile, the material consumption will be much higher compared to other options. However, the effort and money expended will justify itself, since the diagonal laying of tiles is also one of the most spectacular.
Despite the showiness, the diagonal design is not suitable for every bathroom. If the area is small, it is better to use simpler options, since the diagonal will only make all the imperfections of the room visible. It is better to choose a similar layout for a spacious room, however, it is worth monitoring the curvature of the walls - they should be perfectly even without deviations from the perpendicular axis. How to use diagonal tiles in bathroom design can be seen in the photo.
Modular
An effective choice for bathroom design. In this case, tiles of different sizes are used, it can be laid out in any combination, which gives room for imagination. There are a lot of options for combining different tiles in the bathroom, the most interesting can be found in the photo.
Horizontal
Clear lines can significantly change the proportions of a room. The horizontal layout of the tile is most often a dark bottom combined with a light top. There may also be a variant with several horizontal stripes of different colors. With this design, a plain tile is most often used.
If you have chosen a finish with patterns, it is better to separate the parts of the masonry with a plain border. To make the design more harmonious, the border is used not only at the bottom of the walls, but also under the ceiling. How the horizontal tile layout in the bathroom will look like can be seen in the photo below.
vertical
With a vertical tile layout in the bathroom, brighter stripes stand out clearly against a plain background. The width of the stripes can be different, the same or alternate. However, it should be borne in mind that too frequent a strip looks too bright and is not suitable for decorating all bathroom walls. In this way, it is better to select only one wall, a separate section or a niche.
Vertical stripes visually stretch the room up, at the same time slightly narrowing it. It looks good on longitudinal long walls, but not on the ends in narrow rooms. With the help of stripes, you can highlight different areas of the bathroom, if it is combined with a toilet, as well as the most significant design elements.
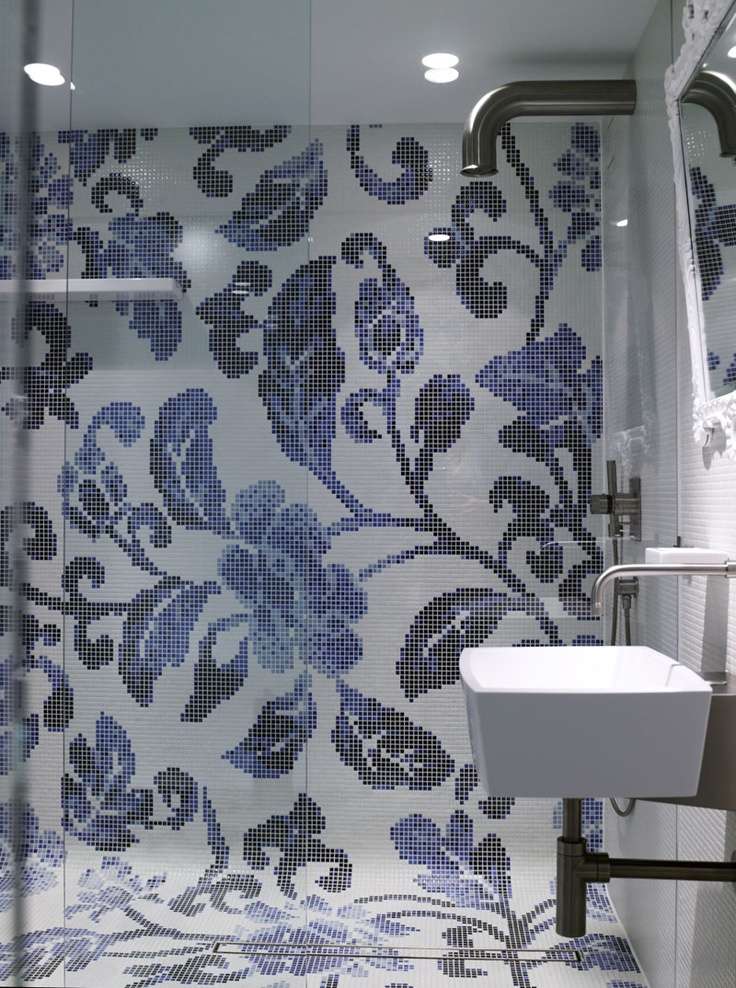
Mosaic layout
The combination of ordinary tiles and mosaics in the bathroom looks very impressive. A real mosaic is more difficult to assemble, since hundreds of small elements are required to be laid out exactly according to the scheme, never making a mistake.
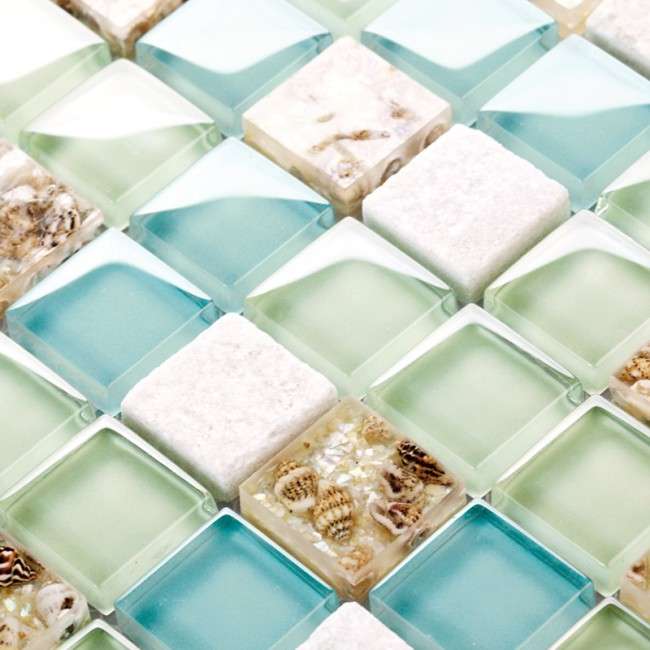
However, there are simpler options - ready-made mosaics on a grid or imitation. Mosaics can be used in many ways:
- Wall decor. A mosaic pattern can be made in one color or be with a full pattern. The choice of ornaments, colors or plot of images depends on the style of the interior and the personal wishes of the household.
- Flooring.If the bathroom is small, colorful mosaics on the walls may look too bright, but similar decor on the floor will look good even in a small area.
- Space zoning. With the help of mosaics, you can divide the bathroom into zones. This finish is especially popular in the shower area or on the wall along the bath.
- To attract attention. Mosaic can highlight specific details, such as a sink or hooks for bath towels.
- Decoration. Mosaic does not have to occupy the entire bathroom, it can be a border, individual stripes or patterns.
- Hard-to-reach places. The tiny details of the mosaic allow it to be used to finish the most complex surfaces.
How to beautifully combine tiles with mosaics in the bathroom can be seen in the photo.
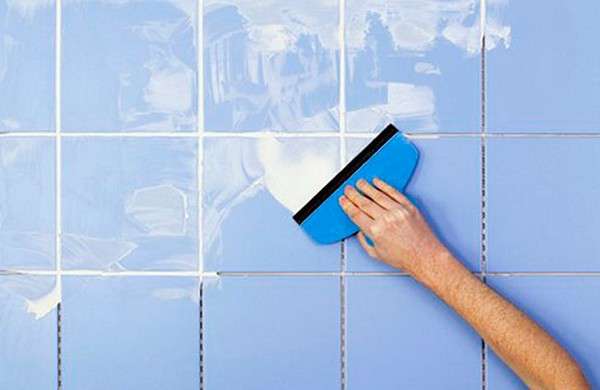
Tile grouting and processing
Grouting tiles is performed after the entire room is lined with this material. If during the laying of tiles on the walls gaps were left for subsequent grouting, then grouting without sand in the composition will be required. Grouts with sand are used for floor tiles, which are also laid at wide intervals. To increase the useful properties of the grout, some craftsmen add latex to it, the solution of which is sold in specialized stores. You should not try to save on this solution, since its useful properties are noticeably reduced along with a decrease in its concentration. The latex solution increases the elasticity of the grout and the quality of its adhesion.
We rub the seams in the bathroom
DIY bathroom tiling
It is convenient to distribute the solution over the surface using a rubber trowel, which must be carefully driven diagonally across the laid tile, holding it slightly at an angle. Proper grouting allows you to fill every single seam with grout, but it is better to check this after the process is completed.
It is recommended to start grouting from the wall near which the bath is located, and when it is finished, it will be possible to clean the place from which the repair was started. After grouting ceramic tiles for protection from harmful effects is treated with a sealant, which is applied using a paint roller, but if only seams are processed, then an ordinary brush can also be used. In order for the tile to serve as long as possible, it is treated with sealant at least once a year.
A little about the choice of material
As we have already said, ceramic bathroom tiles are the most popular type of finishing material. Certain requirements are imposed on this room, respectively, and the materials for its decoration should be chosen correctly, namely, taking into account their technical characteristics:
- minimal moisture absorption;
- increased resistance to cleaning chemicals;
- resistance to mechanical stress;
- resistance to high temperatures and steam;
- bathroom floor tiles must be resistant to abrasion; resist bending and abrasive agents.
When choosing a material, one should proceed from the quality of ceramics. Tiles that meet European standards can be of three varieties, each of which is marked with a certain color. The first grade is a tile with a red marking, which is of high quality and durability. The second grade is a material that can have a marriage of about 5%, this series is marked with blue or light blue markings. The lowest grade is marked in green.
Ceramic tiles are distinguished by a resistance class, of which there are five, they are marked with Roman numerals. In a residential area, it is advisable to use a material not higher than the III class of wear resistance, and for the bathroom, the first class is enough. Since laying out tiles in the bathroom is not easy, you should correctly calculate its quantity - ideally, you should take the material with a margin of about 15% to take into account the fit.Well, the design of the material plays an important role in the choice - after all, everyone wants the bathroom to be not only functional and comfortable, but also beautiful. And the variety of tiles is a guarantee that you can easily find your own way of finishing.
Where to start
The first thing you need to think about is not how to arrange the tile decor in the bathroom, first you need a room plan with the location of the main interior details - plumbing and furniture
What you need to pay attention to when creating a diagram:
- Thinking over the drawing, observe all the proportions and scales of the bathroom, but do not make the drawing too small. The scheme should be large enough to place all the elements on it and clearly indicate the dimensions.
- For the correct layout of the tiles in the bathroom, you need to know the exact dimensions, so measure all the walls of the room, taking into account the doorway, ledges and niches. Sign the obtained values on the diagram.
- Mark the location of plumbing and furniture on the drawing.
- Be sure to indicate the location of the ventilation shaft, sockets, switches, etc.
- Interior details that are mounted on top of the finish are not required to be indicated on the diagram - they do not affect the layout in any way.
- Make a control check - compare the real bathroom with the resulting scheme, make sure everything is correct.

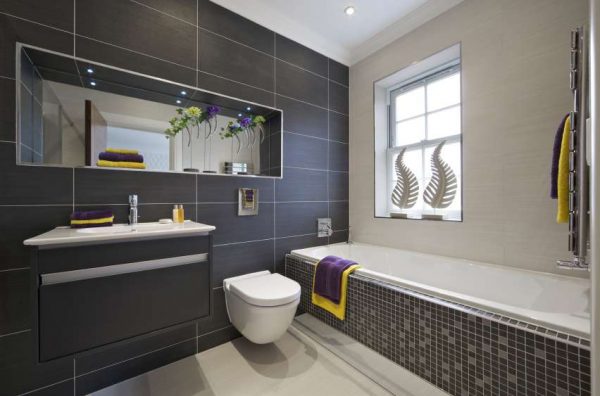
This is what a bathroom should look like with the correct tile layout
An accurate diagram is needed in order to correctly calculate the amount of material, the dimensions of the tile and the ornament itself. If you make even a small miscalculation, it may turn out that the most beautiful elements of the layout will be behind the plumbing or in the corners, otherwise the effect that was conceived from such a decor will be completely lost. Design examples that can be found for laying tiles in the bathroom are shown in the photo below.
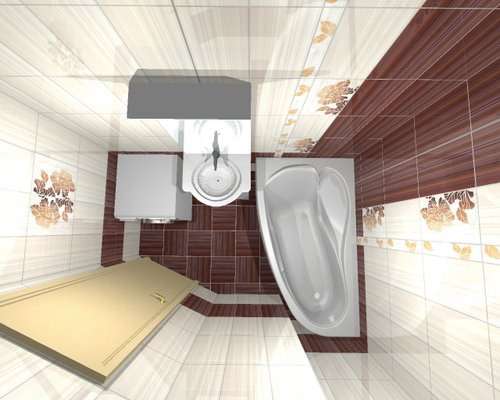
Bathroom tile layout sketch
The tiling process
Having carefully considered the various options for finishing bathroom tiles, let's move on to studying the laying process itself using the example of flooring in the bathroom.
To do this, imagine that the tile has already been selected, all materials have been purchased, and the necessary measurements have been made.
- We clean the surface: we remove the old coating from the floors: linoleum, parquet, tiles along with glue or mortar. Having tapped the surface and heard a dull sound, we also remove the old screed (which means that there are cavities under it and the base is not strong).
- Next, prepare the surface for laying tiles.
- If there are large differences relative to the horizon, it is necessary to level the surface. We do this with a cement-sand mortar.
- After the screed has dried, prime the surface and dry.
- We arrange waterproofing using bituminous pastes or a special mixture for plaster waterproofing.
- We prime again to increase the adhesion of the base to the future coating.
- If the differences in the horizontal level of the floor are small, you can use a special self-leveling mixture (level-mass) that can remove the difference from 3 to 15 mm. In the case of using a level-mass, a surface primer is not needed.
Now the base of the floor is ready.
Above, we have considered the options for the bathroom - tiling, and you have already chosen the appropriate installation method.
- We begin laying the tiles in the direction from the far wall to the doors. We also determine which wall will have a bath, shower, washing machine or furniture, under which the cut edges of the tile will hide. We carry out work from the direction of the open corner (whole tile) to the wall with plumbing (cut tiles).
For this:
- we set two tiles in the corners to the desired height and fasten them to the alabaster (it dries quickly and can be easily removed in the future);
- the wrong side of the tile is well wetted with water (can be lowered into a container of water);
- with a special (notched) trowel we apply diluted glue to the entire surface of the tile;
- we put it in place, joining with the lighthouse tiles, and leaving a gap between them with the help of special identical crosses;
- we upset the laid tile in place, tapping on it with a trowel handle;
- we check the correctness of the draft with a rule, a rail or a nylon thread, putting it on top of the lighthouse tiles, or we check the horizon with a short level;
- excess glue that has come out after precipitation is removed with a trowel;
- clean the seam between the tiles with a spatula;
- check the horizon again;
- we repeat the whole cycle until the end of the row, then we remove the beacons and install them already with glue.
- After all the tiles are laid, and the glue has dried, we proceed to grouting the joints:
- with a dry cloth, it is necessary to remove the remaining glue from the surface of the tiles;
- fill the seams with diluted grout with a rubber spatula;
- Let dry and remove excess.
As you already understood, the laying process is not difficult, but it requires accuracy and care. A well-chosen technology will ensure a long service life of the tile. Good luck!
Gallery
Tile selection and installation
 In order to correctly calculate the amount of facing material, it is necessary to measure the surface area on which it will lie, and also determine the size of the tile itself. Tiles range in size from 100x100mm to 600x600mm and are sold per square metre. You need to buy it with a margin, since when laying about 5% can go to marriage. Also, the number of tiles purchased is affected by the way it is laid. There are several such ways:
- Direct styling. This is the simplest and most common way.
- Diagonal fit. Looks more impressive, suitable for square rooms, will help hide slanting walls.
- Laying in a checkerboard pattern. The best way to lay tiles in two or more colors.
- Offset padding. In this case, the tile of the next row is placed with an offset to the tile of the previous row. This option is more suitable for rectangular rooms.
- Mosaic. This method is laid out of a facing material of different sizes and colors, while creating a certain pattern, pattern.
After the choice and method of laying has been made, you can begin to prepare the walls.
Before starting repair
Before laying the tiles in the bathroom with your own hands, you will need to check if there is a slope on the walls. This is easily done with a level, the walls must be strictly at an angle of 90 degrees. If you deviate up or down, you will need to first level the surface with plaster. You can see how this is done on the video, without leveling it with high quality it will not work to lay tiles in the bathroom - such a repair runs the risk of not holding out for a long time.
If the angle between the wall and the floor deviates from the norm of 90 degrees, there may be ugly gaps in the masonry between the tiles, difficulties with installing a bathtub or shower tray (the appearance of large gaps that will have to be sealed with sealant), etc.