Recommendations for the selection of nuts
If you need to find a nut separately due to loss or damage to the complete one, then you should remember a few simple rules:
| The best selection option - according to the sample | Of course, if you have an old element, then it is much easier to purchase a new one instead. It is enough to compare two products and make sure that they have similar parameters and are interchangeable. But not always a sample is at hand, so you can take with you a mixer part that needs a fastener |
| Explore quality | If there is no sample, then it is necessary to take measurements very carefully and carefully, and when choosing, choose the option that is made better: there are no burrs on the thread, it is knurled evenly and accurately, there are no spots and shells on the surface. Every little thing matters, because it can be used to judge how well the element is made. |
| Take into account the type of crane cover | Putting a bronze nut on a chrome-plated structure, as well as vice versa, is not the best solution, since it does not look very attractive. Of course, this paragraph does not apply to cases where the mount is hidden and it simply will not be visible, in such a situation any color will do. |
Causes of failure of cranes and the need to dismantle for replacement
Each type of crane has its own typical breakdowns. Repair steps also vary
These breakdowns appear, as a rule, very similar - the tap does not close completely, water flows out of it
Worm
| Cause | Actions |
| Wear of the working pad | Remove bushing and replace gasket |
| Worn gasket | Remove bushing and replace gasket |
| Thread wear | Remove the bushing and replace it entirely |
| Valve seat wear | Remove the entire faucet and replace it |
| Hull destruction | Remove the entire faucet and replace it |
Ball
| Cause | Actions |
| Cartridge wear | Remove the cartridge and replace it |
| Worn gasket | Disassemble the housing and replace the gasket |
| Hull destruction | Remove the entire faucet and replace it |
Repair work
Installing new parts on the mixer
If the leakage is caused by a worn gland, you can simply try to tighten the clamping nut. If water continues to flow, it is necessary to unscrew the nut and remove the stuffing box. A couple of turns of stuffing box packing are tightly wrapped around the stem and pressed with a bushing. In the final, it remains only to tighten the clamping nut and test the crane.
But we still have a part of the thread on the stem from the drilled cap of the clamping bolt. It is twisted with pliers, grabbing the edge protruding from the stem.
Also in this situation, you can try to drill out the remnants of the bolt with a thin drill and cut a new thread with a tap.
If the repair did not bring positive results and the faucet continues to flow, the faucet box will have to be replaced with a new one. To do this, with an open-end or adjustable wrench, they wrap around the face of the bolt and unscrew it counterclockwise. Then, in reverse order, install all the details of the mixer in place.
For information on how to replace the faucet box in the mixer, read here.
We also bring to your attention an article on how to repair a ceramic bushing crane.
Install the gander on the mixer
The faucet is a plumbing fixture that almost no bathroom or kitchen can do without. You can find out how to change it correctly or how to install a gander on a mixer from our article.
As practice shows, the old device sooner or later becomes unusable and the question arises - how is it replaced? To resort to the services of specialists who take quite decent money, or do all the work yourself? Installation of this device does not require special skills and is quite within the power of every person.
For this reason, you should not invite someone, but make a replacement yourself. This way you can save money that is better spent on other purposes.
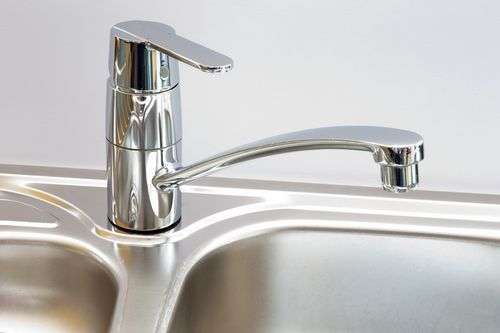
Choosing a bathroom faucet
It is highly not recommended to buy a Chinese-made device, because, as practice shows, its service life is short. You can choose mixers imported or domestic production. Russian manufacturers create devices based on the features of not quite high-quality water. The device should be made of brass, preferably stainless steel.
Based on practice, plumbing fixtures should be thick-walled, which means they should have a fairly decent weight. This is the most important difference from Chinese products
When purchasing a mixer, it is necessary to pay attention to the union inlet nuts, they must be thick-walled. Today, devices with ball and valve type valves are produced.
The latter is much more convenient to regulate water than ball valves.
Mixer kit
Front how to replace mixer, you should carefully check the entire package. Components:
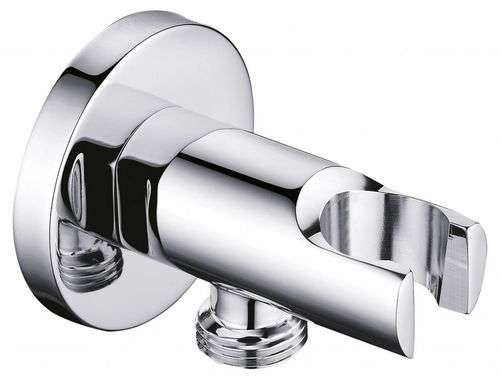
Fitting-holder of a watering can for a shower.
Main block or stem with inlet union nuts, taps or valves.

Silicone or rubber gaskets in union nuts, including rubber rings on the gooseneck.
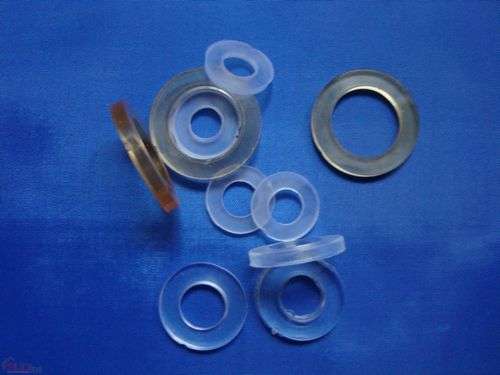
It is advisable to take the gaskets in reserve, as the kit may contain poor-quality nuts or they may be damaged when installing the device.
How to unscrew a faulty faucet in the bathroom or in the kitchen
Worm
When disassembling the mixer, the sequence of actions is as follows:
- Turn off the water.
- Twist and pull out the plastic plug on the handle.
- Loosen the screw securing the handle.
- Remove the faucet handle from the faucet by pulling it towards you.
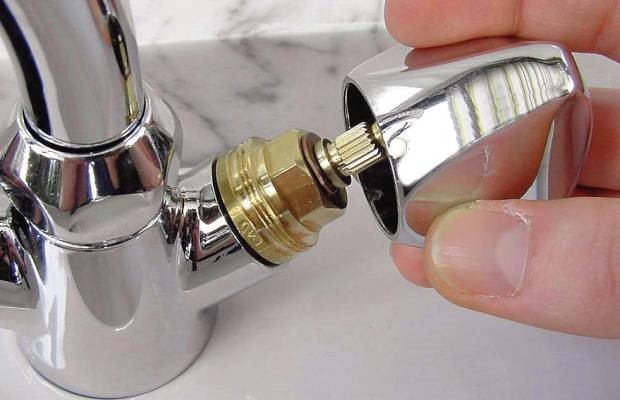 Figure 5: Removing the handle from the axle box
- Using an adjustable or socket wrench, unscrew the axle box from the housing.
- Remove the seal and inspect it.
- While holding the axle box with an adjustable wrench or adjustable pliers, unscrew the gasket fastening screw with a screwdriver and remove it.
After replacing the worn gaskets, assemble the device in the reverse order. Before screwing the axle box, its external thread must be wrapped with FUM tape or other sealant. Do not apply excessive force to avoid damaging the threads.
If replacing the gasket gave only a short-term effect, you will have to change the entire mixer.
Ball
The dismantling of the ball valve is carried out in the following sequence:
Turn off the water.
Place a piece of plastic or cloth in the sink so that it covers the drain hole
This will help pick up small parts if they fall off.
Use a screwdriver or a sharp object to remove the two-color plug under the handle.
Carefully unscrew the small screw from the opened hole with a narrow flat screwdriver. In some models, you will have to use a hexagon.
Pull the handle up and remove it
She sits pretty tight.
Unscrew the round cap of the cartridge. It can be additionally fixed with a plastic nut. You have to be careful not to overdo it.
Remove the ball mechanism from the housing.
Carefully inspect the thin rubber sealing rings. If they are worn out, it is better to select suitable ones in the store, taking the mechanism with you. Both the inner and outer diameter and the height of the seal are important.
Sometimes you can find balls arranged differently. Do not take out the filling right away. You will have to act like this:
Remove plastic shield. The shield itself is yellow, the seal is black
It should be carefully cleaned of dirt and mineral deposits.
Pull the ball up and take it out. If the surface is worn or scratched, the ball must be replaced.
Three rubber sealing rings will become visible inside the case
They also need to be inspected and replaced if worn.
Assembly is carried out in the reverse order, without applying excessive force.
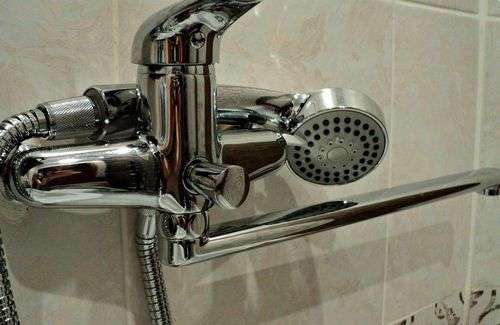
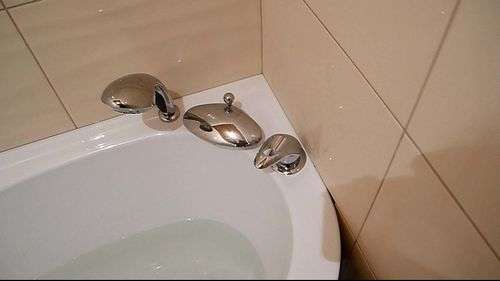
Bathroom faucet gander
In any house or apartment there is at least one bathroom and a sink in the kitchen. In both of these rooms, a mixer is installed above the sink - a device for supplying water from the central water supply. One of the important components for the mixer is the gander, or spout.
What is a goose?
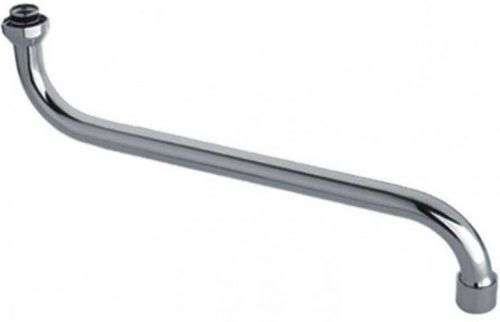
The gander is a curved metal tube where water is mixed to the desired temperature and enters the sink or bath. This detail is also cutely called a nose. Now on the market there are various types of gander for the faucet in the bathroom. The right choice will make the operation of the mixer optimally convenient.
Types of mixer ganders
One of the options for choosing a spout is its length. A long gander for a mixer reaches from 24 to 50 cm. A device of medium length is from 20 to 33 cm. Shortened models are a gander with a length of 15 and 18 cm. The length of the spout should be chosen taking into account the size of the sink in the bathroom. So, for example, a short gander will direct a stream of water not into the drain hole, but into the side, which is why splashing of water drops is ensured. It is for baths that it is advisable to give preference to universal models with a long gander. With it, it is easy to direct the flow of water in the direction of the bathtub or sink you need.
Height is also important when choosing a bathroom faucet. It is measured from the base of the faucet to the opening of the spout, from where water flows into the sink.
Types of products and basic recommendations for installation
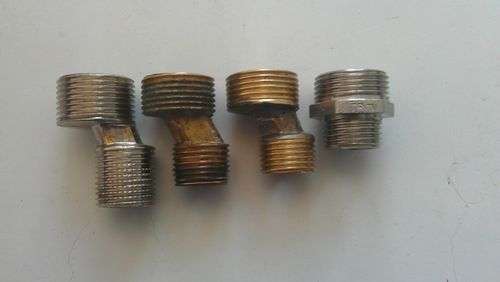
As noted above, various nuts may be present in the design, we will consider the most common of them, since the number of models is huge and atypical elements may be present in the design.
Varieties of nuts
Most often, during installation and repair work, you have to deal with the following nodes:
Elements of fastening to the water supply, they are located on the inlet lines and are usually in plain sight. Most often, they are rigidly fixed to the structure and it is impossible to replace them, it is necessary to purchase a new mixer. Therefore, when working, you should be careful and not apply too much force so as not to break the element, also monitor the position of the rubber gasket, it should be level.
The nut to the mixer body under the spout serves to fix the mixer gander. Its main feature is that the spout must not only be well fixed, but also move left and right; for this, a plastic expansion washer must be present under the nut. Recommendations for fixing such knots are simple: you should not apply too much force, but you need to twist the system carefully so as not to scratch the outer decorative coating.
The clamping nut is also needed for systems installed on a sink or sink, it is located below and is not visible from the outside. The price of these elements is low, but it is better to purchase a bronze or brass option so as not to worry that the assembly will be damaged by corrosion. You can also clamp the system with your own hands without using a key, since too much effort is not required.
Another type is nuts that fix the cartridge in lever taps. They are hidden under a decorative ring and can only be accessed by removing the handle. The design has a large size, in the upper part there are turnkey faces, and in the lower part there is a thread of a certain size.
Features of the work
The installation instructions tell the assembly procedure, but you will have to learn how to disassemble the system yourself.
Consider how to change the nut on the mixer if it cannot be unscrewed:
water faucet
Sometimes the terms faucet and valve are confused. A valve is a valve controlled manually or through an electric (rarely hydraulic or pneumatic) actuator, which is installed in a section of a pipe and serves to shut it off. Theorists call the tap the terminal consumer device for drawing water.Simply put, the faucet is installed above the sink, bath or shower. On one side, it joins the inlet pipes of the water supply, on the other hand, a spout (spout) or shower head. In the middle is a mechanism that regulates the flow of water. A device that allows you to mix hot and cold water to obtain the required temperature is called a mixer. It contains either two separate cranes, or a single integrated one.
Preparatory work
Convenient to have a plumbing tool kit on hand
Before starting work, it is necessary to understand the specific design of the mixer.
A thread is cut in the armature body for screwing in a jumper (crane box body). Thread diameter may vary. Usually a bolt with a half-inch thread is used. Less common are models with ¾ inch bolt threads.
The tightness of the connection between the jumper and the mixer body is ensured by a rubber gasket. Notches for the valve are cut on the valve stem:
- on the stem of a domestic crane, the notches are made in the form of a square;
- the stem of imported production has 20 or 24 slots.
Similar notches are applied inside the valve, which can be plastic or metal alloy.
The design of the mixers provides for the use of two types of crane boxes:
- The worm gear model works by means of a retractable stem. There is a rubber gasket on the valve that blocks the water supply when the stem is twisted. From frequent use, the rubber wears out and needs to be replaced.
- The model on ceramic plates works from a half-turn and is distinguished by wear resistance of the material.
Before starting work, it is necessary to turn off the water on the riser and determine why the tap is leaking. Sometimes water leakage can occur due to wear of the valve gland.
Preparation for repair requires removal of the valve:
Removed valves with decorative caps and new faucets
- At the end of the valve, remove the protective cap and unscrew the clamping bolt with a screwdriver. If it does not unscrew, it can be smeared with vinegar or a special solution of WD-40. It is sold in any auto stores. Due to its high penetration, the solution easily penetrates into the threaded connection and decomposes solid formations.
- If chemicals do not bring a positive result, the bolt head is drilled with a drill. The valve is removed from the stem by slight rocking from side to side. A valve stuck to the slots can also be treated with WD-40 and removed with a puller.
After removing the valve, it is necessary to unscrew the decorative cap on the mixer with an adjustable wrench, which closes the bushing valve and proceed with the repair.
Problem Prevention
In order not to suffer in the future on how to unscrew a rusted nut on a car, bicycle, mixer, when installing this part, do not forget to do the following:
- Be sure to treat the thread with grease: graphite, silicone, teflon.
- Refuse to use grease and lithol. The fact is that these substances are perfect only for dynamic, moving parts, but not static ones, which include a bolt with a nut. In our case, such a lubricant will only stiffen and, conversely, will interfere with unscrewing.
We hope that you found a suitable method that helped you deal with your problem.
Once again, we draw your attention: do not forget about its prevention! Corrosion of the nut occurs due to the ingress of dirt and dust into the joint, which increases the friction between the parts tenfold
It is possible and even necessary to resist rust: you are required to lubricate the joint with oil during fastening. If the nut is rusty, then you can cut it off with a grinder or cut it with a chisel. But how to unscrew a rusted nut
and leave the mount intact? First you need to choose a tool that will be used for work.
Corrosion of the nut occurs due to the ingress of dirt and dust into the joint, which increases the friction between the parts tenfold. It is possible and even necessary to resist rust: you are required to lubricate the joint with oil during fastening. If the nut is rusty, then you can cut it off with a grinder or cut it with a chisel. But how to unscrew a rusted nut
and leave the mount intact? First you need to choose a tool that will be used for work.
Removing the faucet body
If the valve body is damaged (wear, corrosion or manufacturing defects), it will have to be removed. They do it this way.
- Unscrew the nut of the flexible hose leading from the water fitting to the faucet.
- Loosen and unscrew the nut that secures the faucet to the sink or countertop.
- If the nut does not unscrew or cannot be reached with a wrench, you can unscrew the fastening stud with a flat screwdriver. To do this, it is equipped with a slot.
- After removing the mixer body, remove the gaskets from the sink and clean the attachment site from dirt and mineral deposits.
If the flexible eyeliner has already worked for several years, it is better to replace it at the same time.
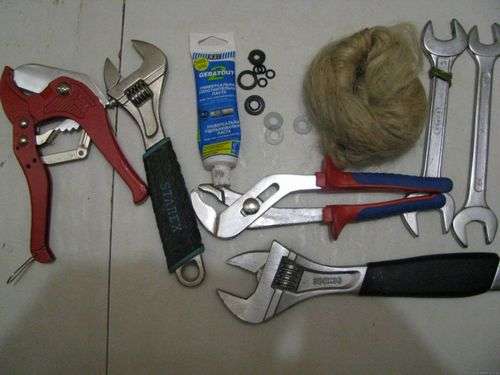
Required tool
Whatever the complexity of the work, you will definitely need a tool. It is better to prepare it in advance so that the house does not remain without water for a long time. First of all, you will need:
An adjustable wrench is most convenient for unscrewing the crane box
- adjustable and pipe wrench, pliers;
- a pair of wrenches corresponding to the size of the faces of the crane box. Typically 14mm and 17mm wrenches fit;
- screwdriver with a curly and flat tip;
- electric drill with a set of drills for metal and a cutter.
In addition to the tool, there must be a spare crane box at hand. If it is not possible to successfully unscrew the old part or it cannot be repaired, it will have to be replaced with a new one.
Best Answers
Uncle from the Future...
brass does not rust .. stuck on salt deposits .. silit beng or something similar .. (household chemical limescale remover ) ..
Lelik and Bolik:
Knock on her
Japanese Chekist:
Lubricate with sunflower oil and wait an hour. Then slowly tear it off.
Belij:
wet a sponge or rag with vinegar and put it on it, smoke a little and repeat if necessary
Mikhail Zhilyakov:
If non-ferrous household chemicals help you, if black or stainless is a bad thing, but there is a way, take the lubricant and spill it a little and twist it back and forth slowly. look don't break it.
Spitz Pomeranian:
The body of the cartridge is plastic and the nut is brass. There are no issues with twisting. You need a good key.
Dismantling a sticky crane box
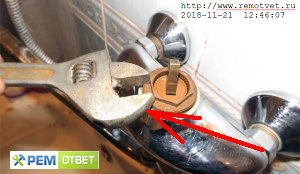
If the crane cannot be repaired due to the fact that the crane box is strongly attached to the body, additional tricks have to be applied:
Capturing the bolt faces with a pipe wrench
- The “licked” faces of the jumper can be tightly wrapped around with a pipe wrench. Using the swinging method, you should try to break the bolt from the spot. But the main thing is not to overdo it, otherwise you can break the thread and break the mixer.
- The use of chemicals will help loosen the threaded connection. WD-40, vinegar, Sillit detergent, and other acidic solutions work well. If surface lubrication did not help, then you can fashion a small container around the jumper from plasticine and pour one of these solutions into it. The depth of the tank should ensure that the faucet box is completely covered with mortar.
- The thermal method will help to move the thread from its place. The threaded part of the mixer body is heated with a building hair dryer until the bolt begins to unscrew by hand.
This cutter can be used instead of a drill
- 90% of Chinese faucets are made of wrought alloy. Light tapping around the threads with a hammer will loosen the plaque and the bolt will turn over the threads.
- When all methods have been tried, the last solution remains: removal of the crane box by drilling.To do this, cut off the protruding part of the jumper with a hacksaw and drill the part remaining in the mixer body with a drill of a suitable diameter. Instead of a drill, a cutter of the same size is suitable. After drilling, you will have to cut a new thread in the mixer body. It makes sense to make such complex repairs for expensive and high-quality mixers. If you had a cheap faucet installed, it will be easier and cheaper to change it to a new one.
How to repair a crane box, see the video:
Mixing taps consist of many elements, each of which performs certain functions. That is why there cannot be trifles in the system, and such a unit as a nut is extremely important for ensuring the operability of the entire structure as a whole.
In fact, in any modification of the crane there are several nuts, we will consider what they are and what functions they are intended for, because often during repairs there are problems with fixing elements.
Recommendations of experts and possible difficulties
If the axle box is “sticky” to the mixer body, experienced craftsmen recommend several ways to unscrew the tap:
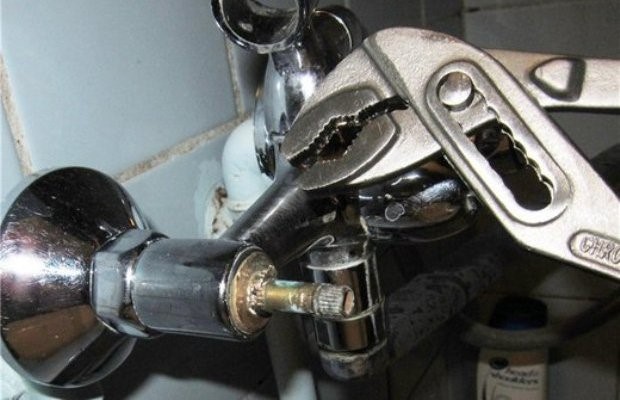 Figure 6: Stuck screw connection
Chemical. Use WD 40 universal helper, table vinegar or descaling agent. They need to moisten the visible part of the thread and let stand from 10 minutes to several hours, depending on the amount of deposits.
- Thermal. Warm up the connection with a building or household hair dryer at low power, so as not to overheat the rubber parts. Due to the different coefficient of expansion, the steel case will expand more than the brass box and can be unscrewed.
- Mechanical. Tapping with a rubber or wooden mallet from all sides 10-20 times destroys lime deposits, and it will be possible to unscrew the stuck connection.
- Boiling. You will need to completely remove the mixer and boil it in a soda solution for 2-3 hours. The deposits should dissolve and the connection can be untwisted.
Flexible hoses should be unscrewed first from the line. From this side, the nut can be turned on the hose flange, and it will not twist. The hoses must be passed through the hole in the sink one by one so that the nuts do not get stuck.
If the faucet in the shower cabin is removed, the design of the cabin and mixer must be taken into account. If the stand-alone cabin is equipped with a mode switch, then it is usually integrated with the mixer.
 Figure 7: Integrated shower faucet
You will have to remove both handles and unscrew the nuts securing the controls.
 Figure 8: Removing the handles. Visible mounting cartridge and mode switch
This is best done with an assistant holding the reinforcement from the back.
There are two nuts under the handle (lever) of the mixer, one is decorative, it is unscrewed and the second nut presses the cartridge to the mixer body.
This nut is very stuck on how to unscrew it.
More than once I came across a situation where the customer, without having thoroughly studied the device of such a mixer, tried to change the cartridge on his own and little worked.
Before unscrewing the nut that presses the cartridge to the body, you need to unscrew (unscrew by hand) this one
Otherwise, the edges of the clamping nut will be inaccessible, that is, the opinion that the mixer body is one piece is erroneous, the decorative nut is unscrewed.
Next, you need to turn off the water on the risers.
We remove the plug by prying with a knife.
We unscrew 1 screw and the mixer lever itself is removed upwards.
Unscrew the spherical nut.
Everything, in front of you is the same clamping nut.
You need the right tool to open it.
Suitable plumbing pliers, or like this
But this is better
A knob is inserted into the holes of the socket wrench, and you can use any knob that fits the size of the holes in the key.
The lever is significant and it is not a problem to unscrew any, even a very strongly stuck nut.
If there is no socket wrench, then you can try the following:
Do not tap the nut hard with a hammer on the edges.
Next, we try to jerk and unscrew it.
If this does not help, penetrating liquids can be used.
Or just soak a rag in vinegar and put it on the nut for a couple of hours.
Everything, again we are trying to unscrew it jerkily, counterclockwise.
More cardinal methods, dismantling the mixer and unscrewing the nut in a vice.
Or a chisel + hammer, beat counterclockwise, be careful, the nut is needed to install a new cartridge.
Though they are on sale separately, as the spare part to the mixer.
That's it, unscrew the nut, change the cartridge and assemble the mixer in reverse order.
Why and what to do
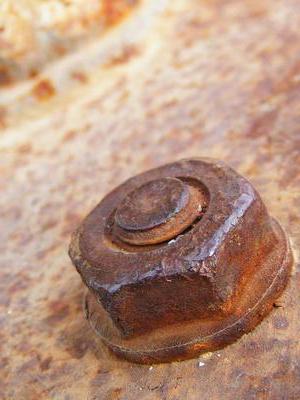
Repair can be seriously difficult, the replacement of the necessary spare parts will have to be postponed until later. It's all about corrosion. And the reason for this is very, very banal. For example, during installation work at the factory or during previous repairs, "professionals" in one area or another decided to ignore the processing of fasteners with lubricant. Then liquid got under the thread. Water caused loosening processes on the surface of the bolt and nut. This loosening tightly linked the parts with a new connection at the molecular level. How to unscrew a rusted nut is a whole science, and the process of unscrewing can take a lot of time, effort and nerves.
Replacing the mixer how the gander and other components are installed on the mixer
The work of installing new plumbing equipment is not difficult, but it requires great care, for this reason it should be approached with all responsibility. First you need to prepare the unit, all the required materials and tools:
- Open-end wrench 13x14.
- Gas wrench No. 1 or adjustable up to 30.
- Construction level for mounting the horizontal position of the device.
- Fum tape or linen thread "Unilok".
- Mixer.
Dismantling work with an old mixer
First, the valves for hot and cold water or inlet taps in the apartment are closed. The gas key from the device loosens and unscrews the union nuts of the shower head hose.
Due to the adjustable wrench, the union nuts of the mixer are loosened, after which it is removed. With a key of 14, the eccentrics are unscrewed and removed to the side. The remnants of the sealant are removed from the threads of sockets or fittings. The quality of the thread in the sockets that are installed on the bar is visually checked, and, if necessary, they are replaced with new ones. If this is not done, the threaded connection will simply leak, and all the work will have to be redone.
Mixer connection options
There are several ways to connect these plumbing devices, depending on the water supply to the kitchen or bathroom:
When the external wiring of the water supply and sockets for mixers is installed on a special bar.
When there is a hidden water supply in the room and several fittings for hot and cold water come out of the wall.
Both in the first and in the second version, the device can be installed on eccentrics, and with the second, the connections are connected directly to the pipes. Accordingly, the mixer should be taken with an internal connection.
Installation of new equipment
Now you need to consider how the faucet in the bathroom is replaced. The Unilok thread is wound on new eccentrics and twisted into rosettes.
how to unscrew the stuck nut on the mixer
For small and shallow shells, low ganders are chosen. Excessively high spout will result in splashing. At the same time, with a very low spout, the sink will be inconvenient to use.
In plumbing stores you can find all kinds of gander shapes: curved in the form of the letters C, S, G and J, straight.Also classic models are a tube, round, triangular or oval. Cascading products with a flat and wide bath spout have appeared on the market.
If the mixer gander is leaking
As the mixer is used, the consumer may notice that the gander is flowing at the attachment point with the body. The reason for this is most often the wear of the gaskets. To solve the problem, unscrew the spout with your hands or a wrench. You will see two rubber and one plastic spacers. It's easy to change them. In a specialized store, you should purchase similar ones and insert in place of the erased ones, pre-coated with grease. After that, the gander is carefully screwed to the mixer body. Now they can be used for their intended purpose.
Preparation and necessary tools
Before embarking on the fight against the stuck connection, you need to properly prepare. Armed with the right tools, we will unscrew the fastener faster and most likely not even damage it. One key is clearly not enough. You need a whole set. Most of all, we will be useful in this matter:
- collar heads;
- wrench;
- socket wrench;
- set of spanners.
Before starting work, you should not forget about your own safety:
- Never use damaged tools.
- When unscrewing, proceed counterclockwise.
- Check the tightness of the key.
- Always wear gloves to avoid injury.