How to paint a ceiling with old paint
If the owner was faced with the task of updating an already painted surface, which means applying another layer of paint to it. How to do this so that the work is not useless?
To paint the ceiling on the old paint without problems, you need to take into account some points.
To avoid unpleasant situations during painting, you need to prepare the surface well. It is impossible to hope that by covering the ceiling with new paint you can hide all the defects. Everything is quite the opposite, a layer of paint will highlight everything: scratches, waves after painting, bumps
First, it is important to carefully examine the ceiling. If everything is good, you need to start the primer
But if there is paint on the surface that has peeled off or does not adhere well to the base, then you need to remove all such paint. This can be done with sandpaper. After that, treat the surface with a primer in a thin layer. After the primer has dried, we proceed to update the surface. If we see that the surface needs to be trimmed, then it is necessary to putty or even plaster the surface to be treated. If this needs to be done, then priming should be carried out more intensively. You can do this even in several layers. This will ensure the quality of the work. The primer is best done with a brush, not a roller. This will ensure good penetration of the primer into the bumps and depressions.
But if the ceiling is not paint, but old whitewash, then simply cleaning the surface and priming will not do. The entire applied layer of white must be completely removed.
After the surface is completely prepared for painting, you need to cover the walls and floor with a film so that they remain clean. The room temperature during painting must comply with the instructions. Also, in order to paint the ceiling with old paint, you need to prepare the tool and the paint you have chosen. Both paint and tools must be of good quality. Because the final result of the work done depends on it. Rollers and brushes will be needed in various sizes, and you can also purchase a telescopic extension and a paint cuvette for convenience.
How to paint the ceiling with old paint using technology so that there are no unpleasant moments later?
The first thing to do is paint over the corners of the ceiling. This can be done with a brush or a small roller. Walk with these tools around the entire perimeter, a strip of 5 centimeters. And the entire surface of the ceiling is then painted with a large roller. For high-quality painting, you need to apply at least two layers. The first layer should be carried out, starting from the window, across the daylight. Pour a small amount of paint into the cuvette, dip the roller into the paint, and then carefully roll it out on a special platform. This will remove all excess paint, which will help distribute it evenly across the ceiling. No need to make sudden movements, smoothly run the roller along the ceiling, at the same time examining for the presence of unpainted areas. And if such are found, immediately paint over them. To paint the ceiling on the old paint, the second layer, you need the same technology. The second coat is applied after a thorough check for a quality first coat and its complete drying. After painting with the second layer, you need to make sure that direct ultraviolet rays do not fall on the ceiling, to exclude drafts. Never try to speed up the drying of the paint in any way, let it happen naturally. This way you can avoid peeling the paint from the base. After each painting, keep the tool clean and free of paint residue.
What defects can be formed when painting the ceiling?
Roller streaks may appear. They are formed with poor rolling of the roller. This can be avoided by re-rolling the roller over the painted substrate when there is no paint on the roller. It can also happen if the roller is not loaded correctly when painting.
It is important to distribute the force applied to the tool so that the load is even.
It is also important before you start working, the paint must be mixed well so that there are no stripes that will differ in shade. If you follow the painting technology, then there will never be a reason to look for flaws in the work done.
And the result will pleasantly surprise
If you follow the painting technology, then there will never be a reason to look for flaws in the work done. And the result will pleasantly surprise you.
Suspended ceiling how to wash
By itself, the care of suspended ceilings will not cause any particular difficulties. The main thing to remember about the rules of washing and the choice of cleaning products.
Ceiling cleaning tools and products
Stores sell a huge selection of cleaning liquids and powders, as well as cleaning tools and accessories.
Advice.
When choosing a product, carefully study its composition. Not all detergents are suitable for the surface of ceilings. The agent must not contain acetone. It can spoil the appearance of the material.
Tools you can use:
-
Special products for washing ceilings.
They are more expensive, but they easily cope with pollution, do not harm the surface and do not leave streaks. -
Liquids for washing glass and mirrors and PVC products
containing ammonia. - Any dishwashing detergent without granules and abrasive particles.
Advice.
Before using any detergent, test it on a small, inconspicuous area.
When cleaning, remember that strong pressure should not be exerted on the surface of the ceilings, as the material may deform.
Ceiling cleaning tools:
- Dry cleaning can be done with a vacuum cleaner and a special nozzle made of soft bristles.
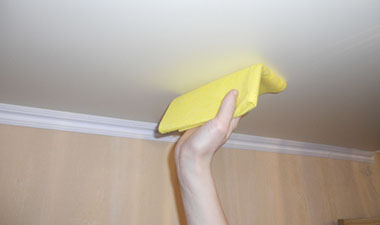
- Washing is carried out with a mop, soft sponges, suede or microfiber cloths, fabrics and rags on a soft basis.
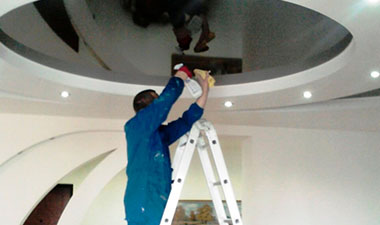
Sequence of work
Before work, we prepare the necessary inventory:
- ladder;
- soft wipes;
- soft sponge;
- vacuum cleaner with nozzle;
- special detergents.
Depending on the degree of contamination, different cleaning methods are used. The most difficult thing is to wash the ceilings in the kitchen, as a large amount of grease and soot accumulates on them.
Minor dirt, streaks and dust can be easily removed damp clean cloth
, then wipe dry with a circular motion with a dry cloth or rag.
To remove dust and cobwebs, you can use a vacuum cleaner
. The brush should be at a distance 2-3 cm from the ceiling
and do not touch the surface.
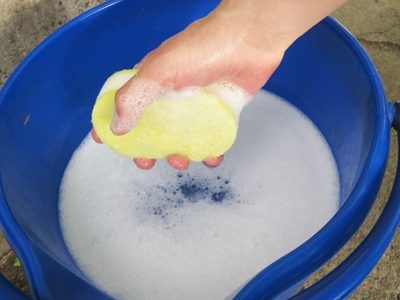
Stubborn soiling can be removed with a soft sponge and detergent diluted in lukewarm water. The surface is cleaned in a circular motion without the use of excessive force.
Then the ceiling is washed with clean water.
After all procedures, the surface is wiped dry and polished with special tools
, glass cleaner or 10% ammonia solution.
Glossy ceiling surface
Such ceilings are best cleaned with a glass cleaner or special cleaners for glossy and mirrored ceilings. To carry out work you need:
- Use soft suede or microfiber cloths or special cleaning cloths.
- To achieve the original shine of the ceiling, after cleaning it can be rubbed with ammonia in a circular motion.
- After treatment, the surface is wiped dry with a dry, clean cloth.
Matte suspended ceiling
It is much easier to take care of such ceilings, because after wet cleaning there are no streaks left on them at all.
Can be used for cleaning water vapor or washing with any detergent approved for use on suspended ceilings
.
After washing, the canvas must be wiped dry and polished if necessary.
fabric ceilings
The most fragile and capricious suspended ceilings are fabric stretch ceilings.
For cleaning such surfaces do not use glass cleaners
, since the dyes included in the composition can spoil the color and structure of the canvas.
fabric ceilings cannot be brushed in a circular motion
. There will be many divorces.
Ceilings are cleaned with a dry cloth, strong dirt can be wiped with a powder solution or a special agent.
My false ceiling in the kitchen
Ceilings most often get dirty in this room. Grease stains and soot are added to ordinary dust.
The surface of the ceilings in the kitchen is washed in the same way as in other rooms.
To clean the ceiling from grease and soot will help ordinary dishwashing liquids and ammonia
.
Where to start and how to wash
All advice on this issue is rather conditional and cannot be an accurate guide to action. However, there are requirements that must be met:
- Before starting work, it is necessary to clear the room of unnecessary items;
- Use a vacuum cleaner to remove dust from the ceiling;
- Then rinse the ceiling with clean warm water. After that, you can apply any version of the solution described above, leave it on the surface for a while (3-5 minutes). Gently wash the ceiling with a sponge or rag;
- Before drying, it is necessary to wash it again with water;
- Wipe the ceiling with a soft flannel or rag, changing the rags often so that there are no streaks.
In living rooms, the plastic ceiling is easy to clean, provided it is regularly cleaned with a vacuum cleaner.
How to keep your kitchen clean
It is more difficult to wash the ceiling panels in the kitchen. Adhering fatty plaques, soot, fumes stains cause a lot of problems. Therefore, many are interested in the question of how to wash the plastic ceiling in the kitchen.
An indispensable remedy for greasy plaque is a soap solution followed by treatment with an alcohol-based agent.
The baking soda paste recipes mentioned above and the ammonia solution do a good job of removing greasy stains.
Yellowed plastic is treated with bleach or ammonia.
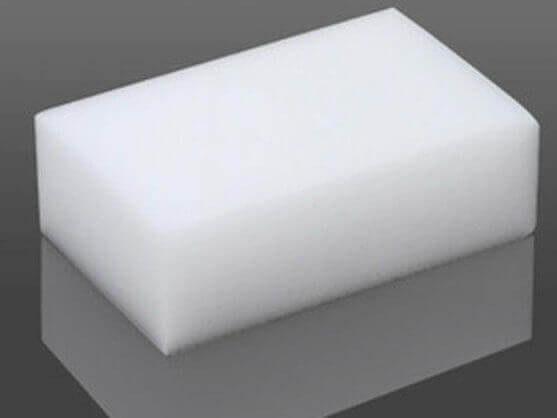
A universal helper in the kitchen is a melamine sponge. It can be used to remove contaminants of any origin. To do this, just moisten it with water and wipe the surface.
After using detergents in the work, it is necessary to rinse the plastic with water, because the chemicals can contain allergens.
With regular maintenance of plastic ceiling panels, dirt is easily removed. But if the dirt is old, you will have to process 2-3 times.
Processing kitchen ceilings differs from cleaning them in living quarters only by a greater expenditure of effort and time.
The question of how to wash plastic ceilings at home, everyone decides on their own. The main thing is that this process does not cause negative emotions, does not turn into torture, but gives pleasure from the result.
In order for the ceiling to always please the eye, it is necessary from time to time to do a light treatment of its surface. In this case, you do not have to spend a lot of effort to combat stubborn old pollution.
How to prepare a painted ceiling for repainting and renovation
Before starting repairs, the question arises of how to wash the ceiling in the kitchen, painted with a water-based composition. Before starting wet work, dry clean the ceiling surface. So you get rid of dust and cobwebs. To do this, walk with a soft brush along the ceiling or simply vacuum it. Small dirt can be removed with a rubber band.Just do not rub the coating too hard, otherwise you risk rubbing off the paint along with the dirt.
Then try to wash off the dirt with plain water and a soft sponge. Do not rub the ink layer intensively. All movements should be smooth and soft, without pressure on the sponge. Particularly contaminated areas and stains are removed with soap and water.
Recommended reading: How to choose a roller for painting the ceiling with water-based paint and which one is better
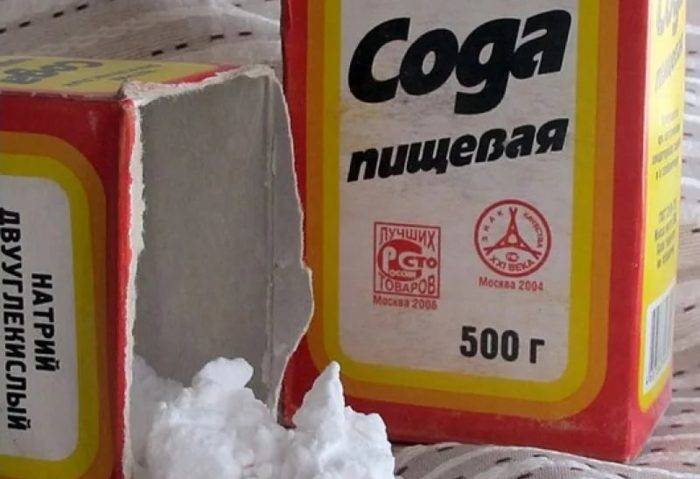
If this does not help, then pour a little baking soda into a basin of water:
- ten liters of water will need 3-4 tablespoons of soda;
- the contaminated areas are washed with the prepared solution;
- wait a quarter of an hour;
- washed with clean water;
- gently dry the surface with a dry cloth.
If washing with baking soda doesn't help, try adding the same amount of table salt. When preparing for a new painting or updating the surface, traces of mold must be removed from the ceiling.
In this case, the following purification methods are used:
- First, they try to wash off the mold with soapy water. If the stains are gone, then the base is treated with antiseptic compounds to protect against damage by fungal microorganisms in the future.
- If this does not help, treat the moldy places with a solution of copper sulfate. After that, everything is washed with water. It is impossible to leave unpainted areas washed with copper sulphate. Therefore, after the moisture has dried, the surface is impregnated with antiseptic compounds so that mold does not reappear in the future. Then the prepared base is painted with a water-based emulsion in one layer.
If you are cleaning the area before repairing or repainting, the concentration of soap or detergent in the water may be higher. The same goes for sponge moisture. You can even work with a stiff brush and wash off the detergent with plenty of water.
As you can see, it is not difficult to wash the water-based coating, but the result will not always please you. If the composition of the water emulsion does not contain silicone or acrylic, then it is forbidden to rub the paint layer strongly and use any detergents other than water. If after washing the ceiling surface looks unpresentable, the coating is updated with another layer of water-based paint.
(No ratings yet)
Puttying materials
To paint the floorboard without difficulty, you should use a high-quality putty to seal up defective areas.
Various self-prepared mixtures can be used as an alternative floor putty for painting:
- large cavities can be filled with tow soaked in an adhesive aqueous solution (15% adhesive content);
- Sawdust putty is known, where, as the name implies, small sawdust is used mixed with ordinary PVA glue or oil floor putty.
There are also two main types of purchased putties: adhesive and semi-oily (read: “What floor putty is needed and how to make it”).
Adhesive composition:
- 100 grams of turpentine are added to 4 liters of oxol;
- 1 liter of an aqueous solution with soap is added;
- about 2 liters of a 20% adhesive solution are poured.
Semi-oil composition:
- 0.5 kilograms of wood glue are mixed with 5 liters of water;
- add 1.5 kilograms of drying oil or oxol;
- add water (by eye) to thin the solution;
- based on the added volume of water (no more than 1 liter), 100-150 grams of soap are added to it.
floor washing
After painting
Before washing the floor after painting, make sure that the paint is completely dry. To do this, you need to find out from the instructions for the paintwork, after what time after applying it you can wash the floor.
Depending on what kind of paint the surface is painted, this period may be different. But in any case, you can start wet cleaning no earlier than 5 days after applying even the most quick-drying composition.
So, the instructions for washing the floor after painting are quite simple:
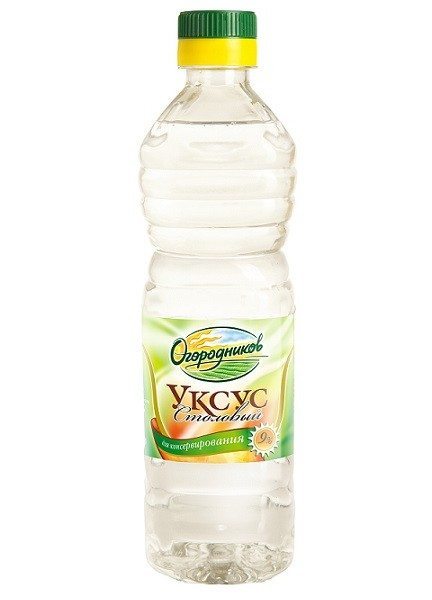
- Pour warm, almost hot water into a clean bucket.
- Then one or two tablespoons of vinegar are added to it.
- After that, the floor is washed with a clean soft cloth dipped in vinegar water.
- After the floor surface is washed, you must once again draw hot water into the bucket, add vinegar and repeat the procedure.
- Then, for seven days, the floors are wiped down with a damp cloth to remove any oil marks that may show through the paint during this time.
This completes the cleaning process. I must say that according to the folk method, it is best to wash the floor with home-made sour kvass. According to many home crafters, this will give the paint a good shine and even make the coating more durable.
Routine care
Of course, caring for a painted floor is not limited to the first wash with vinegar. In addition, you will have to periodically clean it from dust, wash it, rub it, etc.
In the photo - ammonia for washing the floor
However, the result of this work will be not only the atmosphere of comfort in the room, but also the well-being of those who are in it. The fact is that dust particles that remain on a dirty surface rise up and, getting into the respiratory organs, are harmful to our health.
Thus, in order not to spoil the coating in the near future and at the same time not cause harm to health, you need to follow simple rules for its operation:
-
After coming from the street, you must immediately change into slippers
, this will not only allow you to rest your feet, but also prevent dirt from entering the living rooms from the street. -
It is advisable to wipe the floor every day with a damp cloth.
, especially in places where dust usually accumulates, i.e. under beds, wardrobes, sofas and other furniture. -
When cleaning, you need to use a vacuum cleaner
, as it will allow you to clean dust from hard-to-reach places such as cracks and pores. -
When washing a painted floor in water, you can add a few tablespoons of ammonia to a bucket of water
. This solution will give the coating an attractive sheen.
- After the floor is washed with your own hands, it can, like parquet, rub with wax or a special mastic-based product
. After the treated surface dries, a glossy film forms on it, which not only improves the decorative qualities of the finish, but also provides it with additional protection. - Another option to improve the decorative qualities of the floor and protect its surface is use of a special self-shiny emulsion
. As a rule, such products are applied by spraying onto a clean surface, after which they are rubbed with a sponge or a clean cloth. You can apply them in several layers, once or twice a month.
I must say that over time, the layer of such a coating becomes too thick and loses its decorative and protective properties. In this case, it must be cleaned with special detergents. The price of such an emulsion is quite affordable.
Ceiling preparation and alignment
Further repairs are built based on what you need. If you plan to level the ceiling, then do it with a gypsum mixture or plaster. But before leveling, be sure to prime the ceiling, as mentioned earlier. This will provide the best grip. To level the ceiling, you will need a bag of plaster and putty. The consumption of materials depends on the area of \u200b\u200byour ceiling. Arriving at the store, choose the appropriate amount of packaging. If in doubt, check with the sellers how much plaster and putty will be required for your area.
Tools used in the work
- plastering trowel;
- two spatulas - large and small.
Be serious about your choice of tools.It is not worth saving, but it is better to purchase high-quality spatulas and trowels, because the final result of your work will depend on this.
Applying plaster
Dilute the dry plaster mixture with water according to the instructions on the package and mix well. For more thorough mixing, you can use a slow-speed drill with a mixer attachment.
After applying each layer, the surface is left to dry for a day. This completes the rough alignment of the ceiling and you can start working with putty. It will help to even out all the small bumps.
Putty application
Putty is used for fine finishing of the ceiling. It is used after rough leveling of large cracks, irregularities, depressions and differences in the surface with plaster. The same rule applies here as with plaster - after applying each layer, a day must pass before applying the next one.
After the putty has dried, the ceiling can be sanded to a perfect shine.
Types of putty according to the degree of readiness:
- There are dry putties. They are sold packaged in bags. They must first be diluted with water and kneaded;
- Ready-made putties, which are usually sold in buckets. As mentioned earlier, we recommend using ready-made putties, because. they are easy to work with.
Under painting, it is desirable to use a polymer putty. She has the greatest time of "life activity", i.e. after application, it can be stretched for a longer time, which means that it is possible to work out and level the entire surface thoroughly before the composition begins to dry. It also has a very fine grinding, which will have a positive effect on the final cleaning of the surface.
Putty is chosen relative to the base on which it will be applied. Consultants of building stores will also help you in the selection.
After plastering is completed, the ceiling must be covered again with a layer of reinforcing primer. The application must be uniform over the entire surface. Use a paint roller for this, and a brush for hard-to-reach places. When coating highly absorbent surfaces, multiple coats may be required. After applying the primer, the consumption of subsequent materials, as noted earlier, will be greatly reduced. The primer also acts as an antiseptic. If the ceiling suits you perfectly, then proceed to its direct finishing.
Select surface cleaning method
For each type of old coating, there is a different technology for its removal. To choose one or another method, you should have an idea of how they work and what is needed for this.
There are different types of ceiling coverings and they should be removed in different ways. Let's talk about how to clean the ceiling: quickly, with your own hands, using the advice of professionals.
Chalk whitewash
 This type of coating is considered not very durable, so cleaning such a surface is quite simple.
Chalk is easy to clean in several ways:
- With an ordinary spatula. To do this, moisten the surface with warm water using a simple sponge or spray gun and carefully clean it with a spatula to the very base.
- Wash with water. Using a strong spray jet, you need to blur the ceiling until it is completely clean. You can also wash it with a wide stiff brush, periodically wetting it in warm water.
lime whitewash
To remove more durable lime whitewash, professionals advise using special solutions:
- Professional compositions. On sale there is a liquid for removing lime, using which you can easily clean the ceiling. At the same time, one should not forget about safety measures, such as gloves and a respirator.
- Ingredients of own preparation. Making a composition for removing lime whitewash is very simple with your own hands.
To do this, mix 5 tablespoons of soda, 2 tablespoons of planed soap and a bucket of water.
You can also prepare another, no less effective composition. mixing equal proportions of soda and salt (3 tablespoons each) in 5 liters of water.
Dishwashing liquid dissolved in warm water also helps.
Any solution should be applied alternately to each piece of the surface, then held for 5-10 minutes, only then cleaned with a brush or sponge.
It is best to start stripping the ceiling from the corners and move towards its central part.
Adhesive compounds.
- To prepare the adhesive composition, brew in 5-7 liters of boiling water 2-3 tbsp. flour spoons.
- After thickening, the composition is cooled and applied to the lime surface with a roller or brush.
- Literally in 10-15 minutes. whitewash can be cleaned with a spatula, while it will easily move away in layers, without scattering with fine dust and without polluting the surrounding atmosphere.
And why, in fact, to paint
The opinions of designers on this issue are divided: some believe that unpainted floors, covered with special wax or colorless varnish, are able to fully convey the structure of wood. This approach is justified for housing, decorated in a rustic style, or for individual wooden houses.
Proponents of the second approach rightly believe that such surfaces need constant and very time-consuming personal care.
And so that the painted floor does not look rustic, they offer quite modern solutions (by the way, supported by the appropriate range of colors).
Non-standard colors: instead of the tedious red-brown tones (someone called “floor paint” at the time), rich gray or blue-turquoise shades are offered.
The principle is simple - a painted floor should not excite and cause aggressiveness, which excludes the use of, for example, warm colors. But it should not oppress and reduce tone - for this reason, you should not paint the surface in brown tones.
White color is original, but it will resemble a hospital, and care in such cases takes a lot of time.
A floor painted with oil paint can be adequately replaced with a successful ornamentation. Having prepared a template that matches the style of the room (for example, stylized characters from favorite fairy tales or cartoons are suitable for a nursery, a floral ornament for a dining room, etc.), you can relatively quickly “paint” the coating, and at the same time achieve a high degree of unusualness and originality.
It is only important to choose the coloring compositions of the same type, and achieve optimal color perception. It should not be bright and sticky, two or three color shades are enough to make the painted floor look like a real work of art.
The next group can be characterized briefly - related extremes. This is suitable for owners of creative, striving for unusual interior solutions. Here you can surprise guests with a stylization of worn and peeling coatings (quite suitable for apartments decorated in country or Provence styles), or furutistically made abstract spots or lines - for interiors of a minimalist style or High Tech style.
The process of painting the ceiling with water-based paint
It is good that progress does not stand still, and to perform the same work, you can apply not only several methods, but also various auxiliary devices. For example, you can paint the ceiling with a water-based emulsion manually or using an airbrush.
Roller painting
Carefully remove the lid from the jar and stir the contents thoroughly. In some cases, water-based paint must be diluted to the desired density with water (information about this, as a rule, is contained in the instructions). Usually this requires no more than 10% of water from the total volume of paint.
Open the can, stir the paint and dilute it with water if necessary
First of all, paint the corners and edges of the ceiling along the walls with a brush. This will help you not to stain the walls during subsequent work.
First, paint over the corners and edges with a brush.
Pour a small amount of paint into the paint bath. Dip a roller into it and roll it on a corrugated surface so that the paint is evenly distributed and excess paint is removed.
Pick up paint on the roller and wipe off the excess on the bath
Start painting from the window across the direction of the sun's rays, gradually moving deeper into the room.
When the first coat of paint dries, you need to apply the second. This should also be done from the window, but already along the direction of the sun's rays.
So you will eliminate all unpainted areas that have eluded your gaze, but would certainly have shown up over time.
This diagram will tell you how to properly apply layers of paint on the ceiling
Carefully remove small bumps and bubbles found after the surface has dried with fine-grained sandpaper.
Minor flaws that have arisen in the process can be rubbed with sandpaper and, if necessary, painted over with a brush
The whole process, taking into account the drying of the layers, can take you several days. It is recommended to carry out painting work in the morning and early evening: during this period, the sun's rays fall on the surface optimally, this will help you correctly assess how evenly the paint has laid down.
Video about the correct painting of the ceiling with a water-based emulsion using a roller
Spray gun application
Such work will bring you pleasure: it is quick and easy compared to using a roller. The most important thing in the process is to achieve a thin, as uniform layer as possible.
1. Before you start painting the ceiling, move the nozzle of the device away from the surface to be painted, since the spray gun throws out a lot of paint in the first seconds.
Before starting work, "bleed" a small amount of paint from the device
2. When the spray becomes even, start painting the ceiling. Separate the spray gun from the ceiling surface should be a distance of 30 to 50 cm. Move the nozzle at a speed of about 5 seconds per 1 linear meter. In this case, direct the jet strictly perpendicular to the painted surface of the ceiling.
Hold the spray gun at the required distance from the surface
3. To simplify the process, mentally divide the surface into squares. Paint them in turn, first with movements across, then along. At the same time, do not linger for a long time in one area, otherwise the layer will turn out to be thick, and the paint will flow down. Keep a steady pace while coloring.
You need to work with an airbrush according to the already known scheme: one layer is across the direction of light, the second is along
It is recommended to apply paint with an airbrush in 3 layers, each next one is placed after the previous one is completely dry. On a non-hardened surface, the paint will not seize and will quickly begin to exfoliate.
How to wash tensile structures
Before washing the ceiling, it is better to vacuum it first. If the ceiling is fabric, then dry cleaning is used.
When using a vacuum cleaner, do not touch the surface. If the device is too powerful, the material may be deformed. It is better to wash the stretch ceiling by hand. In this case, cleaning is carried out in stages. Wash small areas one at a time.
You can try wrapping a cloth around a mop to clean the surface.
But at the same time, you need to act very carefully so as not to spoil the canvas. To add shine to the surface, you can add a little ammonia to the water.
Ceilings in the bathroom or in the kitchen deserve special attention. Due to high humidity, lime deposits may form on the surface.
To add shine to the surface, you can add a little ammonia to the water. Ceilings in the bathroom or in the kitchen deserve special attention.Due to high humidity, lime deposits may form on the surface.

It should be wiped with a wet cloth, and then wiped with a dry cloth. In the bathroom, the glossy surface may be splashed when bathing. This results in divorces. Dried exile stains are more difficult to remove, so it is best to wipe the surface immediately. The ceilings in the kitchen also require careful maintenance. After all, even with a high-quality hood, greasy spots, soot and dust form on the ceiling surface.
Large greasy stains are first treated with a detergent, and then with a wet cloth.
Cleaned areas are wiped with a dry cloth. You can also use a steam cleaner to remove stubborn stains.
When using a special steam mop, you must use a microfiber nozzle. After steam treatment, all dirt is removed with napkins.
Detergents
Stretch ceilings are made of fragile materials. It is necessary to select the most gentle detergents for their purification. You can remove a light coating of dust from the ceiling with ordinary water. If the pollution is old and the dust layer is dense, there will not be enough water. Detergents are necessary for washing stretch ceilings in the kitchen, loggia, in the country house and in the bathroom. Without detergents, it is difficult to wash the matte stretch ceiling.
Among industrial cleansers, it is worth giving preference to the products "Mr. Muscle" and "Vanish". The concentration of active substances in them is not so high as to harm the delicate surface of the stretch fabric. However, it is quite sufficient for high-quality cleaning of the structure. Dilution of cleaning products in warm water will better clean the surface, avoid streaks and restore the original shine.
Mirror shine will give the product a polish for stretch ceilings. Before using the product, you should carefully read the instructions for its use.
To make maintenance less burdensome, it is recommended to regularly use special products for glossy stretch ceilings with an antistatic effect.
If there are no special cleaning products, you can wash stretch ceilings at home with foam detergents that do not contain a large amount of alkaline substances. These include baby and laundry soap, in addition, dishwashing detergent.
No need to apply detergents directly to the surface. You should also not lather it with soap. Cleaning of the canvas should be carried out with foam of a pre-prepared soap solution. The foam is whipped from the latter. It is her, and not a soap solution, that is applied to the stretch ceiling. Foam perfectly eliminates pollution and is easily washed off with water.
To prepare a soapy solution, use slightly warm water. The high temperature of the liquid can damage the material of the stretch ceiling. The optimum temperature of the detergent is 30-40°C. Some more expensive designs can withstand higher temperatures, but it's not worth the risk.
You can wash the stretch ceiling without streaks with a window cleaner, which includes ammonia. It will easily clean the surface, leave no streaks and restore a radiant shine.
The most suitable is a window cleaner made in the form of a spray. The less physical impact will be exerted on the structure, the better.
When buying a product, you need to make sure that it does not contain acetone. Some window cleaners are made from it.