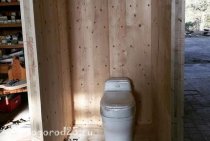
Installing a wall hung toilet
There are two ways to solve the question of how to install a hanging toilet. The first option involves mounting the device on a concrete base, the second - on a metal installation.

In a wall-hung toilet, the flush system works much better due to the design features, in addition, in such systems there is a double flush button, which allows you to use less water.
Installing a wall-mounted toilet in the first way begins with marking. Holes are drilled in the wall for mounting rods for attaching the toilet bowl. Next, a wooden formwork is installed, the panels of which are set strictly vertically and fastened together with self-tapping screws. Two holes are also made in its central part. Then a water drain is installed.
Glue is applied to the holes in the wall and rods are inserted, which must exit the formwork board strictly horizontally. The cavity is filled with concrete. After it hardens, the formwork is removed. Using the corrugation, a drain tank is connected to the device. The corrugation is fixed with silicone sealant. The toilet is hung on rods and clamped with a plastic washer and nut. At the end, the hanging tank is connected and the drain is tested. The whole process can be clearly seen in the video "How to install a wall-hung toilet on a concrete base."
How to install a toilet installation
The wall-hung toilet can be installed on the installation, which is included in the package. It is a metal frame that is attached to the wall, and a toilet bowl is hung on it.

Scheme of the installation design of the toilet bowl
One of the most popular is the Geberit installation, the installation of which is carried out on the basis of the instructions. The frame is installed vertically and fixed to the wall and floor with special fasteners. With the help of the lower stops, the frame is adjusted in height, and the upper ones help to set an equal distance from the wall.
Important! The center of the installation should be located above the middle of the sewer outlet. When the frame is mounted, you can proceed with the installation in their places according to the instructions for connecting elements, such as couplings and pipes
Next, you should install metal rods in the appropriate slots that will hold the toilet bowl. At the required distance, the sewer pipe extends and the bracket is fixed in a predetermined position. Then you need to connect water to the tank using a corrugated pipe. The connections are fixed with a union nut. At the end, you need to install the cover in place and the installation is ready.
When the frame is mounted, you can proceed with the installation in their places according to the instructions for connecting elements, such as couplings and pipes. Next, you should install metal rods in the appropriate slots that will hold the toilet bowl. At the required distance, the sewer pipe extends and the bracket is fixed in a predetermined position. Then you need to connect water to the tank using a corrugated pipe. The connections are fixed with a union nut. At the end, you need to install the cover in place and the installation is ready.
To close the installation, you can mount a false plasterboard wall, the sheets of which are attached to the mounted profiles and the installation frame. After decorative cladding of the wall surface, a toilet bowl is hung on metal rods. Its outlet fits tightly and hermetically into a plastic socket. At the end of the process, a decorative panel of the drain device with a button should be installed. You can familiarize yourself with the installation of the geberit installation in more detail on the video located on specialized sites.

Installations save space and hide drains: all pipes and communications remain out of sight and are placed in the wall
Before proceeding with the installation of the toilet bowl with your own hands, you should study in detail all the subtleties of this issue. The progress of the work depends on the type of product and how it is installed. Following the instructions will allow you to perform the installation efficiently and reliably, resulting in a durable plumbing product and an aesthetic appearance of the bathroom. In the case of involving specialists, you should find out how much it costs to install a toilet. The price of services may vary.
Toilet how to install the device. Mounting methods
The toilet installation option, the video will clearly show the sequence of actions, depends on the type of device and its design features. Floor units are considered the most common type of equipment. They are mounted on the flooring after completion of all facing work. The sequence of actions depends on the installation option of the floor toilet.
The toilet bowl can be fixed to the floor in an open or closed way. The first option involves the installation of the product using special external mounts that come with the device. The second method is more labor intensive. The installation of the toilet bowl is carried out using an internal fastening, which allows you to get a more aesthetic appearance of the device.

Mounting the toilet to the floor in an open way is not as aesthetic as the internal one, but it is much easier to mount it
Wall-hung toilets are installed at a certain height above the floor using special installation structures, on which the system itself is attached. Installation of the device is carried out before the start of finishing work.
The choice of installation option also depends on how the toilet is connected to the sewer pipe. Toilets with a horizontal outlet are connected to the sewerage system at a right angle. Devices with an oblique outlet are connected at an angle of 45 degrees. The sewer socket for connecting the device with a vertical outlet is located in the floor.
Before proceeding with the installation of the toilet, prepare the base. For a floor unit, it must be level.
Mounting methods
There are three main ways in which you can attach the toilet to the floor. Mounting should be chosen based on the external coating, as well as the layout of the bathroom. If there is a major overhaul with a change of plumbing, you should think about fixing the toilet before finishing the room.
Epoxy adhesive
If you are going to use this option, the first step is to thoroughly clean all surfaces to which the substance will be applied. They also need to be thoroughly degreased: for this, both acetone and any other solvent are useful. Then the glue is prepared. If the instructions are followed correctly, the composition will be suitable for use even an hour and a half after preparation. Ready glue is applied to the floor and the surface of the bottom of the toilet bowl. Places of application - the inner contour of the product. The layer should be small, this will provide maximum adhesion. After this procedure, you need to put the toilet on the prepared place and press it tightly, or it is best to press it against the socket. The approximate drying time of the epoxy adhesive in our case is 12 hours, during which time the composition should harden significantly. During these half days, the device should not be touched, used or checked for serviceability, as it may move to the side. This method is suitable for tiled toilets, since other methods are impractical for tiles. An additional plus is that you do not need to have special skills to apply epoxy glue, but you should wait a while to evaluate the final result.
Dowels and screws First you need to select the installation point of the toilet, and when the device takes its place, you should draw markings in the places intended for mounting bushings - there will be holes in the floor
After applying the appropriate marks, the toilet is removed and neat holes are made using a drill: an approximate depth of 5-7 centimeters
It is very important to work with the utmost care, because any extra effort can damage the flooring. In addition, sometimes the drill overheats and bursts, which can also have undesirable consequences.
When the holes are ready, you need to drill concrete along the length of 5-7 centimeters. The finished recesses must be thoroughly cleaned from dust and excess debris
After that, we fill the holes with sealant or tile adhesive and place the dowel there until it stops. He must completely "hide" in a niche. In this case, excess sealant must be removed with a piece of cloth or a spatula before installation, so that the product takes the correct position. Then we fix the toilet bowl to where the recesses for the mounting sleeves are made. The package must contain caps for screws, they are attached at the very last turn. As a result, the toilet is immediately ready for use - and this is a definite plus of this method of attachment.
Wooden taffeta This method can be considered a classic, in view of its high prevalence. To begin with, a special opening is made in the floor, where taffeta, or, more simply, a board, is placed. The size of the recess should exactly match the size of the taffeta. After installing the board, the hole is filled with concrete mortar in order to make the base as stable as possible. It is also advisable to think about how to reinforce the structure. For this purpose, anchors are driven into the board, which in the end should stick out a couple of centimeters. When the concrete mortar dries, the toilet is secured to the taffeta with holes in its flush. For this, screws pre-lubricated with grease are used. Those who prefer this installation method should be aware that during the installation process, the toilet frame may be damaged. In order to avoid this, you need to secure the heads of the screws by first placing pieces of rubber or some kind of leather product under them. If the materials end up “peeping out” from under the screws, the excess can be easily removed with scissors.
Thus, each of the proposed methods has its advantages and disadvantages. The first, like the last, is good in that less time is spent on the installation itself, on the other hand, you need to wait until the compositions dry. The second method does not require additional waiting, but it is longer and more difficult. It is best to choose the option that will be optimal for your bathroom.
Installation order
The workplace has been successfully cleared and you can proceed directly to the installation
It is very important to pay attention to the preparation of outlets and inlets: it is best to use flexible hoses. If some element does not fit, everything can always be compared with them without much difficulty.
To a greater extent, this point concerns putting a hose on a tap, from which water will be supplied to the drain barrel.
Then we install the barrel itself, on the floor or on the wall, depending on the model. After fixing the base, you can start assembling the pipe, periodically checking the serviceability. At the final stage, you need to make a connection with the toilet seat. The device should already have factory fasteners, with the help of accessory bolts a part of the product is attached to them.
This is the short order of installing the toilet bowl to the floor. Now let's take a closer look at the mounting methods most commonly used today.

Installing a toilet is an easy process if you follow a clear plan of action.
Dismantling
You need to start detaching the old toilet bowl with a little preparation.
Dismantling the old toilet.
To begin with, we turn off the water supply in the house, and then drain the excess liquid and unscrew the hose that is responsible for supplying communications.
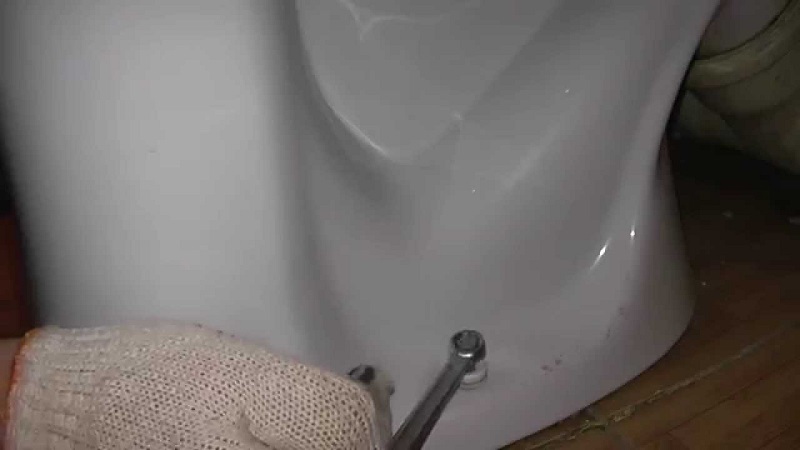
Then you need to remove the old bolts. This is not so easy, because old bolts sometimes rust, and in order to dismantle them, you have to use an open-end wrench and a special lubricant that makes the process easier.
After removing the tank, you need to remove the remaining fasteners
At the same time, it is important to know exactly how the toilet is attached to the floor surface: most often these are anchors and dowels.
Then the drain connected to the sewer is disconnected. In old houses, it is fastened with cement plaster.
A hammer with a chisel will come in handy here, or better, a puncher in combat mode.
The lower mounts should also be disconnected and after that the device can be easily removed.
Then you need to close the hole in the drain pipe with a piece of cloth or a cork.
Subsequently, the room is removed and the base is prepared, preferably under the level. If tile is the exterior finish of your restroom, self-installation of the toilet should be a no-brainer.
Preparing to install a toilet
In order to properly install the toilet bowl on the tile, and then connect it to the sewer system and the water supply system, certain materials will be required, such as:
- a hose designed for supplying cold water;
- ball valve;
- drills for tiles and concrete;
- sealing material that will be used to wind the connections;
- silicone sealant;
- corrugation.
And also you can not do without special tools, namely:
- rubber spatula;
- adjustable wrench;
- screwdrivers;
- core;
- drill;
- hammer;
- pencil.
Depending on the type of toilet you have chosen, it can be installed in two ways: open and closed.
Necessary materials
So, a brand new toilet is delivered directly to its destination and all that remains is to attach it to the place of the old one. However, before proceeding, make sure that you have everything you need for installation.
- Perforator or drill. It will be needed in order to drill concrete or tile. Depending on the dowels that are used, you need to choose the right drills. It is also advisable to get hold of a special tile drill.
- Wrench. Helps tighten the toilet bowl to the floor surface.
- Sealant and gun. Useful for sealing future seams.
- Screwdrivers: flat and Phillips. They will need to tighten small bolts and screws.
- Adapter of the appropriate size. It will be necessary if the previous connection was made using a cast-iron socket, because the fastening must be planned in advance.
- Hammer. A universal tool, without which it is difficult to carry out any installation operations.
Work should begin only when all the necessary materials and equipment are at hand. However, this is not enough - do not forget to take the time to remove the old plumbing equipment. Let's look at this process in detail.
How to install a toilet bowl with an internal mount
Before fixing the toilet bowl to the tile, it is necessary to prepare the outlets in advance for connecting it to the water pipe and to the sewerage system.
The holes must be located as close as possible to the product to be installed. In the same way as in the case of installing a toilet with an open mount, on tiled floor it is necessary to outline the contour of the base of the products and transfer the marks of the mounting holes in the product to the floor.
Place the concealed mount on the floor and make marks for drilling holes in the same way as the previous method. The mount must be installed on the floor and firmly bolted.Next, you need to install the toilet with a void on the mount and fix it through the side holes with bolts with the mount installed inside.
You do not need to immediately tighten the bolts to the stop, because most likely you will have to make adjustments when connecting the product to the water supply and sewer system. However, there are cases when the floor cannot be drilled, because. under the tiles laid underfloor heating system. In this case, silicone glue, liquid nails, or epoxy with a hardener can be used to attach the toilet.
In all cases, it is necessary to prepare the tiles and the lower plane of the toilet bowl. The toilet bowl and tiles are processed with sandpaper, which will make them rough for better adhesion of the adhesive to the surfaces of the toilet bowl and the floor.
How to install a cistern on a toilet
After the silicone has completely hardened and the cistern drain mechanism is assembled, you can proceed to install it on the toilet.
Between the drain tank and the base of the toilet bowl, it is necessary to lay a soft gasket in the form of a ring (comes with the toilet bowl). Then slide the cistern onto the toilet so that the holes for the tie screws on the toilet align with the holes on the cistern. The connecting screws must have a plastic flat washer and a rubber cone. Insert the fixing screws into the holes of the drain tank and twist them on the other side with plastic nuts (horns). When tightening the screws, make sure that the tank is horizontal.

Screw the flexible hose that supplies water to the fitting at the drain tank. This connection does not require the use of a fum tape, since the connection will occur through a rubber gasket.
The installation of the cistern on the toilet is completed, you can open the faucet and check the flow of water, as well as see and eliminate possible leaks in the system.
Put the lid on the drain tank so that all the elements of the trigger mechanism enter the hole. Screw the release button into the hole. Check the functionality of the button. At this stage, the installation of the toilet cistern is completed.
The procedure for installing a toilet in an open way
This method requires less time and effort, but loses to the second (closed) method in terms of aesthetics. The toilet bowl must be placed in the intended place of permanent location and, using a pencil, make marks on the tile in the holes that are intended for fastening
It is important that the pencil is strictly vertical, because. otherwise, the marks may shift and you will make holes that do not fit the mounting bolts
In addition to marks for fastening, it is necessary to circle the contour of the base of the product on the tile. After that, it is necessary to move the toilet to the side and drill holes in the places of the pencil marks.
First, with the help of a core, the glaze on the tile is scratched so that the drill does not slip on it. First you need to use a glass drill to go through the tiles. After that, a concrete drill should be inserted into the puncher or drill and a hole of the required depth should be drilled, depending on the size of the purchased dowels. The finished hole must be cleaned of dust and filled with silicone sealant, which in this case acts as a waterproofing, preventing water from entering under the base of the product. Dowels should be inserted into the holes filled with sealant.
Before fixing the toilet on the tile, apply a strip of sealant along the previously outlined contour of the product, which will prevent water from penetrating under the base of the toilet. Fasteners should be inserted into the mounting holes: bushings, screws or bolts - and tightened to the required position. The attachment points can be closed with plugs to give the product an aesthetic appearance and to protect the fasteners from moisture.Excess silicone that has come out should be removed with a rubber spatula or some other improvised means.
Works on the installation of the toilet have the following sequence
- to begin with, the toilet is installed in the right place and position;
- installation is carried out to the drain pipe, and the position of the compact toilet bowl can be adjusted depending on the length and location of the installed nozzles;
- when the position is finally determined, the installation site is marked on the floor;
- the toilet is moved or removed to prepare the surface for fastening;
- the toilet bowl is fixed to the floor surface and mounted to the drain pipe.
Installation of a toilet bowl to a sewer pipe can occur using two technologies - rigid docking or flexible.
In most public institutions and in former times, the most popular method was hard mounting. Its essence is as follows: the toilet drain hole is fixed to the hole in the sewer pipe with the help of sewer outlets and a pipe. This method is considered more reliable, especially considering the use of metal-plastic (PVC pipes, which have the strength of metal, but are characterized by increased stability and lightness). However, this method is quite laborious and will not protect against leakage in case of mechanical damage to the structure or in case of insufficient quality of the installation of joints.
In addition, the distance of the toilet bowl from the sewer pipe and its very shape can be the reason for the complex combination of the pipe and outlets, respectively, the increase in joints as potentially dangerous places.
Flexible installation of the toilet bowl to the sewer pipe is available to everyone and is characterized by low material costs. To do this, only a sewer corrugation is needed - a flexible corrugated plastic pipe, which is attached at one end to the toilet drain hole, and at the other - to the sewer drain.
The advantages of the method are also in the freedom to choose the position of the toilet, which, after being attached to the drain, remains movable. The disadvantage of flexible fastening is the ease with which the corrugation can be damaged. There were cases when a cat, burying the filler in a nearby tray, scratched the plastic, after which the corrugation had to be changed.
To fix the toilet to the floor surface, there are four methods:
- on tiles with dowels;
- on the board before laying the tiles;
- on a cement pedestal before laying tiles;
- on glue after laying the tiles.
Two methods that relate to the pre-tiled installation of a toilet bowl can be immediately crossed out - they are long outdated and now no one uses these technologies because of their impracticality and labor intensity.
Without even imagining how to install a toilet bowl on a tile with your own hands, it's easy to do. It is enough to have:
- perforator;
- two dowels with bolts (often sold as a set with a toilet bowl);
- silicone glue (suitable for sanitary work in bathrooms).
After the toilet is installed, the places where the dowels are attached to the special holes on the base of the toilet are marked with a pencil or marker. After that, the toilet is moved or removed, and holes are made in the marked places with a puncher. It is highly undesirable to drill without dismantling the toilet: you can accidentally split the base itself or split the tile - both of which cannot be repaired. Having installed the toilet bowl over the holes made, the dowels are mounted and bolted on top.
For greater stability and as a decorative effect, the seam between the base of the toilet bowl and the tile is filled with silicone.
Another option for attaching a toilet bowl to a tile is to glue it with epoxy glue. To do this, you only need to sand the surfaces to be glued with large sandpaper, degrease and put the toilet on the glue for 12 hours. The disadvantage of this method is the inability to change the location of the toilet in the future or simply move it.Yes, and replacing the compact will be a rather time-consuming task.
Therefore, mounting on dowels on tiles is rightfully considered the most popular way.
Connecting the toilet to the water supply
These plumbing products have a different system for connecting to the water supply:
- closed connection;
- external connection.
Despite the different connection options, all joints must be sealed. With a hidden connection method, a flexible water hose made of different materials or a copper tube can be used. If the copper tube is included with the product, then the flexible piping will have to be purchased separately.
Particular attention must be paid to the water pipe suitable for the tank. It can be with both internal and external threads.
If the thread is internal, you will need to put an adapter and apply a sealing winding. After the connection is made, it is necessary to check the operation of the toilet cistern and the possibility of leaks. If everything is working properly, then tighten the mounting bolts to the stop and install the cover.
Experts recommend using screws when installing various kinds of plumbing. only they are the safest and you can minimize the risks of various kinds of problems, for example, with water in conditions of high humidity. In any case, when you go to a plumbing store, be sure to consult with consultants and sellers: they will help you choose the most suitable option.
Connection to the sewer system
The toilet is connected to the sewer system using a corrugated plastic pipe. Corrugation makes it possible to change:
- angle of inclination depending on the location of the outlet of the riser: in the floor or in the wall;
- the distance from the product itself to the entrance to the sewer riser.
The corrugation is not glued to the outlet of the toilet, but tightly and hermetically connected to the outlet of the product, precisely due to the rubber membrane installed inside. The corrugation is also inserted into the sewer riser without the use of glue, by means of a special rim, which prevents unpleasant odors and drained effluents from penetrating into the room.
After connecting the toilet to the sewer system, you need to connect the tank to start connecting cold water. It is necessary to insert washers made of silicone or plastic on metal bolts to prevent them from coming into contact with the faience of the product.
Preparatory stage for installing a toilet
You can install the device yourself, or use the services of specialists. How much it costs to install a toilet in an apartment will depend on the type of product and the mounting option. The average cost of services is 2000 rubles.
If the issue is resolved to start replacing the toilet with your own hands, you should prepare the necessary set of tools and materials:
- puncher or drill with drills for concrete and for ceramic tiles;
- adjustable wrench;
- hammer or chisel;
- rubber spatula;
- flexible hose for connecting the cold water supply;
- fum tape;
- ball valve;
- sealant;
- corrugation or fan pipe;
- toilet mounts;
- cement-sand mortar.

It is impossible to qualitatively install a toilet bowl with your own hands with a minimum set of necessary tools that any owner has in the house
Important! If the toilet is installed on the installation, the above list is supplemented by the corresponding set, which is purchased at the plumbing store. Before you install the toilet with your own hands, you should dismantle the old device
The cold water supply to the tank is shut off, and all liquid is drained from it. Using a wrench, unscrew and remove the hose that connects the tank to the water supply. Next, you should dismantle the tank itself, which was bolted to the toilet bowl with bolts.
Before you install the toilet with your own hands, you should dismantle the old device. The cold water supply to the tank is shut off, and all liquid is drained from it. Using a wrench, unscrew and remove the hose that connects the tank to the water supply. Next, you should dismantle the tank itself, which was bolted to the toilet bowl with bolts.
Now you need to dismantle the toilet itself. The sequence of actions will depend on the device installation option. If the toilet was bolted to the floor, it is enough to unscrew the fasteners and remove the plumbing fixture. If the bowl is mounted on a wooden pedestal, taffeta, then it is necessary to disconnect the screws from the board. And then remove the taffeta itself. As a result, a recess is formed in the floor, which should be sealed with a cement-sand mortar.
Important! The cement mortar hardens in a month, but holes for a new fastening can be drilled in a week

When installing a toilet bowl, the following tasks are solved: connecting to the sewer, sealing the base and firmly fixing it on the floor
If the outlet is sealed with cement mortar, it can be destroyed with a chisel or hammer. The process should be carried out carefully so as not to damage the cast iron outlet itself. To prevent unpleasant odors from the sewer from spreading throughout the room, the hole should be closed with a plug.
If the toilet is mounted with adhesive mastic, it is enough to loosen the seal with a construction knife and hit the front of the bowl properly. Next, you need to pull the release from the cuff.