Bracket Mounting Technology
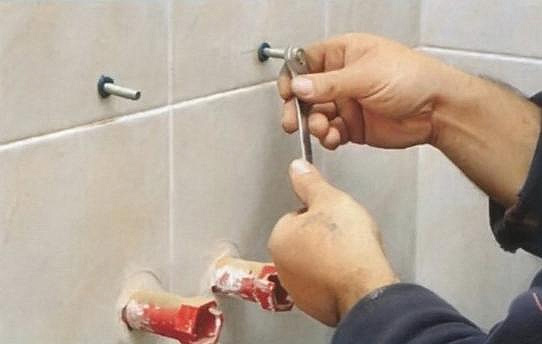
- Determine the density of the load-bearing wall using a small diameter drill. If the wall is not dense, then powerful and long dowels will be needed for fastening.
- Drill the plaster to the base (brick, concrete, other material), deepening 3-4 cm into it.
- Choose special anchors in lengths from 8 to 12 cm.
- Be sure to insert a plastic or nylon dowel.
- Fix the bracket.
- Check the installed (attached) bracket for reliability: pull it with your hand - it should not move.
- Proceed to install the bowl on the attached brackets.
Attaching the sink will not be a big problem if you do not violate the order of work
It is important to choose high-quality brackets suitable for the type of bowl
Now you know how to fix the sink. Mounting on brackets is the most difficult installation option. They need to be matched to the interior of the bathroom and securely fixed, because there will be no other support at the sink.
Mounting a sink without brackets
The mounting kit must be included with the sink upon purchase, if for some reason it is not available or the quality leaves much to be desired, purchase such a kit separately. Focus on products of well-known brands, so as not to worry about the quality of installation later.
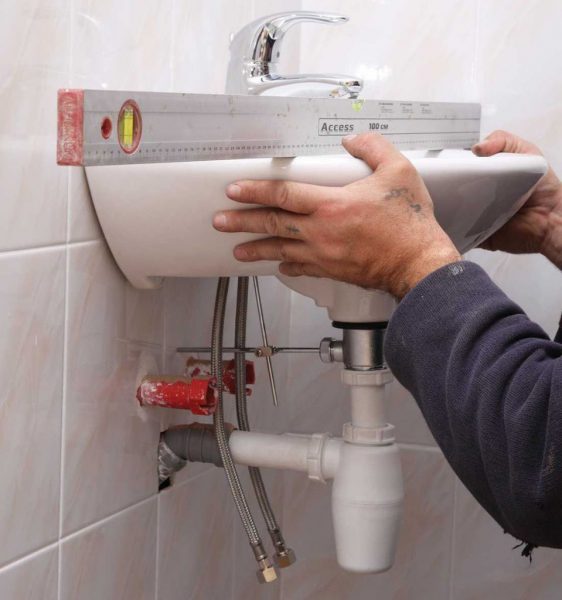
Decide on the place where the sink will be installed, and take measurements. It is usually recommended to install the bowl at a height of 70 - 85 cm from the floor.
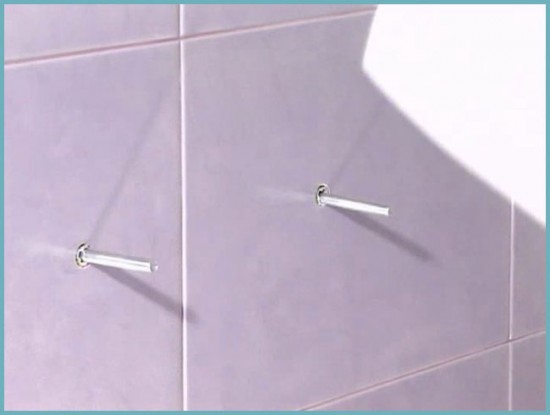
At the selected height, draw a horizontal line along the building level. Now we attach the upper edge of the bowl to the postponed line and mark the attachment points. We drill holes according to the marks and insert the dowels. We screw the studs into the dowels. The screwed-in stud should be 2 cm longer than the width of the washbasin. After the final installation, we tighten the nuts until they stop.
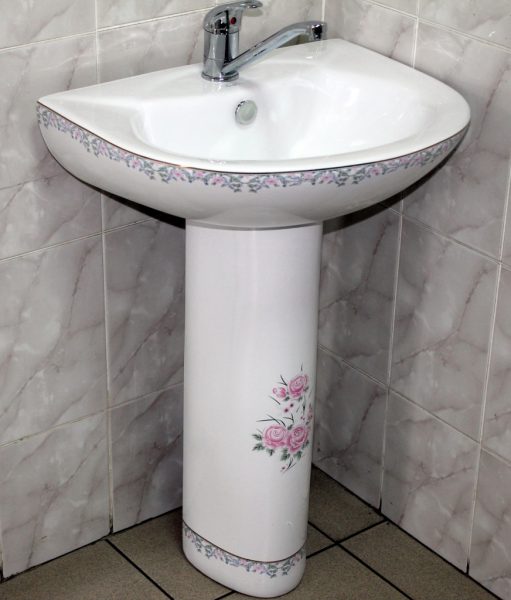
Installation of a wall-mounted sink with a pedestal
This option is good because you can hide all the plumbing in the cabinet.
At the required height, we draw a horizontal line along the level. We try on the cabinet, see how it will be combined with a siphon and a mixer. If necessary, we immediately measure and drill additional holes for plumbing in the back wall. Now we install the brackets and the cabinet on them. How the brackets are attached, we told above.
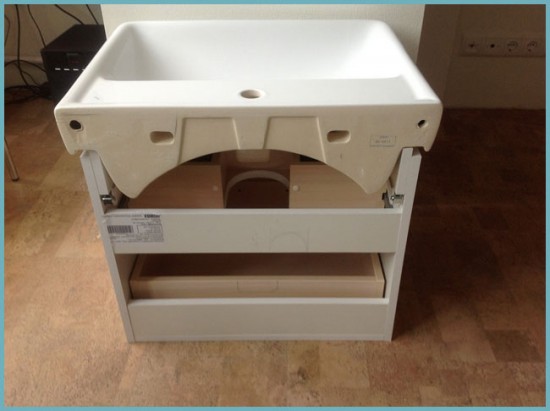
We install a washbasin from above, connect a siphon and a sewer to it. If the bowl model provides for additional fastening to the wall, then drill holes in the right places and tighten the anchor bolts. Or glue the sink to the wall with silicone for greater reliability.
Master Secrets
In order to qualitatively install the sink on the wall, it is worth knowing some of the nuances of this process, without which the installed structure will not be so reliable and stable. These are tips from the best installation experts:
- The wall structure has a significant disadvantage - it is a visually open pipeline and fittings. The excellent aesthetics of the bowl is achieved thanks to a cabinet that is suitable in design, which will close all these eyeliners and the siphon. An additional plus of such an installation is a good place to store various necessary accessories.
- In practice, the entire set of fastening equipment should be included in the general configuration of the product. Check this issue yourself, because often: either the manufacturer forgets to complete the sink with fasteners, or their quality is not very high.
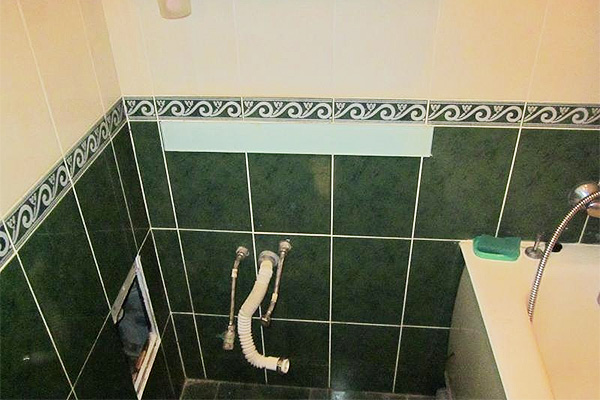
- To avoid getting wet fumes into the space between the bowl and the wall, it is necessary to use a high-quality sealant, for example, silicone.
Upon completion of the installation work, check the drain of the system for a tightness indicator by filling the siphon with water. If you find a leak, make a tighter twist and an additional sealed layer.
- Install the bowl only after all finishing work has been completed. Be very careful when installing fasteners.
- The surface of the wall on which you mount the bowl must be strong and stable, otherwise use a supporting frame.
- If the sink does not “walk” after installation, this is a clear indicator that the bowl installation procedure was successful.
A well-executed installation procedure is synonymous with excellent functionality and durability of the product. In view of this, before installation work, enlist the support of an experienced specialist.
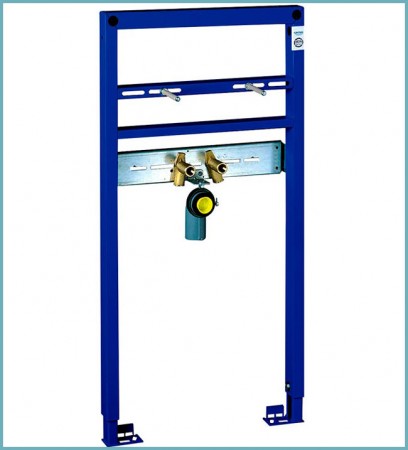
Frame construction for mounting the washbasin
If the walls in your bathroom are not strong enough to install a sink, but you really want just such a model, then you can solve this issue by installing a frame structure. It is attached to the floor and walls and consists of profiles. Height-adjustable with legs, so that the sink can be set at the desired height from the floor. All communications are hidden inside the structure.
The procedure is as follows:
- the frame is leveled and fixed to the floor and wall;
- at the right height, studs are screwed in to fix the sink;
- sheathe the frame with moisture-resistant drywall and tile or any other finishing material;
- between the wall and the sink, a rubber washer is thrown onto the stud to reduce noise during operation;
- attach the hinged sink to the studs on top of the cladding.
A properly assembled installation is able to withstand a load of up to 400 kg, and this is not only a sink, but also other plumbing. In addition, you can make a niche in the design and use it as a shelf.
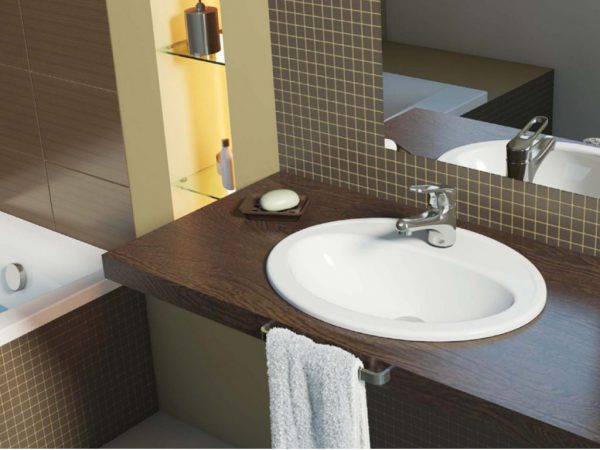
Specifics and models of sinks on the wall
The latest modern sink installation trend is to mount this unit to the wall surface. This type of layout is one of the most familiar and favorite among Russians, since it is this type of installation that has worthy and significant advantages. By installing the sink on the wall, you will save the desired meters of space, and the space under the sink is very convenient to operate and keep it clean.
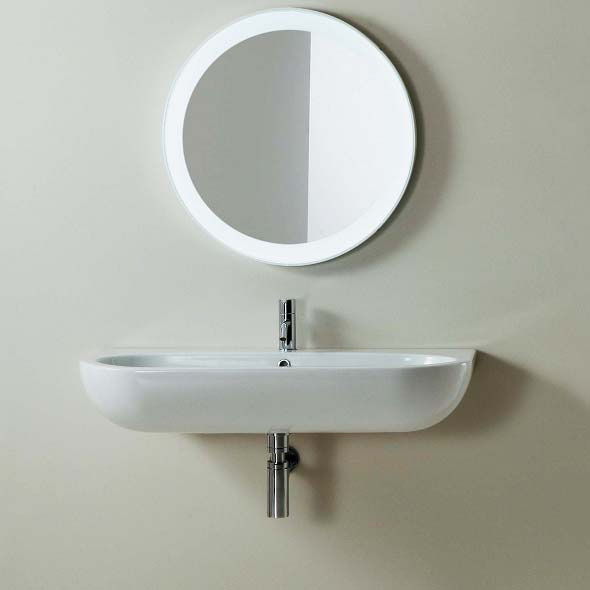
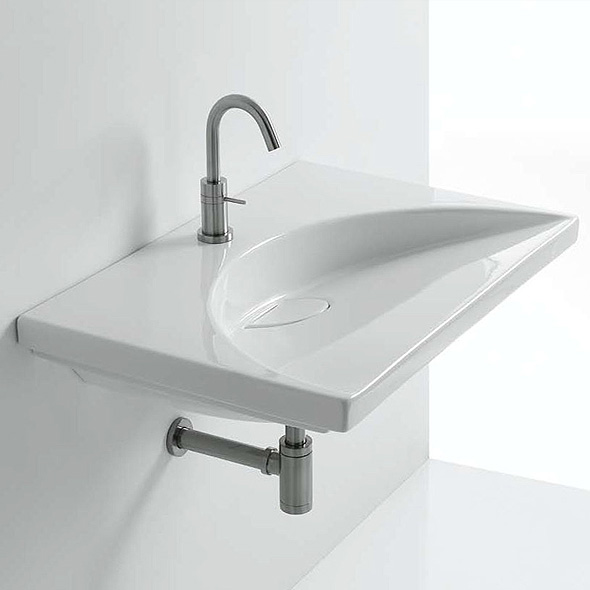
Before proceeding directly with the installation work, choose for yourself the model of the wall-mounted sink, in the most ergonomic design. A separate model has specific design features, which, of course, also affect the way it is installed. Therefore, it is so necessary to have at least some knowledge about the installation and the specifics of connecting the device to a common water supply system.
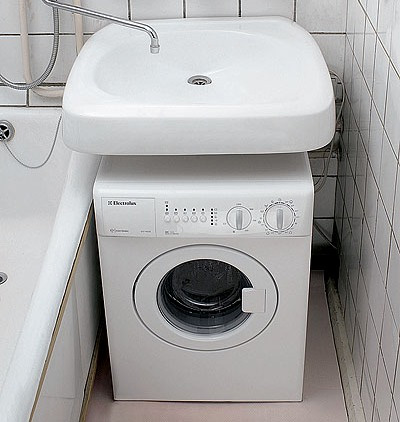
An interesting solution is to install a sink above the washing machine, which saves precious space in the bathroom.
Step by step installation instructions
https://youtube.com/watch?v=8d-LyqQfngQ
Mark the center line with a ruler, marker, and spirit level. Installation will be carried out along its line.
This will be, in a way, the upper limit of the bowl.
It is important to consider the thickness of the side walls of the sink. They must be strong enough to withstand the pressure of the brackets.
Measure the thickness and fix the remaining parameters of the future installation, on both sides of the bowl.
Connect horizontally all the available marks indicating the mounting height of the brackets.
Finally, work begins with the sink itself. Turn the bowl over and fix the brackets on its outer walls.

- Move the sink close to the horizontal and mark with a marker the places for mounting the fasteners. This is done through the recesses on the outside. Constantly measure the coincidence of all brackets and lines.
- Using a drill, make holes that are slightly smaller in diameter compared to the size of the fasteners and dowel screws.
- Drive corks or bushings made of durable plastic or nylon into the finished drilled places, screw screws into them.
Support-brackets are installed on this mount, on which the sink bowl is mounted.
Mark the places for the future attachment of the device to the wall, drill and hoist the sink.
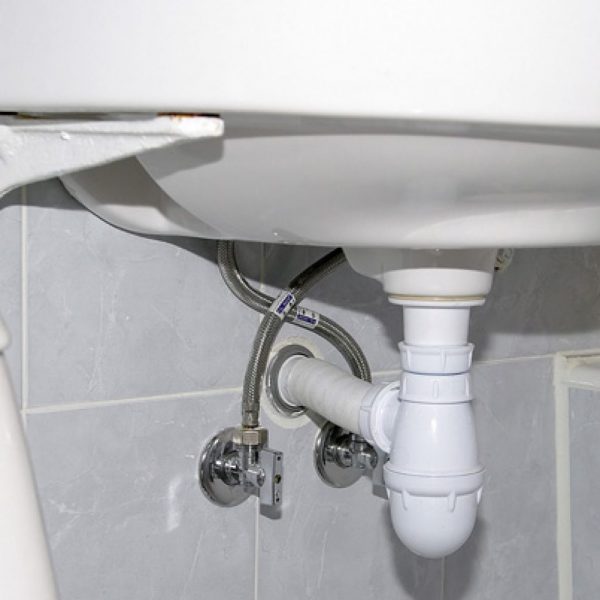
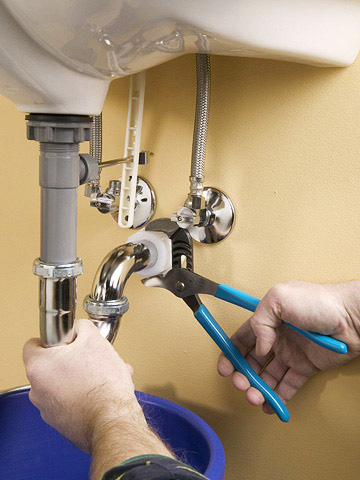
Connect the outlet end of the siphon pipe to the socket of the sewerage system, install the mixer, connect the water supply.
Having made a light fixing "bait", complete the exposure of the bowl on a horizontal level. Then go through all the fasteners again and fix them.
Features of work depending on the model
The types of fastening for the sink to the wall are very different depending on the modifications of the fixture:
For suspended mounting is carried out directly to the wall, so gravity is directed not only to the mount itself, but also to the wall
Therefore, it is very important that the base is strong and thick. Usually there are no problems with this if the installation is carried out in the place designated by the builders.
The Tulip model will look good in a spacious bathroom. During installation, polymer gaskets are installed between the planes of the sink, floor and wall, gluing them to the silicone sealant
This technique prevents the appearance of squeaks and the ringing of ceramics during careless impact. Another important point is that the fastening and pulling up to the wall of the bowl should in no case cause it to be raised on its “leg” in order to avoid splitting
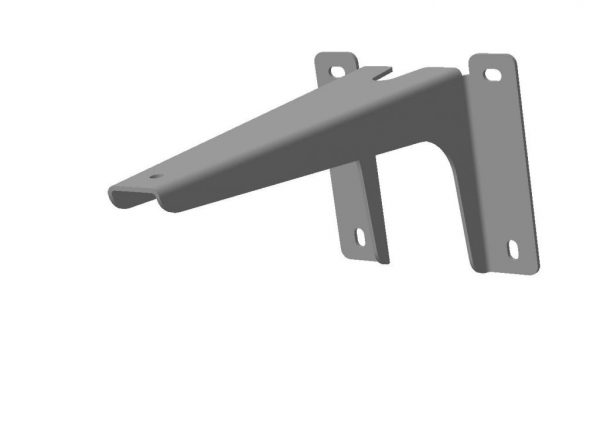
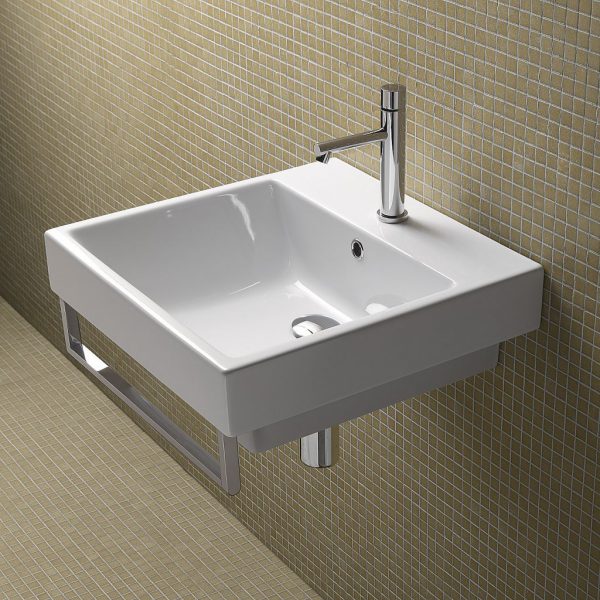
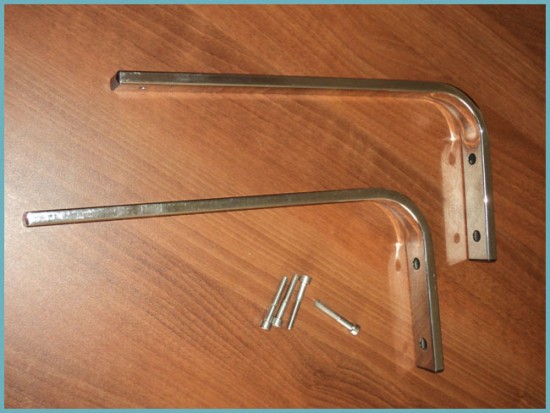
Varieties of brackets for the sink
Fixings for mounting the washbasin on the wall must withstand the weight of the plumbing with a margin. They are made from various metals.
special fasteners designed for mounting a specific model. Often these are exclusive designer washbasins with an unusual shape. Brackets for such plumbing are included and can be made in the form of pins of a special shape, a pipe around the sink or unusual welded structures. Such fasteners are treated with special decorative compounds (ceramic or metal).
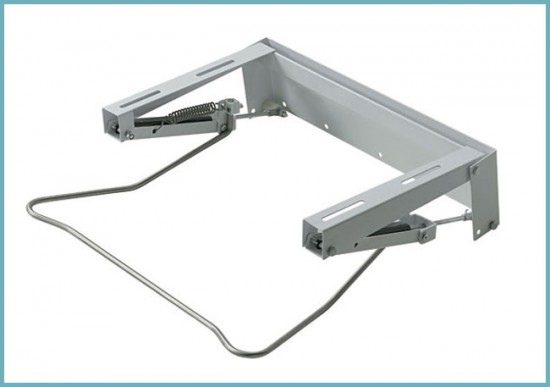
brackets for typical wall-mounted sinks are made of cast iron or steel and coated with anti-corrosion paint. They are produced in the form of T-shaped or L-shaped racks, and can also be made in the form of frames with a sliding assembly to adjust the size of the mount. Brackets in the form of a metal frame, inside which the washbasin is placed, are particularly reliable.
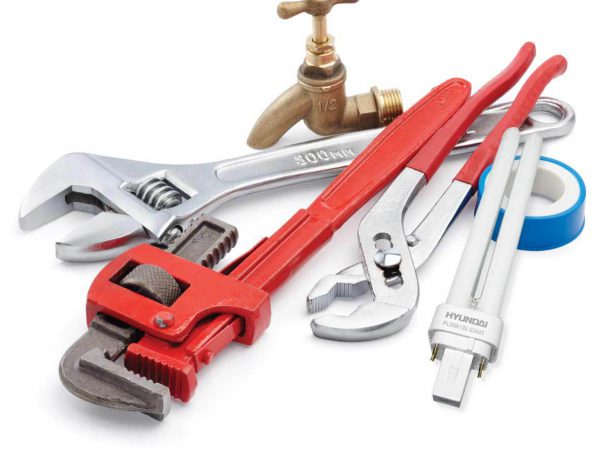
Tools and materials
For installation you will need: a sink, a set of auxiliary materials and various tools. Make sure everything is at hand. Of the tools you will need:
- gas key.
- Electric drill + drill with a pobedite tip.
- Screwdriver.
- Building level.
- Hammer.
- Marker.
- Special tape for threaded connections or tow.
The choice of fasteners is important if you had to deal with installing a sink in a bathroom for the first time. Most models are mounted on metal brackets, which come in different shapes (including openwork forged ones) and sizes. Installation is carried out using powerful bolts and studs. It is not always necessary to fix the sink to the wall. Depending on the model, it can only be placed on the mounting brackets.
There are several types of shells:
Depending on the variety, the ways of attaching the bowl to the wall also differ. Most often, in about 50% of cases, conventional suspended structures are installed, this also includes water lilies. The installation of tulip-type models is somewhat different: the bowl rests on the “leg”, and the sink needs to be fixed to the wall only for additional fixation.
Preparatory work
The bathroom sink has been purchased, the necessary tools are ready, it remains to install the structure correctly.To do this, it is necessary to prepare a wall on which the fixtures for the washbasin will be mounted, and make markings so that the bowl is located at a height convenient for all households.
Fasteners for the sink to the wall must be installed after careful preparation of the surface. It is best if it has passed the finishing (textured plaster, tile or any other finishing material for the bathroom). If the wall is simply plastered, it must be treated with an antiseptic. There are many varieties of them in different price categories.
It is more convenient and easier to use liquid glass. It will perfectly protect the surface from water and at the same time destroy possible bacteria and fungi. After processing, you need to wait a while until the surface is completely dry, then paint and proceed with the installation of the sink.

- Shut off cold and hot water.
- Stand up to your full height in front of the installation site of the future sink.
- Choose the upper limit of the bowl installation so that it is convenient for all households to reach the sink.
- At the marked place, using a long ruler, a pencil and a level, draw a horizontal line along which the main work will be carried out.
- Specify the dimensions of the sides of the bowl (measure it).
- Fix the size with marks on both sides.
- Connect the marks with a horizontal line, thus obtaining the installation height of the sink brackets.
- Turn the bowl over and place it against the wall. Mark where the slots for the brackets are.