About this video
#Sink_from_stone with your own hands: #polishing natural #stone and depth, Day 5
A sink made of stone or as they call it in the common people - a washbasin, a do-it-yourself washstand made of natural stone - the 5th day of work on the sink was remembered by the process of grinding stone, for the first time I am grinding stone using a diamond disc for grinding natural stones, granite, etc.
Another fifth day was remembered for the fact that the depth of the sink, which I planned to make from this stone, was almost ready, when I planned to make a washbasin from this stone.
Also, at 90% of the depth of the shell, an outline of how exactly the shell will look inside and what shape it will be began to appear.
I would like to dwell on the process of grinding natural stone in more detail: to grind the stone, you will need a diamond disc for the stone, a grinder attachment or a drill, as in my case. I opted for the velcro attachment option with removable polishing discs, which will allow you to change the sanding attachments as you grind the stone and achieve a smoother finish.
I thought that I would put the disc on the grinder, but I didn’t take into account that my grinder had a minimum of 12,000 revolutions, and a nozzle for grinding stones in a diameter of 100 mm was designed for 8500 revolutions - the maximum, which, of course, after installation showed itself and shook grinder, ate kept 🙂
If you have an angle grinder with an adjustable speed, you can safely take it and use it by setting the speed at 8500 and then the stone grinding efficiency will be higher due to higher rotation speeds, which will allow you to grind the stone faster and more efficiently. I use improvised means and show that the process of creating natural sinks The stone is quite durable and requires some skill with tools that can hurt you, so be careful and follow the safety rules when working with stone in the first place.
Necessary tools for creating a stone sink and polishing a stone sink, washbasin:
– Bulgarian, preferably a professional grinder, then the process will go faster and with the possibility of water supply;
- A steel chisel, you can take any nozzle from a perforator, it will be very effective, or you can use a perforator at all, but there is a chance of splitting a stone;
- Hammer, stronger :);
- Nozzle for grinder or drill for grinding stone;
- Diamond tortoise on a nozzle for grinding the roughest fraction, I found - 30.
_________________________________________________
Do-it-yourself stone washbasin at home in the country: Day 3 and 4 - https://www.youtube.com/watch?v=1BpXWvTRCY4
DIY stone sink: Day 1 and 2 — https://www.youtube.com/watch?v=GxinNiKFa-I
How to make a stone sink
What to do if you want such a sink, but the price scares off. The answer is quite logical - do it yourself. In this case, you can use not only artificial stone, but also natural.
From natural
Whole pieces are used for natural stone sinks. Usually travertine, marble, granite, onyx and other varieties are used for them. Sometimes a sink may not consist of one piece, but of several elements. It is clear that you will not find such a sink in every home, because the price for them is very high and this is logical, since a lot of effort is spent on their manufacture. Much more often you can find sinks made of artificial stone.
For your own home, it is quite possible to make a sink from natural stone with your own hands. This does not even require special knowledge and special tools. And yes, it won't take that much time.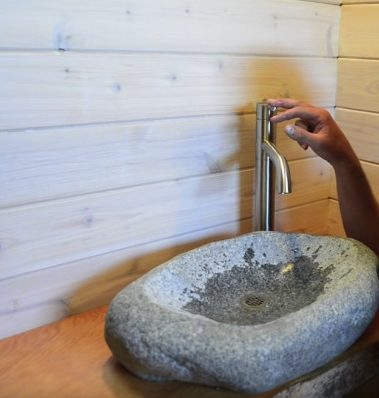
To work, you need to prepare the following tools:
- laser level;
- circular saw (the disc itself must be diamond);
- hammer;
- bit;
- grinder with a diamond wheel;
- impact drill.
Naturally, you will need to find a suitable piece of stone. Its breed, size and shape can be very diverse.
First of all, cuts are made in the stone with the help of a circular saw. This will make a recess for the bowl.
With the help of a hammer and chisel, the cut pieces are broken off and removed. Next, the grinder grinds the entire inner surface of the bowl.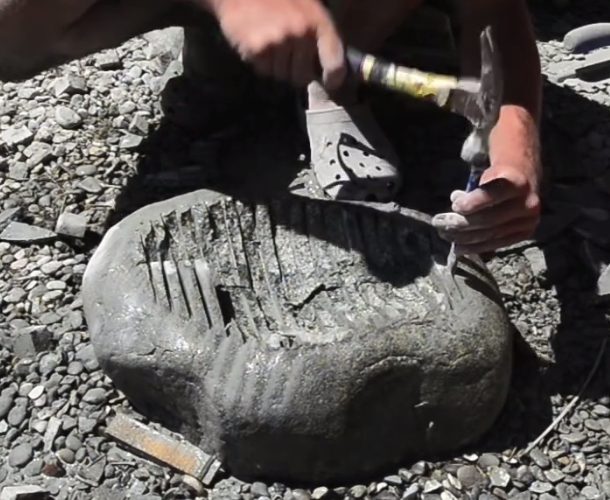
At the final stage, a drain hole is made with an impact drill. That's actually all! It remains only to hoist the sink in its rightful place and connect it to the sewerage and water supply.
Naturally, a home-made sink may not be very large and not the most convenient to use, but it will definitely save money and make the interior of the room unusual.
Attention! During operation, observe the safety regulations
From artificial
In addition to natural stone, you can use acrylic or artificial stone. The production technology will be slightly different.
Acrylic stone sinks
When creating a sink, we adhere to the following plan:
- we make a matrix - for this you can use steel or ordinary silicone;
- we process the finished matrix with a gel coat, which allows us to distribute acrylic over the surface of the mold itself;
- set the form on the vibrating table;
- for casting we use aluminum hydroxide and various hardeners.
Sinks made of quartz stone
To make a sink based on quartz, in addition to artificial stone, you will also need polyester resin.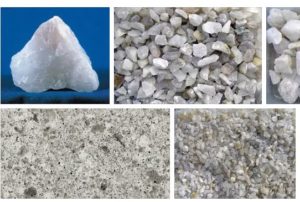
The manufacturing process is as follows:
- mountain quartz is added to the resin and mixed with a construction mixer (an ordinary drill with a special nozzle is also suitable);
- the finished mixture is poured into a mold, which is installed on a vibropress;
- as soon as the sink acquires the necessary shape, you will need an oven and a high temperature in it. When heated, the resin will harden.