Closed pipe laying
The first way to lay and firmly fix sewer pipes is to hide them in the thickness of walls and partitions.
After finishing, the sewer pipes in the wall will be completely invisible, they will not “eat up” the usable area, and the risk of damage during repairs will be reduced to a minimum. This can be done if the material of the walls is subject to gating, with the help of which channels are laid in the wall.
In general, the instructions for carrying out these works are as follows:
- Markup. According to a pre-designed scheme for laying a sewer pipeline, a line is drawn on the walls along which the pipe will be laid, it coincides with its axis.
- Shtroblenie. Channels - strobes are laid along the marked lines in the wall with the help of special tools. They are laid in such a way that the laid pipe does not experience stress, since in this place the pipe may burst.
- Pipe laying. If further plastering is expected, and for the most part it is, the entire pipe is wrapped in a soft material. Also, in the right places, protection against elevated temperatures is provided with the help of heat-insulating materials, especially if the sewer pipes are made of polyethylene or polyvinyl chloride.
After the end of this process, plastering and finishing can be done.
Closed pipe laying
Rules for the installation of polypropylene pipelines
Good day, my reader or reader! In this article, I will briefly list the rules for installing polypropylene pipelines. The main operation during the installation of polypropylene pipelines is soldering. Let's start with her!
Rules for soldering polypropylene pipes
Polypropylene pipes and fittings are connected to each other by soldering. The method is simple, but nevertheless, some rules must be observed. We list these rules below:
The first thing to do is to prepare the welding machine for operation - mount the necessary nozzles on the heating surface, install the welding machine on a tripod (the machine must stand on a flat surface), turn it on and set the required temperature on the thermostat (you can’t set anything on cheap Chinese machines). you need - they heat up to 260 ° C automatically).
After the "welder" has warmed up to operating temperature, you can start soldering. Before soldering, it is necessary to cut the pipe evenly, remove burrs from its edges and mark with a marker the distance at which the pipe will be inserted into the socket. Manufacturers still recommend degreasing the surface of the pipes, but it is enough to just clean the pipe. For pipes reinforced with metal foil, it is necessary to use a special stripper (for pipes with external reinforcement) or a trimmer (for pipes with internal reinforcement)
If the pipe is reinforced with fiberglass, then you just need to cut it evenly.
Next, the fitting and pipe are inserted into the nozzle on the welding machine (it is important to insert the pipe and fitting evenly, otherwise the soldering will be of poor quality) and you start counting the time required to warm up. For different pipe diameters, the time will be different (we will give it in the table below).
| Diameter, mm. | The distance to which the pipe must be inserted into the socket, mm. | Heating time, sec. | Soldering cooling time, min |
| 20 | 17 | 6 | 2 |
| 25 | 19 | 7 | 2 |
| 32 | 22 | 8 | 4 |
| 40 | 24 | 12 | 4 |
| 50 | 27 | 18 | 4 |
| 63 | 30 | 24 | 6 |
| 75 | 32 | 30 | 6 |
| 90 | 35 | 40 | 8 |
After completion of work, it is necessary to turn off the welding machine from the network and wait until it cools down. After that, you can twist the nozzles and put it in a box. Do not cool the welding machine with water. This will damage the equipment.
For more clarity of everything that is said above, watch this video:
For the installation of polypropylene pipes against walls and in hard-to-reach places, you will need a partner. There are difficult cases when you have to use two partners and two soldering irons at the same time. Therefore, in advance, look for a companion for installation work.
How to calculate the number of fasteners for polypropylene?
Support for polypropylene pipes.
Polypropylene pipes have standards for the number of fasteners per unit length. This amount depends on the diameter of the pipe and the temperature regime. For clarity, we present these data in the form of a table:
| Pipe diameter, mm | Distance between fasteners, mm. | ||||||
| 20°C | 30°C | 40°C | 50°C | 60°C | 70°C | 80°C | |
| 20 | 600 | 600 | 600 | 600 | 550 | 500 | 500 |
| 25 | 750 | 750 | 700 | 700 | 650 | 600 | 550 |
| 32 | 900 | 900 | 900 | 800 | 750 | 700 | 650 |
| 40 | 1000 | 1000 | 900 | 900 | 850 | 800 | 750 |
| 50 | 1200 | 1200 | 1100 | 1100 | 1000 | 950 | 900 |
| 63 | 1400 | 1400 | 1300 | 1300 | 1150 | 1150 | 1000 |
| 75 | 1500 | 1500 | 1400 | 1400 | 1250 | 1150 | 1100 |
| 90 | 1800 | 1600 | 1500 | 1500 | 1400 | 1250 | 1200 |
Now you just need to divide the total pipe footage by the distance indicated in the table and you will get the number of fasteners.
The location of the fasteners must be considered separately. Usually, this is done during the project creation process.
It is not worth saving on supports, they are needed to protect pipelines from deformations that occur under the influence of temperature.
Tool for mounting polypropylene pipes
For the installation of polypropylene pipes, the following tool is required:
- Welding machine.
- Nozzles - shoe or pair, depending on what kind of welding machine you have.
- Cutter for plastic pipes.
- Marker for marking the pipe.
- Building level.
- Wrench for tightening threaded connections.
- The belt wrench for combination couplings is a very handy item for tightening combination couplings without a hex.
- Thread, FUM or anaerobic sealant for sealing threaded connections
Wrench for combined couplings. Shoe nozzles for soldering polypropylene.
The list is not too long, but here is the most necessary and it is better not to forget anything. From my own experience I know that it is extremely inconvenient to work without a belt wrench and a marker.
Closed laying of polypropylene pipes
When laying non-reinforced pipes used for transporting hot liquids in a closed way, it is necessary:
- in the wall under plaster, around elbows and tees on vertically and horizontally located pipes, leave a space of 3–4 cm. and for heating systems - at least 10 mm for each meter of the length of a straight section;
- in a strobe punched in the wall, ensure a gap of at least 70% of the pipe diameter in this section. The gap must be symmetrical on both sides of the pipe. It is possible to do this in several ways. For example, lay pipes in special tubular insulation made of foamed polyethylene or foamed polyurethane (may be recommended for pipes with a diameter of up to 25 mm, in a hot water system, the insulation thickness is 9 mm). Create centering foam supports to support the pipe in the gate. The strobe in this case is not filled in, but is closed with an overlay plate. It is possible to lay pipes in a wall or in a floor screed in a corrugated PVC pipe channel. In this case, it is undesirable to replace a corrugated pipe with a smooth one or made of another material, since the rigidity of the pipe must be sufficient to counteract the shrinkage of the cement mortar.
Laying of polypropylene pipes in places of passage through the building structures of walls and partitions, polypropylene pipes should be laid in metal cases or sleeves.
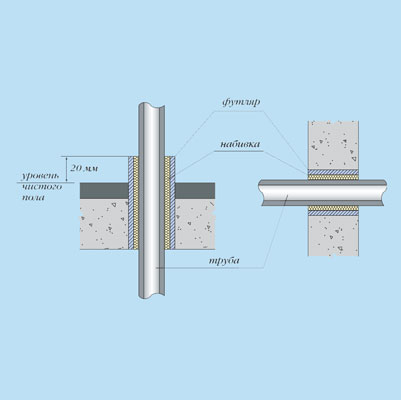
The passage of polypropylene pipes through the ceiling and wall
The inner diameter of the sleeve should be 20-30 mm larger than the outer diameter of the pipeline passing through it. This gap is filled with a soft non-combustible material that facilitates the free movement of the pipeline along the axis.The edge of the sleeve should protrude beyond the building structure by 30-50mm.
It is forbidden to place butt joints of both detachable and non-detachable nature in the sleeve.
In the case when the laying of polypropylene pipes is carried out in a layer of concrete or cement-sand mortar, it is forbidden to monolithic detachable threaded connections.
Overview of state standards for polypropylene pipes
Most products around the world are subject to various control systems governing their production and use.
The main regulatory documents in Russia are SP, SNiP, GOST: polypropylene pipes fall under the requirements of SP 40-101-96, SNiP 2.04.01-85, GOST R 52134-2003 and others.
Basic GOST requirements for polypropylene pipes
GOST R 52134-2003 "Pressure pipes made of thermoplastics ... General specifications" regulates:
- Scope: pipes made of thermoplastics of round section and fittings are used for transportation of drinking and industrial water, designed for the arrangement of cold water and hot water systems, heating of residential and non-residential buildings.
- The main parameters and dimensions are given in the document in tabular form, this paragraph contains data on which, according to GOST 52134 2003, a polypropylene pipe should have outer and inner diameters, wall thickness, tolerances, etc.
- Technical requirements: a large paragraph contains characteristics, requirements for reliability, raw materials, materials, components, recommendations for completeness, marking, packaging.
- Safety and Environmental Requirements: This section specifies hazard classes for pipe manufacturing, contains reference requirements.
- Acceptance Rules: This refers to test methods, lot sizes, how pipes and fittings are to be sampled for testing, etc.
- Methods of control: the section regulates the procedure for testing products.
Large and important sections are also: transportation, storage conditions, pipe installation. In addition, various calculation tables are attached to GOST.
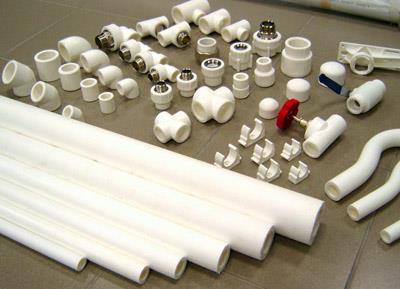
Pipes and accessories for them
What is regulated by the joint venture, SNiPs
Codes of practice, building codes and regulations establish regulations for the design, installation and operation of plumbing, heating and sewer systems, including those made of polypropylene pipes. Polypropylene pipes assembled in accordance with the requirements of SP and SNiP will work most efficiently and for a long time.
PP pipe: GOST, SNiP and most other regulatory documents have now been translated into electronic form
Open laying and fastening of pipes
This method has less labor intensity, it is simpler and more versatile, so it is used much more often. There are two varieties of this method: with one, the pipe is fixed in the clamp motionless, with the other, it has the ability to slide in the longitudinal direction. For these methods, fastening clamps for sewer pipes of various types are used.
In addition to fasteners, each of the methods uses sound-absorbing clamps or couplings to dampen the noise emitted by sewers as they pass through the pipe.
The selection of the diameter of the clamps requires special attention: if you choose products that exactly repeat the diameter of the pipe, the pipeline will not have freedom in the attachment points, and in case of thermal deformation it may be damaged.
The rigid type of fastener can only be used in heated rooms with a constant temperature, since its use does not make it possible to compensate for the temperature deformations that the system experiences with changes in this area.
In general, the installation process when using both methods looks similar and, having mastered it, it is possible to install the sewage system quickly and efficiently. Here is a short guide on how to do it.
markup
Fasteners installed at the junction
At this stage, according to the draft, the pipe laying route is marked on the walls. The laid line corresponds to the axis of the pipe, and this should be followed in further steps. The places where the fasteners will be installed are also marked.
Particular attention is paid to points where there are branches and branches, where the presence of supports is mandatory.
The distance between the points where the fasteners will be installed depends on the diameter of the pipe: it is believed that for a strong fixation, the distance between the clamps should not be less than ten times its diameter.
Fastener installation
If possible, the clamp for fixing sewer pipes is installed at a minimum distance from the wall. This is done in order to reduce the loss of usable area and reduce the risk of damage to the pipeline. If a sliding fastening is planned, special inserts are inserted into the clamps. If they are absent, the edges of the clamp should be rounded off with a special tool in order to avoid damage to the pipe by its sharp edges. Clamps are fastened to the wall using self-tapping screws, sometimes they are included in the design of the clamp.
Pipe clamp
Pipe installation
After the fasteners are prepared and installed, you can proceed with the installation of pipes. This procedure is not difficult: the pipe is inserted into the clamp, and depending on its design, it simply snaps into place or is fixed with a metal pin.
Proper and high-quality fastening of sewer pipes will ensure proper and long-term operation of the entire system. Independently performing work with sufficient mastery of skills can give a result that is practically not inferior to the actions of professionals, also allowing you to achieve certain savings.
Tools and fixtures
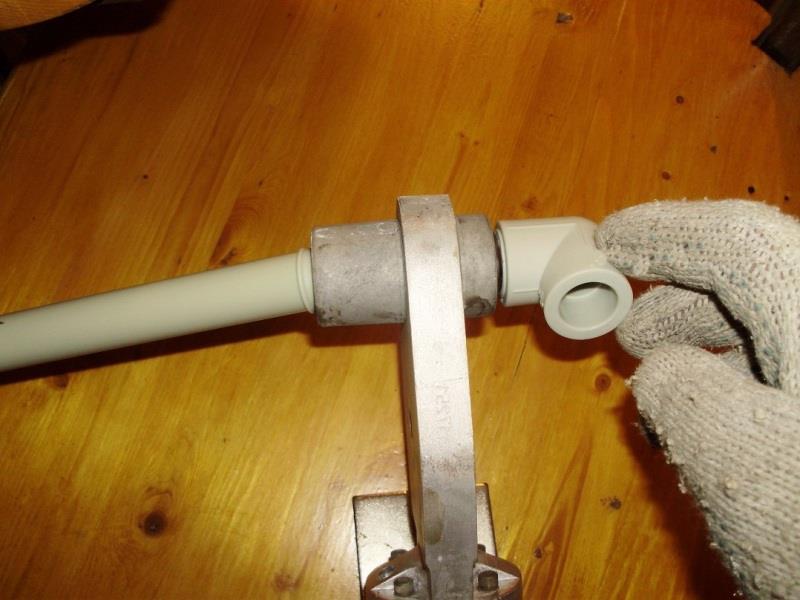
For polyfusion welding, a special electrical appliance is used, complete with the necessary heating nozzles and a wire for connecting to the network. The nozzle temperature is controlled using a contact thermometer. To cut pipelines, use a special cutter equipped with a cutting roller, pipe shears or a hacksaw. Rozma Ital pipes of the PPR Stabi type are prepared for welding using a special cutter. To clean the ends, a pocket knife with a sharp short blade is used.
When welding, you may also need alcohol, a natural cloth rag, a marker, a folding rule, or a tape measure. Parts with a diameter exceeding 50 mm are welded using a scraper and a special mounting tool.
How to choose polypropylene pipes
There are no prohibitions on independent laying of pipelines in your home, therefore, in principle, a person who has installation skills and has an idea about the design of plumbing systems can purchase pipes and accessories for them himself and carry out the laying.
With experience and special tools, pipe laying can be done independently.
Specialists in the installation of pipeline systems themselves purchase the necessary components and provide a comprehensive guarantee for the work performed (materials + installation).
In order not to make a mistake and purchase pipes with the desired characteristics, you must:
- carefully study the certificate for polypropylene pipes in the store, it must contain information about the class of operation of the product according to the State Standard, there are 6 classes of PP pipes:
| Class | Purpose of polypropylene pipes for heating and water supply |
| 1 | Hot water supply (60) |
| 2 | Hot water supply (70) |
| 3 | Low temperature floor heating (60) |
| 4 | High temperature floor and low temperature radiator heating (70) |
| 5 | High temperature radiator heating (90) |
| XV | Cold water supply |
- evaluate the quality of pipes and fittings: the outer and inner surfaces of the pipes must be smooth, the cross section must have a perfectly round shape; the presence of shells, cracks, burrs and bubbles in the material is not allowed; color models must have a uniform color;
- inquire about the guarantee for products, any pipe and accessories for it must be endowed with a supplier's guarantee.
It is important to consider that the permissible storage temperature of polypropylene pipes is not lower than - 20C. Therefore, you should not buy products in the winter on the street or in unheated stores. External inspection of pipes and components should satisfy the buyer
External inspection of pipes and accessories must satisfy the buyer
Polypropylene pipes are easy to install, reliable, aesthetic. They have a long service life of 50 years. But it must be remembered that the long-term trouble-free use of pipeline systems installed in compliance with the standards is possible only under normal conditions.
Types of clamps
In plumbing, there are the following types of fasteners for fixing sewer networks:
Varieties of clamps for fixing the pipeline
- Crimp clamps, with which you can not only fix, but also compress the junction of pipes and fittings, insuring the tightness of the interface.
- Guide clamps that are used in the process of positioning the pipeline relative to the supporting surface. These are more markers than fasteners.
- Support clamps, with the help of which the sewer pipes are fastened to the wall. Such fasteners are equipped with rubber vibration and linear deformation compensators.
- Safety clamps that are mounted on difficult areas that need additional "support".
The pipe is fixed with a support collar
Moreover, all these types of clamps suggest two schemes for attaching pipelines to the supporting surface: rigid and floating.
And the first (hard) fixation option is carried out using crimp or support clamps, which are brought under the pipe socket or put on the fitting body. The main task of such fasteners is to securely fix the junction of pipeline segments or pipes and fittings.
The second (floating) fixation option is implemented using guides or support clamps. The diameter of the fastener tie, in this case, is always greater than the outer diameter of the pipe, which can be displaced in the longitudinal direction.
Hiding pipes in the wall step by step instructions
Often the owners want to install polypropylene pipes in the wall, and for good reason. This is the best option from an aesthetic point of view. But before starting work, a lot of questions arise: how will the walled pipes behave; how to install. Let's take everything in order.
Is it possible to install PP pipes in the wall
Polypropylene is a material that has high resistance to chemicals and corrosion. Therefore, the installation of pipes in the wall is quite acceptable.
In order for the communication system to last for a long time, it is important to leave the necessary space gap when laying to expand the hot water pipe. In addition, the system itself should be as monolithic as possible, with the least number of connections.
The pipe around the entire perimeter must be additionally protected by thermal insulation. It can be corrugated cardboard, glass wool, mineral wool or other insulation. Thus, you protect the structure from fogging.
It is important to provide in a closed communication system the possibility of free access to taps (valves). Usually, special doors or hatches are installed in this place. . Laying PP pipes in the wall
Laying PP pipes in the wall
We carry out the installation of pipes in the wall
Any installation work begins with marking. You can do it with a simple pencil.Then proceed to the main work:
- With the help of a grinder (perforator), it is necessary to make 2 parallel recesses in the wall strictly according to the markup - strobes. To work with a grinder, you should use a diamond-cut disc or a simple stone cutting disc.
- With a chisel or perforator, remove the material between the 2 markings, connecting them into one.
- A polypropylene construction is inserted into the finished strobes. From above, polypropylene pipes in the strobe are closed with cement mortar.
- Finishing is done with plaster or other building material.
The final action an hour after installation is to test the operation of the system. Pipes must be filled with water and checked for leaks, sagging and other malfunctions in the operation of the water supply. If none are found, congratulations, you have correctly fixed the PP pipes.
Ways of fastening pipes made of polypropylene to the wall
Fastening polypropylene pipes to the wall plays a big role in home plumbing. The service life of communications will directly depend on how correctly all actions are performed. In most cases, water pipes in homes are made of metal or plastic.
Metal products quickly become clogged and become unusable. In addition, the wiring of steel plumbing is a rather time-consuming process. Plastic pipes are more durable and easy to install. The main thing is to accurately observe the distance between the fasteners.
Consider all the nuances associated with this operation.
Mounting methods
Clamps or special clips are usually used for mounting polypropylene products. The choice of fasteners directly depends on the diameter and intended use of the pipeline.
Clips. These fasteners are made from nylon. This is a light, elastic, but at the same time very durable material that is resistant to temperature effects and mechanical damage. Products are used for fastening water pipes of small diameter to the wall. Due to the presentable appearance, the fasteners do not need to be masked, they look quite organic. Products are attached to the wall with dowel-nails or self-tapping screws, after which, the water pipe is simply inserted into the clamp and snaps into place. These devices can be single or double.
Clamps. In appearance, this is a composite metal structure made of metal and connected by bolts. Such products are not suitable for fixing pipes in an apartment. They ruin the look. But this is the best option for reliable fixation of heavy communications of large diameter, for example, risers. Clamp attachments can be fixed or floating. To reduce vibration vibrations in the pipe, the clamp can be supplemented with a rubber gasket.
Mounting options
There are two ways to dilute water pipes around the apartment: hidden and external. To hide the pipe in the wall, a strobe is made (a recess in the supporting structures). To do this, markings are applied to the walls, then a recess is made using a perforator or grinder.
The size of the strobe depends on the diameter of the water pipes. In this case, it must be borne in mind that there should be a small space between the wall and the water supply. Plastic products are characterized by dynamic expansion during operation.
The remaining gap can be filled with insulation.
Concealed pipe fastening is usually used for aesthetic purposes or to save space in rooms with a small area. Among the disadvantages of this method, one can note the laboriousness of the installation process and the dirt after gating.
External fastening of communications looks more practical. In addition, for this installation method, you do not need to have skills in working with power tools or involve specialists.The entire workflow can be done by hand. First you need to put markings on the walls and stock up on the necessary tools. You may need:
- screwdriver;
- construction level;
- special scissors for cutting polypropylene;
- soldering iron for plumbing.
During installation, the main thing is to take into account the distance between the supporting elements.
Polypropylene pipes are a very flexible material, so if the clips are too far apart, the plumbing will sag.
This will reduce the throughput of the pipes and reduce their service life. When installing, try to reduce the number of bends and corners of the water supply. This also negatively affects the quality of the plumbing.
Advice! To install communications in hard-to-reach places, it is recommended to assemble the structure in advance and mount it ready-made.
To do this, holes are pre-drilled into which fasteners are hammered. It is not worth applying excessive force when working with a hammer, the clip may crumble from a strong blow.
After that, the pipes are snapped to the fasteners and interconnected with a soldering iron.
The advantage of this mounting method is that in the event of leaks or malfunctions, timely repairs or replacement of damaged elements can be carried out.
Recommended distance between clips
The distance between the fasteners directly depends on the diameter of the pipe and the water temperature. You can find out the recommended parameters from the table.
USEFUL INFO: Installing a faucet for a drinking water filter