How to start a bathroom renovation
How can you make the bathroom more comfortable?
First of all, we need to carefully analyze what we have.
The first is the area and volume of our bathroom. Based on this, we can plan various improvements in our bathroom. We may have a large shower or bathtub, a washing machine, etc.
But we must definitely keep in mind that our bathroom will be much more comfortable if it is spacious enough so as not to hamper our movements.
It is equally important to change the wall covering of the bathroom. Most often, we have tiles there, thanks to modern technologies, the variety of colors and shapes of tiles is huge.
We also need to choose from this huge number those tiles, the wall cladding with which will create for us a feeling of convenience and comfort. The color and shape of the tiles on the wall determine how comfortable we feel in the bathroom.
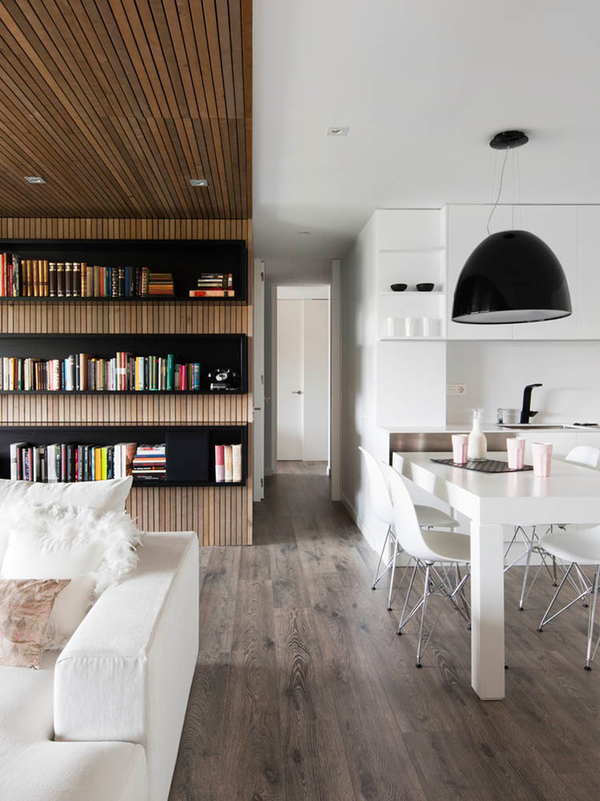
If we have a large bathroom, then when renovating the bathroom, we can fill it with various items for comfort and convenience. It can be: vases, flowers, cabinets and lockers, stools and benches. The bathroom can be a convenient place to store linen and various household items.
Music or TV, safely installed in the bathroom, can create the necessary mood. Currently, a wide variety of audio and video equipment is being produced that runs on 12 V that is safe for us.
Many of us carelessly put sockets in the bathroom at 220V, but in vain. If you need to install such outlets, you need a qualified electrician who can competently secure our stay in the bathroom.
Self-renovation of the bathroom is not a cheap pleasure. As a rule, we are more concerned about the issue of saving than unnecessary spending.
The most effective way to transform our bathroom is to reorganize its space. How to change the layout of the bathroom.
Cleanliness is a very important part of bathroom comfort. Keeping our bathroom clean is one of the free yet effective ways to create comfort.
The transformation and reorganization of our bathroom is very diverse.
This may be the installation of a water heater, an important device that allows you not to be upset by seeing an announcement on the entrance door about turning off hot water for almost a month. Consideration must be given to the installation of a water heater.
Turning off such familiar hot water creates great inconvenience in maintaining personal hygiene for all family members.
A water heater, in which water and electricity 220V work together, is a complex device. Having decided to install it, it is better to consult an electrician and plumber. These two specialists will jointly decide how to make the use of this device convenient and safe, and maintenance is not expensive and easy.
Another way of transforming our bathroom is lighting. See how stores highlight their merchandise with lighting, we love it and it sets the mood. We, too, can use a similar method to change the atmosphere in the bathroom, taking into account our mood. It can be added to our bathroom and germicidal lamps are very effective as additional helpers in cleanliness.
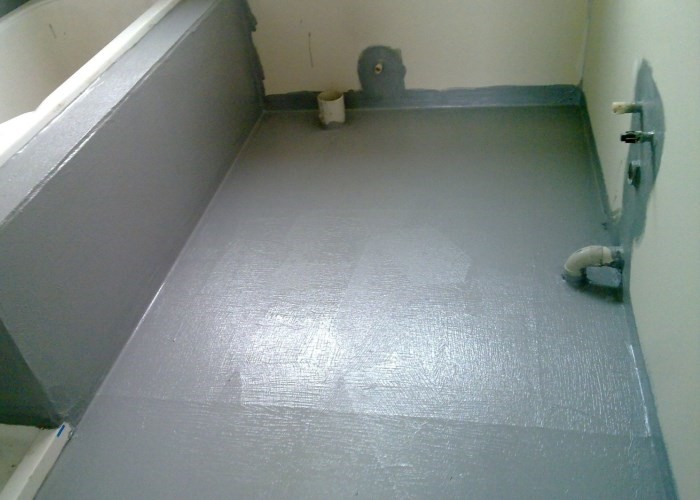
Screed installation
The screed is done only on a clean, dry floor. It is necessary to remove all debris from the floor so that no grains of sand remain. After that, the floor is primed with a brush. Then the mixture for the screed is prepared.
First you need to determine the curvature of the floor. For this, the building level is used. If the floor is level, then no screed is required. With height differences per 1 m2 no more than 1-2 cm, a cement-sand mortar is made. But if the curvature exceeds 2 cm, then a concrete mixture of cement, crushed stone and sand will be required.
Concrete mixture to eliminate large height differences is prepared from cement, crushed stone and sand in a ratio of 1: 3.5: 2.5 in a concrete mixer or thoroughly mixed by hand in a large container.
After preparing the solution, beacons are installed on the floor, along the upper part of which a horizontal line can be drawn. If you put a building level on top of the lighthouses, then it should show a flat surface.
Then the prepared mixture is poured onto the floor in parts. It should reach the top of the lighthouses, but not completely. After an hour, the beacons are pulled out of the dried solution, which is why it is required that the solution does not completely cover their tops.
The resulting cracks from the beacons are filled with a solution. After that, the room is left to dry the floor. During drying, it is better to cover the floor surface with plastic wrap, due to which the concrete will not crack.
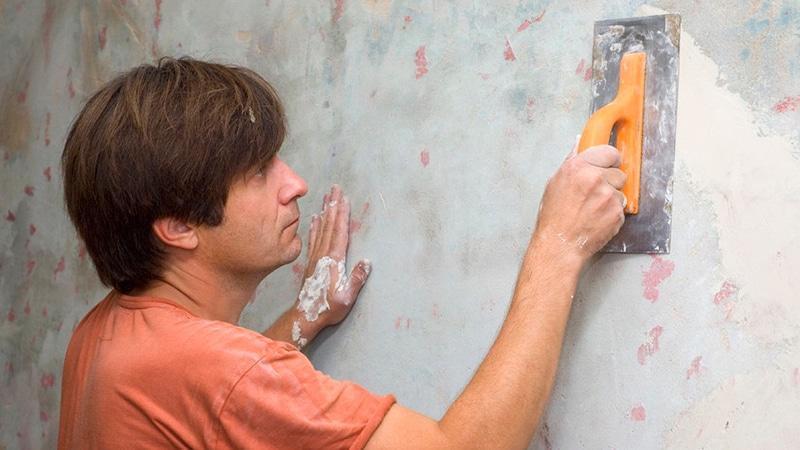
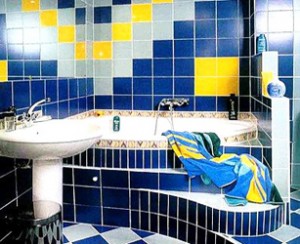
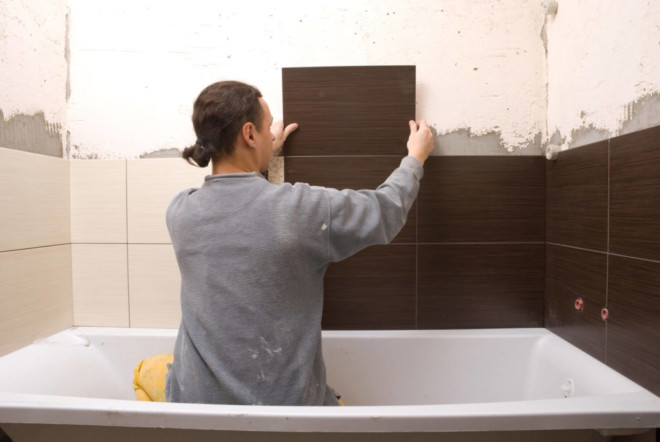
Tiling bathroom surfaces
Tiling bathroom surfaces is no easy task. As we have already said, before facing, it is necessary to prepare the surfaces - primed, level, if necessary, etc.
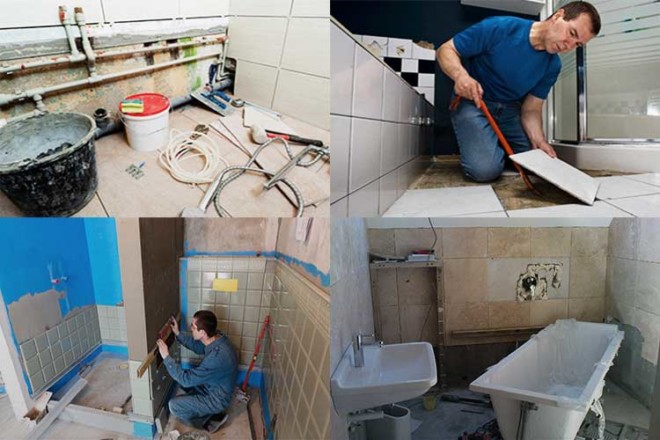
When applied, the leveling layer does not need to be thoroughly rubbed, but it is necessary to perform a rough cleaning to get rid of all protruding roughness. Glue can be mixed manually or using a drill with a nozzle. The adhesive is applied to the surface of the floor or wall with a comb trowel. Having applied glue, we press the tile to the surface and tap it with a fist or a rubber mallet. To comply with identical seams between the tiles, special templates are inserted that look like “P”-shaped brackets or plastic crosses. After the adhesive has set (usually one day after tiling), the templates are removed.
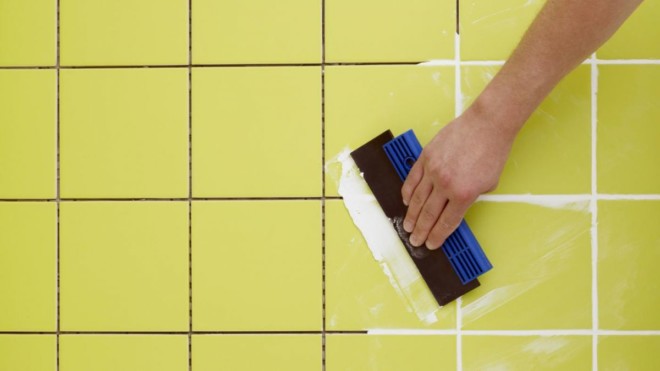
The seams are rubbed with a special composition, matched by tone and color. Let's dwell on this moment in more detail. The thing is that it is almost impossible to choose a grout that perfectly matches in tone (and even more so in color) with a tile. A grout similar in color and tone sometimes looks generally tasteless. Therefore, the tone and color must be selected so that they not only match, but also stand out in comparison with the tiles. Usually the seams are made somewhat lighter than the tiles and in colder colors. It is necessary to rub the seams after the glue has completely dried, but not earlier than after a couple of days, especially when using a light grout. Excess grout must be removed with a dry cloth immediately after it "grabs". To get even seams, go over the fresh seams with a piece of silicone or vinyl insulated round cable. The diameter of the cable should be about twice the width of the seam, then the seams will be smooth and evenly depressed along the entire length.
Well, you did your own bathroom renovation. Having spent a lot of time, you saved some money, gained skills that will be useful to you more than once, and most importantly, you made repairs the way you yourself wanted. It remains only to attach lamps, mirrors, mount plumbing fixtures, put furniture.
How to do it all, how to install shower cabins, hot tubs, siphons, faucets, bath screens, as well as how to work with wood, plastic, ceramics, paint, glass and much more useful and interesting you can learn by reading my blog Man in Dome.Ru. Subscribe and come again and again, so as not to miss anything interesting!
(No ratings yet)
Choice of finishes
The next stage of the bathroom renovation is the choice of finishing materials. The most common option is tiles on the walls and on the floor. This finishing method is popular as it is durable and easy to clean. But the cost of such finishing is high. There are cheaper options, but no less interesting. For example, cork or PVC tiles can be laid on the floor. Walls can be painted, pasted over with special wallpaper, applied decorative plaster on them.
No less options for decorating the ceiling. The standard way of finishing is a bleached or painted ceiling. But recently, suspension or tension systems have become more popular. They allow you to hide communications, although they take a few centimeters in height. Ceilings in the bathroom can be:
- tension;
- from drywall;
- rack (from aluminum rails);
-
PVC panels.
Depending on the type of ceiling, the sequence of repairs in the bathroom changes. When choosing a stretch ceiling, it is done last. After all other finishing work is completed, the doors are installed. The plasterboard ceiling, as well as bleached or painted plaster, is finished simultaneously with the walls or a little earlier - so that whitewash or paint does not fall on the walls. Suspension systems (except drywall) are assembled after finishing the walls.
Drawing up a plan and procedure
After you have decided on all these issues, have chosen plumbing and finishing materials, you begin to draw up a plan. After all the old decoration has been removed, the dimensions of the room are measured with an accuracy of up to a centimeter, and the dimensions are transferred to the plan. On this plan, all communications are drawn, distances to all points of their exit are drawn, plumbing and furniture are drawn on a scale. After all, the location of the outlets of the water supply, sewerage depends on the position of the plumbing and its size. The following is the work plan:
- Dismantling of equipment: baths, washbasins, electrical appliances.
-
Removal of old finishes from walls, floors, ceilings.
- Replacement of water supply and sewerage, installation of new cut-off valves. When replacing the water supply, if necessary, filters can be installed; check sewer valves are often installed on the sewer in apartments to prevent the appearance of an unpleasant odor.
- Electrical wiring. The wires are mounted in the walls, strobes are made under them, in which a corrugated sleeve or plastic cable channels are laid.
- Wall decoration. Here the sequence of repairs in the bathroom depends on the type of finish chosen and the initial state of the walls. Under the tile, the alignment of the walls with plaster is required, for painting and wallpaper, it is still necessary to finish the alignment using putty. When laying tiles, they are laid starting from the bottom, but not from the first, but from the second row. The first row from the floor is laid later, after the floor is made.
- Ceiling and lighting installation. In most cases, built-in lights are used; for the bathroom, they must be in a special sealed case.
-
Floor finishing. If there are large differences in height, before the start of finishing work (after laying electrical wiring), a leveling screed is poured. While all other work is going on, concrete is gaining strength. At this stage, the selected finishing material is laid on a previously leveled base. After laying the first row of tiles (with pruning as necessary).
- Installation of a washbasin, bathtub, other plumbing fixtures.
- Furniture installation.
This is a step by step bathroom renovation plan. There is only one caveat: when to install doors. Usually the door frame is placed after the walls are prepared for finishing. In this case, the wall decoration will fit close to the box.
This is important if platbands are not provided from the inside. The door leaf can be hung later - after the end of all the "dirty" work or immediately, but protect it with a thick plastic wrap
Otherwise, it is desirable to follow the sequence of repairs in the bathroom without changes.
Surface leveling
Smooth surfaces will be the key to an excellent view of the decoration of the room as a whole.
You do not know where to start bathroom renovation? It is important to correctly level the surfaces before facing them. Many say that they do not need to be leveled, as this can be done in the process of laying tiles with glue.
But this is the wrong decision.
A significant layer of glue can cause it to "float". Because of this, the reliability of setting the tiles to the surfaces of the floor and walls is reduced. In addition, you will have to provide a fairly large budget for the purchase of adhesive composition.
Leveling the walls in the bathroom
Leveling surfaces will be cheaper if you use drywall sheets or plaster mix for this. In this case, you will not need to buy a lot of glue to install ceramic tiles on the surface of the floor and ceiling. And proper alignment leads to the fact that the tile is glued exactly on all parts of the plane.
How to make a bathroom renovation modern
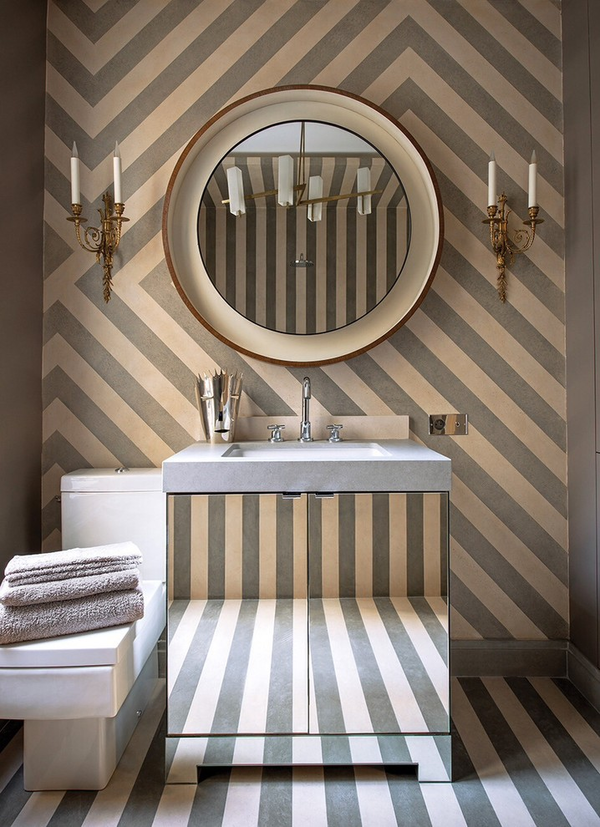
Color matching is very important
The times when the premises were repaired with the materials that could be obtained are long gone. Now the construction market offers the widest range of modern and beautiful facing coatings, plumbing fixtures and all kinds of accessories.
You will have every opportunity to make your bathroom convenient, comfortable and with a competent bathroom interior.
Do not think that since the room is small, you will not be able to make it modern and beautiful.
It is only necessary to choose the right colors and shades in the room, thereby visually expanding it.
- To make the ceiling in the bathroom seem higher, use lighter colors for its lining than on the walls. If they are already light, then the ceiling should be white.
- If you are going to do a modern bathroom renovation, do not be afraid of rich shades. Cool dark color will give the space richness and depth. As a result, you can use materials of all blue shades or dark blue tones for lining the bathroom.
- If you want to make the room "warm", choose pastel colors, and to create bright spots, use accessories. Such a design technique will give a sense of the depth of space.
- Do not use rich red or brown tones for wall cladding. They visually reduce the space.
- Large drawings and shiny accessories overload the room interior too much. But transparent materials and light decor items create its airiness.
- When using mosaics or tiles, refrain from buying a bright set. In the bathroom you relax and unwind. Bright walls will not allow this to be done.
- It is worth remembering that large ceramic tiles always reduce the visual space. Therefore, if your bathroom is very small, choose a tile, no more than 30 × 20 cm.
- Large mirrors add elegance to the room and expand the volume of the room.
Room decoration
Finishing in the case of cosmetic and major repairs can vary greatly. The instructions for tiling are as follows.
Laying tiles start from the top edge of the bath. Since the surface of the edge is not very even, it is usually impossible to maintain the same joint width along the entire border with the bathtub. The tile has to be cut very evenly or close the seam with a corner or a plinth.
Cutouts are made in the places where communications are supplied. The sockets are placed so as not to get into the joint. At the outer corners, the tiles are sawn at an angle of 45 °. Fitting and laying the bottom row of wall tiles is carried out only after the flooring.
When laying the cut tiles, they try to take them out of sight and hide them in corners, under a bathtub or boxes. For a precise fit, manufacturers offer borders, friezes, inserts, but they are much more expensive. A more affordable option is to use tile scraps of a different color.
After the laying is completed, the joints are filled with epoxy-based grout, the excess fugue is removed immediately. Hardened fugue is more difficult to remove and can scratch the surface.
Installation of PVC panels is easier than working with tiles and takes much less time.PVC panels are mounted on rails made of wooden slats, metal or plastic profiles with hidden fasteners - clamps. The tree is pre-treated with antiseptics.

From above and below, the cut ends are hidden by starting strips. In the corners set the outer and inner corners
Particular attention is paid to the vertical evenness, especially the first plank, and the alignment of the pattern. Complete the finishing process with the installation of a stretch or false ceiling
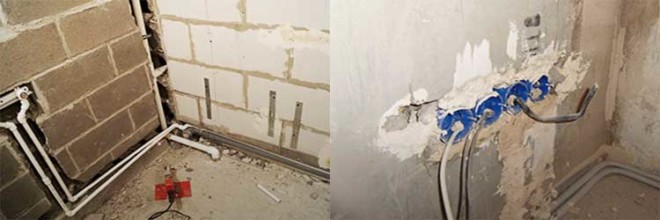
Laying new pipes and electrical wiring
They start chasing walls for pipes and electrical wiring, thoroughly equipped with respiratory, vision and hearing protection. In the lower part of the wall, where the pipes run in a single bundle, communications are usually removed into a box. It is not necessary to hide pipes in strobes if they are covered with a bathtub or shower tray from above.
Metal plumbing risers are painted and packaged in thermal insulation material to prevent corrosion to protect them from condensation and extend their service life. The sewer riser is replaced with the help of a management company. So that the noise of water drained by neighbors does not interfere in the apartment, the sewer riser is covered with sound insulation.

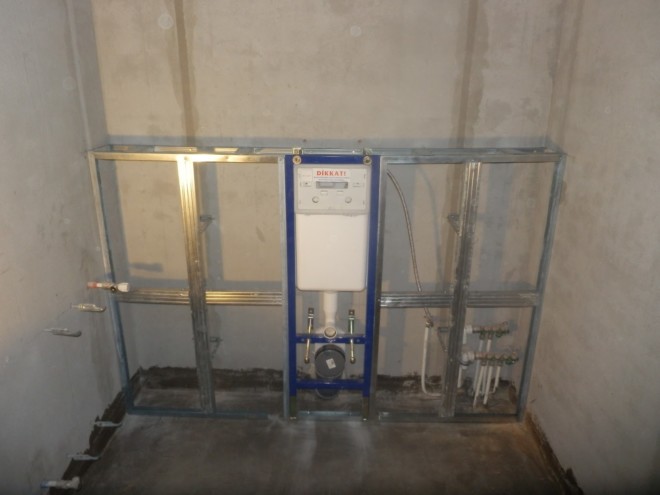
Before wiring in the plumbing cabinet, a frame installation system is mounted for the hidden installation of the toilet bowl, which saves some space. After connecting the pipes of hot and cold water supply to the collector with the installation of meters and sensors, they check the strength and tightness of the connections - pressure testing. This is a mandatory procedure for major repairs.
Electrical wiring is supplied to the locations of electrical installation products and equipment. For electrical safety, the wires are hidden in the corrugation and a ground loop is made. In order for the wiring to be done correctly, the work must be carried out by an experienced person.
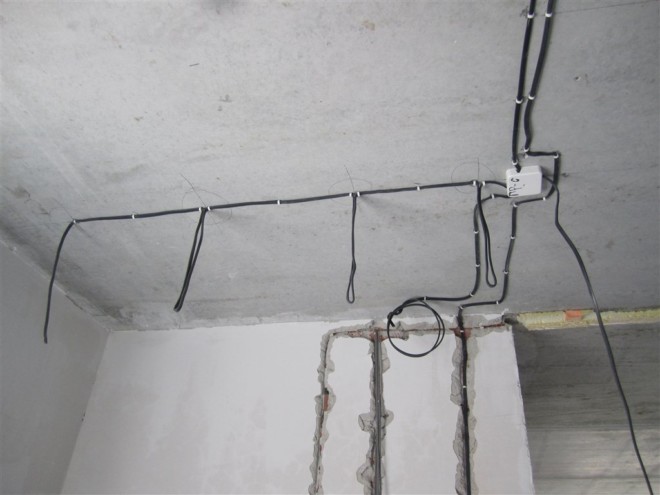
After laying the communications, the strobes close up and erect the walls of the plumbing cabinet with a hidden revision hatch. Depending on where it is more convenient to open, forward or sideways, one of two hatch design options is chosen - sliding or hinged. For the period before the installation of new plumbing, an old toilet is installed.
DIY bathroom decor

Everything should be in the same color scheme, which is successfully combined with the color schemes used in the renovation of the bathroom.
With a budget renovation, homeowners will have to go for some tricks to liven up the look of a renovated bathroom. You can do this with:
- stylish curtains near the bathroom;
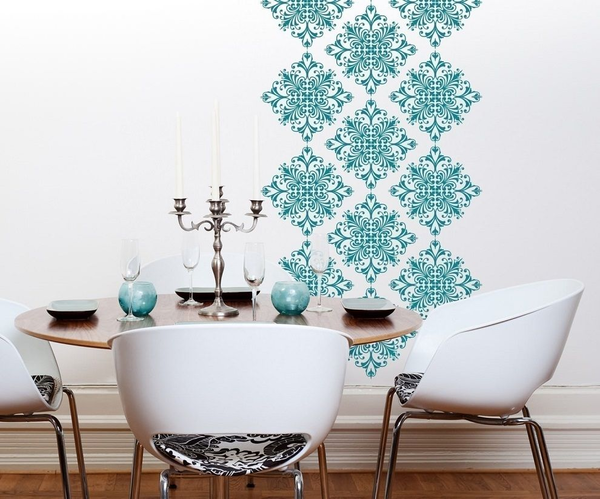
- creative wall stickers
- unusual shelves and hangers with new towels.
Things from the home pantry will also help to change the look of the room. For example, a mirror in a carved frame, together with the already familiar and rather boring, will create a completely different atmosphere and emphasize the individuality of the owner of the apartment. Other old things will also be interesting to fit into the interior. For example, a vintage suitcase can be turned into a vintage-style wall cabinet, or an old sewing machine can become a sink stand. The same function (provided, of course, that there is enough space in the bathroom) can be performed by an old bicycle.
Useful for DIY decor:
- a white-painted staircase that can turn into an original wall-towel rack;
- a pile of old newspapers - you can make paper tubes out of them, which in turn will become material for weaving a laundry basket;
- sea shells brought from trips - to decorate the frame of the mirror;
- an idle basket in the closet that can be beautifully placed on a shelf and stored in a spa set;
- a bouquet of dried flowers - it will decorate any bathroom, the main thing at the same time is that it blends harmoniously with the tiles.
You can decorate a bathroom relatively inexpensively with the help of cute little things:
- in the "marine" style (using pebbles and shells; stickers with the appropriate theme);
- in country style (add wooden shelves to the interior, a wicker basket for furniture and textiles on the floor).
Everything is the details that radically change the look of a familiar place. Moreover, in some cases they can even… replace the repair itself, because thanks to them the space will change and become better.
It is quite possible to save your money when renovating your bathroom. The main thing is to follow a few simple rules: use high-quality materials, strictly follow the technology of work and not start a global redevelopment (in any case, it will cost a very decent amount). And it’s also worth doing the maximum work yourself so as not to pay builders for work about the same as for building materials in a store.
Processes outright
Despite its bright name, this period may turn out to be the darkest. This is because when it is carried out, it is most often necessary to eliminate the shortcomings that could appear during the period of primary operation. So, you may need:
Re-filling the floor and laying a new coating.

Finishing the floor
- Replacement of doorways, window frames and window sills.
- Leveling walls, laying tiles.
- Replacement plumbing and pipes.
Therefore, this type of alteration will not be cosmetic at all, but capital. That is why the lion's share of the budget should be allocated for this stage.
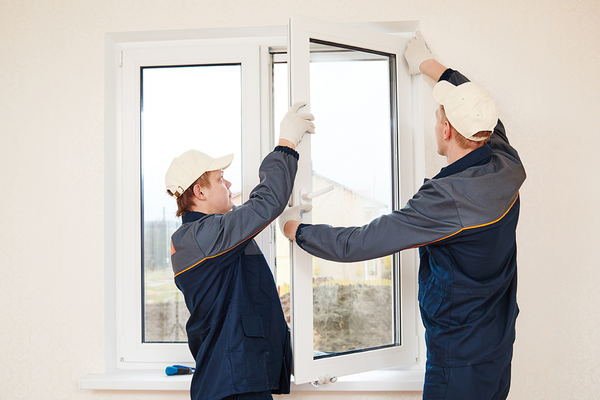
Sometimes, due to shrinkage of the building, it is necessary to replace windows

Laying tiles
Finishing will follow the finishing step immediately, and at this stage you can already give free rein to your imagination and realize all the most interesting ideas, since there are no restrictions on the quality of the finishing building materials used, and upon completion you can use absolutely any decor and furniture. The reason for this is simple: now nothing needs to be moved from place to place or dismantled for the period of change. So it is after this stage that you can safely raise the grand piano and oak furniture set to the top floor.
Finishing will transform your interior
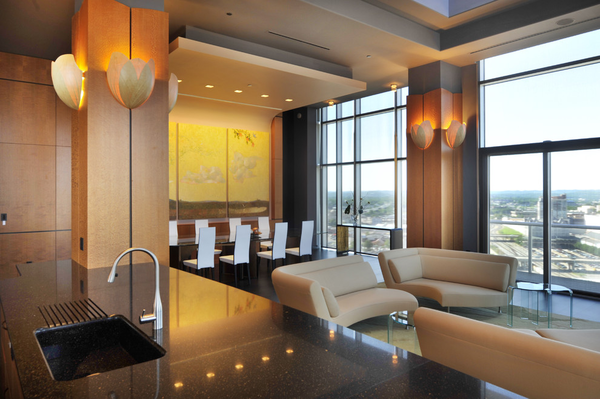
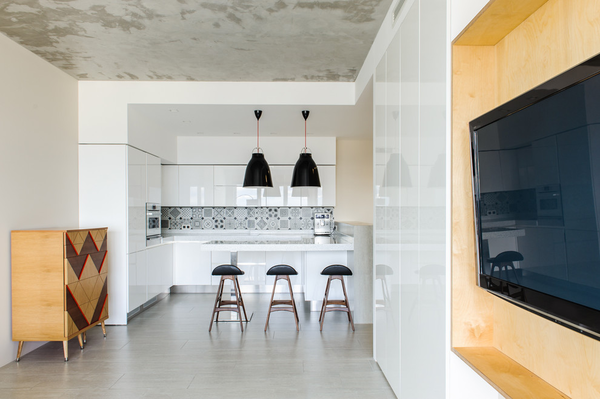
Interior of a studio apartment in a modern style
Where to begin
Any work in the bathroom begins with determining the location: sinks, baths, showers, furniture.
To do this, the location of all objects is drawn on a piece of paper. The future environment of the room depends not only on your own desires, but also on the convenience of laying pipes. It is necessary to place all objects in such a way that it is convenient to pull pipes for supplying and draining water to them.
After that, the calculation of the necessary materials is performed. And for this you need to know the size of the room. It is necessary to accurately measure the height and width of the walls, the dimensions of the ceiling and floor. After that, calculate how much tiles you need on the walls and floor. You also need to consider whether you need to lay tiles behind the bath. If not, then this area must be subtracted from the calculated one. But do not forget about a small supply of materials (about 10%), which will be spent on cutting. If you decide to lay tiles, read the articles Preparing walls for tiles and How to lay tiles.
It is necessary to calculate the required amount of plaster, which will be required for the possible alignment of the walls. If the surfaces are relatively flat, then the material will go much less.
We start repairing the bathroom with our own hands, the first steps
The room in which we take water procedures is considered very specific. Serious humidity and temperature fluctuations are constantly present here, water flows in large volumes in it. It is clear that for the repair of such a room it is necessary to select special materials that can withstand all negative influences. To finish the premises of interest to us, they usually choose:
- plastic panels;
- porcelain stoneware;
- tiles (for walls and floors).
These materials have the required qualities that allow them to be used in a room where there is steam and high temperature.
Finishing the bathroom with plastic panels
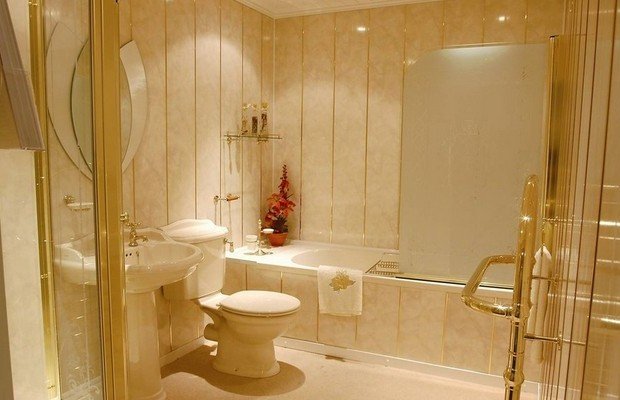
In addition, the bathroom should have a special atmosphere that promotes relaxation of a person. So, you need to correctly think over the design of this room and choose the right color scheme for it. Most often, bathrooms are made in pastel colors that do not irritate a person, but, on the contrary, calm his nervous system after a busy day. Professional designers recommend finishing bathrooms with products in beige, blue, peach, and blue shades.
Now you need to decide on the scope of work and make a plan for their implementation. The sequence of self-renovation of the bathroom, as a rule, is as follows:
- Preparing the room for renovations.
- Analysis of the state of the existing flooring and the choice of technology for its restoration or complete replacement.
- Floor repair, insulation and waterproofing.
- Installation of sewer and water pipes.
- Laying electrical wiring.
- Plastering of ceiling and wall surfaces, their sheathing with the selected material and insulation.
- Installation of an efficient ventilation system.
- Installation of sanitary equipment.
The given sequence will allow you to spend a minimum of time on giving the room for water procedures an ideal look.
Determine the type of repair
Bathroom renovations can include:
Unplanned. The need for spontaneous repairs may arise if an unforeseen situation arises (a pipe burst or your neighbors flooded you). If you decide to replace the bathtub, then this may entail a sudden repair (change of sewer pipes, installation of other plumbing, tiling, etc.);
Scheduled renovation. According to the complexity and material costs, the planned repairs can be major or cosmetic. Of course, cosmetic repairs are cheaper, but such work can only be carried out if there is no fungus and the plumbing and plumbing are in good condition. Such repairs include the replacement of wall and ceiling coverings, updating the floor and faucets. And a more serious repair, even if not quite a major one, requires thorough preparation and a serious approach.
This is interesting: How to choose curtains for the bedroom and create a harmony of style and comfort: we explain carefully
Rules for choosing inexpensive, but high-quality plumbing
One of the secrets to saving money when renovating a bathroom is to carefully plan all expenses in advance.
It is important to remember this when making an estimate for plumbing before going shopping. It would not be superfluous to study the price range in advance by sitting on the Internet for a couple of hours.
Savings for each item can range from 1,000 to 3,000 rubles. You can also win significantly when buying a promotional product or when buying a product for which a gift service is required to deliver plumbing from the store to the house.

Acrylic bathtubs retain heat well, and the water poured into such a bathtub remains warm much longer.
As for the bathroom, the most budget option here is made of acrylic. This material is cheaper than cast iron, but at the same time it has its own significant advantages:
fairly simple installation;
easy care;
safety in use (which is very important if the family has small children or elderly people who have a high risk of injury when falling on a cast-iron surface).
You can also save money due to the size of the bathroom. The smaller it is, the cheaper it is. Another option is not to change your home bathroom at all. A - to resort to the procedures of its "rejuvenation" due to the restoration with acrylic. As a result, it will look like new, and you can do the work yourself, without the involvement of specialists.
When choosing a sink, you should look at the models of domestic production.Russian products are cheaper, but at the same time no worse than eminent foreign counterparts.

In addition to Russian sinks, washbasins from Poland, Slovenia and Bulgaria meet the “price-quality” ratio well
In addition, you should not discount the sellers who work on the principle of "from the warehouse" - that is, at more affordable, in fact, "discount" prices: you can select the desired model from them on the website on the Internet, after which the seller himself will promptly deliver her to the buyer's house. Payment - only after acceptance of the goods, which excludes the possibility of fraud.
In addition, there is another way, which, however, is not suitable for everyone. And someone will generally consider it wild, although for fans of life hacks, it’s probably worth bringing it: it has long been noticed that you can often find completely new plumbing fixtures near garbage cans near new buildings. The owners of apartments in newly built houses decide to replace it, not because it is bad, but because they want to have a completely different sink or bathroom. As a result, plumbing solutions from the developer are sent to a landfill, although they could well serve - at least for several years.
A separate conversation is about pipes and mixers. It is also not worth saving on them. At the slightest hint of rust, it is better to replace the pipes. Installing new plastic ones will prove to be an inexpensive option, which will also reduce costs. But what, again, cannot be saved - these are valves and valves. It is necessary to choose and install only the highest quality ones, even if they are more expensive.
How to save money on wall decoration

Wall painting can be attributed to the budget option for finishing, but smooth and prepared walls are required.
One of the main rules of inexpensive bathroom renovations is not to try to save on materials and on the services of craftsmen by inviting unskilled workers who will do everything cheaper, but worse.
First of all, this concerns the decoration of the walls. Here it is impossible to reduce the expenditure part at any cost and use cheaper materials. They will last for a very short time and, at least in a couple of years, you will have to think about starting a new repair.
There are five options for relatively inexpensive wall decoration. This:
- painting (oil and acrylic paint are suitable for rooms with high humidity);
- the use of PVC wall panels (or lining - a cheap, moisture-resistant and easy-to-use material, which, by the way, will help hide existing wall defects);
- pasting with a film (it is also not afraid of moisture, it keeps well on a flat surface and allows you to experiment with colors);
- registration with a sheet mirror (it corrects the space, allows you to save on the purchase of a mirror and is easy to mount);
- inexpensive tiling.
The last option is the most preferred. Tiles should last for several years. In doing so, she:
- practical (withstands temperature extremes and is not afraid of water);
- looks good on the wall;
- easy to care for (can be put in order using powerful detergents);
- has a number of advantages over other options (when laying tiles, the area of \u200b\u200bthe room does not decrease as when using PVC panels, for example).
How to save on walls? A few ideas:
- buy inexpensive domestic tiles;
- do not cover the entire wall from floor to ceiling, but only the apron in the area of \u200b\u200bthe bathroom and sink (the rest can be painted or pasted over with special, moisture-resistant wallpaper);
- trim part of the wall with more expensive tiles, and part with simpler tiles, turning this into a kind of design decision;
- replace not all the old tiles, but only part of it;
- level the walls with moisture-resistant drywall, and not with mixtures (this will cost less and take less time).

The ease of use and durability of the finish depend on the correct choice of tile adhesive with the desired characteristics.
You can save money when choosing tile adhesive. So, of the two brands common in Russian building materials stores - Ceresit and Moment, you can purchase the less expensive Moment, because its qualities correspond to the required hardness range. In addition, it is produced by the same manufacturer as Ceresit - Henkel. And she is responsible for the quality.
In general, you can really save on building materials if you start purchasing them in advance, and not buy everything at the very last moment. So, you can save the contents of your wallet when buying in a store belonging to a large distribution network:
- goods in the last copy (sellers often make discounts on them);
- tiles from the remains of the collection (it can also be bought at half price, and sometimes even cheaper);
- building materials, which are subject to special discounts for a certain period of time.