Video
In this video, a specialist will share his knowledge and tell you how to install a home heating system with your own hands:
Today, water supply is produced using modern materials.
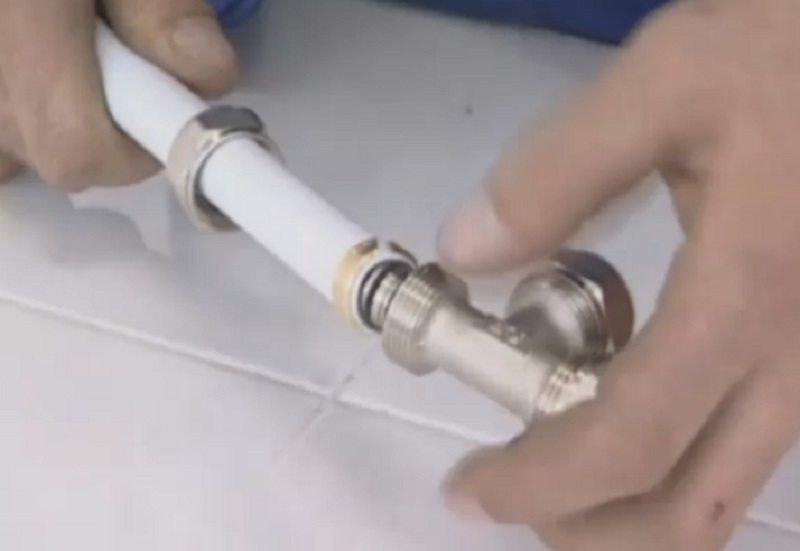
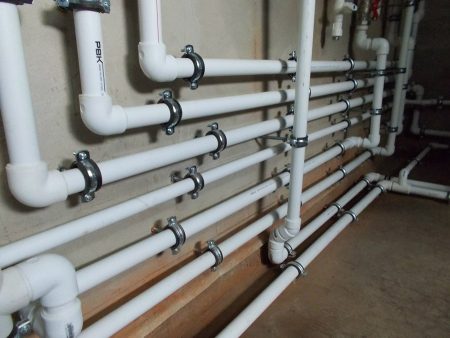
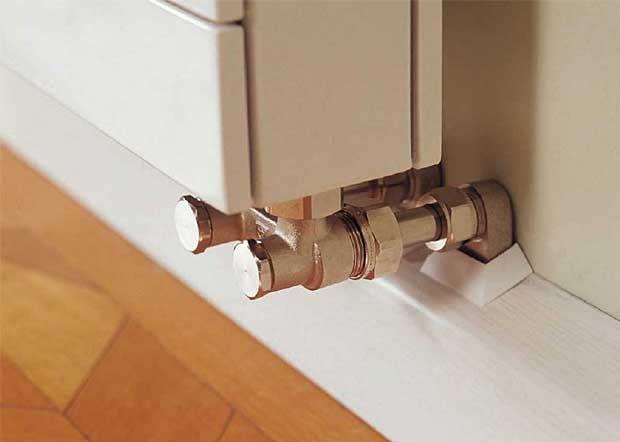
The metal-plastic pipeline has become a very relevant option for using these products for cold and hot water supply, as well as heating. However, it is worth knowing that, when installing metal-plastic pipes with your own hands, it would be appropriate to additionally install gearboxes. This type of pipe does not like pressure drops in the system, reducers equalize this pressure.
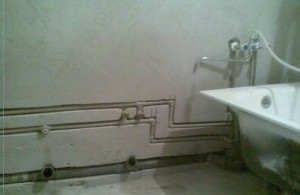
Scheme of the distribution of water pipes.
Fasteners and other materials
In addition to the pipes themselves, for installation you need to prepare in advance:
- Mounting materials:
- fixing clips made of plastic or clamps for polypropylene pipes of a given diameter;
- dowel-nails.
- Tools:
- hammer;
- drill;
- crosshead screwdriver;
- scissors or a knife for cutting pipes;
- roulette;
- level;
- marker.
Clips - their meaning and subtleties of installation
The clip is made from a special material - nylon. It has such useful properties as high heat resistance and resistance to mechanical stress.
Among the technical characteristics of the clip, you need to pay attention to the diameter, it must correspond to the size of the outer diameter of the polypropylene pipe. The installation of clips has its own rules, on the implementation of which the service life of the finished communication system depends
Single clip and double clip
The main issue that is important not to miss is the size of the step between the clips. If you set the clips too far apart, there is a risk of deflection at the support points.
When installing a communication system with two parallel pipes, use a double clip.
Correct pitch between clips
When are clamps used?
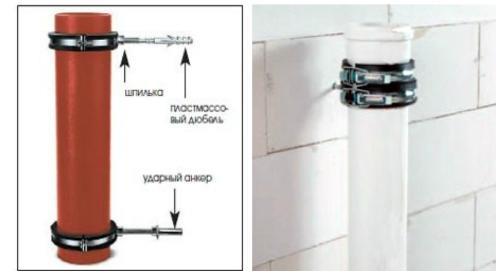
Fastening polypropylene pipes to the wall with clamps is recommended in cases where it is necessary to install large diameter pipes with a fairly heavy weight. Clamps are a screw tie design with a rubber inner liner that is needed to absorb vibration. As a result, they securely hold the pipe even in the event of strong vibrations.
Clamps are equipped with a dowel and a hairpin. The mount can be made of metal or plastic. When laying polypropylene pipes, it is better to choose clamps from similar raw materials: this way you will ensure the same strength indicators for the entire structure. Installation of fastening material can be rigid or floating:
- Rigid fastening is made by extremely tight tightening of the clamp around the pipes. A rigid hitch is required in places below the bell. Due to rigid fixation, the possibility of displacement of the communication system is excluded.
- Floating mount indicates the presence of a gap between the pipes and the clamp. The fastening is tightened in such a way as to leave the possibility of free movement of the pipe. The mobility of the fastener provides the possibility of expansion of pipes during temperature fluctuations.
How the clamp is attached
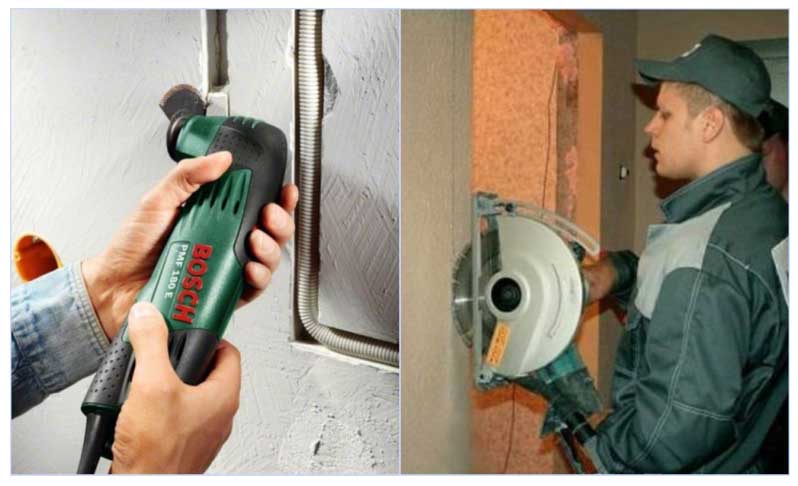
Chasing brick walls with a perforator
A perforator is a versatile construction tool that can be used to drill holes and knock out hard materials - thanks to these properties, the tool can quite effectively knock out channels for plumbing or heating pipes. The order of work is as follows:
- Pobeditovy drill for concrete with a diameter of 8 or 10 mm. in perforation mode, it makes a series of holes of the required depth along the entire length of two lines, the step can be chosen arbitrarily, but the smaller the distance between the holes, the better the edges of the strobe will be.
- Next, a spade-shaped nozzle is inserted into the puncher, switching it to the impact mode, and the bricks are knocked between the drilled grooves, controlling the depth with a pipe segment.
- Upon completion of the work, the strobe is cleaned of dust and foreign debris; for this, you can use a household vacuum cleaner.
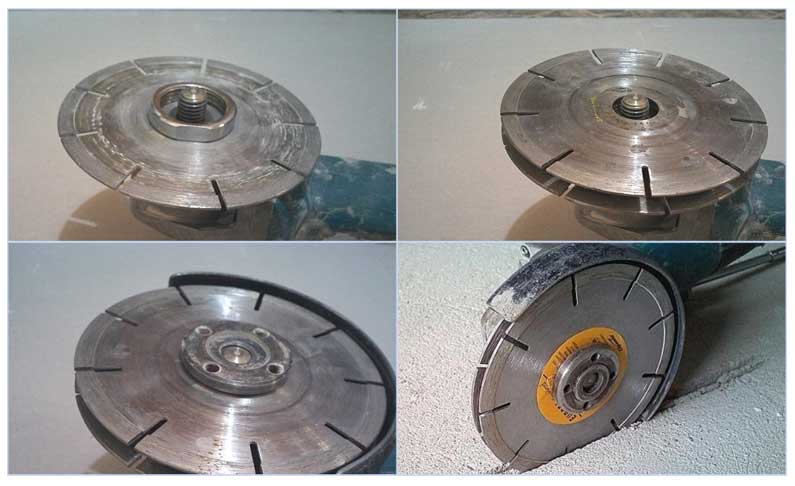
Rice. 8 Angle grinder with two discs
Gating technology using various construction tools
When deciding how to groove a wall in a bathroom under pipes or make channels in the floor in order to run hot heating pipelines through them, they resort to dismantling work using the following methods and tools.
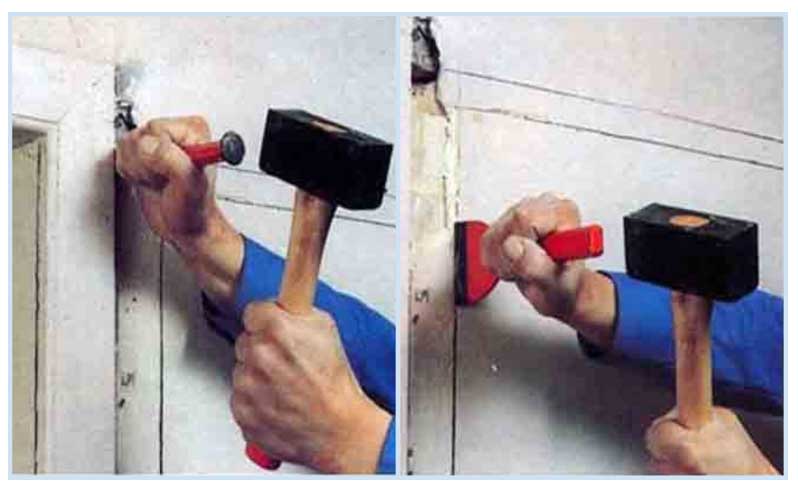
Hammer and chisel
Old-fashioned method, suitable for work in walls made of soft building materials (gas silicate blocks, foam concrete, gypsum plaster). During installation, at the beginning, special grooves are knocked out along two channel lines with a depth of about 10 mm, then the material is removed between the punched lines, after which the operation is repeated many times until the desired depth is obtained.
Perforator
To work with a puncher, they use a special construction nozzle in the form of a spatula; the tool is used to punch through any kind of wall. The main disadvantage of the perforator is the not very aesthetic appearance of the punched channel and a large amount of excess debris - during operation, material is knocked out outside the outer perimeter of the strobe.
Therefore, to optimize work, before using the puncher, the borders of the strobes are cut with an angle grinder (grinder) or holes of the required depth are drilled in them in increments of about 10 mm.
Rice. 4 Chasing with hammer and chisel
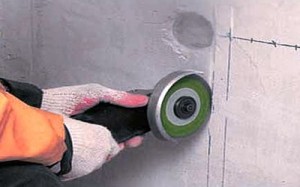
Bulgarian
When working with a grinder to cut through concrete or brick walls, special diamond-coated discs are used for concrete. The grinder is a dangerous tool, so it is imperative to use a protective cover on the body when working with it.
With the help of an angle grinder, even deep lines are cut along the perimeter of the strobe, after which the material between them is knocked out with a chisel or perforator.
The main disadvantage of working with an angle grinder is the high content of dust in the air; dust glasses, tight clothing and a respirator should be used for protection.
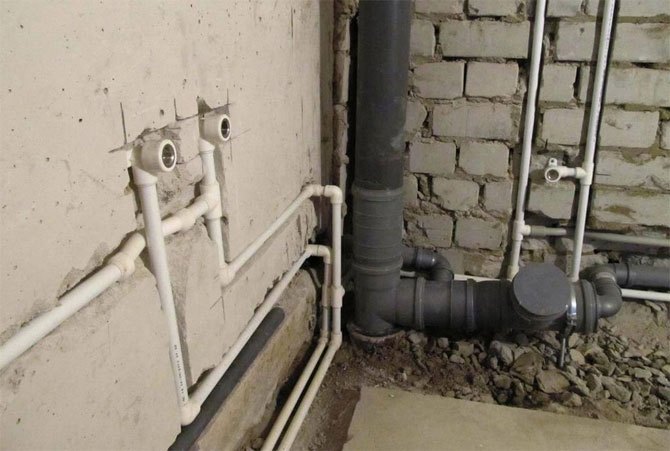
Laying polypropylene pipes in the wall
Very often, water and sewer pipes that are located along the walls of a room simply spoil its appearance. Therefore, many are interested in how polypropylene pipes are laid in the wall.
This must be done carefully and deliberately, taking into account all the possible consequences of such a disguise.
Is it possible to brick polypropylene pipes into walls?
 These pipes are made of a material that is resistant to chemicals and is not afraid of corrosion. Installation is carried out by welding, and the connection is one-piece and monolithic. Under this condition, there is no need to constantly tighten the connection, which would have to be done with metal pipes. Therefore, the installation of polypropylene pipes in the wall is possible, however, if the condition of matching the type of pipe to the coolant in terms of pressure and temperature is met. For pipes with hot water, you need to leave the necessary space for its expansion.
Concealed pipe installation rules
 1. The system hidden in the wall should be as solid as possible and should have as few connections as possible.
2. The connecting elements of the pipeline must be of the same material as its main part and have the same or even greater margin of safety.
3. All pipes embedded in the wall must be thermally insulated. This stops them from sweating. Also, such a measure will give the pipes a free opportunity to expand and narrow.
4. Do not forget to leave free access to the revision, shut-off valves and the like before masking the pipes. You can close the holes with special plumbing hatches, of which there are many on sale and their sizes are very different.
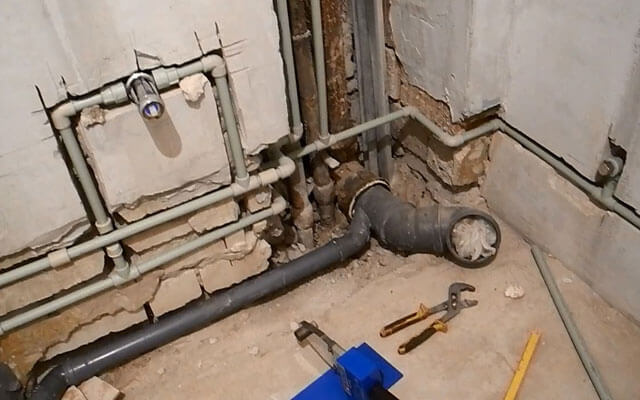
The process of masking pipes into the wall
 1. Embedding a polypropylene pipe into a wall provides for wall chasing. Let's say right away that horizontal gating of panel walls is prohibited. This also applies to brick walls laid out in half a brick, since this thickness is insufficient for such work.
2. Make special recesses in the wall. This is what strobes are. Sewer and water pipes will be removed in them. For this, a grinder or a puncher is used.
3. Mark with a pencil. Put on the grinder a special disc for cutting stone. For work with a large area, it is more reasonable to buy a disc with diamond-tipped teeth.
4. Act in one of two ways. With a grinder, go along two lines, cutting them at the same time to the required depth. Then use a chisel to knock out all the excess. You can also do this: cut the two marked lines with a grinder and use a perforator to connect them into one. Here you need a special nozzle in the form of a spatula.
5. There is a special nozzle for working with a puncher. It is intended specifically for wall chasing. Its purchase eliminates the need to mark up the future channel.
6. Mount polypropylene pipes in the slotted grooves. If the hole in the wall came out more than the pipe, then it's okay. The grooves for the hot water pipes should already be wider than the pipe itself. After installing the pipes in the strobes, they are cemented, and the wall is plastered so that it is completely even.
The advantage of plastic pipes
- Plastic pipes, unlike metal pipes, are not subject to corrosion, and therefore are environmentally friendly. During operation, they do not clog, do not hum or vibrate.
- Plastic is a dielectric and does not pass electric current - electrical safety. Due to this property, pipes can be used for laying cables.
- Withstand high temperatures (up to 95 degrees), and do not heat up, which ensures low heat loss.
- Plastic pipes are many times lighter and more elastic than metal ones.
- Profitability, a water supply system assembled from polymer pipes costs 15-20% cheaper than the same system made from metal pipes. The service life of such pipes is approximately 50 years.
Based on the above, we can draw the following conclusion: plastic pipes are an excellent alternative to steel and cast iron pipes, they are well suited for cold and hot water supply and heating systems.
For the installation of plastic pipes, such large equipment is not required, and almost anyone can assemble it. The main thing is to observe certain nuances, and adhere to the sequence of actions so that the system serves for a long time and does not cause problems during operation.
To complete the work you will need:
- Roulette;
- Soft pencil or marker;
- Special pipe cutter;
- Stripping (if foil-reinforced pipes are used);
- And most importantly, a soldering iron (welding machine) with nozzles.
How to weld polypropylene pipes correctly?
Now the most important point is how to properly weld polypropylene pipes. To begin with, we set the required operating temperature on the welding machine, fix the nozzles of the desired diameter, and turn it on for warming up. While the soldering iron is heating up, prepare the pipes and fittings.
- We measure and cut the pipe of the required length. When using reinforced pipes, they must be cleaned;
- Alcohol, degrease the joints;
- We measure the depth of the fitting and transfer it to the pipe minus 2mm .;
- On the details, we note the alignment of alignment for the correct location.
We have already considered a more detailed process for soldering plastic pipes.
The device has warmed up, and now we proceed directly to soldering:
- Taking the pipe and fitting in hand, at the same time we insert it into the nozzles, the pipe to the mark, and the fitting to the stop.We warm up the right time, for each diameter there is a different time (usually there is a table on the cover of the suitcase from the device).
- At the end of the warm-up, we take out the parts from the nozzles and smoothly connect them, combining our marks for alignment.
- We fix the connection until it cools.
To achieve the best soldering result, it is strictly forbidden to rotate the parts during the soldering process.
Is it possible to hide polypropylene pipes in the wall?
Is it possible to hide plastic pipes in the wall? If you follow a few guidelines, yes.
- The pipe should have as few joints as possible, and be as solid as possible;
- All elements are made of the same material;
- Pipes must be thermally insulated;
- Access to taps and metering devices should remain free.
How to mount polypropylene pipes in the wall?
- First you need to make markup;
- Further, according to the markup, strobes are made;
- Connect the pipes, and mount in a prepared place;
- Next comes the painting work.
How to cut a hole in a stretch ceiling for a pipe?
When installing stretch ceilings, it becomes necessary to bypass the pipes. How to cut a hole in a stretch ceiling for a pipe without damaging it. To do this, an incision is made on the working canvas, and reinforced with a special lining that will protect the ceiling from spreading.
The overlay is better to make from 1-2 mm. plastic. Cut out a rectangle 1.5 cm wide. from the pipe diameter. The length of the rectangle is equal to the distance from the baguette to the outer edge of the pipe, plus 1.5 cm. Draw a line in the center. On one side of the rectangle, we draw a circle 4-6 mm larger than the diameter of the pipe. At a distance of 3-5mm. from the circle we draw a semicircle, from it we lower the lines to the opposite edge, we get the outer part of the ring. Now we carefully cut everything out, the ring overlay is ready.
The easiest way to bypass the pipe is to install the lining on the outside of the canvas. The entire canvas is tucked into a baguette, not reaching 20-25 cm. to the pipe on both sides. Further, in the center of the pipe, the canvas is carefully cut and tucked into place. Now we put the overlay-ring on the pipe, and glue it to the canvas. Everything is ready.
Materials and tools for installation
To carry out the installation, you will need the following:
The device of metal-plastic pipes.
- pipe cutter or hacksaw for metal with fine teeth; construction knife; hammer; external and internal mandrels; set of adjustable wrenches; fittings, nuts, ferrules, fastening clips; calibrator; pliers; drill; dowels, self-tapping screws, nails (for attaching clips).
The advantages of metal-plastic pipes include:
- ease of installation; low price; the ability to work at high temperatures for a long time; mechanical strength; low coefficient of thermal expansion; long service life (50 years); absence of mineral deposits; resistance to corrosion; aesthetic appeal.
Features of polymer products
As is known even from the school physics course, when substances are heated, they begin to increase in volume. This is directly related to plastic products, and high temperature also makes them plastic.
When installing pipelines for cold water, you can not take into account the coefficient of expansion (for more details: "Preliminary calculation of the thermal expansion of polypropylene pipes"). At the same time, when arranging a heating structure, this nuance must be taken into account.
It is this circumstance that causes many home craftsmen to doubt whether polypropylene pipes can be bricked into the wall, which, when the hot pipeline is started, will begin to lengthen and expand.
This raises a logical question as to whether the finishing materials into which the elements of the engineering system are recessed will not be damaged.
Experts assure that metal pipe products, which expand slightly, can simply be embedded in a layer of material, but in order to hide polypropylene pipes in the wall, you have to fully adhere to the installation technology (for more details: “Types, properties, do-it-yourself installation of propylene pipes”) . Otherwise, the decoration of the room will be covered with cracks, and the tiled coating will most likely fall off.
Do-it-yourself wall chasing for pipes
After drawing up a plan for the placement of the pipeline, taking into account the fact that all branches and changes in direction in the line are carried out at right angles, they begin marking. Work is performed in the following sequence:
- Checks for hidden wiring in the work area, if there is no layout, you can use a special device to find wires.
- Using a construction pencil and a level, two lines are drawn on the wall corresponding to the width of the pipes with a small margin. If a heat insulator is used on a pipeline with hot water, the width of the channel is increased accordingly.
- At the end of marking the walls with the help of a building level, tape measure and pencil, you can start chasing, the above tools are used during the work.
If you need gating, there are several options for how to most effectively carry out this procedure, for work you can:
- Use the services of hired specialists, the cost of one linear meter of a strobe, depending on its parameters, wall material and region, ranges from 5 USD. per running metre.
- If the right tool is not available, you can rent it and do the work yourself, while saving some money.
- If you have your own puncher and the necessary nozzles for it, you can pierce the wall yourself only with this tool. If there is only a grinder, they cut through the wall with it, and you will have to knock out the material manually with a chisel and a hammer.
Rice. 6 Cutting a channel with a grinder with a diamond blade
Hidden laying of heating pipes
Pros and cons of hidden gaskets
The undoubted advantage of this method is that there is no need to be afraid that during the design of the room, the heating pipes will not be able to harmoniously fit into the interior.
Disadvantages of flush mounting:
- Labor intensity.
- The presence of heat loss, since even with high-quality pipe insulation, part of the heat is spent on heating the structure, which simultaneously performs protective and decorative functions.
- The complexity of maintenance associated with the need to dismantle protective and decorative structures for access to emergency areas;
- High price due to the need for more material.

Hidden laying of heating pipes in the floor is carried out before pouring the screed
Technology of hidden laying of heating pipes
Installation of heating pipe wiring is carried out after installing all radiators on the walls. For the period of finishing work, the factory packaging is not removed from the radiators.
Stages of work production:
- Preparation, including the choice of type of heating. For the installation of a system with forced circulation, the laying of heating pipes under the floor or in a wall structure is best suited. With natural circulation, the injection pipe is placed behind the suspended ceiling, and the riser slopes and the lower pipeline are laid in the wall.
- Marking of the pipeline, produced on the walls.
- Execution of a strobe. First, with the help of a grinder, its boundaries are set, then the strobe itself is knocked out with a puncher.
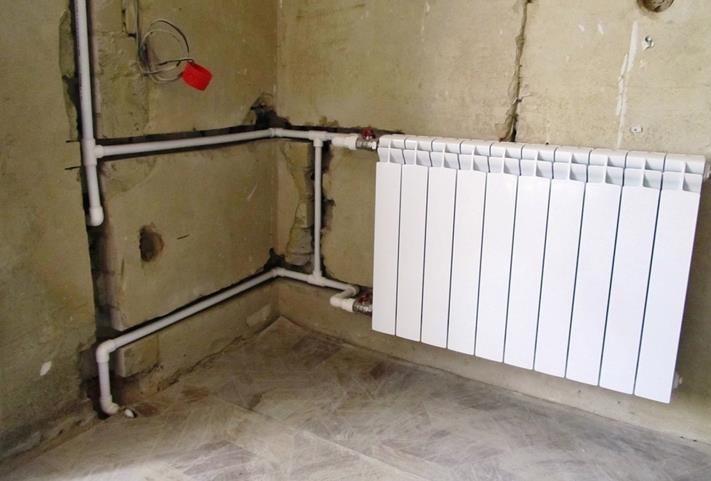
Laying heating pipes in a gate
- Wiring pad. Fastening of heating pipes in the strobe is carried out with clips.
It must be remembered that the use of detachable connections, such as connections with detachable nuts, collets for metal-plastic pipes, is unacceptable for hidden wiring.
- Connecting the pipeline to heating appliances.
- Pressurization is carried out, in accordance with current standards, under pressure.
With hidden wiring, pipes must be filled only after a hydraulic test (pressure test) of the heating system.
- Decorating or immuring. Before starting work, the pipes must be insulated. Decoration can be done in the following ways:
- Plastering - sealing the strobe with a low-strength solution of sand and cement or gypsum-based plaster.
- Heating pipes in the wall can be decorated with drywall. Drywall strips are glued with gypsum plaster. The subsequent putty completely masks the strobe.
- Drywall boxes, which do not require damage to the walls. They are used quite often, since their use eliminates the need to destroy the finish in the event of a malfunction.
Decorating the heating pipeline with a box
Termination of the pipeline should be carried out only when the entire heating system is under pressure, which emulates its "behavior". Making the necessary adjustments allows you to achieve a minimum effect of deformation forces on the decorative finish.
Preparing for installation
The primary task is to draw up an assembly drawing of future highways. In fact, the pipeline plan must be carried out taking into account all connections, taps, technological cabinets, and valves. Detailed planning helps to avoid redundant connections and waste of material, as it is determined in advance which parts are needed and in what quantities.
Walls for hidden installation of pipes will have to be ditched, that is, a channel should be cut in concrete for laying a pipe line. It is advisable to pre-mark the working area in order to make an even and high-quality channel.
It is advisable to take into account that chasing walls in panel houses is not recommended, since the thickness of the panels is usually small. The most suitable are walls made of thick brick or concrete. They can be crushed without fear.
Next, you need to mark the pipes and fittings in order to know the direction of welding and the installation procedure. If necessary, it is better to cut the products in advance.
To perform installation work, you need tools designed for polypropylene:
- scissors for cutting;
- a shaver for removing reinforcement and a beveler for leveling the cut surface;
- welding machine with temperature up to 260 °C;
- wall chaser or grinder for cutting a cavity in the wall;
- chisel and hammer or perforator to remove material between the strobes.
Installation
When the tools are ready, there is a detailed plan for installing pipe lines and markings, you can get to work:
- A grinder or a wall chaser cuts parallel to each other slots on the concrete surface of the wall, the distance between the slots should be slightly more than the thickness of the polypropylene pipe in the thermal insulation. It is recommended to use a stone disc or a toothed diamond-coated disc.
- A perforator or chisel removes concrete between the slots.
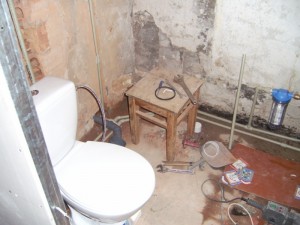
- To accommodate technological cabinets, you will have to make a cavity in the wall and install a cabinet with slots for communications in it. This design will facilitate access to valves or sensors.
- The pipes are welded in advance, after which they are laid in the wall and fixed in the channel with clamps or supports. It is desirable to do most of the welding outside of the channel because it is easier than doing it in a confined space. Before closing the strobes, it is recommended to check the system for leaks by letting water into it. If no leaks are observed, then you can proceed to the final finish.
- Before laying the pipe, it is advisable to wrap it in a layer of energy flex, or make polyurethane foam filling after installation. This will provide room for the pipe to expand.

Of course, you can lay pipes on top of the walls and finish on top of the highway, but then the free space in the room decreases, and the cavity formed between the finish and the wall will have to be filled with insulation. This approach is inefficient, since the finishing material must fit snugly against the surface.
If you want to hide an already finished pipeline structure, it is better not to make a blank monolithic wall, but to build a special drywall box in order to provide free access to the pipes if necessary.
After a test check of the operability of the pipeline, you can start finishing the wall, it is better to use drywall for this.