2 How to assemble a sink in the kitchen, we mount a cabinet
Mortise and overhead sinks are installed in bedside tables and cabinets, with opening (less often sliding) doors in front and an empty opening in the back. The assembly of these elements of a kitchen set has its own characteristic features. The fact is that they do not provide for internal bulkheads, they can interfere with the connection of sewers and water pipes. This means that there will be no additional stiffening ribs inside the cabinet. If an overhead sink is installed, even the countertop is missing, it is replaced by a steel sink panel.
The assembly of the cabinet under the sink should be much more reliable and durable than other parts of the kitchen set. It must be installed on special linings, because. with the best tightness, water leaks are possible. The material itself will not interfere with the treatment with water-repellent compounds. Inside the nightstand, it is necessary to provide fasteners for tightening jumpers - they are installed after connecting the sink to communications for the strength of the entire structure. The jumpers themselves can be made from flat and thick planks, which will serve as additional mini-shelves inside the cabinet.
What to make a cabinet in the bathroom
At the disposal of modern home craftsmen in this matter is not only the "traditional" MDF, but also waterproof drywall, plastic or even glass. Each type of material has its drawbacks: drywall does not “hold” the weight load well enough, plastic quickly scratches and loses its original appearance, and glass, although it looks luxurious, is quite difficult to handle and install.
After the material is selected, it is worth thinking about its lining. Glass, for example, can be decorated with a special mosaic, and a tree with figured painting. At the same time, do not forget that the lining should be in harmony with the general style of the room.
Step-by-step instruction
Dimensions should be calculated based on the size of the washbasin and its height 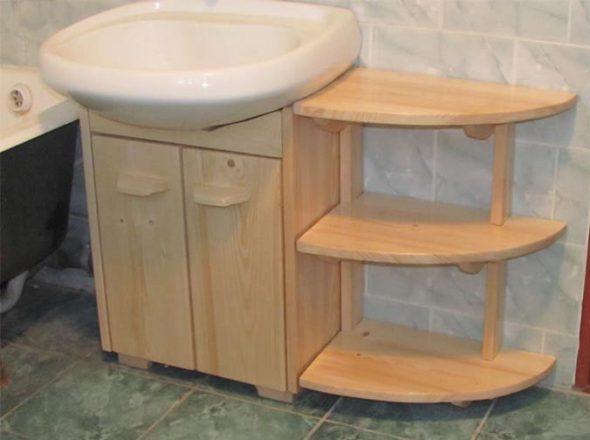 location. First, it is worth making a couple of frames, taking into account the width and depth of the cabinet. The furniture board serves as raw material for a pair of sidewalls. They are attached with frames.
Fastening is carried out using self-tapping screws or using glue. In the latter case, it is required to clamp the connected elements with clamps. Before doing this, cardboard is placed between them and the walls on the sides to avoid damage and deterioration of the appearance of the walls. And so let them hold until the glue dries completely. If self-tapping screws act as fasteners, then holes should be drilled so that the surface remains intact and does not crack under mechanical stress on it.
 A wooden board serves as a plank on the surface of this product. At the same time, a minimum gap must remain so that the doors close well. After that, take an electric jigsaw, knife, hammer and a piece of skin. Try on the sink to the top of the product and align them with each other.
Further, in order to improve the overhead sink, it is necessary to grind and plan off its side parts to a smooth state. After that, cut the doors to fit. In them, in turn, you need to drill holes for the hinges. Remember that sometimes, if you hammer or fasten immediately, then cracks on the surface are possible.
The cabinet is attached to the wall with metal corners, which ensures its stability. Holes of 8 mm in size are made in the wall with a perforator, after which plastic dowels are hammered into them. This allows for strength.
The stage has come to bring the pedestal to perfect condition. Doors are sanded, and the surface is treated with varnish or paint. The second layer is not applied until the first one dries. Now you can varnish or paint a second time in the desired color.Choose a paint that is as resistant to moisture as possible.
Do-it-yourself sink cabinet: drawings and video instructions will help you make a product that will last a long time, become a comfortable piece of furniture, and also please the eye. Before starting work, complete all the necessary drawings, notes for yourself, you can even draw up an action plan, according to the size of your future creation and its features. Thus, it is possible to avoid a lot of problems and inaccuracies that may arise in the process of work. Don't be afraid, if you are doing this for the first time, everything will work out for the one who tries.
A do-it-yourself sink cabinet is a great option for those who appreciate quality and are ready to devote time to it. Basic recommendations will help make it sound and practical.
How to make a cabinet under the sink with your own hands
Before you start carpentry, you need to prepare the room and the tool needed for assembly and installation. Take all the basic measurements: the height of the bowl, the space around the washbasin, the distance to the water supply and outlet pipes, the diameter of all pipes, etc. Do not be shy in the drawings and sketches: the better the future design is visualized, the more assembly can be avoided.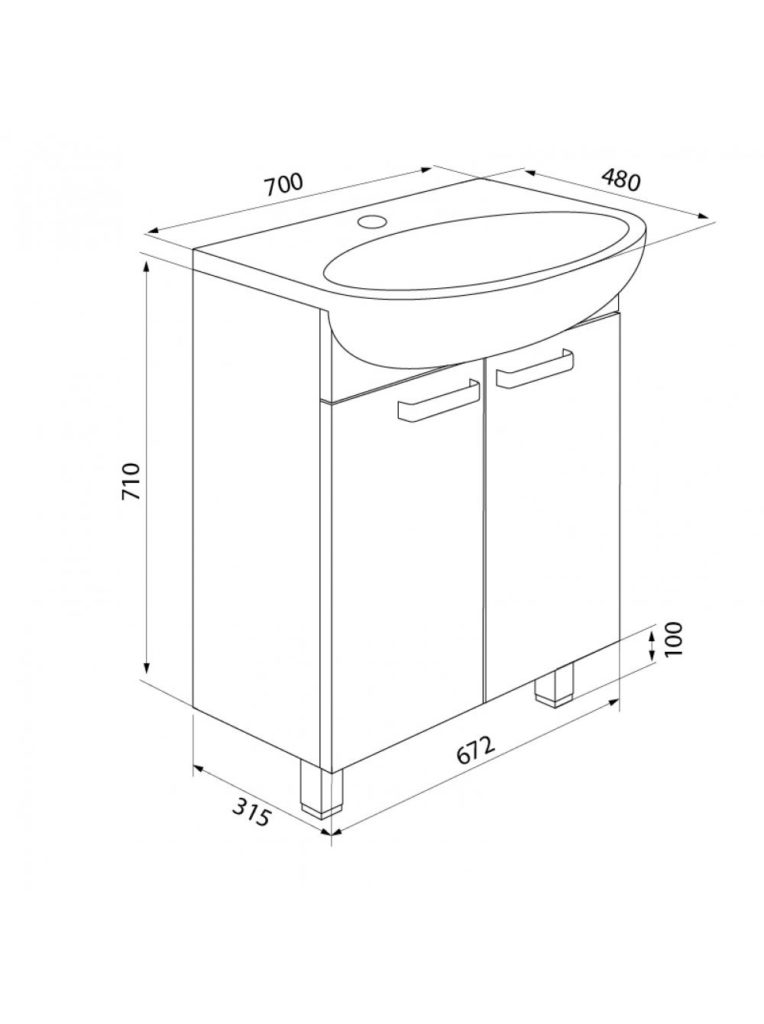
After the measurements are made and the sketches are completed, it is necessary to draw up a detailed diagram of the product with the dimensions of each part applied. When the scheme is ready, you can go for the tool. You will need:
- hammer, screwdriver, pliers;
- electric drill, electric jigsaw, screwdriver;
- saw, chisel;
- sandpaper;
- tape measure, simple pencil, square;
- building level.
Using a jigsaw, a hacksaw and a drill, all the parts indicated in the diagram are cut out. If we are talking about a product made of MDF, then first of all, the details of the frame of the cabinet are cut out of the sheets of material, and then all the other parts (doors, drawers, etc.). All sections are processed with sandpaper or a grinder.
To give the structure greater strength, it is necessary to fasten its side panels to the base using pre-made wooden corners. The frame of the "pedestal" for the overhead sink is adjusted in size, based on the dimensions of the "washbasin" itself. When the frame is assembled, you can move on to the doors, shelves, drawers and handles. If the cabinet is supposed to be made on legs, then its bottom should be fixed at a distance of at least 10 cm from the floor covering.
If we are talking about a mortise sink, then before proceeding with the tie-in, it is required to apply markings on the countertop. To do this, you can make a cardboard template according to the dimensions of the bowl, or you can simply turn the sink upside down, attaching it to the countertop and outlining the contour of the bowl on it, then measure its side in several places and apply a second, inner contour to the outlined circle. When the markup is applied, you can proceed to the cutout.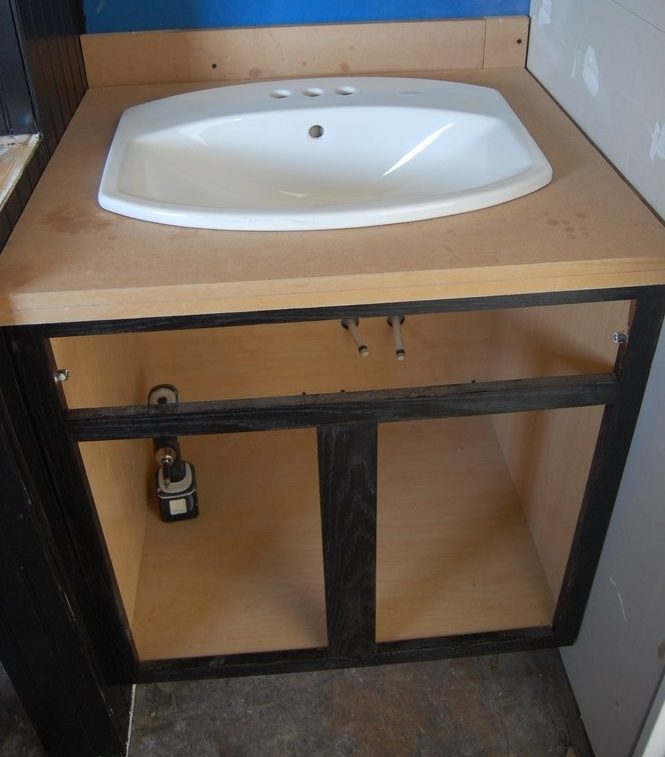
First of all, you should make a hole for the jigsaw blade in the future tabletop. To do this, use a drill: on the surface of the inner contour, drill (without going beyond the contour) a hole of a wide diameter. After that, insert the jigsaw file into the hole and start cutting out the “nest” for the future sink, carefully following exactly along the marked line.
In order for the cut-out part of the countertop not to fall off ahead of time, small self-tapping screws can be periodically screwed around the perimeter of the cut. When the cutout is finished, they can be turned out and the cut out part of the product can be carefully removed.
The cut must be cleaned with sandpaper and treated with a sealant. After all the manipulations and installation of the sink to the wall, you can proceed to the connection of communications and facing work.
suspended
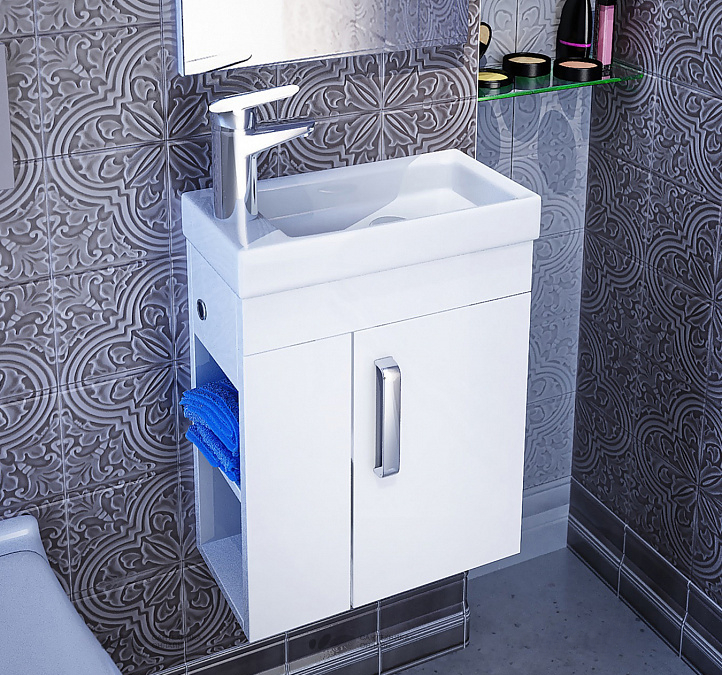
Very compact and at the same time roomy cabinet for the bathroom. It fits the sink from Iddis, model number 0014000U28.Dimensions - 40 × 22 × 60 cm. This product does not imply any difficulties in the preparation or assembly process.
For work you will need:
- MDF sheets;
- knife saw;
- grinder or sandpaper;
- metal handle for furniture;
- hanging loops (2 pcs.);
- drill with a crown for wood;
- screwdriver and screws;
- screwdriver;
- primer for paint;
- furniture polymer acrylic enamel;
- pencil and tape measure.
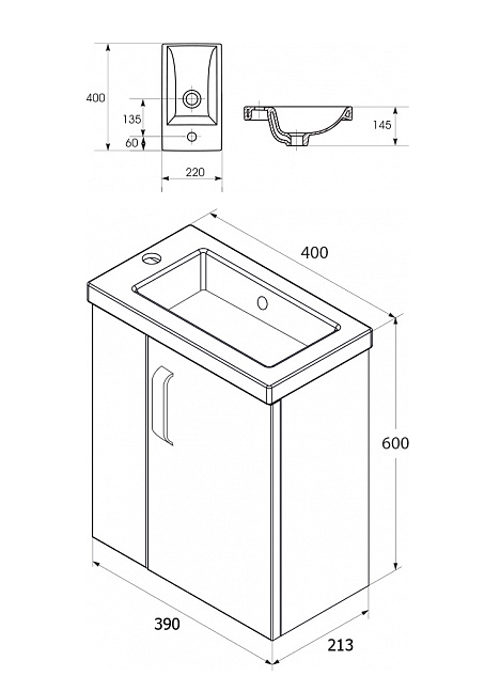
The height of the cabinet indicated in the drawing, if desired, is not forbidden to slightly reduce or increase. The length and width are limited by the dimensions of the sink and cannot be changed.
Production description:
- On MDF sheets, the contours of the parts are measured and each element is marked with a letter or number, so that later it is easier to assemble.
- A hacksaw makes cuts along the marked lines.
- Cut out holes for water pipes and sewers.
- The grinder goes through all the cuts and surfaces of the boards until the splinters and irregularities disappear.
- Carefully rub the primer into the front side of the parts. When it dries, again carry out grinding and leveling.
- Start assembly:
- interconnect the body parts;
- hang the cabinet door and screw the handle;
- mount a shelf in the side niche.
- Install the sink.
Cabinet classifications
There are two main types of classification of washbasin cabinets: according to the installation method and according to the type of sink. According to the method of installation, the products are ranked as follows:
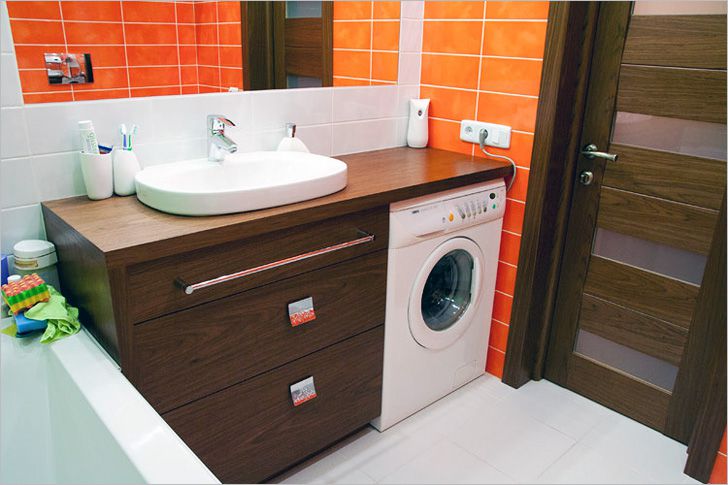
- Floor.
- Suspended.
- Corner floor/pendant.
The first type of products is quite multifunctional and widespread, and the suspended ones have a rather stylish design, save “precious” centimeters of bathroom space and harmoniously fit into modern design designs. Corner cabinets are perfect for small rooms and unused areas of the room that are not included in its “working” area.
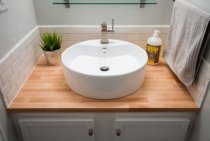
As for the classification by type of shells, according to it, products are distinguished:
- Under mortise sink type.
- Under the consignment type sinks.
Cabinets of the first type are made with a solid top, after which a hole is cut in the upper part of the cabinet, corresponding to the size of the bowl. As for the overhead sinks, they (what a surprise!) Are "superimposed" on the supports of the pedestal without a countertop, after which they are fixed with brackets or waterproof glue.