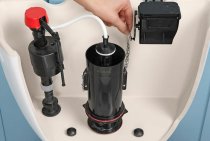
Valve repair
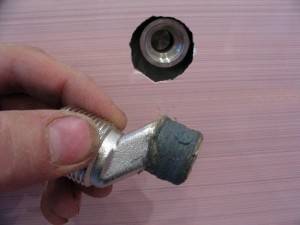
The valve is a safety fitting, so its reliability and tightness of locking require closer attention. The condition of the valve gasket deserves special attention. The gasket rib is not protected from either water pressure or water hammer, since the valves do not have recesses. This drawback is mitigated by the fact that the gaskets are fastened with a nut and a threaded stud to the valve, and the pressure washer gives the gasket additional rigidity, it strengthens it.
The valve has neither a chrome body nor a union nut, so it is easier to replace the gasket than with taps and mixers. If necessary, the gasket for the valve can also be made independently if a notch is made in advance. You can also place a workpiece cut out of a piece of rubber, after pricking a hole in the center, onto a threaded stud at the valve, fix the workpiece with a nut and washer in the same way as the finished gasket. With a sharp cutting object, bring the contour of the workpiece to a perfectly even circle.
The requirements for the technical condition of the valve correspond to the requirements for the state of water taps - for example, the valve gland must be tightly packed to prevent water leakage along the stem, since it is under pressure all the time.
Valves must be regularly inspected, carefully monitor their condition.
If a leak is detected, it is necessary to follow the same sequence of actions as when repairing a faucet - try to tighten the packing by tightening the union nut or, if it does not work out, add packing. To check the tightness of the connection, it is necessary to tighten the flywheel all the way, open any tap installed after the valve - if water does not flow out, then the gasket is in order and you can start stuffing the stuffing box.
Bring the valve to the closed position, unscrew the sleeve or unscrew the union nut, remove the flywheel, leaving the stem stationary, put a seal in the gap between the stem and the body, tamp the seal with a screwdriver, thus eliminating the malfunction.
It should be remembered that if the sleeve is removed, the pressure will squeeze out the seal, since the water is not blocked, and the flood will not be avoided. If the valve does not hold water in the closed position, it should be borne in mind that large foreign particles may have entered - in this case, the valve must be closed and opened several times. If these actions did not lead to the expected result, you need to unscrew the valve head and figure out the causes of the malfunction. In case of serious breakdowns, for example, if there is a destruction of the ball joint of the stem with the valve, which can lie in the seat, the stem must be replaced together with the valve.
You should always remember that before any work related to the replacement of plumbing, it is necessary to turn off the valve at the inlet, but if it is impossible to fulfill these conditions for some reason, turn off the entire riser in order to avoid possible troubles associated with flooding the room uncontrolled flow of water.
Installation, replacement of a tap, mixer in Moscow, all districts 8 (925) 712-24-15
How do they work
Now let's pay a little attention to the devices of the above cranes. Adjustment of the pressure and water temperature in two-valve mixers is carried out by means of a pair of crane-boxes located in one housing. In mono-command designs, you can increase the pressure by lifting the handle up, and turning it to the left or right regulates the water temperature.With the help of a lever, we change the gap between a pair of polymer plates or spheres responsible for the flow of fluid. Cartridges of such mixers are ceramic and ball. The first ones consist of two ceramic-metal plates ground to each other. In the second case, a steel adjusting head is used.
Single command crane design
The design of thermostatic devices includes a special cartridge, consisting of wax and bimetallic plates, which are very sensitive to the slightest temperature changes. This cartridge controls the mixing element. By setting the faucet handle in a certain position on your own, you will actuate the fixing and adjusting screw, and water of the required temperature will flow from the tap in the bathroom all the time.
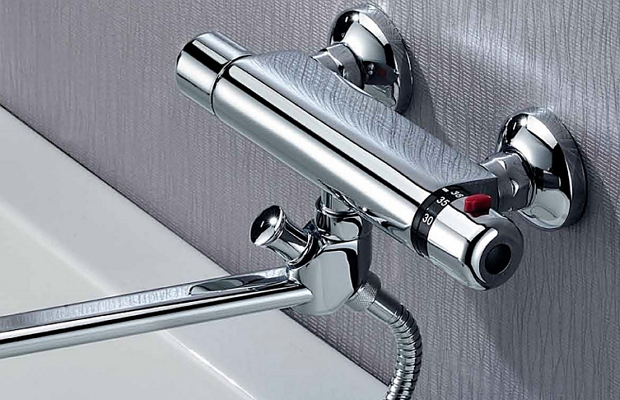
Thermostatic device with cartridge
The operation of non-contact devices is based on the action of an infrared sensor that controls the locking element. But the temperature and pressure of the liquid are set using an external lever or a screw hidden in the body. Such mixers differ in the principle of operation. Some supply water for a certain period of time. In others, the valve shuts off the flow of liquid instantly as soon as you remove your hands from the area of effect.
What to consider before starting work
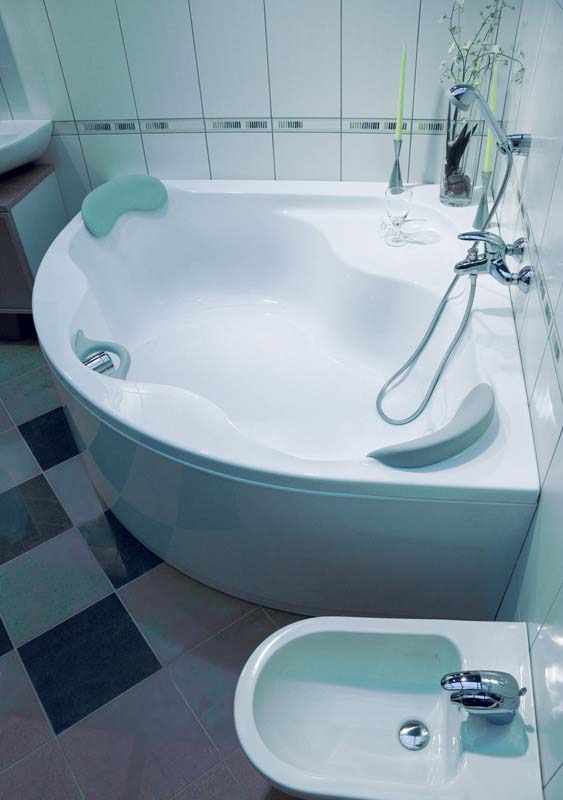
An example of fixing a single-lever faucet to the wall at a convenient height above the corner bath
You should immediately decide on the installation method and choose the right model of the mixer. The equipment can be mounted directly on the wall, be built into it, as well as attached to the edge of the bathroom or on the sink. Each individual case will have its own characteristic nuances and features. For example, to ensure maximum comfort during operation, the installation height of the mixer must be correctly calculated when placing it on the wall in bathroom.
To work, you will need the following tools and materials: adjustable wrench, tow or fum-tape for sealing joints, fasteners. The product itself should include:
- main block,
- gaskets,
- eccentrics,
- decorative plafonds,
- gander,
- shower head,
- shower hose.
Recommendations and basic rules for installing mixers
So, independent is quite possible. Further, the task relating to all family members is the competent use and timely care of the mixer. In order for it to please with trouble-free operation for a long time, experts recommend adhering to some simple and elementary rules:
First rule
Therefore, you first need to carefully examine the cartridge and the crane-boxes of the valves. The faucet usually begins to leak when these particular parts become unusable. After carefully studying the instructions, you can do it yourself or trust the experts.
Second rule
The standard mixer kit includes flexible hoses, the characteristics of which leave much to be desired. Leads made of cheap and unreliable silumin material can be thrown away immediately. Instead, it is recommended to look for hoses in a metal winding with red and blue markings. You should be careful when choosing the length of the hose. In this case, it is necessary to measure the distance from the outlet of the pipes to the tap, taking into account a small margin.
Third rule
If you are faced with winding pipes and installing a mixer for the first time, then you must take into account that the winding should be carried out only in a clockwise direction, otherwise there is a risk of overtightening and thereby causing a leak.
Fourth Rule
Schematic diagram of a single-lever mixer with a ball mechanism.
It is necessary to observe the generally recognized arrangement of pipes with cold and hot water discharge (the pipe with cold water is on the right, with hot water on the left). It is necessary to take this point into account when fastening flexible hoses.
The mixer is mounted directly on a sink.GOST regulations and standards determine the height of the countertop - 86 cm. So, the height of the spout of the located mixer will be at the level of about 1 m. Thanks to this installation height of the mixer, you can comfortably use the tap without bending over. If some family members are taller, then it is better to purchase a higher sink.
sixth rule
Connecting pipelines should be arranged in such a way that during the operation of the mixer, under the influence of external factors, there is no deformation of the line (for example, placed kitchen utensils).
Seventh Rule
In order not to redo the installation of a new mixer, you should periodically check the tightness and quality factor of all connections.
Tips for choosing a faucet
When choosing a mixer, you need to be guided by the following parameters:
Bathroom faucet assembly diagram.
- Weight. The quality of this device can be determined by its weight. A device made of high-quality and durable material cannot be light in weight, since it is the thickness of the metal that affects the long-term operation of a particular mixer. Its weight is a guarantee of the use of thick, high-strength metal.
- Material. In the manufacture of a bathroom faucet, brass or silumin can be used. The latter metal is cheaper, besides, it is significantly lighter than brass counterparts. Silumin, which means an alloy of aluminum with silicon, is a fragile metal, therefore, mixers made from it very often break handles or burst clamping nuts. The only advantage of silumin devices is their low cost. As for brass devices, they are much more expensive, while they have a large weight and increased viscosity of the alloys, which prevents the pipe and nut from bursting during minor deformations that occur during the installation and operation of the crane.
- Parameters. Do-it-yourself mixer replacement involves a preliminary study of technical parameters. Even if you purchase the most expensive device, it may not be suitable for use if its parameters do not match the place of its future installation. Therefore, before you buy it, you need to decide whether you need a mixer with or without a tap. If the first option is chosen, you should decide how long the crane should be.
Tips for choosing a faucet
When choosing a mixer, you need to be guided by the following parameters:
Bathroom faucet assembly diagram.
- Weight. The quality of this device can be determined by its weight. A device made of high-quality and durable material cannot be light in weight, since it is the thickness of the metal that affects the long-term operation of a particular mixer. Its weight is a guarantee of the use of thick, high-strength metal.
- Material. In the manufacture of a bathroom faucet, brass or silumin can be used. The latter metal is cheaper, besides, it is significantly lighter than brass counterparts. Silumin, which means an alloy of aluminum with silicon, is a fragile metal, therefore, mixers made from it very often break handles or burst clamping nuts. The only advantage of silumin devices is their low cost. As for brass devices, they are much more expensive, while they have a large weight and increased viscosity of the alloys, which prevents the pipe and nut from bursting during minor deformations that occur during the installation and operation of the crane.
- Parameters. Do-it-yourself mixer replacement involves a preliminary study of technical parameters. Even if you purchase the most expensive device, it may not be suitable for use if its parameters do not match the place of its future installation.Therefore, before you buy it, you need to decide whether you need a mixer with or without a tap. If the first option is chosen, you should decide how long the crane should be.
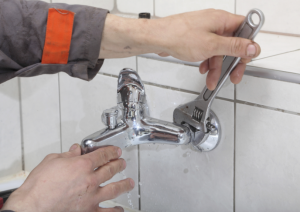
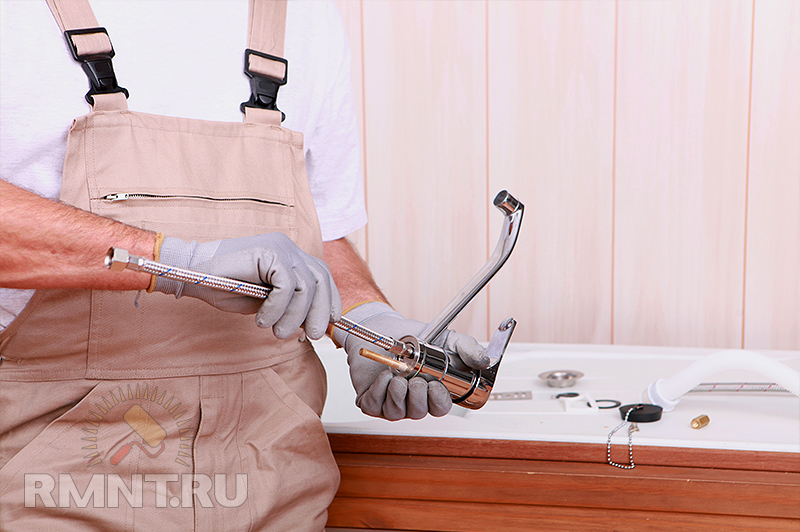
Faucet installation tools and workflow
If you simply change the old device to a new one, then you do not have to choose the installation location. Installation will be carried out where there is already a communications outlet. We will consider replacing a conventional wall-mounted faucet.
To replace the mixer you will need:
- new mixer;
- gas key No. 1;
- wrench;
- open-end wrenches No. 17 and No. 14;
- linen tow or teflon tape for sealing threaded connections.
Next, the procedure is as follows:
- Make sure that the faucets that shut off the supply of hot and cold water are in good condition. To do this, rotate them clockwise until they stop. If these are ball devices, then simply rotate them 90 degrees. When the valves are not used for a long time, lime deposits may appear inside the mechanism, which make rotation difficult and prevent the water flow from being completely blocked. If this is the case, then it is necessary to slowly open and close each valve several times. After making sure they are closed, fully open the water on the faucet and make sure it does not leak.
- Next, you need to dismantle the old device. To do this, unscrew the nuts holding it on the eccentrics. Evaluate the health of the old eccentrics - check their integrity and thread condition. If they are made of good metal, then it is not necessary to change them. This saves you the hassle of installing and positioning new eccentrics. If there are doubts about the serviceability of the old eccentrics, then carefully unscrew them counterclockwise from the pipe entry so as not to damage it (otherwise you will have to change the pipe entries, which will ruin all the repairs in the room). If the old eccentrics do not unscrew, then the places of their connection with the pipes can be gently tapped using an open-end wrench, or heated with a lighter fire. This usually helps. After removing the old eccentrics, it is necessary to clean the pipes of the water pipes from various contaminants.
- Twisting new eccentrics is done clockwise until it stops. Their outlet pipes must be located on the same horizontal line, and the distance between their axes must be 150 mm. Even before the start of twisting, tow or tape must be wound on the threads of both eccentrics. You need to start from the beginning of threading in the direction of the cut of the element. Tape or tow should be wound in a dense even layer. Checking the correct installation of the eccentrics is carried out by pre-installing the mixer in place. To do this, the device is baited with one input on any eccentric, and the second is combined with another eccentric. If everything fits together exactly, then you can make the final installation of the mixer. If not, then you need to tighten one of the eccentrics to the correct position.
- Put decorative caps on the eccentrics, install the sealing gaskets that are included in the kit on the mixer nozzles. Then unscrew the nuts on it until they stop, otherwise they will interfere with you. Wrap tow or tape tightly on the threads of the eccentrics. Tighten the mixer nuts by hand. Then tighten the connections with a wrench, but do not overdo it, otherwise the threads may be stripped.
- The last step is to install the attachments of the mixer: gander, shower hose and watering can. Be sure to seal all connections with tow or tape.
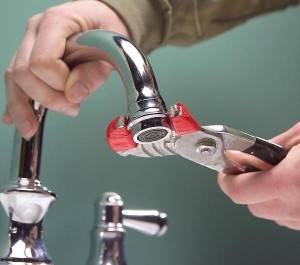 First unscrew the aerator from the tip of the spout, otherwise it may become clogged with particles of scale and deposits that have fallen into the pipes during the installation of the device.
Check the faucet by changing the water pressure. In this case, there should be no leakage in any connection. If it is still found, you will have to remove the device and repeat the entire installation, while replacing all the tow and tape on the threads.
As you can see, the work of replacing the mixer is not difficult and may well be done with your own hands. Your assistants in this matter will be the accuracy and thoroughness of the implementation of all stages.
How to install the faucet yourself in 20 minutes photo and video
We understand the details of installing a new faucet in the kitchen. Installation in the countertop and connection to the water supply system. How to ensure long-term operation without leakage.


1. Before starting work
- First, it is necessary to turn off the water to avoid possible flooding;
- Open the faucet to remove the water that remains;
- Examine the passport for a new kitchen faucet made by moscowmebel.com or another factory.
2. Preparation
To replace, we need the following materials and tools:
- Adjustable wrench (alternative - wrench);
- Two types of screwdrivers - flat and Phillips;
- Sandpaper;
- Lamp;
- Container for draining water, when replacing the siphon;
- New mixer.

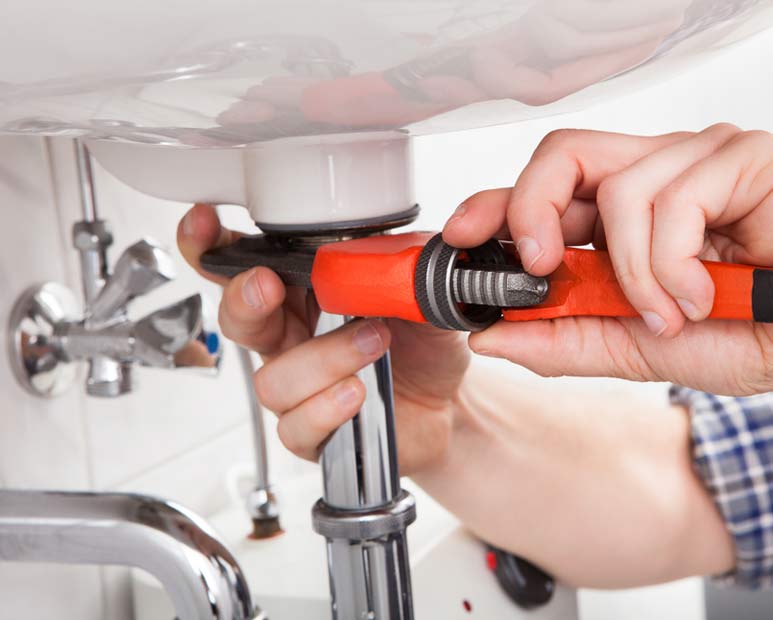
The chrome-plated siphon for the kitchen sink is tightened with an adjustable wrench.
In the event that the old faucet belongs to the economy class, it is better to replace the soft hoses that connect the product and the water supply.
3. Dismantling
Before starting dismantling, turn off the water in the bathroom to prevent flooding.
Stages:
- We find the connection point with the pipes of the plumbing system.
- We fix the place of attachment of the product with a sink;
- If the sink is consignment note, we will dismantle it;
- We remove the soft tubes with an adjustable wrench, and pour the water into the prepared container.
Be careful to keep the connections intact.
We remove the part of the siphon (lower).
We dismantle and turn the sink so as to organize maximum convenient access to the junction.
We loosen the nut and other fasteners with an adjustable wrench, then dismantle the threaded pins with a screwdriver. To prevent the product from falling, control its position.
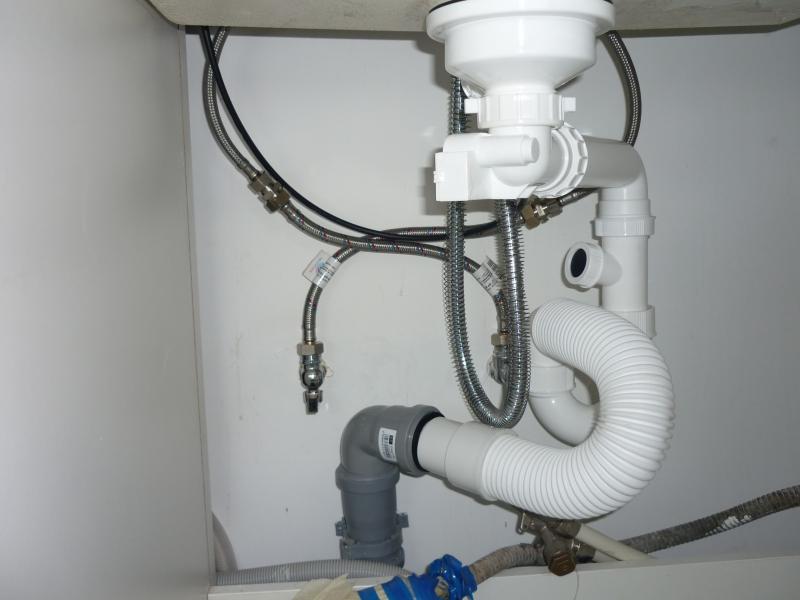
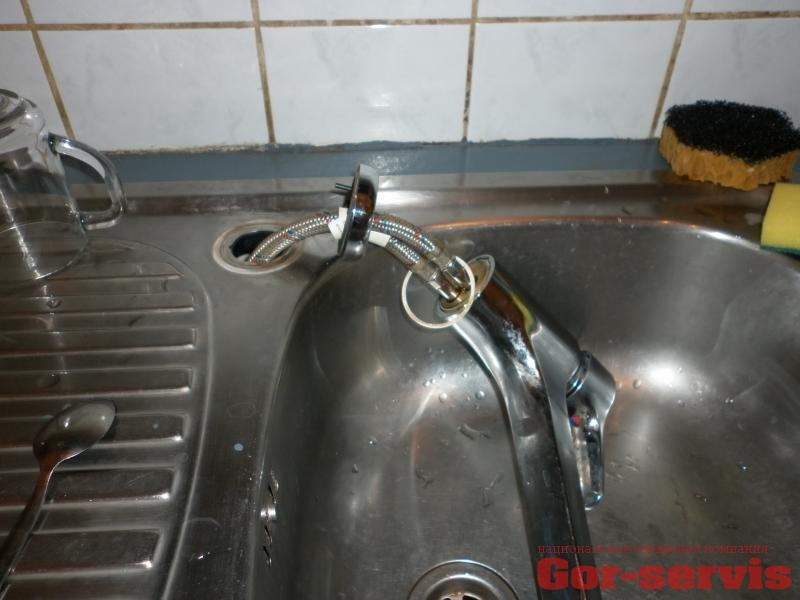
We remove the special clamp, flexible hoses and mixer. We pull out the hoses through the mounting hole.

4. Mounting
The day before, you should check the condition of the mounting hole. If dirt has accumulated in it, it must be removed.

Before starting the installation, install the hoses (water supply).
Stages:
1. We fix a special gasket (annular) on the base in the provided groove. This procedure will allow you to make a sealed system.

2. We stretch the hoses and then turn the sink over to its original position, holding the mixer. Check the position of the gasket - it should remain in place.
4. We screw in special pins (threaded).
Reliable fastening due to threaded pins.
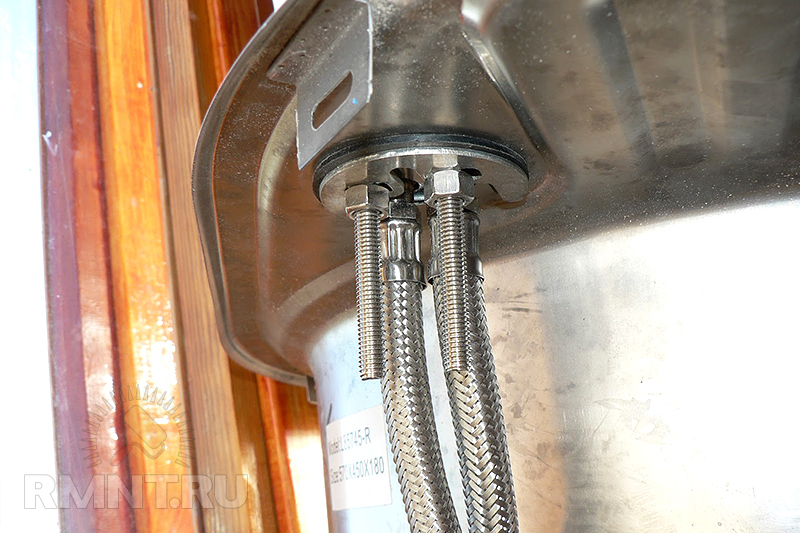

5. Tighten the mounting nuts with an adjustable wrench.
If the nuts are loosely tightened, the mixer will constantly scroll.

5. Launch
- Check four connections;
- After making sure that everything is in order, close the tap and turn on the water;
- Check the cold and hot water supply alternately to eliminate the risk of leaks.

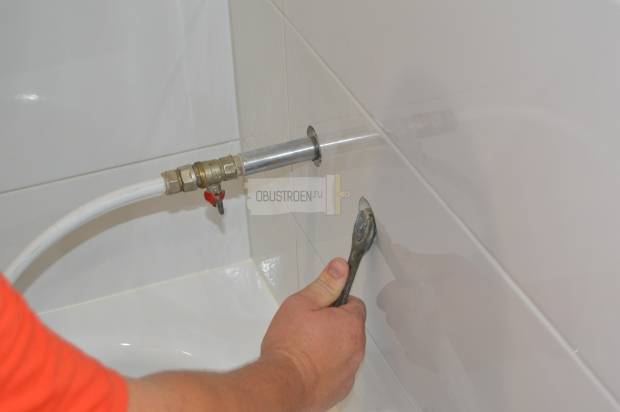
Step 1 Cleaning the water sockets and screwing on the eccentrics
Before you get started, prepare the necessary set of tools. You will need: adjustable wrench, hexagons, a set of open-ended wrenches, screwdrivers (screwdriver), sealing thread or FUM tape, hammer, hydraulic level, tape measure. After preparing the tools, turn off the water. The hot water tap is on the left, and the cold water tap is on the right.

Using an open end wrench, unscrew the water sockets and thoroughly clean the holes with a clean rag and water. After cleaning, wipe the holes with a dry cloth.
We prepare S-shaped eccentrics with a displaced center. Both ends of the eccentrics are threaded ¾" and ½" in diameter. We wind the seal on the narrow part of the fitting. When choosing a sealant, we advise you to give preference to fum-tape or sealing thread. In our case, we use a sealing thread.No one forbids you to use other seals. A comparison article on the use of fum-tape and flax with paste, as well as anaerobic sealant, will help you make the final choice, where you will find information on the correct winding of the sealing thread. We wind the sealant clockwise, making 5–6 skeins, completely blocking the threaded connection.

We screw the eccentrics with a sealant into the holes, make sure they go along the thread. Slightly twist the eccentrics with a key, not reaching the end, so that the mixer can then be adjusted in level. We expose the eccentrics so that the bends look up. The final distance between the entrances to the water should be 150 mm.
How to choose a mixer model and a place for its installation
Bidet faucet diagram.
not a very simple matter, but if you have the necessary tools at hand, with strict adherence to the instructions, you can do the work yourself and not resort to the services of a specialist.
Often, the place where the mixer can be installed is limited by the placement of communications; replacement of the location is possible only during a major overhaul, when there is a movement of pipes. In the kitchen, the faucet can be installed above the sink or on its side.
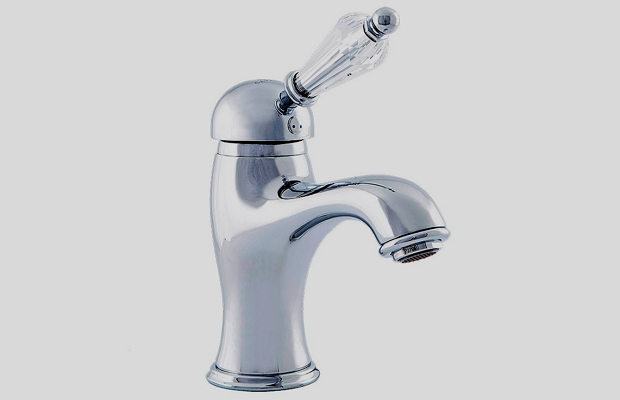
Choosing a bathroom faucet, you should pay attention to the length of the spout
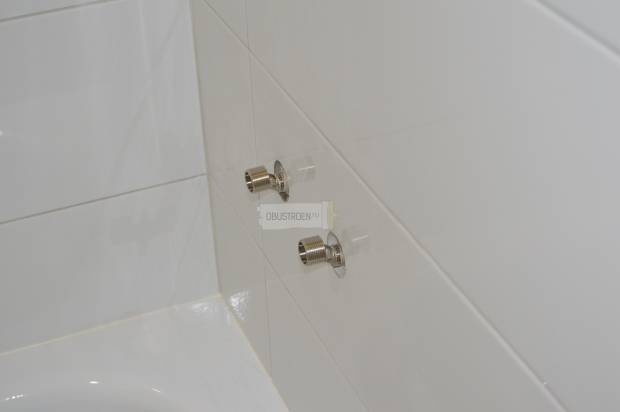
When it is required to til the wall with tiles and change the plumbing pipes, to bring the fittings for installing the mixer on the wall, you need to calculate some parameters:
- the distance between the centers of the fittings should be 150 mm, while they should be located strictly parallel to each other;
- after laying the tiles on the wall, the extreme point of the fitting must be flush with the plane of the wall;
- when installing the faucet on the wall, the fittings must be at the same level.
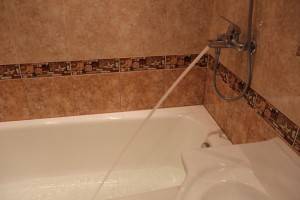
When the faucet is intended for the bathtub and the sink at the same time, it is preferable to choose models with a longer spout, as models with a short spout will create inconvenience due to the fact that water gets on the sides of the sink and splashes.
Installation of mixers requires strict adherence to the sequence of work specified in the instructions.
in the following ways: using flexible hoses in a metal sheath or brass (copper) tubes that have union nuts. Connecting with flexible hoses is, of course, easier because no adjustment is required. If the distances between the mixer nozzles and the outlets from the water pipes do not match, special curved bushings are used when connecting with brass or copper pipes.
It is necessary to position the mixer strictly horizontally, since the resulting distortions can cause cracks on fragile parts that are made of glass or porcelain. Under the nut, you need to wind the sealant and make sure that the winding is even. Tighten the nuts first by hand and only then make 1-2 turns with a wrench so as not to spoil the gasket or break the nut. At the end of the installation, turn on the water, and if a leak appears at the joints, it is necessary to disassemble the connection and change the winding of the seal.
Today, when in bathrooms you can install bathtubs of various shapes, jacuzzis, etc., non-standard ones may be required, for example, on a shelf, on a wall, on a bathtub rim or on a rack.
Bathroom faucets, their types and choice of installation location
When buying a bathroom faucet, it is important not to get lost in the abundance of models on offer. When going to the store, you should already know exactly what device you need to buy.
Currently, bathroom faucets are available in three installation options:
- wall - the most common and familiar;
- on-board, installed on the side of the bath (which must have a width of at least 7-8 cm, otherwise installation will be impossible);
- a mixer on a rack or a special shelf is an expensive device, the cost of which is several times higher than that of a conventional mixer.
The latter option is rarely used, since its installation requires quite a lot of space, which is simply not available in a standard bathroom. You will only need to choose a place for installing the mixer in the case of equipping a new bathroom during the construction of a house or a major overhaul of a bathroom.
Here you need to focus on the following considerations:
- Choose the installation location by eye and evaluate whether it will be convenient to use the mixer.
- If this is a faucet with a shower, then it must be mounted at a height of 120 cm from the bottom of the bath after its installation.
- If the gander of the mixer will also turn the sink, then the height must be selected even more carefully. Please note that the height of the sink is rarely less than 85 cm. To this must be added the size of the faucet itself and the height necessary for comfortable hand washing.
- You should not mount the mixer on the horizontal, which is located at the height of the curb, which is usually done at a height of 100 cm from the floor. It is better to place the device where the wall is lined with smooth tiles, otherwise the faucet reflectors will not adhere tightly to the surface (the curb usually has a rough finish).