Instructions for whitewashing the oven
Before whitewashing the stove, it is worth deciding on the material used. After all, the preparation of the solution and the application process itself depend on this.
For whitewashing with lime, follow a few simple steps:
- Carefully remove the old layer of whitewash, especially where there are strong contaminations. To do this, use a metal brush or washcloth for dishes. If whitewashing is carried out for the first time, then all the chips, cracks and seams between the bricks are first sealed.
- Wet the stove with water. It is better to do this in parts, as whitewash is applied. If possible, wash off the remaining soot.
- Cover up existing cracks and repair chipped plaster.
- Dilute the product with water until smooth and apply with a brush or sponge to the surface of the oven. Apply a second layer if necessary. Rubber gloves should be used to prevent harmful effects of the material on the hands.
- Leave the material to dry.
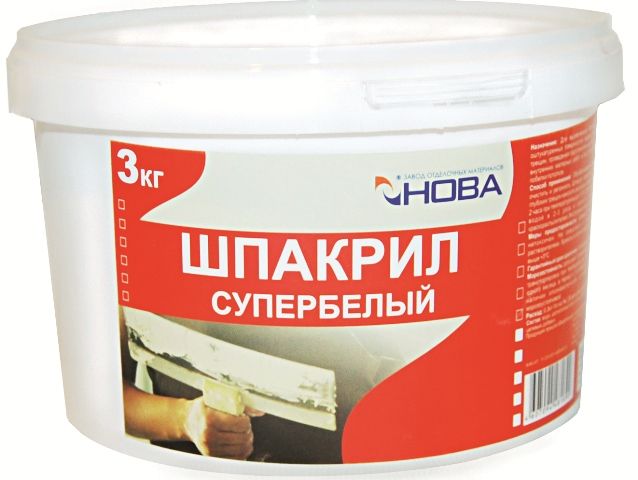
Important! Spackle for whitewashing the oven is used in the same way. Only for the preparation of the solution is taken part of the material and 2 parts of water
When whitewashing with chalk for the oven, powdered material is taken. It is purchased at hardware or construction stores. To prepare the mixture, 800 g of chalk is diluted in a liter of water and applied to the surface. The resulting solution acquires a gray tint, but you should not be afraid of it. After the chalk dries, the oven will turn a beautiful white color.
To prepare a mixture of tooth powder, you will need: 4 packs of the product and egg yolks, as well as 200 ml of milk. All components are mixed and after 10-15 minutes can be smeared on a heated oven. The consistency of the mixture resembles oil paint.

Regardless of how the stove is whitewashed in the house, several rules must be followed during the procedure in order to avoid stains on the surface:
- pre-moisten the oven with a soft cloth or sponge;
- the solution is applied to a cold surface, and when using tooth powder - to a warm one;
- when whitewashing, use a wide paint brush or roller;
- the first layer is applied horizontally, and the second - vertically;
- preferably no direct sunlight;
- in order not to stain the door, it is covered with paper.
When choosing how to whitewash the oven in the country, you can use proven methods or purchase a ready-made shpakril composition. The main thing is to choose the right tool for whitewashing and evenly distribute the product over the oven surface.
Expert answers
Natalya Klemyatich:
White Coller .. in jars they sell .. a glass of milk for 3 liters of water + 200 mg of primer and go .. Let it dry for 2 hours and coat again ... Don’t regret Coller .. Good luck !!!!
n.:
There is a ready-made whitewash for trees in garden stores, I think it's perfect.
••Tatyana••:
they say they whiten with ordinary tooth powder and the effect is good. (in the sense they whiten an already painted stove)
IMHO:
You can’t replace lime with anything, chalk gives a short-term effect.
EVA:
My mother whitened with white clay. I added a little blue and brewed starch so that it would not be smeared later.
Tatyana Ushakova:
In general, my oven is covered with white vinyl wallpaper for painting. But they've been like that for 2 years now. and never dyed. I whiten only a small part directly at the firebox with water-based paints for ceilings (or wipe)
Agnia Raspberry:
There is such a creamy composition, I don’t remember the exact name, either shpakril, or putty. White and snow white. Sold in bags of 5.10 kg, even in plastic buckets. Any hardware store. So mom has been using it for a long time to whitewash the stove, the ceiling. Dilute by eye with plain water. Perfectly lays down on the surface, does not travel around the skin, is easily washed off.If you need a different color, then you can add a coller to the finished solution, they are also a lot of different colors. Try it! )
Valery Shalakhov:
water based paint
Soggy,(it means ❝wet❞):
Any heat resistant paint. There are a bunch of them out now. There is a paint that paints the engine blocks and the engine compartment (sold in auto parts). So it will stay 100% on the stove.
Alexander Amaretto:
Oh, God forbid, I haven't seen a Russian stove for so many years! My grandfather (b. 1895) did this, took one part of sand, three parts of clay and one part of lime (sour cream) and a glass of coarse (non-iodized) salt. All this was thoroughly mixed and left for a day. I smeared it with a top and didn’t drown it for 2 days, but only with this mixture, with a large fly brush, I smeared it. Then, on a slow fire (and this is the most important thing), he drowned for one day. Everything, for 1-3 years, she was like new! Good luck!
Klava Golubkova:
Eugene, go to Yandex, and ask your question .. get a real answer ..
andrey yartsev:
well, in general, clay and sand are taken at the rate of 1/2 ... salt is also added 100 grams per 10 kg of mass of sand clay; (well, this is if you have deep cracks and it really smokes in places))) Important! Before filling the cracks, clean them and moisten them with water!!! In this way, I restored the stove from a granny in the village, and in general, buy a ready-made stove mixture (clay, sand, quartz molding sand) - it costs about 200 rubles per bag of 25 kg. Fill with water and go! good luck)
What are the special paints for brick walls and how to apply them
If you decide to buy paint to paint the oven, then it is best to choose paints that are resistant to high temperatures. Such paints will not burst and crack after a short period of time, but, on the contrary, retain their original appearance for a long time.
Also, you can paint the stove with oil or enamel paints, which will allow the stove to enhance its thermal conductivity.
When choosing how to paint a brick oven, it is best not to paint it with paints with the addition of aluminum and the like. Since if the furnace is built incorrectly and the wall of the hearth of the furnace itself does not comply with building codes, then its outer side can heat up from eighty degrees Celsius, and such heating can release from the paint itself such incredibly harmful substances as toxic fumes that can poison from the inside human body and so on.
Well, paints that were made on the basis of drying oil may darken over time or completely lose their original color.
To date, in hardware stores you can find special paints with increased heat resistance. Such paints are ideal for frequently used stoves. But, unfortunately, their color range will not please a sophisticated painter, and if you could not find the shade you need, you can always paint the stove with a special primer or paint it with paint with the addition of building latex.
What can whiten the oven
Knowing how to whitewash the stove, you can avoid further troubles, such as premature shedding of the material or its unsuitability for such work.
Lime
Lime is formed as a result of annealing of mountain limestone in mines. By adding water to the resulting solution, a white color is obtained, which is used for construction purposes. Especially often this method of whitewashing is used in the bath.

The advantages of this method are as follows:
- low cost of materials;
- the solution has antimicrobial and moisture resistant properties;
- can be applied to the old layer.
Important! Lime is an alkali so care must be taken when using it.
Shpakril
Shpakril is a paste for interior work. The disadvantages include only the high cost of the material. At the same time, it has a lot of advantages:
- moisture resistant material;
- sold ready-made, it remains only to add water;
- characterized by increased whiteness;
- the surface will not get dirty;
- small cracks covered up.
Chalk is a natural material that is easily applied to the surface and easily washed off. With the help of the tool, a good bright white color is obtained. The only disadvantage of chalk is its ability to leave traces, that is, every time you touch the stove, a white spot remains on clothes.
dental solution
Tooth powder is an expensive option than whitewashing the stove in the house. However, this method has a large number of adherents, since it has the following advantages:
- does not get dirty and does not leave marks on clothes;
- retains an attractive appearance for a long time;
- the surface of the stove does not crack for a long time;
- you can drown on the first day after the procedure.
other methods
As an alternative, instead of the classic white color, you can use artistic painting. If you have the ability, then you should draw the selected drawing yourself, otherwise stencils will come to the rescue. You can make them yourself or buy them at the store. The template is glued to the surface and a contour is drawn, which is then painted with the necessary colors.
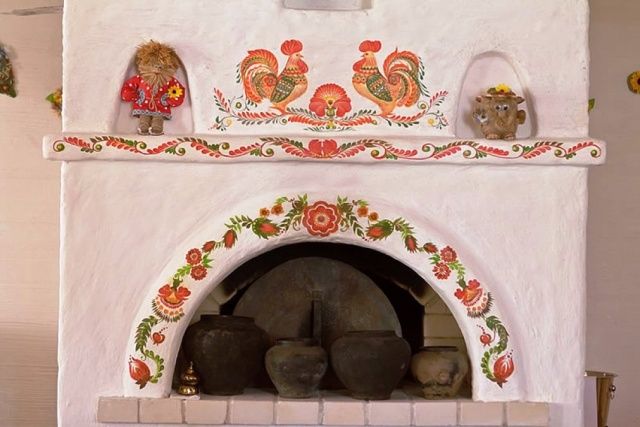
The same whitewash is taken as the basis with the addition of paints, for example, gouache, acrylic or water-dispersion. They tend not to crack at high temperatures and do not emit harmful substances. The image itself is applied with brushes for drawing. For large patterns use cans of paint or spray gun. After drawing the picture, it is not recommended to heat the stove for 2 days.
Furnace surface painting
Before you paint the stove, you should make sure that it does not need to be reanimated? Work on restoring the surface of the furnace with your own hands will not take much effort and time, but will protect it from cracks, damage and the negative effects of time.
Work recommendations:
- The outer part of the warm oven is treated with a brush with a special environmentally friendly varnish that is resistant to prolonged high temperatures and mechanical damage. To do this, you can use a mixture - a varnish prepared by yourself. Make a mixture of flour obtained from crane bricks, milk and 10 egg whites. It should be thick and viscous, then the surface will be a uniform red color.
- To give the surface a dark red matte shade, you can apply drying oil.
- If you want to get a glossy effect, you can cover the stove with oil or synthetic varnish.
- Shades of latex coloring composition will help to satisfy color preferences.
A mixture of turpentine and PF-283 varnish can also be used as oven paint. Taking equal proportions of these substances, a transparent, slightly opaque substance is obtained. It can be given the desired color. To do this, dried gouache, ground into powder, is first carefully sifted, then added to the mixture, achieving the desired result.
Painting other elements of the furnace
In addition to the surface, the oven also has other elements: a door, a lid, etc. Since they are iron or cast iron, it is quite possible that rust, soot, or stains appear on them after whitewashing. For their painting, heat-resistant and heat-resistant enamel in the form of aerosols is recommended. The prepared surface is not primed, but painted immediately. Your oven should be the most beautiful, remember this!
How to whiten
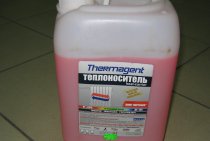
In stores you can find modern compositions for whitewashing the oven, they are made by different manufacturers, but they go under the same name - shpakril. Before use, such a purchased composition must be diluted with water in a ratio of 1 to 2.
After he has processed the oven, its walls will have a well-groomed appearance for a long time and will not fade. Among the popular manufacturers, it is worth highlighting those whose products come at an affordable price and with high quality composition.
| Brand | Volume, kg | Description | Price, in rubles |
| Master | 1 | Under this tool, you need to prepare the surface of the furnace so that it is dry and dust-free. They can repair small cracks and whitewash walls, ceilings and stoves. |
30
Nova
0,8
Can be used on plastered, wood and concrete surfaces.
21
BRAVO
16
The water-dispersion composition of the product is used for painting rooms and preparing walls for wallpaper.
960
Diola-006
4
In its pure form, it is used to seal cracks, places after the removal of nails and screws, and to restore chips. After dilution with water, it is used as a paint.
115
Flamingo
5
Its moisture-resistant composition can be used for any premises, it is highly plastic.
110
The better to whitewash the stove in the house, everyone decides for himself, from the above means you can choose the right one.
Options for whitewashing a Russian stove
To prepare the solution, you need 2 liters of milk and 1 kg of chalk. That is, the proportion of the composition is 2: 1. Crush the chalk into dust, use the mortar. Sift through a fine sieve: the material should not contain pebbles and large fractions. Fill with milk and immediately start whitewashing.
Tip: at high wall temperatures, the composition may turn brown. To avoid this, add 50 ml of blue to the prepared solution. It's about a quarter cup.
Protein-milk composition. To whitewash the oven in this way, you will need 100 ml of milk, two egg whites and 2 boxes of tooth powder. Mix the ingredients, you should get a mass, similar in consistency to sour cream. Do not make large volumes of funds: the protein quickly folds.
Lime-salt composition. Everything is simple here: you need 1 kg of lime and 40 g of salt (two tablespoons with a slide). Prepare the solution, as for ordinary whitewash, dissolve the salt. After finishing work, fire up the oven. When heated, the salt melts, covers the surface with a transparent and even layer.
The modern way is shpakril. If there is a hardware store nearby, buy a jar of shpakryl. Dilute with water in a ratio of 1: 2 and proceed to whitewash. Experienced craftsmen claim that such a surface treatment of the walls is durable, does not stain clothes and does not fade.
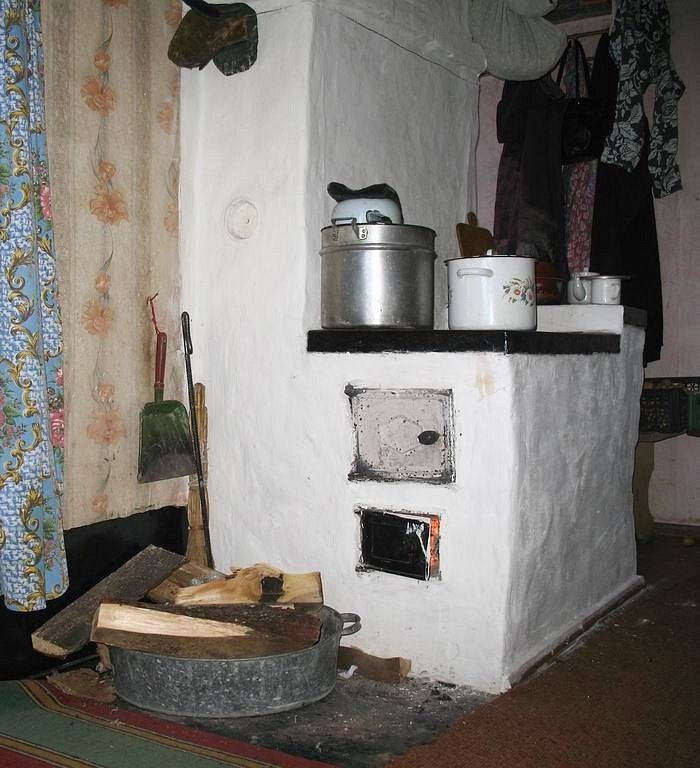
The stove, so indispensable in a private house for its practicality of use, autonomy from gas and electricity, still has its drawbacks. We will not list them all, but according to the thematic features of our article, one of them is the exit of exhaust gases through fittings, slots, etc., which, as a result, leads to soot deposition on its walls. At the same time, you can get dirty on the stove, the stove also loses its attractive appearance, breaking out of the interior of the house. The solution to this problem is whitewashing the oven.
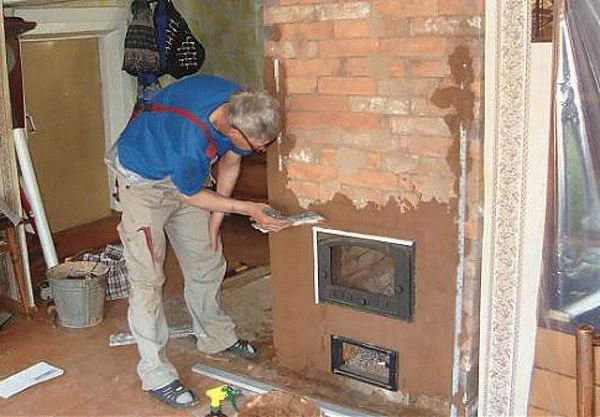
In fact, whitewashing the oven is not such a complicated procedure, it is similar to whitewashing the ceiling. The difference is that it is usually even more convenient to whitewash the stove, but with the peculiarity of applying a thicker layer of whitewash to certain parts of the stove.
The first step is to remove the part of the surface layer where the most soot has settled. If we do not remove the soot and start whitening, then it will begin to show through, it will not work to whiten this place to the original whiteness. The top layer is best removed with a steel dishcloth or wire brush, but the brush must be done more carefully, as it is harder and can lead to deep scratches on the stove.
Next, you need to wet the oven with water. It will be difficult to apply whitewash on a dry surface of the oven, as the whitewash will roll into balls and be poorly absorbed. The oven can be soaked with water in parts, in accordance with the speed of whitewashing and the places intended for whitewashing. At the same time, try to wash off the remaining soot as much as possible.
Now it is necessary to inspect the furnace and if there are cracks, or plaster has crumbled somewhere, then it is necessary to restore it. You can use a brush to apply putty.Its advantage in application lies in the fact that it repeats complex surface contours, filling hollows and chips with putty from the hairs. Or use a more traditional putty spatula. For whitewashing and putty, spakril can be used. More detailed information about shpakril can be found in the article "Shpakril".
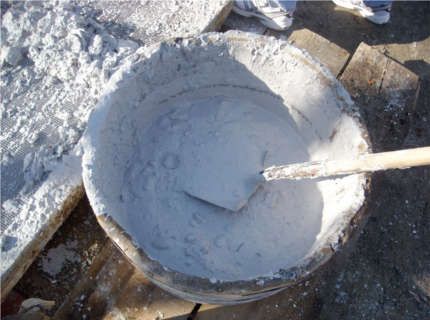
We dilute the solution for whitewashing.
Expert answers
Elina Linberg:
It is possible, but you won’t get the original look, overlay with tiles or tiles
-:
Well, is there now a heat-resistant brick that can be overlaid with them?
perception:
Whiten again with whitewash, but with the addition of salt, the soiling will disappear. You can clean it off, but there is hardly any cement there. . The whole thing would crack. Most likely it is clay.
Ac:
Whitewash is washed off.
Eugene Chemic:
a problem may arise - clay does not allow smoke to enter the house through brickwork and cracks ... if the clay is peeled off, most likely you will have to coat it again at least where it smokes ..
Gossamer:
Agree with Maria. Or you can tile.
Granny:
Probably necessary. whitewash absorbs dust. Therefore, it must be washed off and re-baked or whitewashed or finished with special tiles.
last name:
They whiten the stove (especially the chimney) so that the place of the smoke leak can be seen (it will turn black) as it should be according to fire regulations - here is .kamin /about/conditions.php but these guests and snips are ancient, but no one has canceled them
BASIL:
under the whitewashing, the brick is most likely already bad, whiten with a water-based emulsion, it does not get dirty, it just stinks a bit, some downs can sew it up with drywall
kulisvet:
to keep warm longer
Renat Aliyev:
Houses are lighter
Russian King:
Just to be nice
Sergei Stroganov:
the cracks on the bleached stove are visibly good
Lily:
fire safety... On a white color, cracks on the surface are easily distinguishable, from where smoke and carbon monoxide will leak.:
Bella Spring ✿:
It has long been customary in Russia, because the bricks were ugly, roughly speaking.
izeta:
In Russia, it was believed that in order to expel evil spirits, you need to whitewash the stove. White color is an indicator of cleanliness, neatness. The whitewashing of the stove was treated with special responsibility. They avoided whitewashing both the new and the old stove on Monday, Saturday, and also on those days when the month was at a loss. Violation of such a ban, according to legend, could bring misfortune to the house. The stove was whitewashed with whitewash, which was prepared from crushed and sifted chalk mixed with skimmed (skimmed) cow's milk. In order to remove the yellowness, a little linen blue or some other blue dye, such as ink, fabric dyes, etc., was added to the chalk solution. Milk-chalk whitewash has been used successfully to this day. To avoid the appearance of cracks in the future, one or two layers of gauze are glued to the surface of the furnace before whitewashing. The white oven is too easily soiled. Some time passed, and it gradually became dirty and covered with soot. A careful hostess constantly maintained the whiteness of the stove, whitening it from time to time. Most often, the stove was whitewashed for the holidays, especially for Easter and Christmas. Before Easter, it was possible to whitewash the oven only on Maundy Thursday during Holy Week. At the same time, the floor and the wooden ceiling were washed with sand.
BellaRom:
this is purely for aesthetic reasons.
grandfather mikhey:
winter was boring...
Elena Turchaninova:
To make it beautiful and even the mother-in-law said, frequent whitewashing does not allow the plaster to crack. Indeed, if whitewashing is rare, the plaster begins to crumble. But I like the unbleached brick oven more
MODEROK - PIDOROK:
they were also covered with tiles, which also worsened heat transfer
husky:
dark people, what do they know about quanta. And you go into the hut of another person, you look - the owner looks through the small scope, the stove is unbleached, and you can lay your head that a telescope is arranged in the attic
Olga:
smarter
Elena Makarova:
I whitewash the dirt, and with it the whole misfortune (as my great-grandmother used to say). My assumptions: the houses had small windows, and the white color is an additional reflection of light. Why lime? - it does not crack with temperature changes, and there were no paints in those days, or they were expensive. Lime closes the cracks and prevents combustion products from entering the house. It seems to me that many other more important and useful qualities were hidden in the bleaching of the stove. After all, chalk gets dirty and it’s inconvenient, maybe they whiten the stove not at all for beauty - otherwise the stoves would have been made beautiful from the beginning, using other materials ...
Lily White:
From poverty. Traditions were created around poverty to make poverty easier to accept. The tiled stove is richer.
Divergent:
Who told you this??? Not everyone!
Methods for preparing solutions for whitewashing
The first and oldest of the methods is milk-chalk whitewashing. Even from the name it is clear that milk and chalk are used to prepare the mixture. Chalk must be finely crushed in a mortar and sift through a sieve. Sifting eliminates the ingress of foreign particles into the solution, so this step should not be ignored. Pour skimmed cow's milk into the resulting powder. To avoid yellowness from chalk, add blue or any blue dye, for example, ink, to the solution. We use the dye quite a bit, otherwise the whitewash will have a blue tint. In terms of density, the solution should turn out to be quite liquid. Recommended ratios: take 1.5-2 liters of milk per 1 kg of chalk. After mixing, you can immediately start whitewashing.
The second method, no less well-known, is whitewashing with tooth powder. You will need 2 boxes of tooth powder, 2 chicken eggs and half a glass of milk. Separate the whites from the yolks, mix them with milk and gradually pour in the tooth powder. We gently stir everything, let it stand for 10 minutes and start whitewashing. The mixture acquires the consistency of sour cream, so it is convenient to use a brush for whitewashing. The Russian stove after such painting turns out to be even and smooth. The surface dries quickly and does not stain clothes.
Slaked lime for whitewashing
The fourth way is whitewashing using shpakril. Shpakril is a paste-like mass, which is intended for interior work. In order to prepare whitewash in a bucket, it is necessary to mix water and shpakril in a ratio of 2: 1. Then stir well so that there are no lumps, and you can get to work.
Spackle for whitewashing
Whitewashing the stove with lime mortar
The first thing to start with the procedure for treating the furnace with lime mortar is the preparation of the surface of the furnace itself. We will not consider the procedure for puttying and priming a new oven; there are separate topics for this, but we will go straight to preparing for whitewashing.
The stove is inspected in an attempt to find places covered with soot. If they are, then they must first be completely cleaned or washed, otherwise, after whitewashing, blackness will appear in these places. Washing is used if the soot has not yet had time to eat well into the clay. If the stove has been in operation for several years, then the best way to clean it from soot is to use a metal brush. It is only necessary to try not to cause excessively deep damage to the plaster.
It is necessary to carefully inspect the furnace for cracks and chips on the surface that appeared during operation. If such elements are found, then it is necessary to prepare a clay solution and cover them up, and small cracks, the so-called cobweb, can be eliminated simply by wetting the clay that makes up the putty of the furnace.
After preparing the surface of the stove, it is necessary to prepare a lime mortar, which will be used to whitewash the Russian stove with your own hands.To do this, quicklime is taken and poured into a metal bowl; an old enameled basin or a galvanized bucket is quite suitable for this. Before starting the extinguishing procedure, it is necessary to move to fresh air or be in a well-ventilated area. If you need a universal plastic mass for whitewashing, then dilute the existing lime with salt water in a ratio of about 1 to 4 and mix thoroughly. If you just need to lightly whitewash the oven over the existing whitewash, then you can dilute the lime with salt water 1 to 1. After a homogeneous mass has been obtained in the container, you must leave it for an hour in order to completely eliminate the active reaction of the mixture during its further use. After the chemical reaction has stopped, the water is allowed to evaporate, and the lime, after removing the water, is preferably crushed into a fine fraction, for ease of further use.
The resulting slaked mixture is diluted with water or milk, when diluted with water, it is advisable to add 1-2 egg whites so that the mixture sticks to the brick better. Dilution is carried out until the consistency of thick sour cream is obtained, it is this mixture that is best suited for whitening the oven, but for a more even coating, it is advisable to pass the mixture through a large sieve to avoid lumps.
When the solution is ready, you can proceed to the whitewashing procedure itself. To do this, a medium-hard flute brush is purchased and a thick whitewash solution is carefully applied from top to bottom. In order to check how it will lie on the stove, you must first cover the area and let it dry completely, if everything is fine, then you can continue whitewashing.
After the procedure for applying the lime composition to the surface of the furnace is completed, it is advisable to leave it to dry for 1-2 days. If, as a result of drying, a not perfectly white oven is obtained, then it is better to repeat the whitewashing procedure in order to create a stronger and thicker light layer on the surface of the oven.
HomeSite map
home » Heating and ventilation in the country.
Preparing the oven for whitewashing
The first step is surface preparation. First of all, the walls of the new furnace are covered with a layer of plaster, then coated with clay. If it is old and the plaster falls off in places, you need to re-plaster these places. You should choose a special, heat-resistant plaster, you can buy it or make it yourself.
After two days, the stove is heated at least three times. This is necessary in order for the clay layer to become as strong as possible. But at first, the oven should not be heated much: its walls should become slightly warm.
 Before whitewashing the stove, it must be covered with a layer of plaster
If the old plaster holds up well, it only needs to be cleaned of dirt and soot. Soot stains are well removed with a metal brush or dishcloth. To remove greasy traces from the surface, a caustic solution (2%) is used. Rust stains are removed with a solution of copper sulphate in the proportion of 100 g of powder and 1 liter of water.
How to whitewash the stove with your own hands
First you need to conduct a visual inspection of the furnace, if there are deep cracks and chips on it, then they must first be covered in the old fashioned way with clay or specially purchased putty. It’s impossible to beautifully whitewash the stove without preparatory work; you need to carefully eliminate all defects so that your efforts are not in vain.
Tools for the job
Before whitewashing the stove, its surfaces should be cleaned with a broom or brush; for old exhibits, you can use a metal brush, but most importantly, do not damage the plastered surface with it. Then you need to determine the method of applying whitewash, for this you can use:
- Brush - it is chosen by those who have already painted any surface more than once, and are sure that they will do everything smoothly and without streaks.Before performing painting work, it is advisable to soak the brush in water so that when whitewashing, no hairs remain on the surface of the furnace.
- Sponge is an alternative technique, it does not give a clearly even coloring, it is used only for small ovens, since it will take a long time to obtain the desired density of painting.
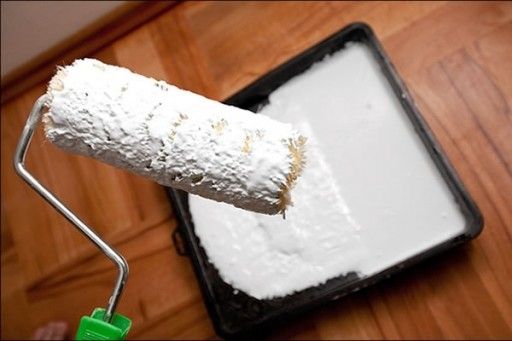
- Roller - suitable for both beginners and professionals, it captures a larger area in one stroke than a regular brush. The application of the selected composition with a roller is very simple, the main thing is to move along the surface in the direction of the window in order to create uniform stripes.
- Airbrush - it is used for large furnaces. It is easier to handle it together, one person will maintain the desired pressure in the device, and the second will monitor the uniformity of the application of the composition filled into it. Before using it, it is necessary to check the spray gun, and then constantly hold the spray gun at a right angle to the furnace wall, while maintaining an optimal distance of 30 cm from it.
The Russian stove is an essential attribute of almost every private house. The easiest way to decorate the stove is whitewashing. It has long been believed that whitewashing is done soundly if after it the clothes do not get dirty from the oven. Why actually whitewashing and white? It used to be believed that the white color provides protection from the evil eye and various misfortunes, and also preserves the family hearth. Once upon a time, among the peasants, it was considered a great sin to apply any drawings on the Russian stove or to stain it. Such work was carried out, as a rule, on certain days. It was necessary to carry out whitewashing on the growing moon and in no case on Saturday and Monday.