Preparation, list of tools
Before starting work, you need to determine and mark out the place that the new stove will take.
The chimney pipe must be no closer than 15 cm from the roof rafters.
If you are laying for the first time, professional stove-makers advise you to practice in advance by making a model of the future furnace from the prepared brick. Naturally, without solution. This minimizes the possible risks in real laying, allowing you to learn from your mistakes, which can still be corrected in the layout.
The furnace foundation requires preliminary waterproofing, in area it must exceed the area of \u200b\u200bthe stove.
During the laying of a new row, it is necessary to control the absolute verticality of the walls.

For the construction of a brick oven, the following tools are needed:
- plumb;
- trowel;
- roulette;
- putty knife;
- Bulgarian;
- knitting wire;
- building level;
- metal strips, corners;
- containers for cement and clay mortar.
Choice of doors
The first thing to consider when choosing a door for a brick oven is the heating temperature that will occur in the furnace. As the temperature rises, the product will expand. Other factors must also be taken into account
There is an important rule for choosing oven doors
The gap between the door and the oven wall should be kept to a minimum. It is filled with basalt wool or asbestos. In addition, it is worth considering some recommendations of professional stove-makers:
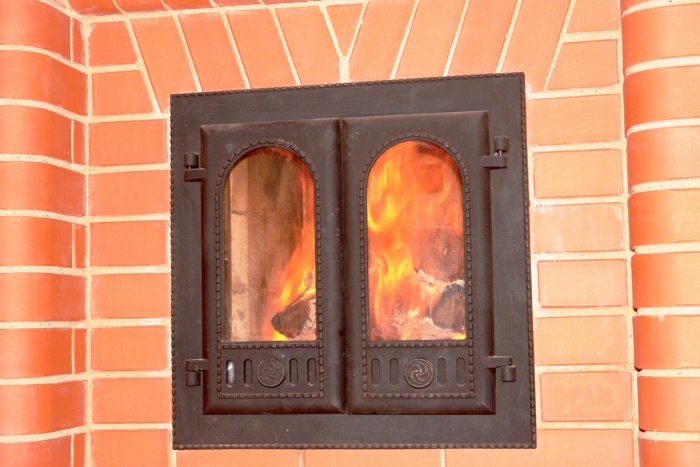
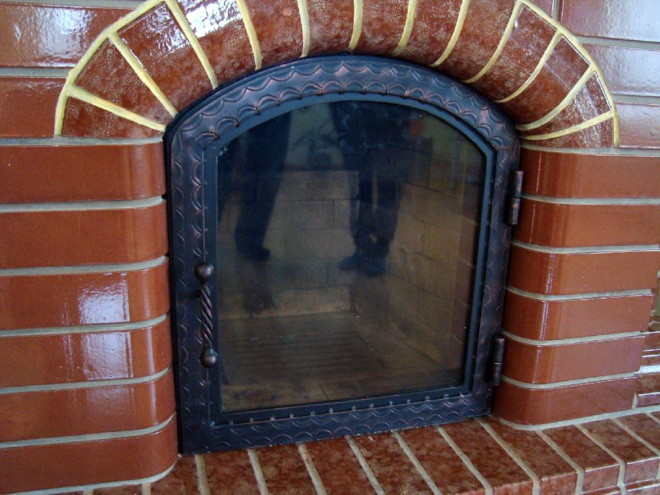
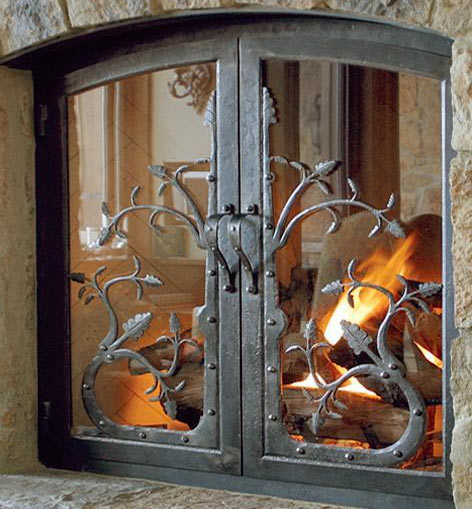
- To look at the flame, you should buy cast iron products with glass inserts. However, be prepared for the fact that the product will be expensive.
- For heaters on coal or mixed fuels, cast iron products should be chosen. If the stove is fired with wood, you can use glass or steel.
- To increase safety, it is better to purchase a metal structure that has a heat shield. In this case, the maximum temperature of the outer surface of the door will heat up to 40 degrees.
- To prevent cracks in the glass, when installing a door with a seal, you can leave a small space between the product and the walls. This will eliminate the appearance of cracks even with severe overheating.
These tips will help install the door in any oven.
Specifications
The designs of all stoves, unlike most fireplaces, require the obligatory closing of the hearth. The furnace door for the furnace has several functions:
- protects the room from open fire;
- provides heat transfer from burning fuel to rooms;
- prevents sparks from entering the room;
- increases the efficiency of the combustion process;
- embellishes the structure as a whole.
All elements of furnaces must be fire-resistant, mechanically strong, and exclude the occurrence of fires.
Ordinary doors for the furnace compartment allow air to pass through, because they are not hermetically sealed with an ordinary handle. Compacted types have a clamping mechanism, which reduces the amount of air entering the interior.
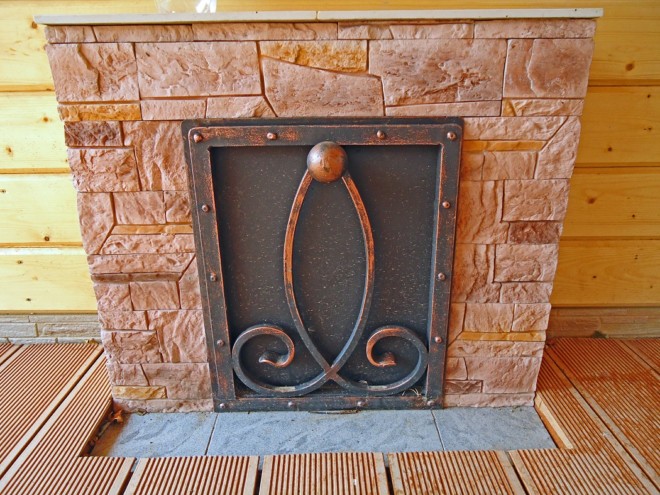
An eye-pleasing feature of some doors is a glass insert mounted in the center; it does not perform any important functions, but it makes it possible to enjoy the view of a burning hearth, which many owners really like.
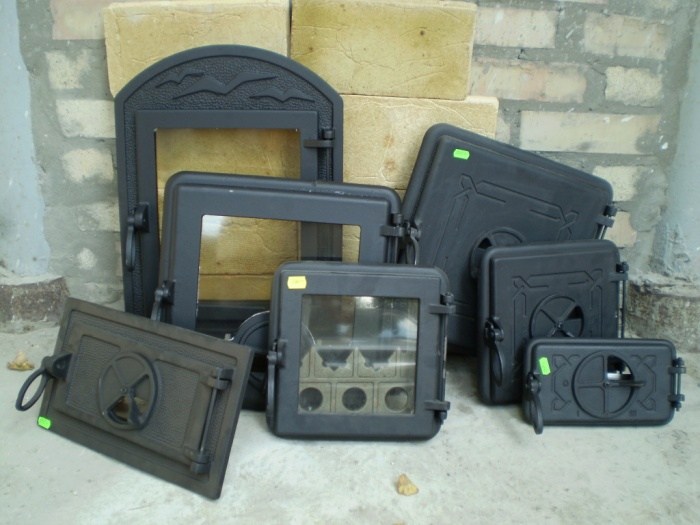
Types of furnace doors
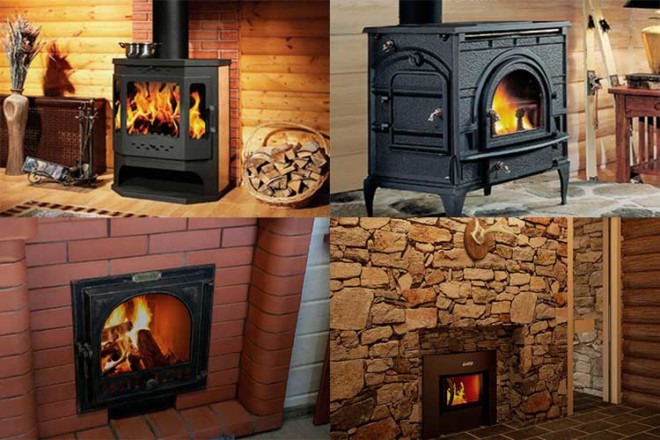
Today, all the doors used in ovens can be divided into several groups that differ in a certain way. For example, such products are made from a variety of materials:
- One of the most common materials for furnace doors is cast iron. Such products have been quite popular for many decades. However, they differ in such disadvantages as a large mass, inconvenience of use, a significant volume of products.
- The second group includes iron doors. Typically, such products are used in the arrangement of stoves in baths. For a home stove, iron doors are not used, since they have a relatively small number of positive characteristics.
- Also oven doors are made of panoramic glass. Today, such models are most widely used. They are quite light, and also provide a full view of the furnace space.
The last version of the oven door is worth paying special attention to. Their advantages and disadvantages should be described, as well as the varieties of such products should be highlighted.
Stages of work
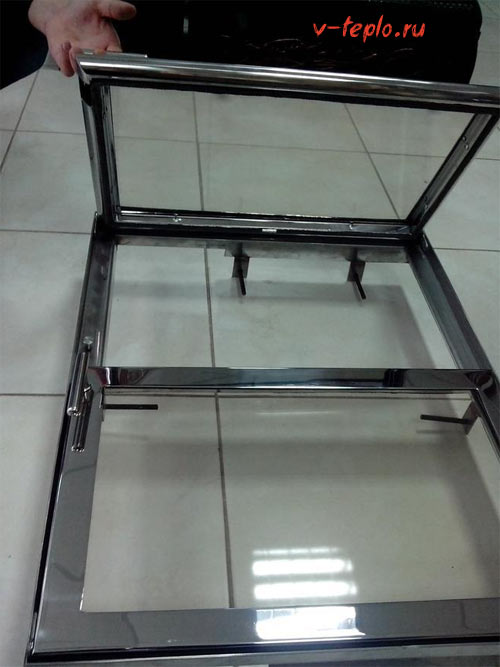
The first thing to do is cut out the corner. And then give the desired shape to the structure. In order to carry out this operation, it is necessary to lay out the corner on a flat surface, check the correctness of all connections, and then weld all the necessary details. After finishing work, you need to again inspect the door for correctness and compliance with the form.
Then, on a sheet of metal, it is necessary to mark the inner contour of the frame. After finishing the markup and receiving all the measurements, they must be slightly increased and a small allowance left on each side. Taking into account these marks, it is necessary to cut the part with a metal grinder. Since the door is planned with glass, it is necessary to have a piece of heat-resistant material that will be mounted.
With the help of the same tool, glass is cut with the desired dimensions. Next, the curtains must be welded to the frame. After that, you need to grab them to the common door frame. When this operation is completed, you need to make sure that nothing prevents the opening and closing of the door. If this condition is met, then you can proceed to the final welding. The door handle is attached last.
Step-by-step instructions with a photo for laying the stove
Different stove-makers have their own masonry technologies and their own secrets that have come with years of experience. Here is information about a fairly simple way to create a fireplace stove for heating a two-story house, the process will not seem extremely complicated even for beginner stove-makers.
Foundation masonry
The base row of brickwork will serve as the foundation. It is carried out with any brick, some stove-makers even fill this level with rubble.

When laying the base row, cement mortar is used.

The foundation is completely filled with mortar, the layer is leveled.

The erection of the furnace body
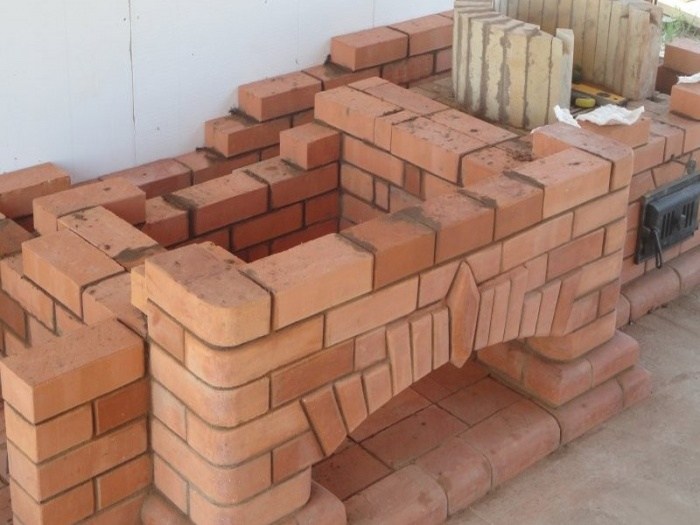
The first oven row is marked. The horizontal, from which they repel when marking, is the wall of the room.

Where the fireplace is planned to be placed, a grate is placed. From this row, the bricks are already laid on the furnace mortar.

An important stage of work is the scrupulous alignment of each new row by level.

Second row laying. The stove wall closest to the wall of the room is reinforced with an additional brick to increase fire safety.
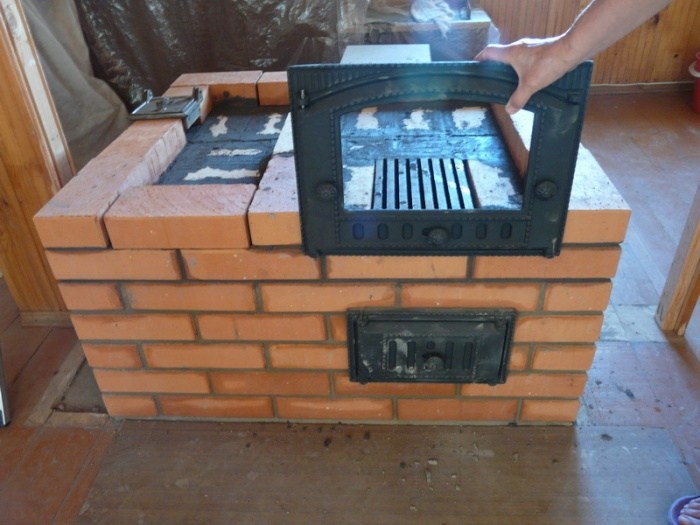
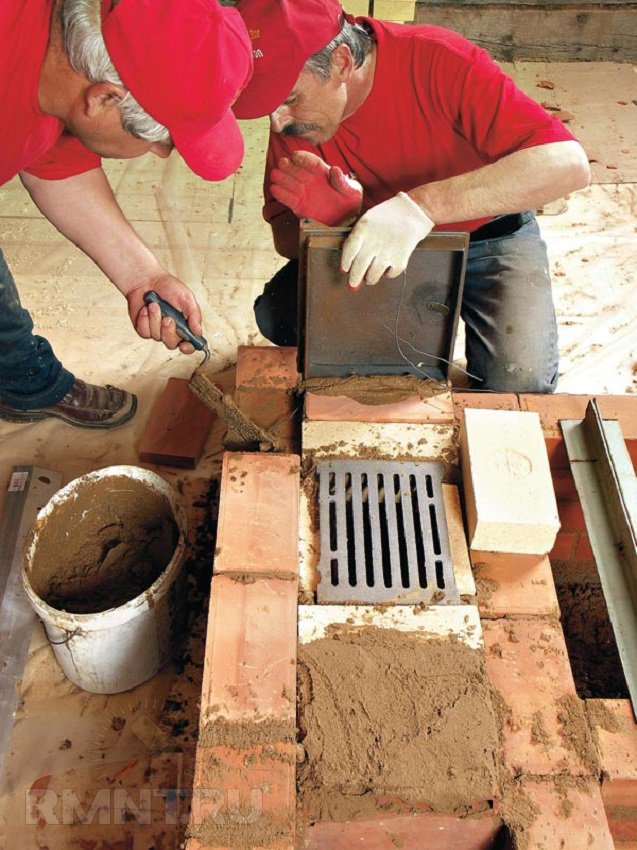
The place where the chimney will be located in the 2nd row remains empty, the rest of the stove is completely laid. A door is mounted through which the owners will clean out the ashes.

The door is installed on the solution, leveled. For a more reliable fixation, it is fixed with a wire that must be laid between the bricks.

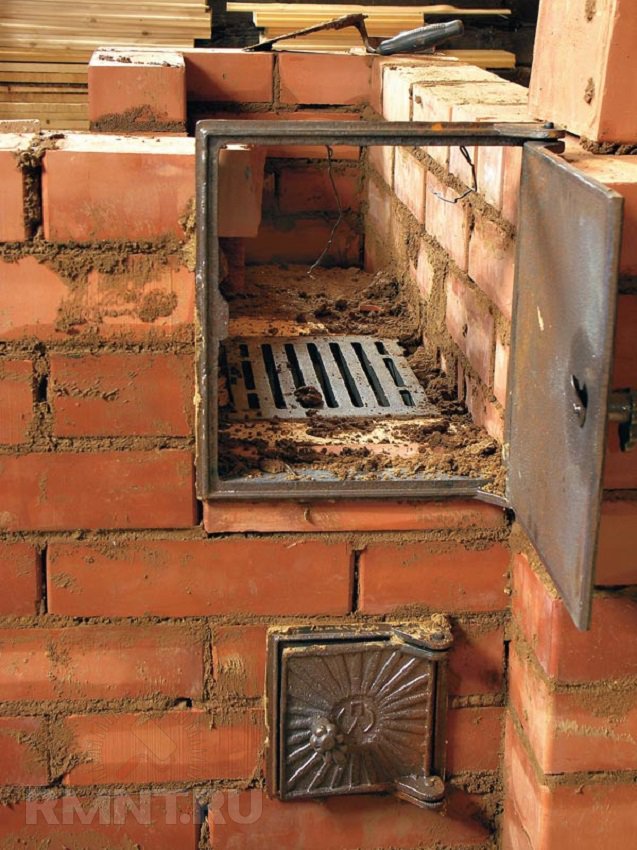
Next, the next 3 rows are placed. Then a brick stop for the grate is installed - 2 rows of 1/4 bricks are placed on the sides.
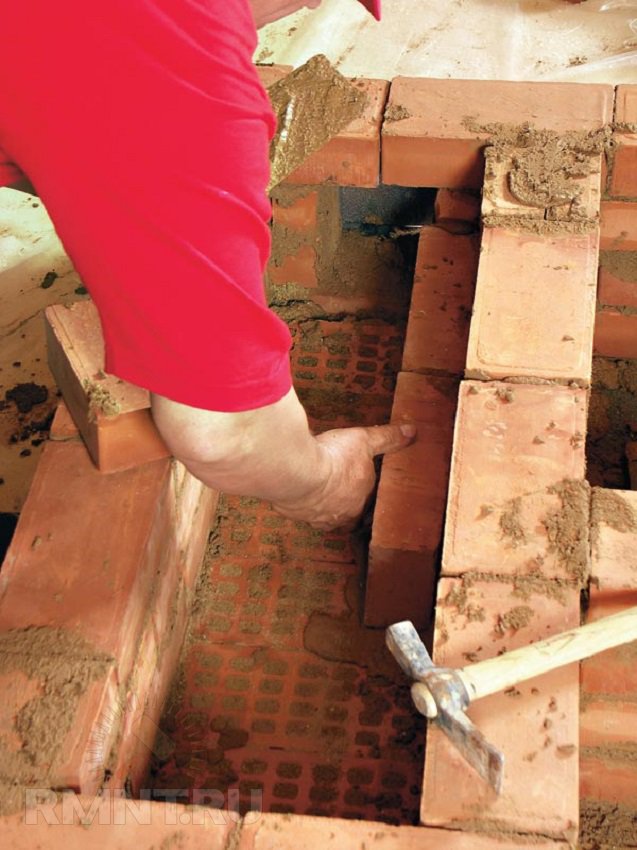
The grate is laid not on a simple, but on a refractory brick. In order for it to lie on the same level as the bricks, holes are cut out in fireclay bricks.

The size of the brick is easily adjusted - the excess is measured and carefully cut off.

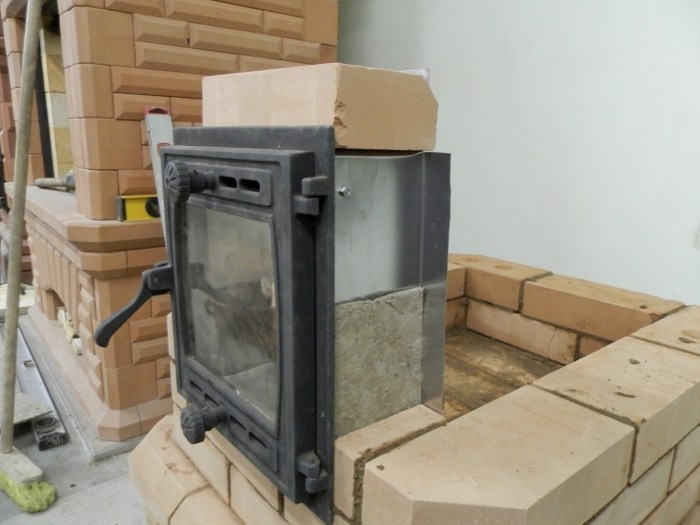
The large door is mounted next to the installed grate.
The large oven door is similarly fixed with wire fasteners.

The first firebox row is placed exactly above the fireplace, it is reinforced with metal corners and a strip or thick tin. So that the masonry can lie on them, it is cut with a grinder, then the slots are brought manually to the desired size.

The next brick row is laid.

A fireplace grate is laid on a refractory brick along with a brick row.

The door is fixed, the brick is strictly adjusted to it.

The firebox of the new stove with a fireplace is ready.
Fire-resistant fireclay bricks are placed over the furnace furnace.

The body of the stove is built.

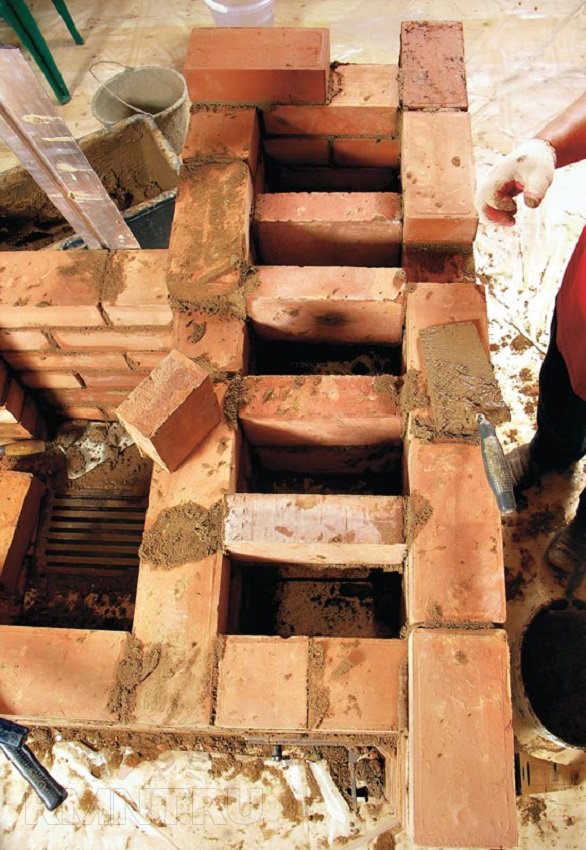
Creating a chimney
The place left under the chimney is divided into wells. The design requires reinforcement with metal plates.

Brick chimney wells are being laid.

Soot cleaners are mounted above the furnace roof.

The wells are again divided, the first rows of walls should be reinforced with strips of metal.
After strengthening, the ceiling of the furnace body is erected. The space related to the chimney remains empty.

The cornice of the body is laid out, then the chimneys are laid.
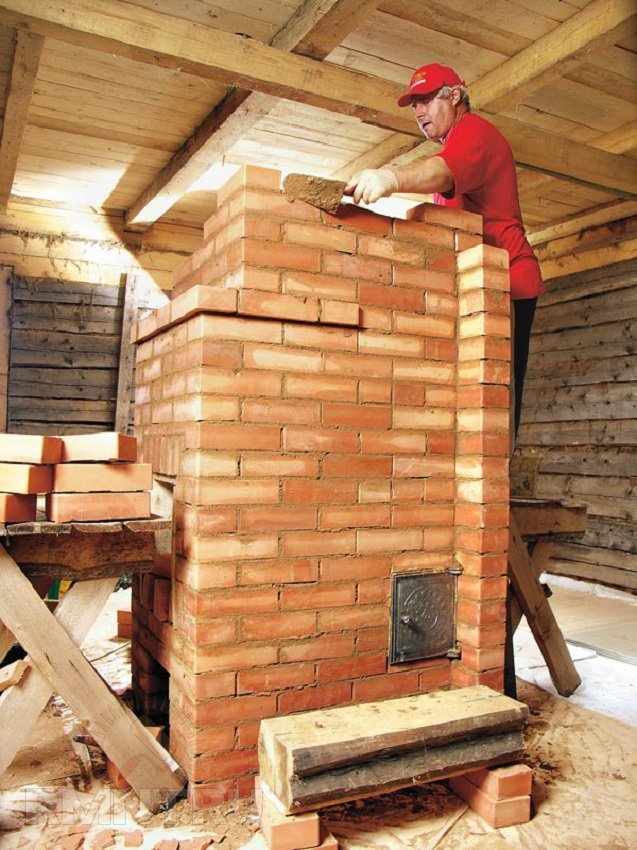
The final stage of work on the first floor. The stove is located at the bottom left, the smoke inside the chimneys moves in a spiral and exits at the top left. The final separation of the wells is closed with a tin sheet. In order to compensate for the pressure inside the fireplace stove, 2 brick rows are laid on the tin.

Two chimneys stretch to the second floor of the house - from the fireplace and the stove itself, they are separated from each other. Each chimney requires a separate damper.

Floor level of the second floor. Waterproofing is mounted here, the chimney is again reinforced with metal corners. In order to save money and not build a heating stove on the second floor, the chimney of the stove under construction is again divided. The smoke will go through it like a snake, having time to warm up the room. In order for the chimney to warm up much faster, it is laid in the area of \u200b\u200bthe second floor with a thickness of 1/4 or 1/2 bricks.

A hole for the stove chimney is carefully sawn out in the roof.

Before bringing the chimney to the roof, it is reinforced with metal corners.
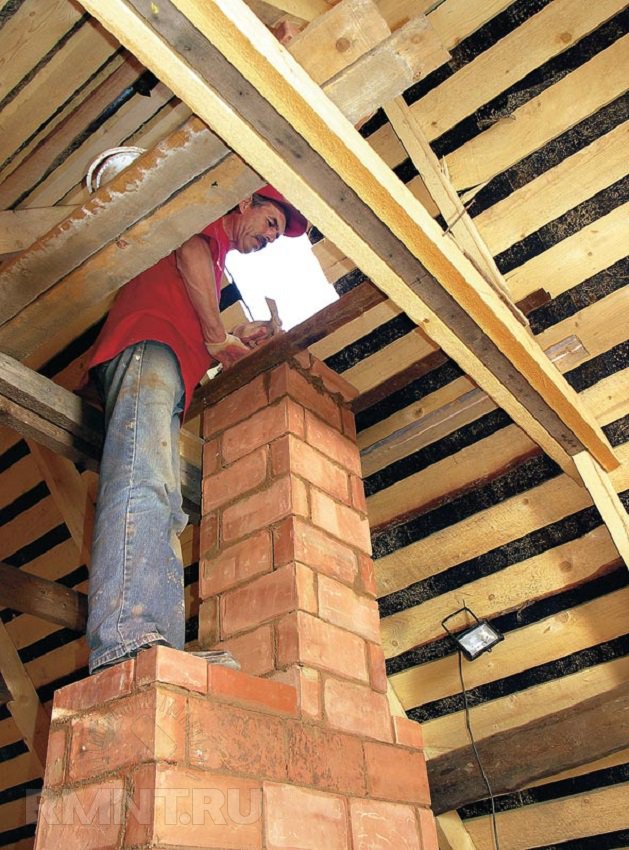
If the chimney is located in close proximity to the roof ridge, it must be laid out above the ridge by at least 0.5 meters. If further, then the height of the chimney is allowed, equal to the height of the ridge, but not lower. In this case, the wind increases the stove draft, lifting the smoke up.

Even a small oven in the house is a cosiness and comfort. Larger stoves require increased skill and additional materials, but the principle of their construction is similar to the above method.
rmnt.ru
19.02.17
Heat resistant glass
So, we found out that in most cases, consumers prefer to install doors for fireplaces and stoves made of heat-resistant glass (the exception is those appliances that consume coal or mixed fuel). What is the secret of popularity? First of all, the fact that today the production of such glasses has noticeably improved and become more complicated. The production process consists of several stages, such as:
- heat treatment;
- treatment with chemicals;
- high temperature polishing.
With the help of special glass melting furnaces, manufacturers obtain sheets of material of the required thickness, and their (sheets) surfaces are treated with special preparations that increase not only fire resistance and strength, but also the service life of finished products.
After the completion of all technological stages, the finished fireplace glass acquires a lot of unique positive qualities, including:
- resistance to high temperatures;
- low heating rate;
- aesthetic and, so to speak, noble appearance;
- excellent noise absorption;
- the ability to withstand significant temperature changes due to low thermal expansion;
- in addition, no visible defects, even the smallest cracks, appear on the glass surface.
Moreover, today, unlike a few years ago, heat-resistant glasses are produced with crystal and corrugated surfaces, as well as tinted ones (in the latter case, the bright flashes of fire are somewhat muffled).
Above, we have already mentioned glasses that can independently remove the soot that appears on the surface. Such glasses are called self-cleaning and differ in that they are covered with an almost imperceptible ball of metal oxide. Due to this, the inner surface of the glass during the combustion of fuel is heated to a higher temperature, and soot, as a result, almost completely burns out.
How to care for fireplace doors?
We have already noted that metal doors for stoves and fireplaces do not need special care - you just need to paint them with heat-resistant paint. With glass models, everything is somewhat more complicated. For example, even self-cleaning models must be periodically cleaned of accumulated soot. This procedure will require a damp cloth and detergent (the same "Mr. Muscle"), but without abrasive components and chlorine. So you do not damage the glass and the protective layer.
What affects cleaning frequency? First of all, it is the type of firewood used (how much resin it contains) and the pulling force.
This is interesting: Fittings for sliding interior doors
Glass door installation
Before installing the door with glass in the stove, it is worth checking the ease of opening it. With a tight movement of the part, it should be developed. This will allow you to use the door as conveniently as possible in the future.
Usually in small heaters the temperature does not rise high enough. In addition, the frame is not exposed to open flame. For this reason, the expansion of standard ovens is minimal. Even when a piece of wire near the door is exposed, it itself holds in place very tightly.
There is an effective way to fix the furnace door, which prevents it from falling out. It is necessary to rivet special metal plates to it from below and above. It is better to choose products with expanding edges. Once all the steps have been completed, the plates should be inserted into the brick.
Installation of the furnace door is carried out in stages:
- First lay the grate.
- After that, plates and wire are attached to the door. As soon as the preparations are completed, the product is installed on the solution.
- After the wire and plates are bred on the inner walls of the combustion chamber.
- The other ends of the metal elements are placed on 2 bricks, pressing one brick on top.
The door angle is checked with a plumb bob. Then the last wire is pushed into the hole in the door. It must be twisted tight enough so that rings do not form. Then the wire is laid in a hole in the first edge of the brick. Then, on the mortar, it is pressed with a brick from above.
Options for installing a stove in the house
The placement of the stove depends entirely on what exactly the owners expect from it. If it is installed in a house of a small area and will be used as a fireplace for friendly gatherings, you can use the first scheme. Such a stove is a good option for barbecue on the grill or shish kebabs.
 Options for placing a brick oven
The second scheme is for a solid quadrature house. In this case, the front side of the fireplace stove opens into the living room, the stove walls heat both bedrooms, and the heat in the remaining rooms is maintained by heat exchange.
The third scheme with a stove for heating and cooking is a budget housing option for a bachelor or a small family. Pluses - a warm couch and the possibility of placing a dryer in the hallway.
Important: it is worth taking care of the external insulation of the house in advance, because it greatly increases the efficiency of stove heating
Selection of bricks, sand, mortar
In order for the oven to serve for a long time, you need to correctly select all the materials. Bricks are of three types:
- Ceramic - can be used to build a furnace.
- Silicate - not suitable at all in this case, even double M150.
- Refractory - ideal, but they are more often surrounded only by a firebox and fireplaces, varieties: fireclay, refractory bricks, etc.

Tip: when choosing a brick for the stove, you need to completely abandon its hollow types.
The solution is made from clay. Red clay is suitable if the stove is made of red brick; when using fireclay, special fireclay clay is required. Some stove-setters still make their own solution from river sand with a grain of 1–1.5 mm, clay (in a ratio of 2.5: 1) and water in the old fashioned way. In this case, it is advisable to use angular quarry sand without foreign inclusions and the so-called greasy clay. However, it is easier and more reliable to buy a ready-made oven mixture in the store, having prepared it according to the instructions.
From the fittings, you need to purchase grates, blower and furnace doors, soot cleaners, valves or dampers.