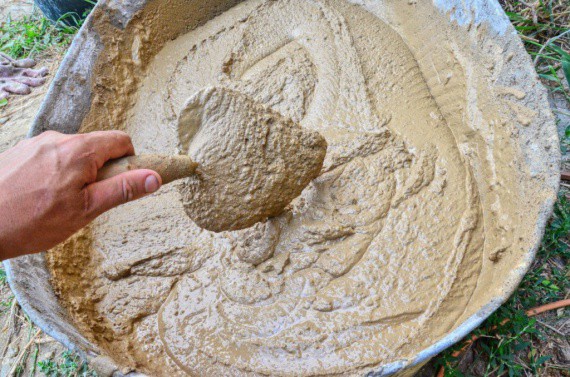
Preparation of tools and materials for work
Clay walls are plastered in 2-3 layers. Initial wall plastering is carried out using the following materials:
- Clay.
- Wood sawdust.
- Sand. Material with medium-sized grains is best suited, it is recommended to screen out large inclusions.
Plastering tools.
Special attention should be paid to sawdust, which will be used to plaster the walls. Only thoroughly dried sawdust can be used
In no case should they be affected by fungal diseases. Fresh sawdust cannot be used for plastering clay walls. Before use, they must lie for at least 1 year. In the process of preparing the mixture, sand is first mixed with sawdust and only after that water and clay are added.
The 2nd layer of wall plaster is applied using sand, cement and clay. To work, you will need a minimum set of tools, namely:
- Board-grater. Instead, you can use 2 spatulas of different sizes. Work with what is more convenient for you.
- Building level.
- Rule.
- Trowel.
For plastering such walls, a special clay composition is used. You will have to choose the optimal ratio yourself, because. the properties of clay from different areas, such as plasticity, "fatness", etc., vary. The optimal proportions of the composition directly depend on this.
Take part of the sawdust, the same amount of clay and 3 times the amount of sand. Thoroughly knead the mixture by slowly adding water to it. To check the readiness of the plaster composition, you can use various simple and proven methods. Despite their simplicity, they will help you find out without any problems whether the mixture is ready or whether you still need to experiment with the ratio of ingredients.
Schematic of wall plastering.
The first method is known as "clay ball". You need to bring the plaster composition to a state where it will no longer stick to the skin. Roll a small ball out of the resulting mass, a diameter of 30 mm will be enough. Place this ball on any horizontal surface and crush it with your palm. If cracks appear along the edges, then the composition is not plastic enough, and the proportions will need to be revised. Ideally, when there are no cracks. Such a composition can be safely used for plastering clay walls.
Another method is based on checking the flagellum. Prepare a small amount of the composition and roll it into flagella. There will be enough flagella with a diameter of 2 cm and a length of about 20 cm. Bend the cooked flagella. Check the quality of the composition again by the presence or absence of cracks.
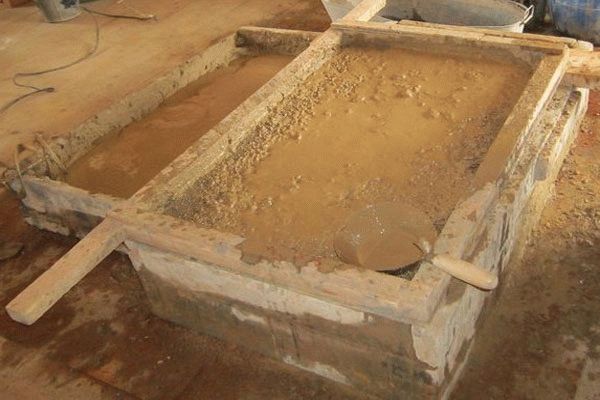
To control plasticity, less or more sand will need to be added to the composition. It accounts for about 50-80% of the total mass of the finished mixture. It is more convenient if you have a concrete mixer to prepare the solution. If it is not there, you will need to dig a hole, add the components there and knead the solution with your feet. You can also use a trough for this. It is necessary to check the plasticity of the mixture. Otherwise, during the drying process, the plaster will simply crack, and all the work will go down the drain.
If in the process of work you had to leave somewhere and during this time the mixture had time to dry out, to return it to a working state, you only need to add a certain amount of water.
After that, you can return to work. Such properties are the undoubted advantage of such plaster.
Where is clay plaster used?
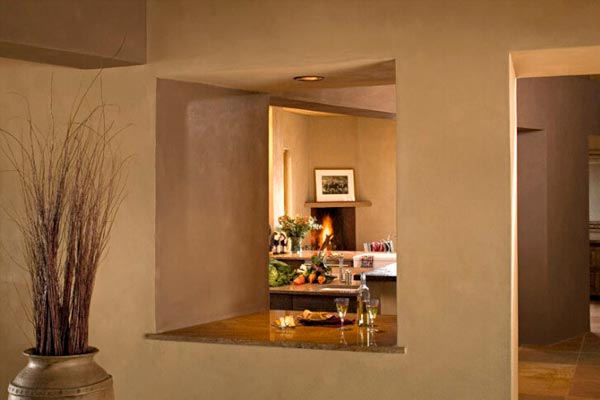
 For many years, clay plaster was used, perhaps, only for laying partitions inside the premises, as well as for finishing and laying stoves and fireplaces.But, if you look at the old buildings, plastered with clay compounds, you can be sure that it still serves properly.
Partitions made of red brick are also very durable, in the laying of which cement-clay mixtures are often used. Moreover, unlike fragile drywall, heavy racks can be hung on them without fear of their fall.
Clay-sand mortar is most often plastered on wooden, clay (adobe) walls, not only outside, but also inside the house. Plastering with clay, in principle, can be any surface. The main thing is to prepare them correctly, as well as to choose the fat content of the clay and observe the proportions with additives (sand, sawdust, straw) in the solution.
This environmentally friendly material is able to absorb excess moisture and release it as needed. Clay plaster with the inclusion of flax or straw fibers looks original, so designers and craftsmen are increasingly using it as decorative finishes
.
Clay plaster
The principle of working with a clay mixture, in fact, is no different from working with ordinary plaster:
- Beacon profiles are also placed for alignment.
- To obtain a durable surface without cracking, the thickness of each layer should not exceed 10-15 mm.
- With strong slopes and the need to apply a solution of greater thickness, clay-straw or sawdust mixtures are used, which can be applied to walls reinforced with shingles in a large layer.
- If necessary, a new layer is added on top of the first only after the surface has dried.
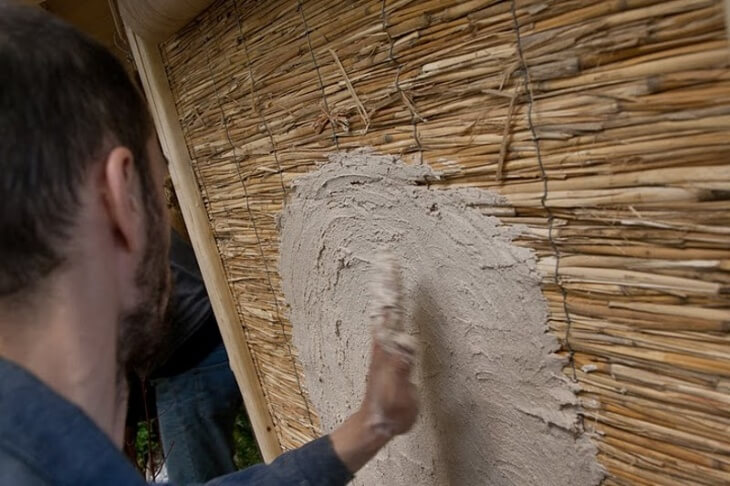
- The walls after finishing with shingles are dust-free and wetted with water.
- The surface is abundantly moistened so that it does not take liquid from the solution and does not weaken the plaster.
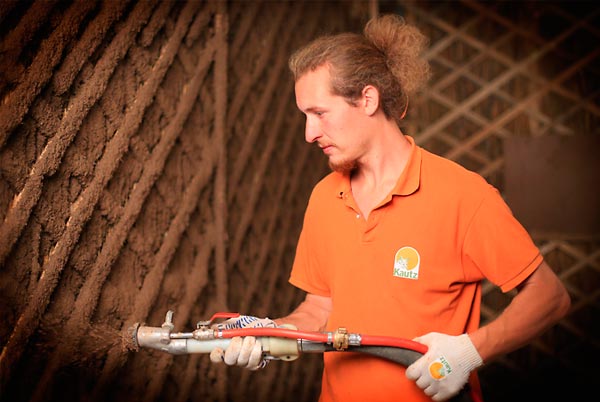
- The solution is thrown with force to provide a better grip.
- To reduce the formation of cracks in the solution, it is desirable to add fibrous additives.
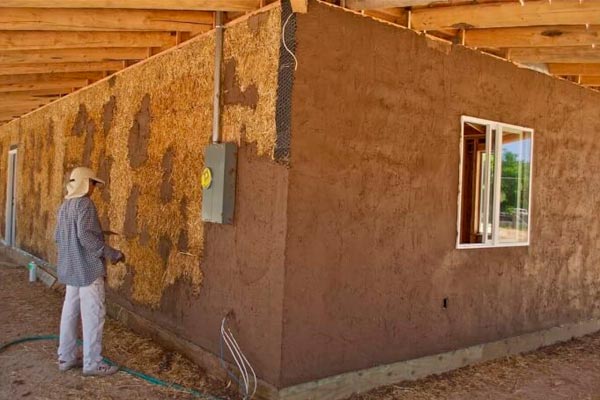
The video below shows how to plaster a clay or wood wall.
Instructions for applying clay plaster
The first step is to prepare all the necessary tools and materials:
- Mixing container or concrete mixer;
- Spatulas of different sizes for wall plastering;
- Sieve for filtering the solution;
- Hammer or screwdriver;
- Fasteners (nails or screws);
- Reinforcing mesh or shingles.
After that, you can start preparing the base:
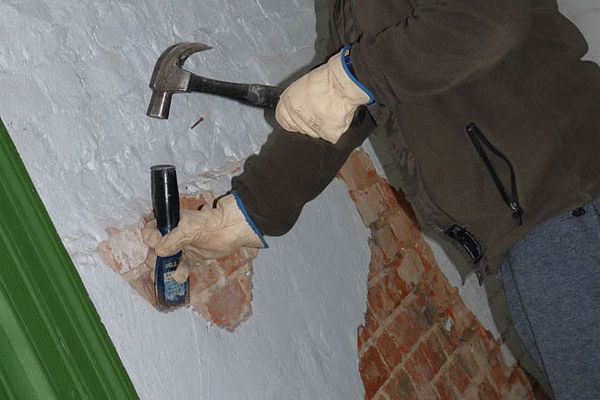
- Before plastering with clay, the old coating is removed, especially when it comes to cement plaster.
- The surface is carefully cleaned, fasteners are removed from it, and the protruding reinforcement is cut with a grinder.
- The area to be treated is made rough with a grinder. If the walls are made of wood, then shingles will be required.
Solution preparation
In order to properly make a clay composition, it is necessary to be guided only by the fat content of the solution.
There are no exact formulas, instructions and proportions, as, for example, for gypsum or cement mixtures. The classic recipe contains straw, but the factory production technology involves the use of polypropylene fiber.
There are two ways to test the plasticity of clay:
- First you need to put the clay in a container and fill it with water, then knead it with an electric drill with a mixer nozzle. Properly prepared solution should not stick to hands. From the finished plaster, you need to make a small ball with your own hands (just roll it in your palm) and flatten it into a cake. Then you need to consider its edges: if they are cracked, then there is a lot of sand in the solution and little clay and water. A properly made composition after compression forms an even “pancake” without breaks.
- You can also roll not a ball, but a flagellum up to 20 cm long. It must be bent in an arc, if cracks appear on the surface, it means that the solution lacks clay.
Instructions for applying clay compositions with your own hands:
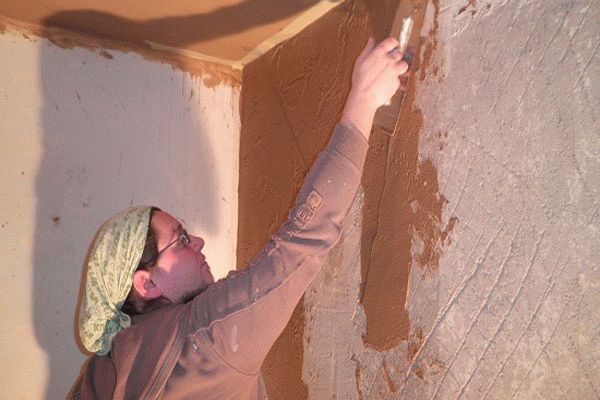
- Solution cakes are applied to the entire wall at even intervals, after which they take a wide spatula, trowel or rule and stretch the material over the surface using the selected tool.
- Evenness is checked with a building level, if necessary, another layer of plaster is made.
- The surface is left to dry for a month in summer and 3 months in winter.
- Then you need to carry out a clean finish. To do this, the first step is to prepare a clay solution of a more liquid consistency than for rough work. The ratio is as follows: 1 part clay, 1 part cement, 3 parts sand.
- The mixture is applied in a thin layer on the wall and carefully leveled with hand tools, after which the surface is left to dry for 3-4 weeks.
At the end, the walls are whitewashed with lime whitewash. You can also rub the clay coating with a grater, treat with a primer, and plaster on top with a gypsum mortar. This completes the plastering with clay.
Do-it-yourself plastering of walls with clay is a fairly simple process. Unlike work with other materials, it does not require clear calculations and careful surface preparation. The main thing is to follow the above instructions and check the walls as often as possible.
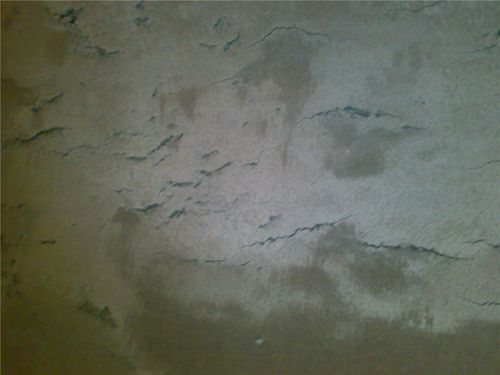
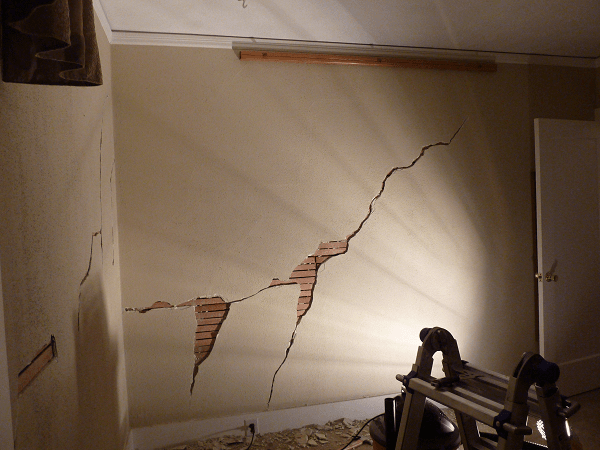
Problems with the strength of plaster occur quite often at the initial stage of finishing work. Plaster cracks not only on the outer surface, cracks are observed in the most unexpected places. The manifestation and development of cracks is expressed at the outer corners of the walls, especially in the lower part adjacent to the plinth surfaces of the masonry. Less commonly, the stucco finish may crack, peel off in pieces, and eventually fall off the wall.
Dust
In order not to subsequently wonder what to do if the plaster on the walls cracks, it is necessary to remove dust from the surfaces processed by it in advance, and to the maximum. Its presence significantly impairs the adhesion of the liquid solution, as a result of which cracks will necessarily appear on the walls or on the ceiling, albeit not immediately.
It is worth noting that it is not at all necessary to do dusty sweeping of all walls and ceilings. It is enough to moisten them a little from the spray gun, but only before the start of finishing work, and not in advance.
Gypsum plaster: subtleties of use
The answer to why gypsum plaster cracks literally immediately after drying sounds different than in the situation with its cement-sand counterpart. In this situation, the primary sources of defects are as follows:
- Gypsum plaster cracks during drying where the surfaces to be treated have not been rough prepared. That is, cracks and voids were not removed from them, into which gypsum will then gradually penetrate, provoking breaks in the decorative layer.
- Excess water is why the plaster on the walls cracks, because gypsum mixtures are extremely susceptible to a large amount of moisture, which weakens their structure. This is especially true when a slightly dried working solution is diluted with water.
- Another important indicator is the thickness of the applied layer, which cannot be less than 0.5 cm. Otherwise, the moisture will evaporate very quickly, and the coating will inevitably “tear”.
It turns out that the cracking of the plaster is the result of an irresponsible attitude to its use, and disregard for the recommendations indicated by the manufacturers. In general, this is a fairly easy-to-use coating that allows you to make a budget and high-quality, and most importantly, an environmentally friendly basis for a future decorative coating.
Clay plaster, the composition of which is simple and literally lies under our feet, is increasingly found on construction sites as a facing material for interior and exterior decoration. It is known that it was the main material for masters many centuries ago, why are we returning to this experience again today?
Preparation of plaster
Unfortunately, it is quite difficult to prepare a mortar and plaster walls with it on your own.
This process is not only labor-intensive, but also very long: the clay dries for a long time. But the result is worth it, so for those who decide to use this material, we suggest that you watch how clay plastering is done and carefully study the recommendations below.
What should be included in the plaster
The main components are ordinary clay, sand and water. A solution prepared only from them has a high thermal conductivity, therefore it is usually used only to complete the final leveling layer. For a rough finish, the task of which is to strengthen the thermal insulation of the walls, they make plaster with filler.
It can be:
Chopping straw or hay;
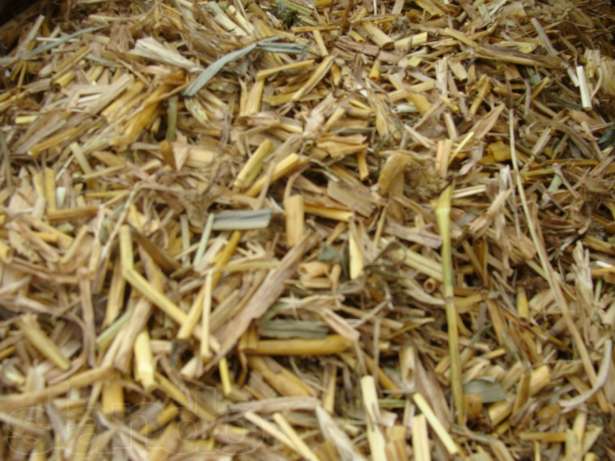
- hemp or flax fibers;
- Sawdust or shavings, preferably pine, oak, alder;
- Kizyak (horse manure).
All these materials have long been used by our ancestors, and they knew a lot about warming their homes. Today, modern fillers have been added to them, which can be used without fear. These include various fibers and granulated polystyrene foam.
There are other options:
- For example, if it is planned to plaster furnaces with clay, then cement, asbestos or fiberglass are often added to the mortar to give the plaster greater strength.
- For the manufacture of decorative clay plaster, colored clay (white, yellow, blue) is used, pigments and ground mineral fillers are added to it.
Solution preparation
You can use any clay, but it can be of different fat content, so it will be necessary to determine the ratio of all components in the plaster empirically. To choose the proportions, first prepare a little solution.
The instruction is:
- Take one part of the clay and fill it with water for a day, which should be 3-4 times larger in volume;
- Thoroughly mix the solution, breaking up all the lumps until a homogeneous mass is obtained;
- Stirring occasionally, start adding sifted sand to it. For clay of normal fat content, four parts of sand are required, but you pour it in until the mass begins to easily slide off the trowel.
Now you need to test in one of the following ways:
-
Method 1.
Roll up a small ball, lift it a meter from the floor and drop it. It should not fall apart or crack on impact. -
Method 2.
Roll out a tourniquet 15-20 cm long and about 2 cm in diameter from the resulting mass, lay it on a flat surface and bend it in an arc. Breaks and cracks should not appear on the fold.
If your samples fail the test, they have too much sand in them.
Having found out the proportions, you can prepare the solution in the right volume by adding fillers and water to it. Sawdust or chopped straw for heat-insulating rough plaster should be about half of the total volume or slightly less. Gradually add them and water until you get a batch of the desired consistency.
Now it's time to learn how to plaster with clay.
How and why plaster cracks
To unequivocally answer the question, a small analysis of the circumstances and conditions for the destruction of the plaster mass will be required. The plaster warps and cracks most often due to deviations in the technological process:
- Violation of the proportions of the main binders of the plaster;
- Exceeding the optimal layer, once applied to the wall, the wrong mode of drying the plaster layer;
- Violation of kneading technology when preparing a plaster solution;
- Use of unsuitable materials for kneading;
- Settling or violation of the integrity of the bearing walls, "foundation floats".
Advice!
If the plaster begins to crack, the first step is to immediately check whether the destruction of the supporting structures of the walls is occurring.Otherwise, behind the problem of plastering, you may not notice how the building itself will begin to crack and collapse.
In such cases, the depth of cracks is checked with a special probe made of thin steel wire. If the probe entered to a depth greater than the thickness of the plaster, then. problems are more serious than poor-quality wall decoration.
Advantages and disadvantages of the material
This type of finishing work, like clay plaster, has a huge number of advantages:
- naturalness of the material;
- with its help in the room you can regulate the ideal level of humidity for you;
- due to its absorbent properties, this coating will be able to absorb harmful substances from the surrounding space;
- clay is an elastic, refractory and waterproofing material;
- the material is ideal for covering various surfaces: brick, wood, concrete, etc.;
- a clay-based solution is easy enough to apply with your own hands, even for beginners;
- distinguished by its cheapness.
This type of finishing work, like clay plaster, has a huge number of advantages.
As you can see, the advantages are quite significant, but, of course, there are also disadvantages, albeit in a small amount.
The main drawback is the difficulty in finding a really high-quality and environmentally friendly material that would not be contaminated with radioactive substances and other human waste.
The second disadvantage is the prolonged drying of the surface treated with clay. At room temperature, such plaster (if its layer is not more than 1 cm) will dry for at least 5 days, and when the temperature rises to 350C, it will take at least 2 days.
Whether to use a long process with the application of clay plaster or use more modern techniques and materials - now the choice is yours.
How to remove old plaster from walls?
Volumetric plaster on the wall: features and application technique
Drywall plastering: what you need to know before starting work?
Today, when we, having been saturated with modern technologies, are once again striving to decorate our homes with environmentally friendly materials that do not contain toxic and harmful substances, clay plaster is becoming more and more popular again - its composition is completely natural, all components were given to us by nature.
Unfortunately, there are fewer and fewer good craftsmen who know the technology of its preparation and application, but if you wish, you can cope with this matter on your own.
Practically on all packages with modern plaster mixtures (see) there is a mark on the environmental safety of the product. And in most cases it is true. Nevertheless, they often contain synthetic additives that give the material plasticity, frost resistance, increased strength and other useful properties.
Clay plasters are completely composed only of natural materials: the clay itself, sand and fillers such as sawdust, straw, needles, etc. They have a lot of advantages that even the highest quality and most expensive cement, gypsum (see) and, especially, polymer-based plasters do not have.

So:
- Possessing an excellent ability to accumulate moisture from the air and give it back, clay provides climate control in the room;
- It also accumulates heat and gradually releases it when the air temperature drops. Even to the touch it is always warm and pleasant;
- Such plaster perfectly absorbs odors, is a good barrier to extraneous sounds from the street and high-frequency radiation;
- It has antiseptic properties, prevents the appearance of mold on the walls;
- Another great property is the ability to “breathe”, passing through the vapors contained in the air. Wooden structures with such protection always remain dry, do not rot and are not attacked by pests;
- Clay plaster can be reused by soaking it with water. They also act with a frozen working solution, so no waste remains during the repair;
- It can be used on any basis: wooden, brick, concrete, cinder block, etc.;

Of course, an important plus is the extremely low price of the material. It may not cost you anything at all if you use clay from a foundation pit dug under the foundation for plastering, and bring sand from the river bank. But ready-made mixtures are usually no more expensive.
Solution and its application
When mixing the solution, the main thing to consider is the place of its application.
The most popular recipe for clay plaster is lime-clay mortar, which is mixed as follows:
- on the eve of work, soak the clay for 24 hours;
- before the immediate start of kneading, the clay must be thoroughly kneaded;
- lime and crushed clay should be mixed in some container;
- sand can be added to the resulting mixture in small portions, pour a little water without ceasing to stir;
- if the clay has a “sticky” consistency, you need to pour more sand into the solution;
- to make the solution stronger, it is necessary to pour into it such a secret ingredient as sawdust or straw;
- before adding sawdust to the solution, they must be sifted;
- to give the mixture viscosity, add a little cement or gypsum to it.

The most popular clay plaster recipe is lime-clay mortar.
In order for the sawdust in the solution not to swell and absorb all the moisture, they must first be soaked well in water and allowed to “rest” a little so that the excess liquid is glass.
Also, do not use plaster, which contains dry sawdust or straw, to finish the surface. This will give the walls irregularities, and their further smoothing may result in the loss of fragments of the clay finish.
When mixing the solution, try to pour water in small portions so that you can control its consistency.
There are clay solutions that were invented specifically for plastering high-temperature surfaces. They include a substance that allows you to increase the thermal stability of the plaster - asbestos.
Application of clay plaster
There are many variations of such a solution that you can prepare with your own hands without much effort and knowledge, consider the most popular ones:
-
Composition No. 1
In this case, cement is not used, but the following proportion is required: 3 parts of clay, 2 lime, 1 gypsum, 1 sand, and the main component of the mixture is 1/5 asbestos. -
Composition No. 2
This mixture is kneaded without adding gypsum, but more clay is required - 4 parts. Also, the composition should be: 4 times less cement and lime, 2 times less sand, and 10 less asbestos. -
Composition No. 3
This composition is the most elementary, and the proportion looks like this: 1 part clay, 1 cement, 2 sand, 1/10 asbestos.
Using these types of clay mortar, you can easily create a very warm and cozy room with your own hands.

Exterior finish with clay plaster
Classification of clay solutions
The variety of clay compositions is also displayed on the classification of the plaster itself, for which it is used.
Clay plaster can be obtained from the following components:
- from light clay, the plasticity of which is 0.17-0.27;
- from heavy, ductility more than 0.27.
The second option is used much less frequently, because due to its density, it cracks over the years under the influence of temperature changes, and the proportions have absolutely nothing to do with it.
The color scheme of such a building material is very diverse:
- white (kaolin);
- gray;
- black;
- red (most often used in construction work);
- yellow;
- blue.

Decorative clay plaster
Please note that the natural composition of clay does not always indicate the environmental friendliness of the product. Always pay special attention to the composition of the clay
The following components can be added to it in various proportions:
- dolomite;
- calcite;
- quartz;
- magnetite;
- cellulose;
- sodium gluconate;
- urea.

Clay decorative plaster
Below is a table of variations in the composition of the mixture in volume parts.
|
Components |
The composition of the mixture in volume parts |
||||
|
A |
B |
C |
D |
E |
|
|
Cast mortar (based on soil and sand in a ratio of 1: 2) |
10 |
10 |
10 |
10 |
10 |
|
Sand |
25 |
25 |
25 |
25 |
25 |
|
Cellulose |
— |
5 |
5 |
— |
5 |
|
casein glue |
1 |
— |
— |
— |
1 |
|
Urea |
— |
— |
0,2 |
— |
— |
|
Sodium gluconate |
— |
0,2 |
— |
— |
— |
Studies conducted at the time proved that the addition of such impurities to the clay plaster composition simplifies the process of laying the mixture and improves its strength.
But, be careful with the choice, because all such additives are characterized by a high level of natural natural radioactivity. It is better not to use clay with a “dangerous” composition at all during the plastering of surfaces, and do not hesitate to ask the seller the place where the material was mined. And also remember that the proportions of additives greatly affect the elasticity of the clay solution.
What to do to avoid cracks during drying
- First, of course, to observe the technology of manufacturing ceramics.
-
Secondly, to achieve a relatively uniform thickness of the walls and bottom of the product.
If you are sure that the thickness of the walls and the bottom is approximately the same, then this is already half the battle. Sometimes you can remove the excess thickness before the work is completed. If you did not have time to “finish” the product directly during creation, turning the bottom can help, but for this the product must dry so much that no deformation occurs during pre-firing processing. -
Thirdly, to artificially slow down the rate of drying of ceramics.
In such cases, ceramics are placed to dry in cool rooms, but without drafts, since a sharp drop in the rate of evaporation of moisture from the surface can again lead to uneven drying. In any case, the batteries must be kept away from ceramics, otherwise drying will again be uneven. You can also artificially and slightly increase the humidity in the room, or moisten the drying ceramics. But slowing down the drying rate is not always possible, especially when the workshop has only one room.
Therefore, the solution is often just to speed up the drying time of raw products with the obligatory preservation of its uniformity.
Sometimes the bottom of the ceramic product is dried with a hair dryer immediately after manufacturing. But here it is important not to overdo it, since it is possible to achieve uneven drying of the outer surface of the work with a hair dryer, which, on the contrary, must be avoided. If the task is to achieve uniform drying, then proceed as follows
First of all, the product must be placed upside down on a moisture-absorbing surface, the classic version is a gypsum circle or a gypsum stand. But plastic won't work. In extreme cases, you can put a regular newspaper, which, due to its "friability", absorbs moisture very well.
Further, our task is to achieve uniform drying of the walls and bottom. Sometimes, when drying, ceramics are placed in bags or covered with glass caps.
If the task is to achieve uniform drying, then proceed as follows. First of all, the product must be placed upside down on a moisture-absorbing surface, the classic version is a gypsum circle or a gypsum stand. But plastic won't work. In extreme cases, you can put a regular newspaper, which, due to its "friability", absorbs moisture very well.
Further, our task is to achieve uniform drying of the walls and bottom. Sometimes ceramics are placed in bags during drying or covered with glass caps.
For uniform drying, it is necessary that the thin walls dry in time in the same way as the thicker bottom.Therefore, the best option is when the walls of the product are covered (a plastic bag, matched to the size, is quite suitable), and air is provided to the bottom. However, here it is necessary to take into account the dimensions and not leave the drying ceramics unattended, periodically checking the uniformity of the mass drying throughout the product.
Best Answers
Garny Boy:
Now listen to the correct answer of a professional. To "thin" oily clay, up to 30% of burnt ground clay is added to it. Sand gives problems during firing, so it is not used. The mixture is called SHAMOT. Such a mass can have a thickness of up to 10 cm, subject to slow drying. The fire shrinkage of fireclay is also small, so all monumental ceramics are made from it.
Veloria Granta:
yolk or maybe liquid glass
VASILY logins:
add ordinary sand. and the proportions depend on the purpose
Dr.Evil:
The drying mode, plasticizer additives, including organic ones, depend on the purpose and further technical process - firing, coating with something, etc.
Vladimir Ivanov:
Guys, don't worry: Asbestos is added.
Konstantin:
if the clay cracks when it dries ... it means it is "greasy" ... add sifted sand ... better than river ...
Anastasia Babashkina:
Sand is sand, but there is such a moment - the clay must be well crushed, all, piece by piece, in order to extract from it all the fragments of stones, glass, debris. Because it is precisely because of foreign bodies that the work cracks in half the cases, and even during firing it simply shatters into pieces.
Expert answers
thanks for the advice:
I answer as a professional ceramist .. .1) you need to clean the clay from debris and stones. to do this, fill it to the top with water (in a basin or bath), when it gets wet - stir to the consistency of sour cream and drive through a large sieve. Leave the resulting mass for several days to evaporate excess water. to improve plasticity, you can add a little ordinary clerical glue to that creamy mass (liquid glass is also called). if you sculpt monumental sculptures and don’t intend to fire them later, then you don’t have to clean them ... but for small sculptures I highly recommend this procedure! 2) when drying (and then during firing), the clay decreases in volume - shrinks. uneven shrinkage is the cause of cod ... to avoid this, a number of simple requirements must be observed: * during long-term modeling, it is necessary to regularly moisten the product; * at the end of the modeling session, the product must be covered with a wet rag and hermetically packed in polyethylene from heat sources and, again, under a polyethylene cap (hermetic packaging is no longer needed here) ... good luck !!!!
alex suvorov:
deplete it, add filler, sand, straw, shells, manure, etc.
Bill Gilbert:
Add 1/3 of the sand
Katerina Pshchevyat:
Well there are many options!!!
Gyurza:
Add more fine sand to the clay. And the pipe is not bad on cement. I did.
TCH:
ceresite (there you need to grease it repeatedly if it cracks all the time. There are good recommendations on YouTube.
Josef Schweik:
In order for the clay-sand mortar not to crack, it is necessary to choose the right ratio of clay and sand (if the clay is "fat" - more sand is needed, if "skinny" - less). You will find the proportions in the stove-maker's reference book (search on the Internet). On average, the ratio of clay and sand is 1: 2
Alexander Urmatsky:
buy alinex308 for these purposes. I tiled wells. if you don't want to, then add horse or cow dung
Igor Iskandarov:
Sand needs to be added, river, or washed well.
Alexander Kamaev:
A lot of sand, Skinny Clay Add clay, a bucket of ash and 400 g of table salt - this is for 10 kg of mortar, and the pipe can be transferred to a regular cement composition (only not hogs)
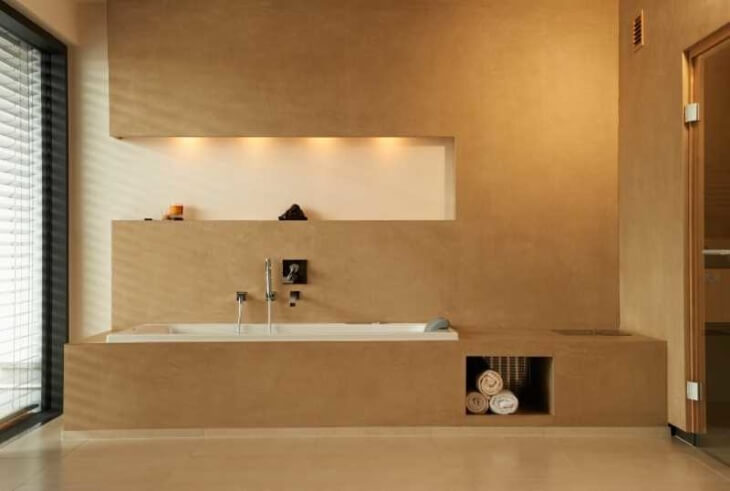
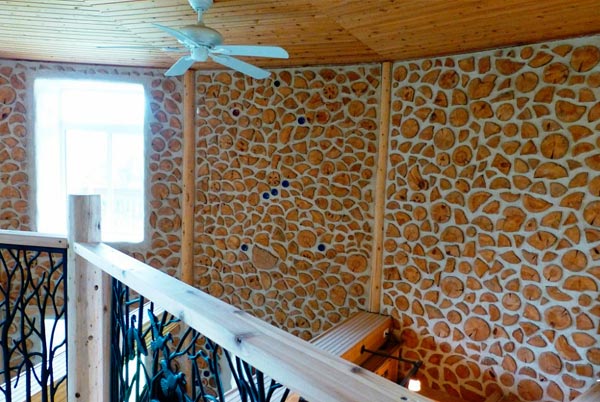
Decorative clay finish
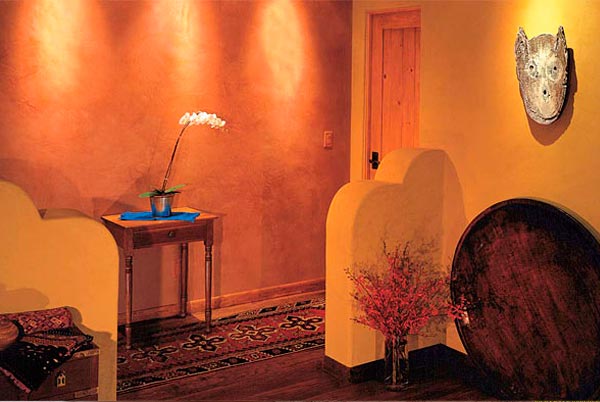
Recently, clay colored plaster has become one of the most sought-after materials for interior decoration.It is used in many decorating techniques and is suitable for emphasizing the commitment of the owners of the house to natural traditional materials.
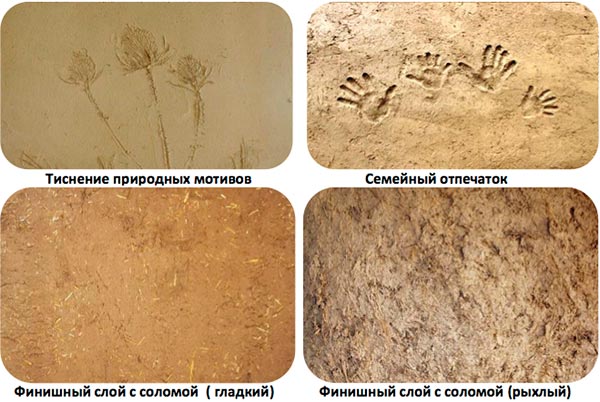
Often the natural texture of the clay wall is complemented by the application of relief drawings or patterns. To do this, putty on clay with a fine-grained composition without impurities. Then, a layer of putty 3-5 mm thick is rolled with rollers, stamps, or a pattern is formed with your own hands.
The finish layer of the finish can be coated with a vapor-permeable casein primer or paint in various colors.
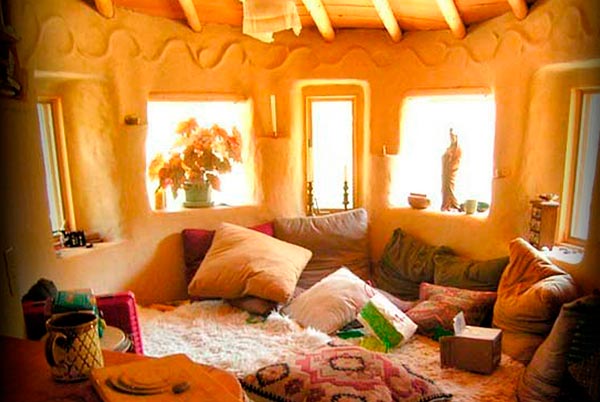
Here are some photos of clay in the interior.
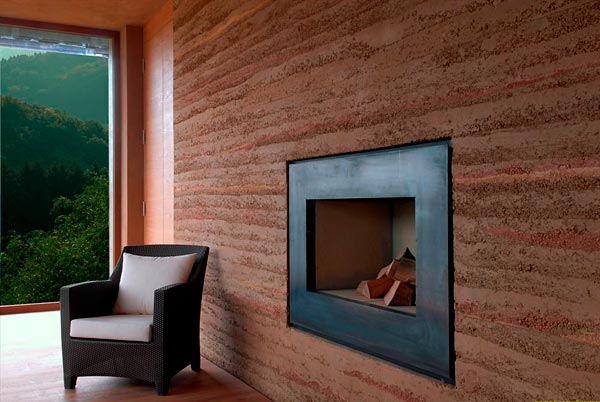
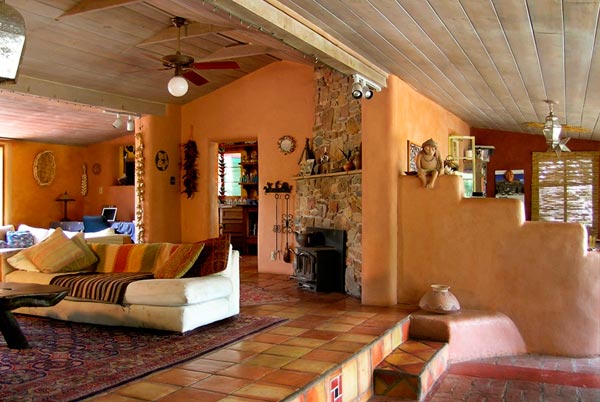
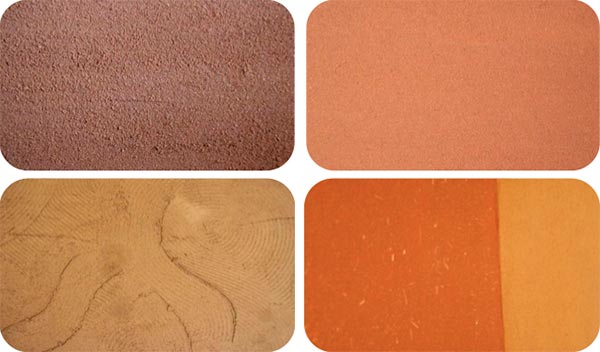
Texture of decorative clay plaster
wall decoration
Ecology of consumption. Manor: Plastering with clay mortar solves several issues at once. Firstly, there is no need to look for and buy a mixture for work. Secondly, clay is an environmentally friendly material. Thirdly, due to the use of natural material, repairs are significantly cheaper.
How to properly cover the oven so that it does not crack
Here I looked for you the rules for plastering the oven)
The most popular solutions: Clay-1 hour + sand-2 hours.
lime dough-2h+gypsum-1h+sand-1h. It is recommended to add asbestos in the amount of 0.2 parts and salt 0.1-0.25 g to all mixtures. for 1 bucket of solution. True, they argue about salt, but I think those who add it are right, since it retains moisture and prevents the plaster layer from cracking. Now there are a lot of additives and mixtures in stores that make the solutions durable and prevent them from drying out.
the system selected this answer as the best
add to favorites link thank you
Bugovich Zhanna
Thank you, knowledge will come in handy, especially since there are no men in the house. - 5 years ago
I wish you success. - 5 years ago
It is not so easy to cover the oven so that it does not crack. I can say that the best option is to overlay the stove with special tiles, then it will look good from the aesthetic side and you won’t have to cover up the stove every year, only if suddenly the tile does not fall off. Another option is to wrap the stove with an aluminum sheet: you don’t have to cover it up every year, nothing crumbles or cracks.
And if you still need to cover the oven, then for this they take clay, sand, and add glue for refractory tiles to the resulting mixture. It will still crack, but it won't fall off.
A solution consisting of clay and sand, to which straw is added, also holds well. The straw holds the mortar together and the stove does not crack so much anymore, and even if it cracks, the pieces will not fall off.
add to favorites link thank you
It is recommended to make a special clay solution of this composition
4 buckets of clay pre-soaked in warm water for a day or at least 12 hours;
2 buckets of clean sand.
Mixing is done with water. Add water gradually.
You need to stir vigorously, there is such an old way - to stomp your feet.
Then you need to cover the mixture with plastic wrap and leave overnight. You cannot use it right away.
The density of the solution should be about the same as that of very thick sour cream.
The finished solution should not crack when dried. You can check the quality by rolling a ball from the resulting mixture in your hand and waiting a bit. If the ball cracks, then there is little moisture in the solution.
add to favorites link thank you
To keep the oven from cracking. you need to seal it properly.
We smear our stove in a private house with a mixture of clay and chaff (chopped straw).
It turns out that for 4 buckets of clay you need to take a bucket of water and add a bucket of sand.
When all this is mixed, add the chaff until, stirring it all constantly, until the batch is ready for the oven smear.
But now the plaster mesh is on sale.
I would also advise using it when smearing the furnace.
The oven will not crack after that.