How to glue polycarbonate on a greenhouse
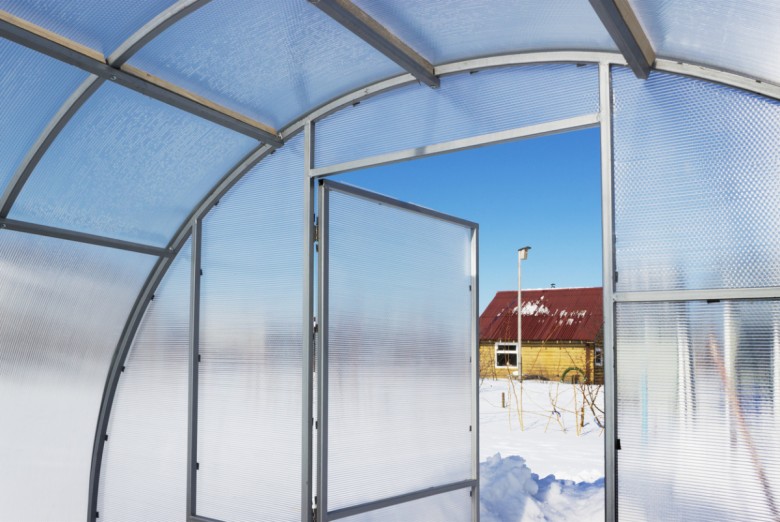
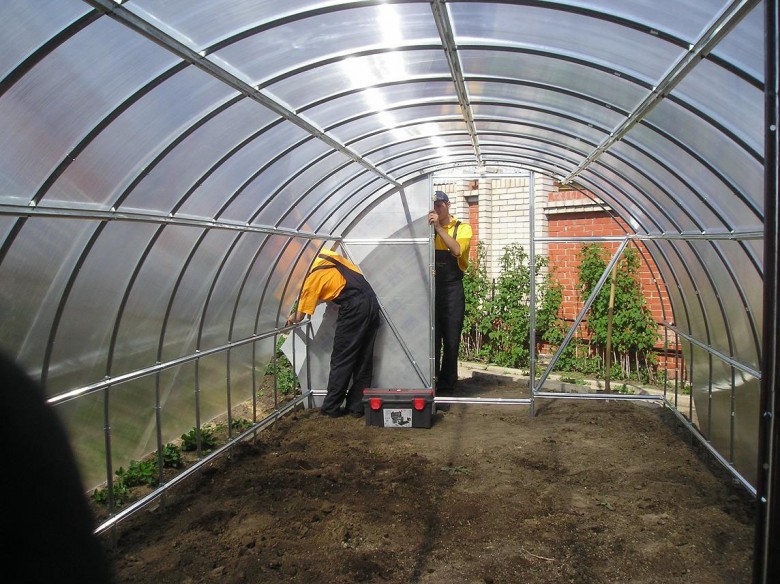
Farming has recently been gaining popularity again among rural residents. Technology has made it possible to harvest several crops a year at once. This can be done with the help of greenhouses. Plants growing in isolation from the external environment bear fruit even in winter. This is facilitated by a special material - polycarbonate. They are upholstered with a metal frame of the greenhouse. Depending on the quality of the material, the structure can stand up to 10 years.
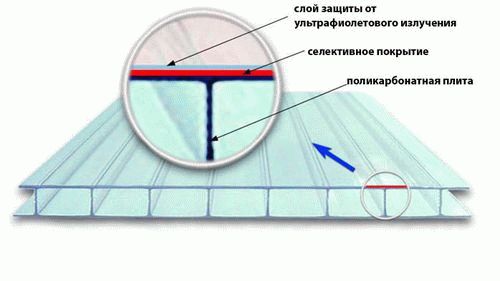
Adhesive for polycarbonate
Materials and blanks
Sometimes, at low temperatures or under mechanical stress, cracks and holes may appear in polycarbonate. This cannot be avoided. Sooner or later, wear of the coating will occur, which can lead to unpleasant consequences - loss of crop. If you have a similar problem, it can be solved in several ways at once. You can seal a hole in the greenhouse polycarbonate using the following materials:
Also, in some cases, you will need a small piece of polycarbonate. Of the tools, a knife, scissors, a brush, a hairdryer, a saw, sandpaper will come in handy.
Ways to temporarily seal holes
- Oblong cracks can be glued with ordinary tape. On the surface of the greenhouse, where a crack or a small gap is noticed, formed during the cracking of the material under the influence of temperature changes and other natural phenomena, a polyethylene tape (adhesive tape) is applied and carefully ironed. After that, you should try to heat the edges of the adhesive tape so that they fit as tightly as possible and do not peel off under the influence of moisture. You can carry out heating with an ordinary hair dryer, which will greatly facilitate the task, and you can easily glue the surfaces.
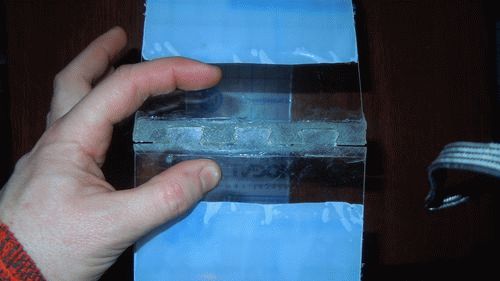
Such repairs give a temporary result, so it is natural that there are some drawbacks. The disadvantages of this method of sealing cracks are the instability of this material to weather conditions. In the future, the section will need to be replaced or better insulated in a different way. The photo shows the moment when you have to replace the whole sheet.
- Small holes in polycarbonate can be sealed with electrical tape. It is much more resistant to climatic conditions and does not detach when the adhesive dries out under the influence of the sun. This will help to delay the destruction of the coating for a while. However, this material will not be airtight with occasional moisture ingress. Thus, during the rainy season, it is better not to try to install a temporary tire of electrical tape on the roof of the greenhouse.
Overhaul
- Liquid nails can be used to seal not only holes in the material, but also to process joints. This versatile substance is similar to plasticine. As it dries, it becomes hard and strong. The viscous material will last much longer than the others. Such a repair will allow you not to worry about the tightness of the applied tire.
- More serious damage can be removed by applying a patch of polycarbonate or film. A piece of the desired size and shape is cut out and attached to the greenhouse wall with rubber glue. In order to be able to seal the surfaces as tightly as possible, they should be processed with sandpaper. When the patch and the area around the hole are well sanded, they are treated with glue.
- Another available option is adhesive tape. It can be purchased at any hardware store. It is excellent for gluing large surfaces, does not tear, does not change in frost.
In no case should you try to seal the damage by melting polycarbonate. The substances of which it consists are very toxic and can cause poisoning. Also, heat can cause a fire.
Independent construction expertise of a residential building, shed and buildings Center KRDekspert, Krasnodar
Can
save on replacing polycarbonate and repair it: buy silicone
sealant and gun for him, picture below. sealant
must be silicone and must be for outdoor work, it is better
take colorless. After hardening, such a sealant withstands temperatures from
minus 30 to plus 50.
V
first of all, polycarbonate is damaged (destructs) where there is more
the total amount of sunlight gets during the whole day, in the places of fastenings with self-tapping bolts, so
how the greatest stresses arise in polycarbonate from the tightening force
self-tapping screw. There are two options for repairing damage:
1.
Safer for polycarbonate, but
less beautiful way: just coat with silicone sealant around
clamping washer of the self-tapping bolt, and if cracks are visible, coat them too. It is better
go through all the self-tapping bolts at once, so that later you don’t have to climb the second one
time, if you suddenly missed any self-tapping bolt.
2.
More accurate, but also more time consuming
method, as there is a danger of damaging the polycarbonate. Slightly unscrew
self-tapping bolt and introduce sealant under the washer. Then carefully with a wrench
tighten the self-tapping bolt until it comes into contact with the polycarbonate. You can not tighten
! Polycarbonate can be damaged. Therefore it should not
use a screwdriver, polycarbonate has already begun to destruct and a screwdriver, even with the minimum torque set
maybe just in
press the self-tapping screw into polycarbonate.
P
then you have to close the whole bolt
sealant, plus polycarbonate will be damaged even more. It is recommended to go through all
self-tapping bolts, for prevention, even if this place is not leaking yet.
If
there is damage from hail, just cover the hole with more
sealant, it's okay if it gets inside the polycarbonate. sealant
not so liquid as to leak somewhere, but the overlap of the square "channel" inside
polycarbonate also does not threaten anything terrible, it will just be visible where the embedment
hail holes. For 1 year, such a repair is enough, and if necessary for the second
year, you can repeat the procedure. When repairing polycarbonate, step on it
directly undesirable, because it is already damaged.
Farming has recently been gaining popularity again among rural residents. Technology has made it possible to harvest several crops a year at once. This can be done with the help of greenhouses. Plants growing in isolation from the external environment bear fruit even in winter. This is facilitated by a special material - polycarbonate. They are upholstered with a metal frame of the greenhouse. Depending on the quality of the material, the structure can stand up to 10 years.
Device
Do-it-yourself greenhouse equipment is not such a difficult task. To equip a place for growing plants, you need to make sure that the room always has clean and sufficiently humid air, as well as that the heating and water supply systems work well.
Heating
First of all, in order for the room where the plants are grown to be constantly warm, you need to take care of additional heating. This is a guarantee that the seedlings can be started growing in early spring, and they will not freeze. The heating system depends entirely on the dimensions of the greenhouse. But the most important thing is that it should be full-fledged, not local. After all, such a system is not able to completely warm the entire room.
The second important point - the heat must certainly go in the direction from the bottom up, and not vice versa. There are three heating options that can be used in a greenhouse: gas, solid fuel and electric.

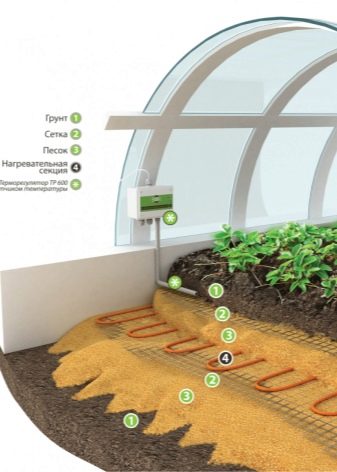
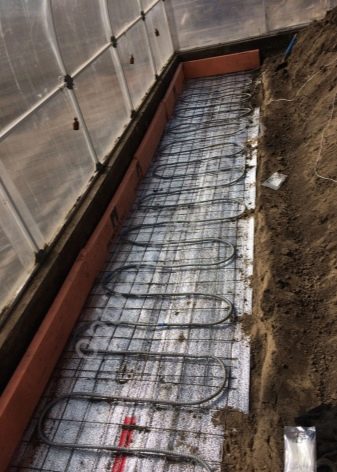
If possible, you can turn to innovative methods of heating. Among these, it is worth highlighting the heating of the soil directly. This contributes to the rapid growth and maturation of everything growing in the ground.It is quite possible to carry out such a system in your greenhouse. Heating is by cable.
Before laying it, you need to lay polystyrene foam or other means of thermal insulation, which is characterized by increased moisture resistance. From above, you can lay a layer of sand, in which the cable is hidden. A protective mesh and a layer of soil are placed on top of it.
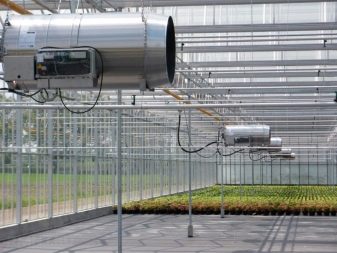
You can install a water radiator heating system. Infrared heaters are also quite popular. In addition, they are also able to illuminate the room. The use of infrared heaters is also considered very beneficial because they can be used to divide the space into several separate temperature zones.
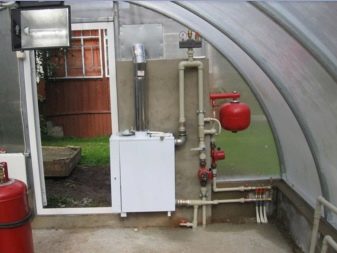
A gas heating system is also considered profitable. Especially if it is possible to connect the greenhouse to the home heating system. You can also install a burner in the greenhouse or an automatic heating system with a small boiler. And in order for all the efforts spent on heating not to be in vain, you need to additionally insulate the place for growing plants.
Ventilation
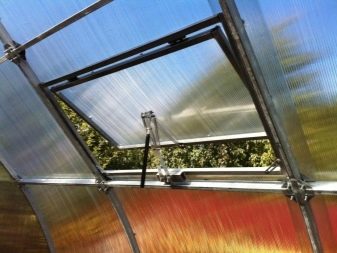
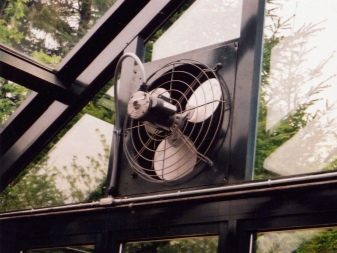
It is also important to consider the ventilation system. The correct temperature regime is created with the help of ventilation frames
In addition, you can add a special fan to the room. Its installation will not only solve the problem of temperature control, but will also make it possible to distribute heat throughout the room. This type of fan is installed on the roof. Due to this, fresh air enters the greenhouse.
At the same time, when installing ventilation, everything must be done so that during the cold season the cooled air does not penetrate into the room. And, therefore, there should not be problems with thermal insulation either.
Water supply
A very important role in the arrangement of the greenhouse is played by the correct level of humidity in the room. This depends on the condition of the plants. The fact is that if there is an insufficient level of humidity in the room, the plants will dry out. But an excess of moisture is also not very good. In such an environment, the root system of the plant develops more slowly, the harvest is also not very encouraging.

So that the irrigation process does not take much time, and each plant receives as much moisture as it needs, it is necessary to equip the correct water supply system inside the greenhouse.
- The water supply must always be at room temperature. Too cold water damages the roots. They quickly rot in such an environment. Also, drops should not be allowed to fall on the trunks of plants and their leaves. Some sensitive plants are harmed.
- Plants should be watered regularly. It is better to do this in the evenings and mornings. As for the amount of water used, it all depends on how deep the root system of the plants is. The deeper it is, the more water is required. In general, the approximate water consumption is ten or twelve liters per square meter.
There are three main ways to supply water to greenhouses: drip, irrigation and subsoil. From surface irrigation should be abandoned. From this, the humidity inside rises to an undesirable level, and it becomes more difficult to control the flow of water.
Overhaul
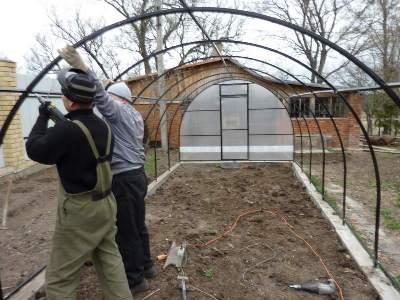
When a building has been in service for a long time or it has been significantly damaged, major repairs are required. It can consist of different elements, which we will discuss below. You can also do it by hand.
Complete replacement of polycarbonate
The first is held in the warm season.
Profile cutting is best done with a circular or band saw with fine teeth.
It provides for the complete dismantling of polycarbonate sheets and the fastening of new ones using standard technology. All openings will need to be sealed with sealant to prevent moisture ingress and rust formation.
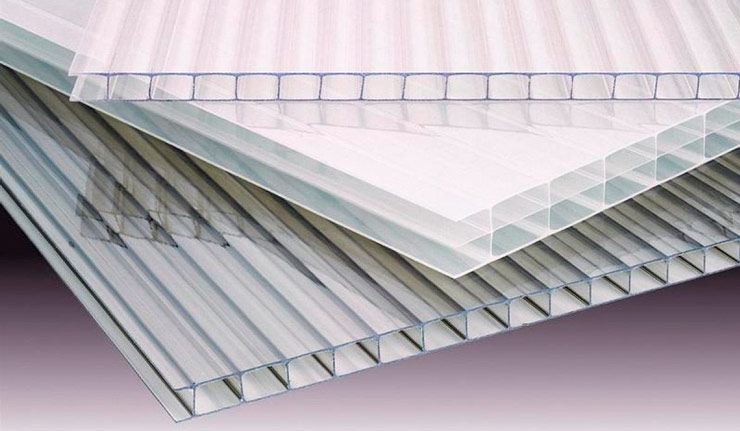
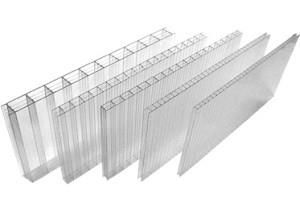
Remember that when choosing a new material, it is important to pay attention to its color and thickness.Try to choose a sheet with the maximum thickness, in general it is recommended to lay several layers. Also, the best option is a polymer with an inner layer, such a material will reduce the need to replace the polymer in the future.
Also, the best option is a polymer with an inner layer, such a material will reduce the need to replace the polymer in the future.
When choosing a color, think about the plants for which the greenhouse is intended. If you will be growing mostly vegetables and fruits, then the recommended option for you is a transparent polymer, not a colored one.
Frame repair
Repair as quickly as possible if defects are found, so as not to aggravate the breakdown. You can fix old parts, or better buy new parts if the structure is severely deformed.
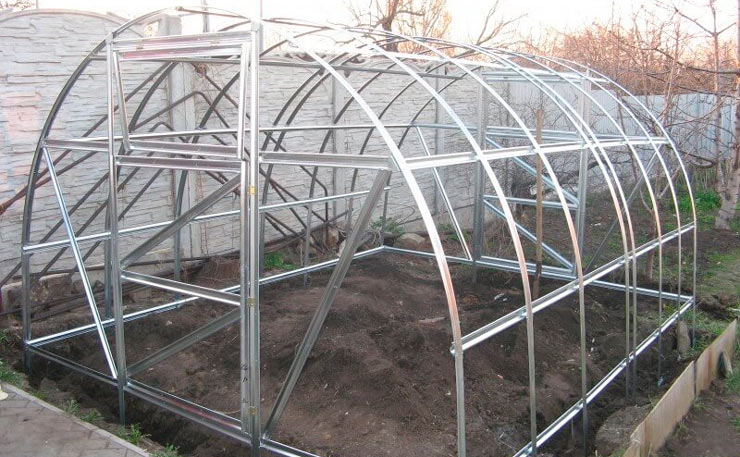
Bent parts must be removed, leveled with a vise and installed in their original place. After that, it is recommended to perform painting, since during deformations the coating on the elements cracks and peels off. Also, replacement is necessary if the part is corroded. In this case, it is better to put additional stiffeners. If you replace wooden supports, you can strengthen it with an additional bar, and after completion it is mandatory to cover it with an antiseptic substance.
Pay attention to the wooden frame: in winter or during prolonged rainfall, such a structure can soften and collapse
Fundamental works
Cracks in the foundation and violation of the strength of the structure must be eliminated before the winter period. If water gets into the chips, it will freeze, expansion will occur, which can lead to the destruction of the foundation.
Foundation repair can be done in two main ways:
- sealing cracks with concrete mortar;
- epoxy resin coating.
To repair a defect with mortar, follow these steps:
Restoration with epoxy resin is carried out according to the following algorithm:
- crack preparation according to the technology described above;
- applying resin using special nozzles that are glued every 30-35 cm;
- mixing resin with hardener, performed on a smooth surface;
- applying resin to the bottom of the nozzle;
- gluing the nozzle and waiting for complete hardening;
- the nozzle is closed with a cap;
- covering the entire surface of the crack with the prepared mixture;
- the resin is squeezed out directly into the recess, the layer on the surface should be 3–4 mm;
- drying out;
- cutting nozzles and cleaning the surface.
Extensive foundation damage
If the foundation is significantly damaged, the first thing recommended for repair is to disconnect or simply loosen the structural fasteners. If the frame is disconnected, place it on wooden supports while repairing. Remove any parts that cannot be recovered. Clean the remaining parts with a metal brush.

Next, you need to make formwork from boards around the perimeter of the foundation with an indent of 5–10 cm. After the solution is poured, when preparing it, take into account how massive the structure is. Work quickly so that the concrete does not have time to set before it covers all the required surface. The formwork with poured concrete is covered with a film.
So, a greenhouse is a structure that can be damaged under the influence of negative factors.
It is important to make repairs in a timely manner in order to minimize the risk of destruction of the building. You can do this work yourself, following some recommendations.
Remember safety precautions: always work with gloves, keep children away from the construction site, and also be vigilant when working with tools.
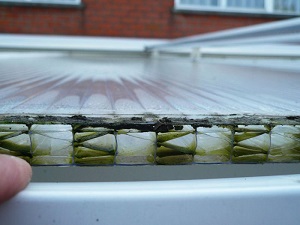
Sealing the ends of cellular polycarbonate with perforated tape
For greater convenience, we will present the entire process of mounting a punched tape on the end of a polycarbonate sheet in the form of a step-by-step instruction.
Step 1. Remove the film from the SPC that protects the material during storage and transportation.
Step 2Using a construction knife with a replaceable blade, finish the end face, trim it, remove all burrs and defects, if any.
Step 3 Inspect the sheet for dirt. It can be not only dust, but also adhesive residue from the protective film.
Step 4 Using a sponge dipped in soapy water, clean the butt of dirt and degrease it.
Step 5. Dry the end of the cellular polycarbonate sheet. Moisture trapped in the cells can be removed with a conventional vacuum cleaner.
Step 6 Install or lay the sheet on the workplace, fix it with clamps or ask your assistant to do it.
Step 7. Measure the tape along the width of the end of the sheet with a tape measure and cut it off with a construction knife.
Step 8 Carefully remove the protective paper strip.
Step 9. Attach the tape to the edge of the sheet in such a way that during the subsequent fold, its middle falls on the end of the SPC.
Step 10. Iron the part of the tape already glued to one of the edges of the sheet, get rid of bumps and “bubbles”.
Step 11 Bend the tape so that its middle covers the end of the SPC sheet. Iron it in this area.
Step 12. Bend again so that the end of the tape covers the second edge of the sheet. Repeat step 10.
To create a perfectly even and smooth connection of the tape with polycarbonate, use a pressure roller.
The end sealing does not end there - now you need to mount the corresponding profile. Let's see how this happens step by step.
Step 1. Measure the desired length of the end profile and cut.
Step 2 Clean and degrease it if necessary.
Step 3. Along the length of the end, make holes with a diameter of 3-4 mm in increments of 20-30 cm. They are necessary for the final removal of condensate.
Step 4. Lean the profile against the end of the sheet, the wider edge should adjoin the back side of the sheet, facing the inside of the future building.
Step 5 With a narrow spatula, pry off the narrow edge of the end profile and lift it up a little.
Step 6. Push the profile onto the end of the SPK sheet. Leave a drainage gap of 3-4 mm between it and the profile.
Video - Gluing perforated tape and installing the end profile
Please note that all of the above steps must be performed before the cellular polycarbonate sheet is mounted on the frame. Otherwise, it will not be possible to lay the perforated tape and the end profile.
What can replace perforated tape
What to do if there was no perforated tape in the hardware store, but you need to install cellular polycarbonate here and now? Is it possible to somehow replace it and at the same time significantly save money? Yes, with due desire and diligence, it is possible to make a home-made analogue of a perforated tape.
For the base, high-quality construction tape is used. The main difficulty in this is the creation of pores
Here you will either have to work extremely carefully and for a long time with the thinnest needle that is in the house, or find a tool that allows you to make small diameter holes.
It should be understood that a home-made perforated tape in terms of its characteristics will be an order of magnitude inferior to factory samples and that this is only a temporary solution. Subsequently, if possible, dismantle the cellular polycarbonate sheet and replace the tape.
Profile for polycarbonate
When installing typical arched greenhouses, two types of profile are used - end and one-piece connecting. For the construction of a homemade greenhouse, other types of it may come in handy. Read more here.
If you want to maximize the life of your greenhouse, canopy or polycarbonate fence, be sure to use perforated and sealing tape, as well as other accessories as needed.
>
How often and when to inspect the greenhouse
From the point of view of timely detection and elimination of faults, scheduled inspections of the greenhouse should be carried out regularly - at least twice a year. The first time - in the spring, even before planting seedlings on the beds. The second inspection is in the fall, after harvesting and before preparing for winter. For such a case, choose a dry and clear day if possible - so that the rains do not interfere and there is no risk of moisture penetrating into the skin or frame, where it can damage the structure. A step-by-step planned inspection of the greenhouse is as follows.
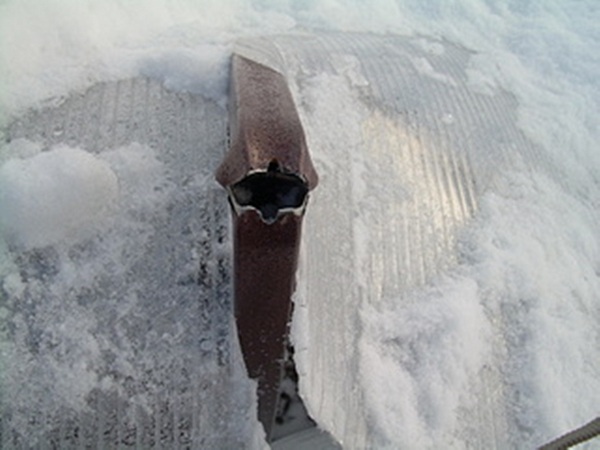
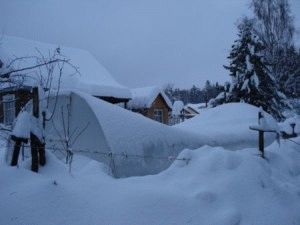
Step 1. If the event is held in the spring, and the snow has not yet completely melted, remove it from the roof and the space around the greenhouse.
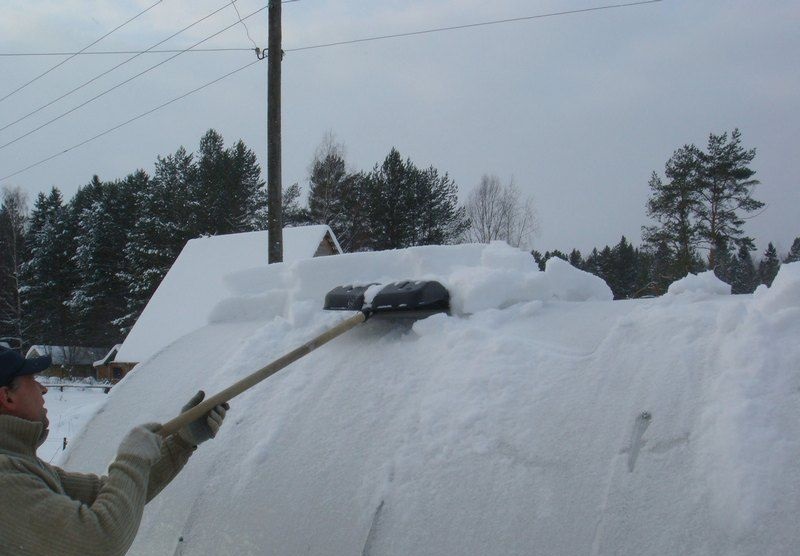 Cleaning the roof of the greenhouse from snow
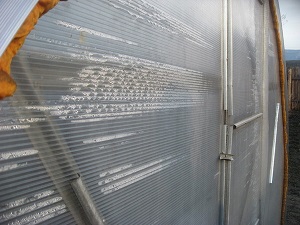
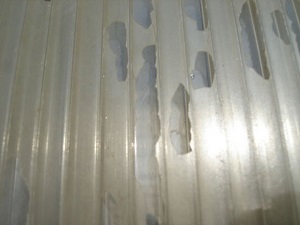
Step 2. Inspect the outer skin for serious mechanical damage - cracks, chips, dents, burnt holes.
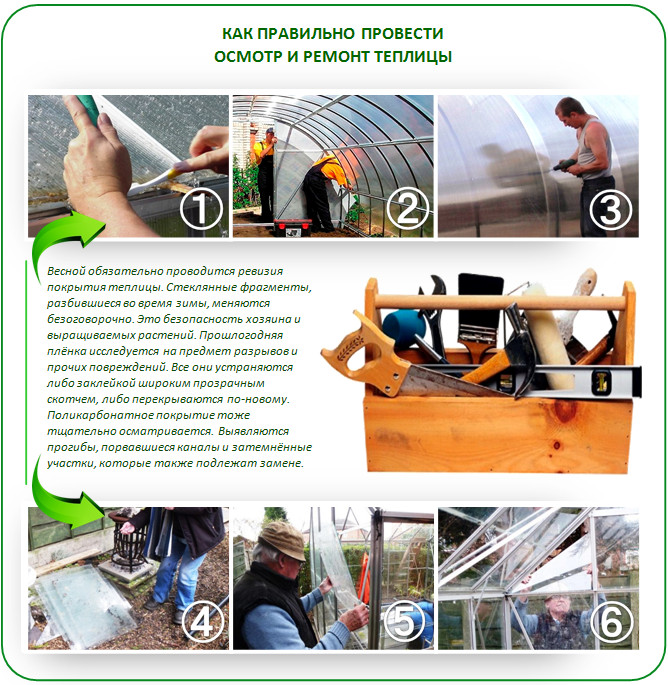 How to properly repair and inspect the greenhouse
Step 3. Then inspect the skin for internal defects - condensation, pollution, turbidity and bloom.
Step 4. Repeat the previous two steps, but already inside the greenhouse for the other side of the skin.
Step 5 Inspect all parts of the frame for defects and malfunctions. These can be paint chips, rust formation, deflections, weld gaps, loose fasteners, and so on. If the frame is made of wood, then darkening, mold, breaks, cracks and splits act as defects.
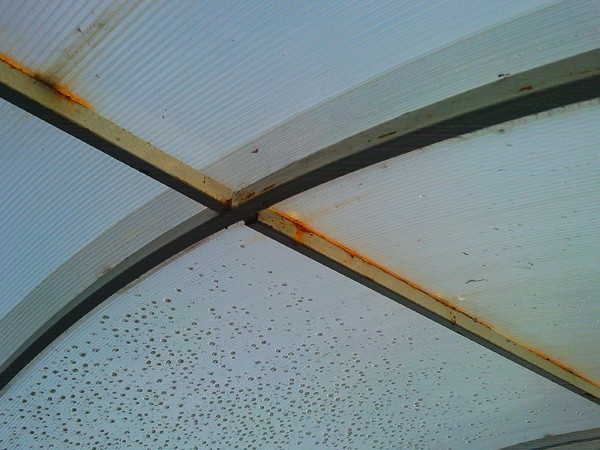 Rust on the frame of a polycarbonate greenhouse
 Frame breakage
Step 6. Check the frame for strength. The easiest way, but at the same time not too safe for both you and the greenhouse itself, is to hang on it or stand on top of the building. But first, make sure that the greenhouse and you do not collapse with it, otherwise there is a high probability of injury.
 Checking the frame for strength
Step 7. Using the level, check how exactly the building is horizontally, if it has sagged down one of the corners or sides.
Step 8. Check hinges and latches on doors, vents and other mechanisms associated with them.
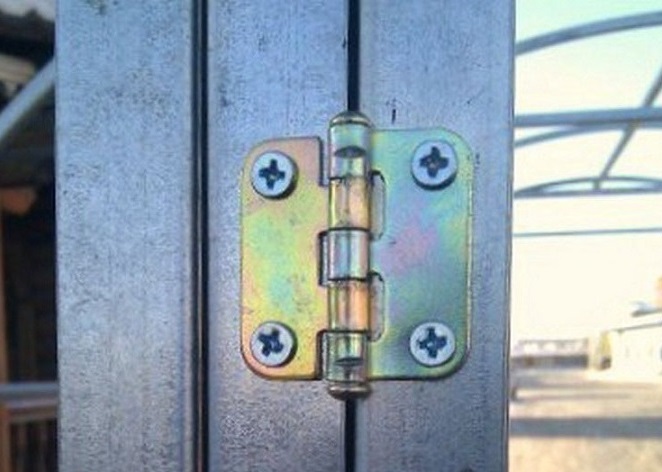 Greenhouse hinges
Step 7. Inspect the places where the frame of the greenhouse is fastened to the foundation - whether they are strong enough, whether they need to be replaced.
Step 8 Finally, examine the foundation itself. If it is made of wood, inspect for cracking, rotting, or damage by microorganisms and insects. If it is a concrete or brick foundation, examine for cracks.
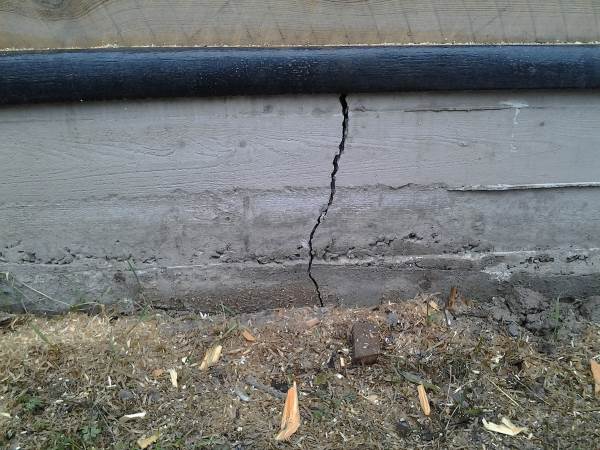 Crack in the foundation
Step 9. After completing the inspection, count how many faults you have found, and consider measures to eliminate them. Then move on to minor repairs. After it is completed (or immediately after the check if no faults are found), wash the greenhouse cladding with a sponge dipped in soapy water and wipe dry.
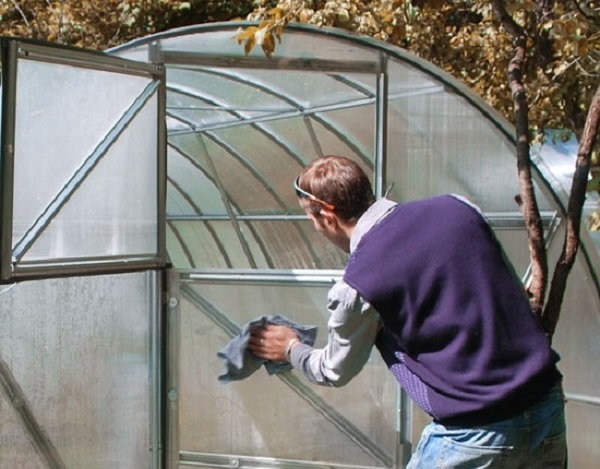 Washing the greenhouse with a rag
After completing the inspection, you can begin to prepare the beds in the building for the summer season or winter, depending on the time of the event.
It is often difficult for beginners to recognize small defects in polycarbonate sheathing. With cracks, breaks or holes, everything is clear - it is impossible not to notice them. And the table below will help you to detect small, but therefore no less significant skin malfunctions.
Table. The main defects of the greenhouse with cellular polycarbonate sheathing.
| Defect name, photo | Description |
|---|---|
Condensate |
Accumulations of individual drops of water and condensate on the inner walls of the cells of cellular polycarbonate. They are formed when there are problems with the tightness of the skin, the lack of drainage and improper installation of cellular polycarbonate. |
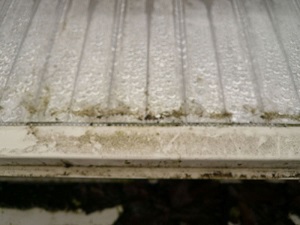
Cell contamination |
Particles of dust and dirt that fall on the inner walls of the cells of cellular polycarbonate along with moisture. The cause of the occurrence is the same as that of condensate. |
Bloom |
Formations of algae and fungus of green, blue-green and yellow color on the inner walls of the cells. |
clouding |
Loss of transparency of cellular polycarbonate, acquisition of a yellowish tint, increased fragility and brittleness of the material. Occurs when the stabilizing coating of the sheet is of poor quality or improper installation. |
Video about the consequences of saving when buying polycarbonate material
The best time to do this is on a clear and sunny day with no rain. This will protect parts and elements from unwanted moisture ingress, which can lead to further failures.
Inspection will require a careful examination of all structural elements of the greenhouse. First of all, you need to carefully examine the coating itself for the presence of turbidity, swelling, cracks, dents or any other deformations on it.
Following the coating, the frame is inspected. It is necessary to check whether it was damaged during the downtime, whether the precipitation of the supports was washed away, whether the frame products were installed evenly. Corrosion could appear on the parts, then they need to be cleaned and covered with a layer of paint.
When inspecting the frame, an ordinary level is useful. They can check the position of the building, it must be strictly horizontal.
If no shortcomings were found, then you can start using it. Before this, you need to wash the greenhouse from the outside and inside.
Polycarbonate panels are cleaned with a sponge or cloth with warm water and detergents without alkalis or other aggressive substances. Afterwards, rinse everything with clean water.
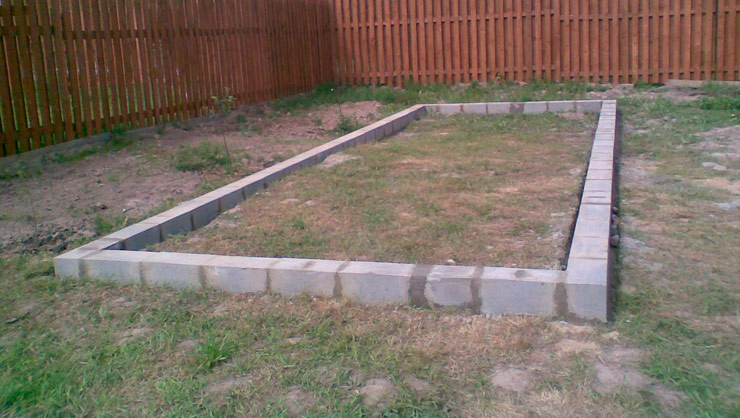
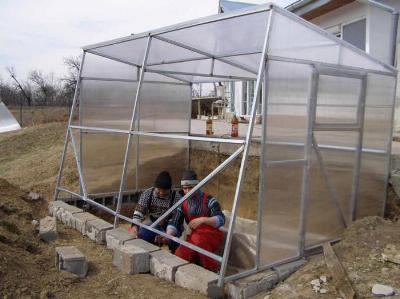
Greenhouse Foundation Repair
Defects in greenhouse foundations are a very serious but relatively rare problem. They should be eliminated as soon as possible, otherwise the risk of the building sagging along one of the corners or sides increases seriously.
If we are talking about a foundation made of timber, then the cause of defects in most cases is wood damage by dampness, rotting or mold. In this case, the design must be replaced.
Greenhouse on a wooden foundation
Step 1. Remove the casing from the greenhouse.
Step 2. Remove the frame from the fastenings to the foundation on pins or anchor bolts.
Step 3. Move the frame to another location.
Step 4 Excavate and replace the damaged wood foundation piece. If there are many defects, replace the beam completely, additionally take care of the careful treatment of wood with antiseptics.
 New wooden greenhouse foundation
Step 5 Install the greenhouse frame back, secure it to the foundation. Also re-install the trim.
 You can protect the foundation of wood from dampness by covering it with a layer of roofing material on top.
The main type of defects in a monolithic concrete foundation are cracks. They appear either when the soil is seriously heaving, or when laying technologies are violated. Repair cracks as follows.
Step 1. Undermine at the point of origin of the crack so that you can see the concrete in full.
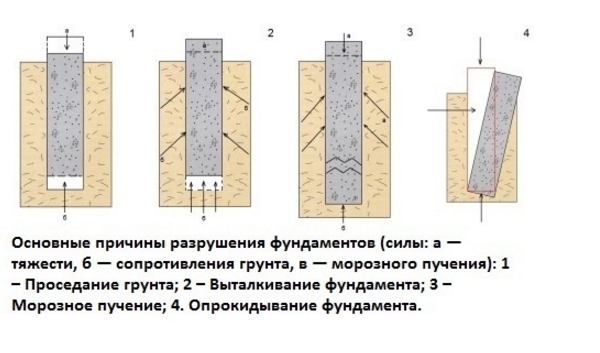 The main causes of the destruction of foundations
Step 2. With a chisel and a metal brush, clean the crack from dust, dirt, pebbles and small fragments.
Step 3. If moisture got inside the crack, dry it with a hair dryer.
Step 4. Prepare a quick-drying concrete mix. It is advisable to buy a ready-made dry product and dilute it with water. Please note that you should work with the mixture without delay.
 How to fix a crack in a foundation
concrete mix prices
concrete mix
Step 5 Using a trowel, fill the crack with the finished mixture.
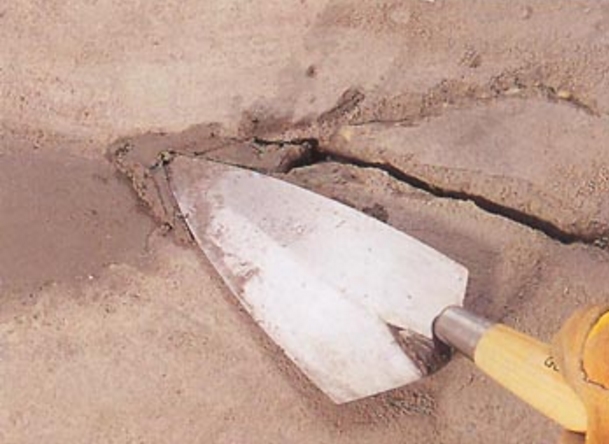 Crack repair
Step 6. Level the freshly placed concrete mix.
Step 7. As soon as the composition in the crack dries and gains strength, dig the tunnel back. Check the condition of the foundation at this location in a few months.
Do-it-yourself polycarbonate repair how to fix the material
Often there are cases when the polymer needs to be repaired. For example, when, after hail, cracks and small holes formed on the hinged roof, or after a heavy snowfall, the polycarbonate sank.Such situations occur due to improperly selected sheet thickness or poor-quality material.
An important detail: In order for polycarbonate to need repairs as rarely as possible, it is worth purchasing it from trusted manufacturers, and there is also no need to save on its thickness.
In addition, in order for the structure with a polymer coating to serve for a long time, it is necessary to carry out all installation work in accordance with the instructions. Store polycarbonate material in a ventilated area.
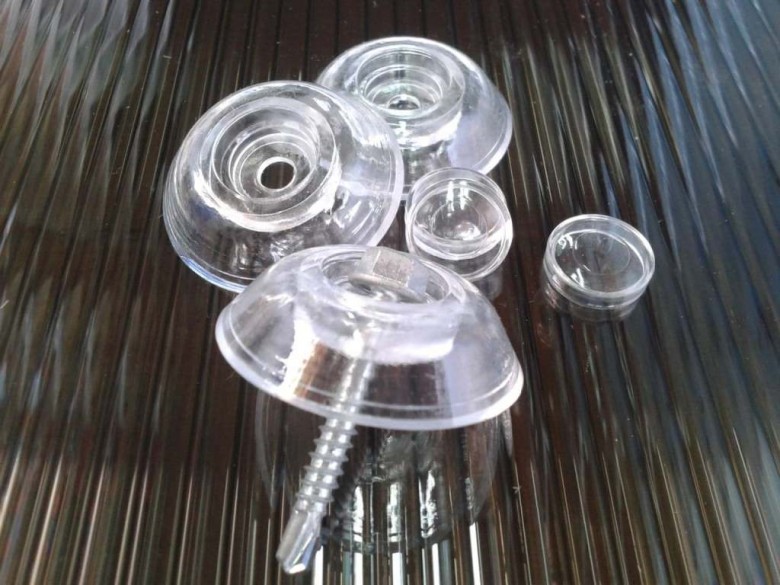
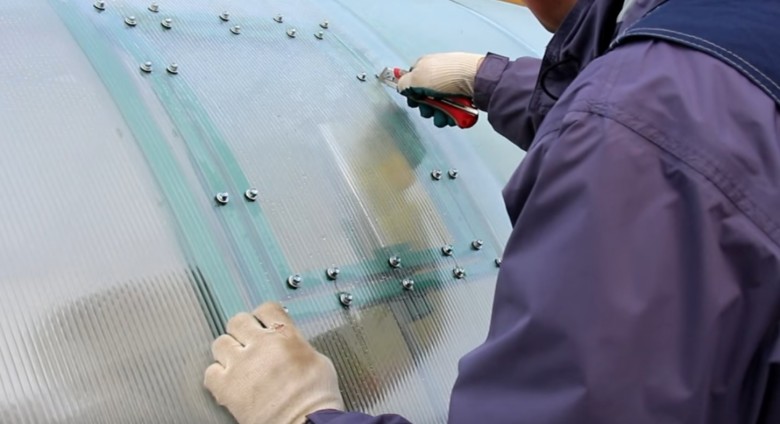
How to repair polycarbonate with your own hands?
This question often arises before summer residents and owners of private houses who are faced with a similar problem.
Cracks and small holes are filled with sealant (both transparent silicone and gray roofing will do). You can also pull it off with thermal washers and self-tapping screws. If a significant part is damaged, then it is necessary to replace the polymer sheet with a new one.
How to fix a polycarbonate greenhouse with your own hands if it breaks from snow?
There are cases when snow "broke" a greenhouse covered with a polymer material. What to do in such a situation? Let's look at an example.
A greenhouse measuring 8 m was covered with polymer plastic, the thickness of the coating was 4 mm. A design with a sheet thickness of 8 mm would withstand such a load, since the thickness of the sheet is much larger, as well as the arches are at a smaller distance from each other and the thickness of the profile is greater.
So, in order to repair a structure made of polycarbonate material that has sagged from snow, it is necessary:
- raise the frame and cover;
- supports are inserted under the raised frame and polymer plastic (most often such supports are wooden);
- you can’t do without a jack (with its help they give the structure the required shape);
- you will need plates made of metal in which small holes are drilled;
- remove the old mount and install a new one in its place, metal plates;
- bolts are used to connect the plate to the profile;
- then the bolts are tightened (this process gives the profile the desired shape).
What should be done so that cellular polycarbonate needs to be repaired as rarely as possible?
First, do not save on the thickness of the sheets. It is also necessary in winter to clean off snowdrifts from the structure from time to time. The roof of a building most often breaks due to the fact that the frame is weak, unable to withstand additional, unforeseen loads, such as weather conditions.
Also, when choosing a design, you need to pay attention to its quality, as some manufacturers try to save on it. Often there are situations when the profile section is weak, not of high quality
Therefore, in order to avoid repairing polycarbonate in the near future, it is necessary to purchase a high-quality construction in advance, where all components will be strong and reliable.
To make the design reliable, the following tips will help:
- It is better to choose thicker sheets for covering the greenhouse.
- You can make a stronger frame on your own. Profile pipes and profiles will help with this.
- It is recommended not only to remove snow from the roof, but also to install supports in the winter. Logs and beams are suitable as supports.
- Also, do not forget that the correct installation of the frame and polycarbonate is of great importance.
Tip: If you choose polycarbonate with a greater thickness, then such a sheet will last much longer, it will rarely have to be changed and repaired, so it is strongly recommended not to save on it.
Panel breakage
 Damage to the coating does not always require replacement and you can fix the situation yourself.
Polycarbonate panels may slightly change its shape under the influence of temperature
. In this case, it is enough to reinstall the panel, leaving a small gap.
If cloudy and dark places form on the polycarbonate surface, then you need to make sure that the sheet is installed with the protective layer out. However, if damage has appeared over a large area, then the panel is recommended to be replaced.
If moisture has appeared in the honeycombs, then the coating must be dismantled, and then blown and dried well.
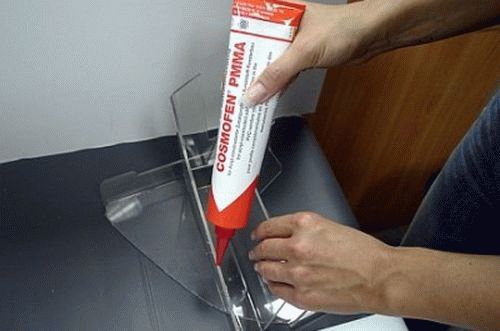
Cracks are the most difficult and unpleasant breakdown. But even such damage can be repaired. Such cracks are filled with silicone or roofing sealant.
However, if the hole is large, then the only way out is to replace the entire panel. At the same time, if the panel is rectangular, then you can cut out the damaged fragment, and install a whole one in its place, while strengthening the seams.
But in the case of structures of an arched or other complex shape, it will be necessary to replace the polycarbonate in the greenhouse. At the time of replacement, the polycarbonate surface can be covered with a film, but it should be borne in mind that this is only a temporary measure.
Foundation destruction
 The appearance of such a problem is unlikely, but if this did happen, then the situation can be corrected.
The base of the greenhouse made of timber is especially susceptible to destruction.
, so it will need to be replaced periodically, unlike a concrete foundation. In such a situation, the structure is completely dismantled and assembled on a new basis. It is preferable to do If the concrete foundation has cracked, then it is also possible to repair it. First you need to dig in the place of the breakdown
You need to try to do everything as carefully as possible so as not to increase the crack
After that, you need to fill the gap with a solution. It is necessary to pour the solution until the moment when it ceases to be absorbed.
How professionals work
Proper sealing of joints for a polycarbonate greenhouse is a guarantee of durability with reasonable operation. Professionals successfully use thermal bonding for such work - it is reliable, practical, aesthetically pleasing.
Two sheets of polycarbonate are heated at the same time, as indicated in the instructions for the device, and then they are automatically connected by soldering
When working, it is important not to deviate from the recommended temperature regime. With this type of fastening, gaps should be provided to ensure the flow of water - rain, melted snow.
With this type of fastening, gaps should be provided to ensure the flow of water - rain, melted snow.
For homework, this method is not optimal, as it requires certain skills and special equipment. Of course, this is not a reason to be discouraged - there are always alternatives.
The connection of individual polycarbonate sheets with a profile, glue or point fastening is simple and accessible to everyone.