Heater diagram
If the temperature with a fully warmed-up engine is within degrees, we are looking for the causes of underblowing in the legs in the design of the heater. A feature of the stove on the Chevrolet Niva is the absence of a stove radiator valve, that is, antifreeze circulates in a full circle in winter and summer and passes through the heater radiator.
Given this fact, the plant somewhat complicated the design of air ducts and air dampers - there are two of them in the Chevrolet Niva. One works for frontal airflow, the second is responsible for supplying air to the legs of the front and rear passengers and the driver.
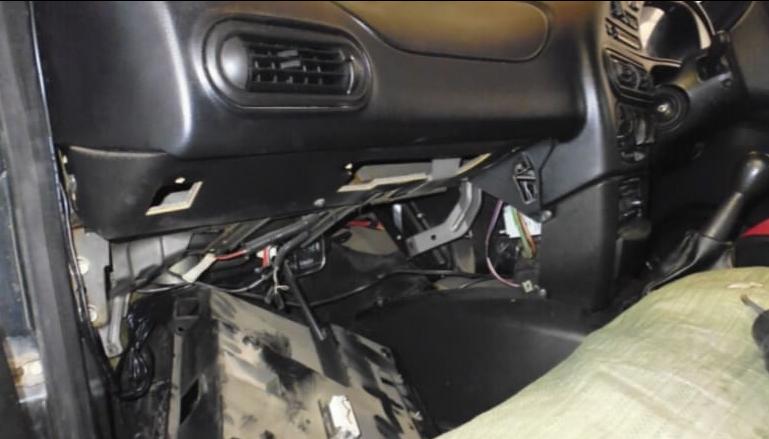
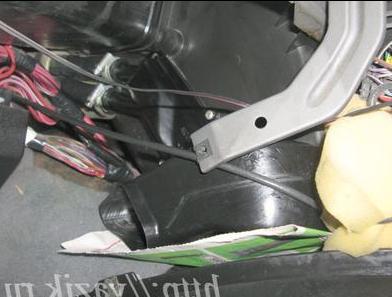
It is with this damper that problems arise that we will try to solve. We take out the central air duct and the air duct that conducts air to the driver's legs.
Unscrew 2 screws on the radiator.
And we begin to collect in the reverse order. If during assembly you have a couple of extra screws left, then you assembled everything correctly! If you suddenly have questions or I may have forgotten to add something, please contact me, I will be happy to advise.
Chevrolet Niva Shaitan cyclone at the feet, refinement!
The choice of the operating mode of the stove, temperature and direction of air flows is made using the stove control unit located on the center console. Heating system with air conditioning The principle of operation of the stove of a car with air conditioning is similar to that described above. However, its design is significantly different. Instead of the intermediate body of the heater, an air conditioner evaporator is installed, hidden by a plastic casing.

When the air conditioner is turned on, air is supplied to the passenger compartment through the evaporator using a damper. The design of the stove of a car with air conditioning is somewhat different: In order to carry out a quality repair, it is first necessary to understand the causes and identify the faulty element of the system.
The stove does not heat the footwell There can be several reasons why the stove does not direct air to the feet. First you need to find out if this mode is enabled correctly.
Due to the design features of the damper system, the direction of air to the feet is carried out as follows: Set the fourth speed of rotation of the stove fan. Set the heater mode switch to the top vertical position.
Toggle the mode controller one position to the left. After that, air should begin to flow into the legs. If this does not happen, the procedure should be repeated several more times.
If the mode still does not turn on, the following components should be checked: Coolant leakage If antifreeze leaks from the cooling system without visible smudges on the radiator and pipes, it is necessary to pay attention to the condition of the heating system
The main signs of a coolant leak through the stove are: Usually the leak occurs through the heater core. To verify this, you need to remove the lower part of the center console.
Do-it-yourself heater replacement
If traces of moisture are found in the area of the stove body, it is recommended to replace the radiator. If a coolant leak is detected through the stove radiator, it should be replaced. Before replacing the stove radiator, check the tightness of the stove pipes and their connections.
The stove does not heat the air well Often the stove does not heat the interior efficiently enough. Slightly warm or even cool air comes out of the deflectors instead of hot.
This usually happens for the following reasons: Before the decisive step of removing and replacing the stove, you should pay attention to the heater core. It may well be that the reason for the non-working state lies precisely in it.
In a Chevrolet Niva car, the stove is installed and dismantled without any problems, the main thing is to follow the procedure. Radiator The radiator of the Niva-Chevrolet stove is a delicate topic and deserves separate consideration.

The standard heating system in this vehicle does not always work well and generates little heat. The regular radiator begins to leak over time, and you have to change it.

But do not rush, perhaps it makes sense to clean or solder? But if there is no option other than replacement, then this is what you should do.
Before replacing the radiator, it is necessary to understand the existing types of such devices. Types of radiators Radiators are made from two types of material: Each has its own pluses and minuses. The aluminum radiator heats up quickly, is inexpensive and has good rigidity with low weight.

Heater diagram
The most common reason for its failure is: Warm air does not enter the lower part of the passenger compartment Before starting the repair of the stove, check the temperature of the coolant coolant. Perhaps the problem is not in the interior heater, but in the cooling system.

With the help of damper position regulators, warm air is directed to different parts of the cabin. First, adjust the dampers. Follow the steps below to blow hot air to your feet. The engine warms up until the moment when warm air can be felt by hand. Therefore, it is almost impossible to open the tap and not break it.
niva chevrolet stove
https://youtube.com/watch?v=UNMCm8ypDbI
To get to it, you need to dismantle the torpedo in the cabin from the side of the passenger seat. The stove faucet is mounted in a special niche in the engine compartment. If the faucet has been replaced, then it is better to put new pipes with it, because during operation they have probably already lost their elasticity.
Collective farm tuning of the Chevrolet Niva stove: In some cases, the way to turn it on correctly does not work, and then you have to modify the heater in order to achieve its full-functional operation. The main problem with dampers and air ducts is leakage.

We will improve the cracks and remove the leakage of the stove. Remove the stove control unit by disconnecting all wires and cables from it. If you have a radio, remove that as well. Disconnect the gearbox tunnel lining.
It can not be removed completely, but only lifted by unscrewing two self-tapping screws from the driver's and passenger's sides. Remove the steering wheel, steering column trim and unscrew the screws securing the front panel. When removing the torpedo, mark all the wires so that it will be easier to attach them to their places in the future.

Without removing the entire front panel, when dismantling the heater unit, some elements of the air conditioner and the stove itself can be damaged. Remove the front panel frame attached to the body with screws. The heater housing cannot be removed without dismantling the front panel frame. Behind the frame you will find the heater block shroud connected to the intermediate body of the stove or to the evaporator section on a car with air conditioning.
Chevrolet Niva 2012, 80 l. With. - self-repair
Installation of a new block is carried out in the reverse order. The most common purpose of such tuning is to improve the air supply to the driver's and front passenger's footwells. To do this, install additional air ducts and adjust the shape of the damper drive bar
For such refinement, you will need: It is necessary to work with the plastic of the heater housing very carefully, since it is quite fragile

Actions are performed in the following order: Select tubes suitable for the role of additional air ducts. Plumbing pipes can be used as additional air ducts. Remove the side moldings on the center console from both sides.
Air flows in the cabin are distributed by air ducts, which are located under the instrument panel and under the lining of the floor tunnel, and for air supply to the rear passengers' feet - and under the floor upholstery.
To control the distribution of air flows, the distribution regulator handle on the center console of the instrument panel, as well as the regulators and guides of the central and side deflectors on the instrument panel, serve.

To heat the interior, move the temperature control knob to the hot red zone. In this case, outside air is directed through a damper through the heater core, which is integrated with the engine cooling system.
Turn out screws of brackets of fastening of drafts. Disconnect the rods from the heater damper levers. Turn out the screw of fastening bracket of draft of a drive of a damper of recirculation and Remove an arm bracket of levers and disconnect block of a plait of wires from the switch of the electrofan of a heater.
Heater scheme First of all, we want to orient you that a liquid-type heater has already been installed on the Niva, which allows not only to supply warm air to the car interior, but also to cool the running engine, preventing it from overheating. It's no secret that overheating the engine entails extremely undesirable consequences.
An electromagnetic clutch is built into the compressor pulley, which turns the compressor shaft on and off from the pulley according to the signals of the engine control system controller. The refrigerant vapor from the compressor enters under high pressure into a condenser located in front of the radiator of the engine cooling system. Passing through the cells of the condenser, the refrigerant is cooled by the oncoming air flow and with the help of cooling system fans.
Stove fan replacement
Replacing the stove motor is quite simple.
Required Tools
For work you will need:
- a set of hex keys;
- Phillips screwdriver;
- new heater motor.
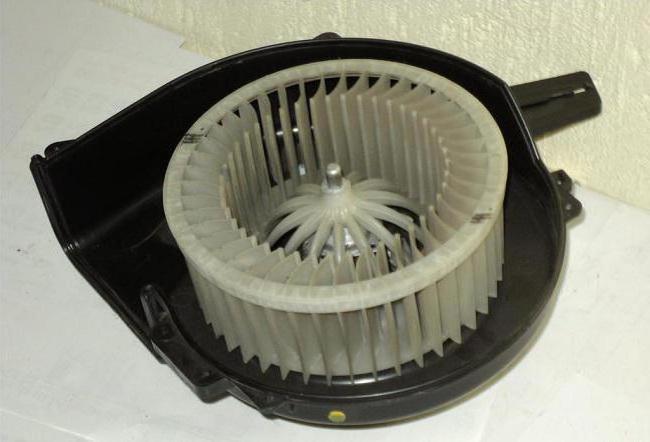
Dismantling the oven fan
The stove fan is removed as follows.
- Disconnect the negative battery terminal.
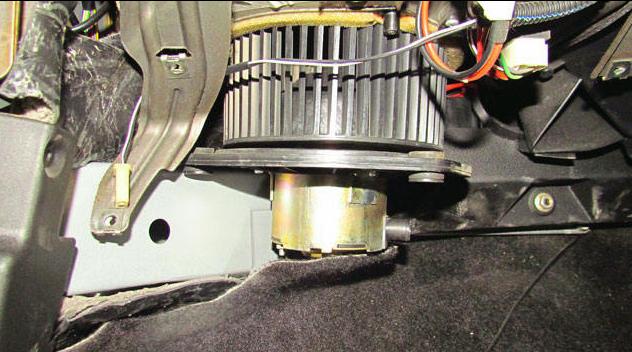
- On the right (in the direction of travel), a cabin filter is installed under the windshield, protected by a snap-on cover. After removing the cover and removing the filter, access to the heater fan opens. To access the heater fan, the cabin filter is removed.
- The impeller is removed. To do this, use a Phillips screwdriver to unscrew the bolt holding the mounting bracket. The impeller moves to the side and is removed. To remove the impeller, unscrew the bolt and remove the mounting bracket
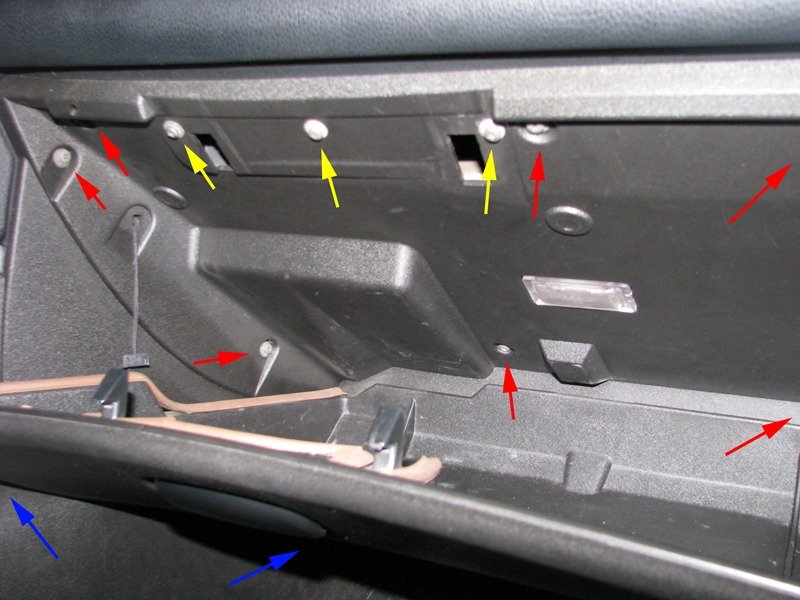
- In the cabin, in front of the passenger seat, the glove compartment panel fasteners are unscrewed. The glove compartment panel is removed to access the electric motor.
- The connector with power wires is disconnected. To remove the electric motor, you must disconnect the connector with the power wires
- The fastening bolts are unscrewed with a short 10 hexagon, and the electric motor is removed. The electric motor of the stove is fixed with three bolts.
- After removing the engine, the impeller is carefully removed through the niche of the cabin filter. The impeller is freely pulled out from the side of the cabin filter
Installing the oven fan
A defective electric motor is repaired or replaced with a new one. A damaged impeller should also be replaced. A thin wire is threaded into the holes in its body and the cavity of the cabin filter is fixed. The impeller must be installed in such a way that the groove located inside it enters the pin of the electric motor shaft.
Before installing a new engine, the axle is lubricated with a special grease.
Assembly is carried out in reverse order. If the impeller does not fall into place, it should be moved several times in different directions until it is fully seated on the motor shaft. Then, under the hood, the wire is cut with wire cutters, the mounting bracket is installed and the bolt is tightened. New oven fan installed.
Thus, diagnosing malfunctions, repairing and replacing the stove fan on a Chevrolet Niva car is not very difficult. This will require a minimum set of standard tools.Keep an eye on the stove, and the interior of your car will always be warm.
Replacing the heater on the Niva Chevrolet
The device of the heating system on the Chevy Niva
The heating and ventilation system of the interior of the Chevrolet Niva body:
1 - air duct ventilation,
2 - air duct for heating the windshield,
3 - transitional body,
4 - transitional air duct,
5 - air intake filter housing,
6 - fan of the heating system,
7 - the central nozzle for interior ventilation,
8 – finishing of the panel of control levers,
9 – front air duct for interior heating,
10 - rear air duct for heating the passenger compartment,
11 - air duct for heating the legs,
12 - heater assembly,
13 - side nozzle.
Do-it-yourself heater replacement
So, you have a stove heater leaking, to make sure of this and not to engage in “monkey labor”, we touch the sections of the heater pipe from the front passenger side, if dry, then we look under the driver’s carpet for a puddle. If the puddle is from antifreeze, then it will taste oily and sweet. So if all the signs match, then the heater probably leaked.
We go to the supermarket, we buy a heater. I bought a simple metal one for 500 rubles and clamps just in case of a fire. You will also need 10 liters of antifreeze. Also stock up on boxes for self-drilling screws, because there will be a lot of them!
We drain the antifreeze. To get more out, blow into the expansion tank.
I must say right away that it is necessary to remove the dashboard if you do not want to get to the refueling kondeya, although judging by the assumptions, in that case it will be necessary to remove the dashboard.
First of all, we remove the glove compartment, it is removed easily, there should not be any problems.
We unscrew the center console at the same time as the radio. There is absolutely nothing complicated here either.
Next, unscrew the decorative panel of the center console, which is on the side. Weaken the finish of the checkpoint tunnel. To do this, it is quite enough to unscrew one (as it were) extreme screw. From the driver's side, closer to the pedals, from the passenger's side it's similar.
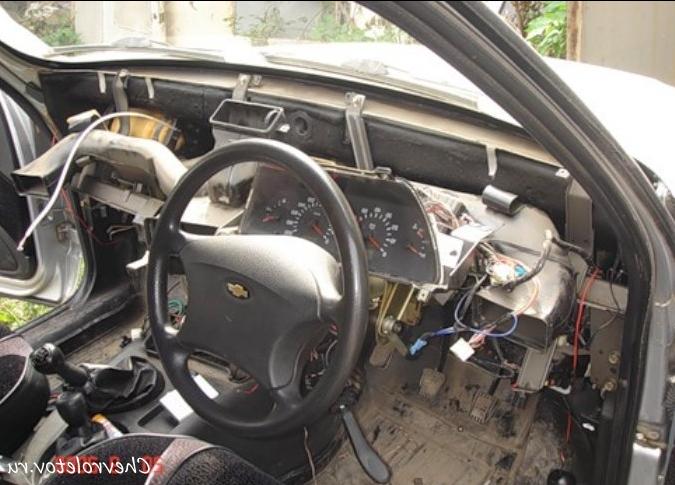
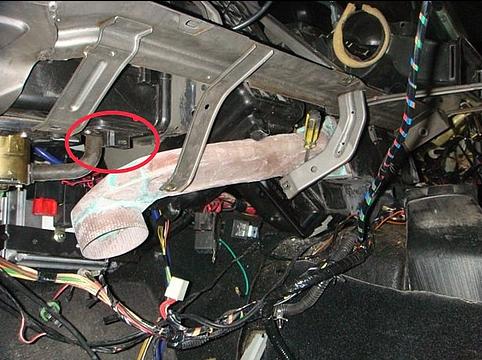
Next, we will begin to dismantle the decorative trim of the dashboard, at the same time throwing off the instrument panel and steering column cover with toggle switches. We take out the air duct, which is located behind the dashboard. Here you will need to suffer with cables. Why can't the dashboard be removed completely? - you ask. This bolt will not give you.
Chevrolet Niva replacing the stove and backlight regulator in 5 minutes
Here is the bolt. And how did the designers manage to make it spin from the side of the atomizer? So we have this kind of thing. Dashboard frame simultaneously with the steering column.
Unscrew the steering column cardan. And we will begin to unscrew the dashboard frame, having previously thrown off all the wiring from it. Carefully pull it all out of the car and voila. You have almost reached the heater.
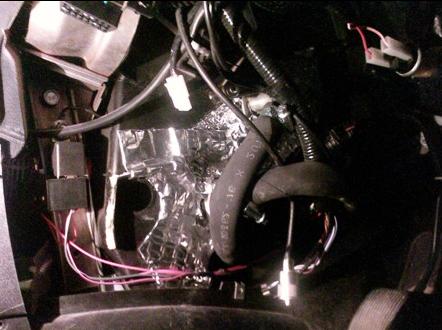
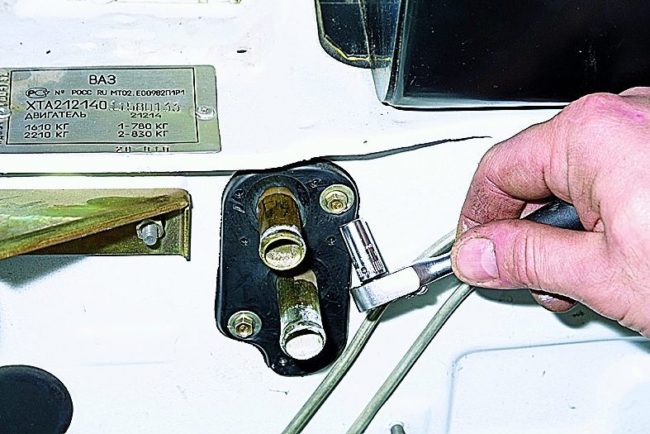
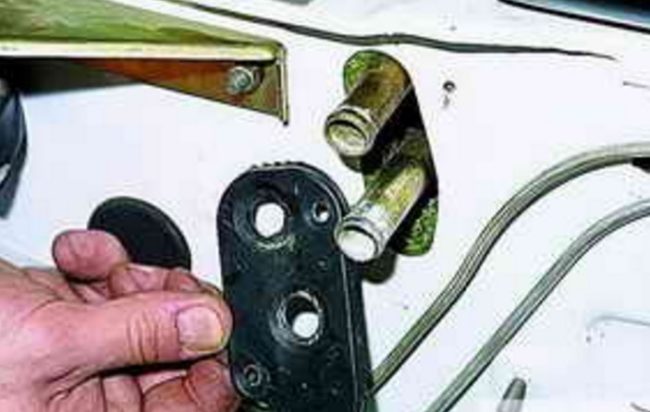
Then we unscrew the body of the heater from the atomizer and the gearbox tunnel. Here you will meet a self-tapping screw, which is located between the casing of the atomizer and the casing of the heater. This is possibly an ambush! Unscrews with a tambourine and mats. When collecting, you can not twist, because. it is even more difficult to screw it, and it holds almost nothing to hold. We take out the central air duct and the air duct, which conducts air to the driver's legs. Like everything. Unscrew 2 screws on the radiator. Take it out, put in a new one. And we will start to collect in the reverse order.
If you have a couple of extra screws left when assembling, then you assembled everything correctly!
Thank you for attention! If for no reason at all you have questions or I may have forgotten to add something, please contact me, I will be happy to advise. The most important thing is not to be afraid of the working volume and take care of yourself!. Heating ‘target=”_blank”>’)
Heating ‘target=”_blank”>’)
My account
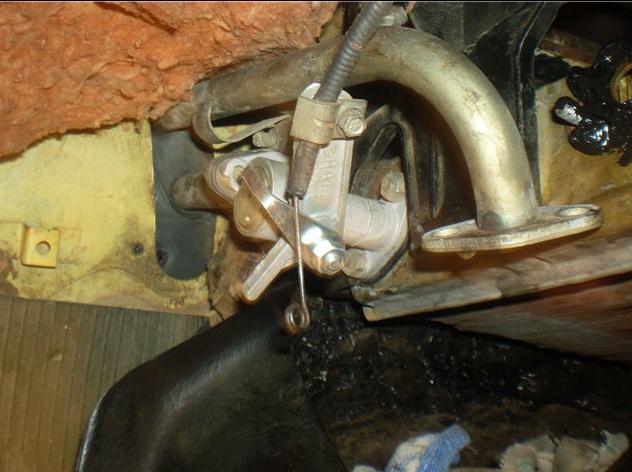
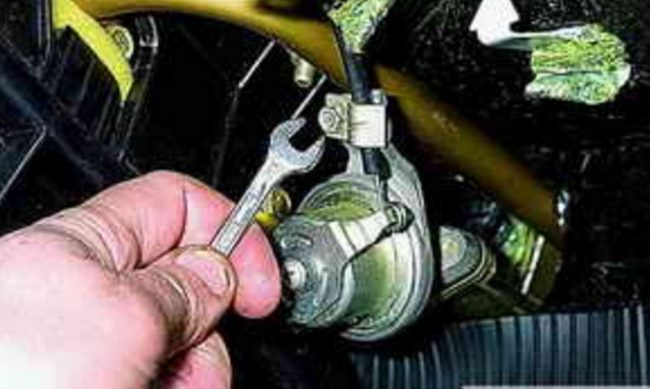
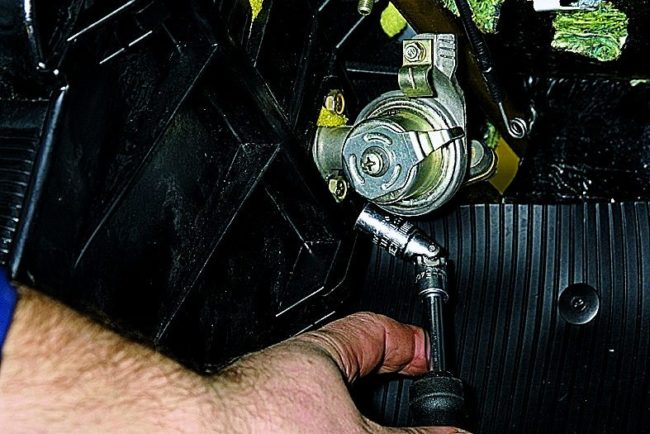
After removing the glove compartment, access to the heater tap opens.A rod is attached to the crane lever with a clamping bracket. Open-end wrench 7 loosens the nut located on the bracket.
The traction cable is removed from the crane lever. With the help of an open-end wrench, the fastening of the thrust is loosened. With a socket head, two bolts securing the crane to the wall of the engine compartment are unscrewed by 10. The fixing bolts of the heating tap are unscrewed with a 10 socket wrench. The heater tap is removed from its niche and replaced with a new one.
The heating tap is removed from the seat. The assembly and installation of the tap is carried out in the reverse order. First, disconnect the hose from the nozzle. This action is quite difficult, because the hose is firmly seated on the nozzle. If you move it carelessly, your hand may slip and you may be injured.

For this reason, we recommend that you wear gloves to avoid such unfortunate consequences. Now, using a screwdriver, unscrew the screws that fix the seal, pressing it against the partition.
To dismantle the stove faucet, it is necessary to drain the antifreeze. If possible, open the faucet to the limit. We substitute the hose and insert one end into the basin. To drain the antifreeze, it is necessary to unscrew the plug on the cylinder block. Lightly hold the hose with your hand and gradually open the cap, which is located on the expansion tank.
We do this work carefully, since the antifreeze jet will gradually increase
In order to remove the stove tap, it is necessary to completely drain the antifreeze. We loosen the clamp on the carburetor heating pipe and remove this part from the fitting. After all the coolant has flowed out, we twist the plug into the block and tighten it well. Antifreeze leak from the stove In used cars, coolant often starts to leak from the stove. The reason for this is usually the wear of the nozzles or a malfunction of the stove tap.
Since antifreeze circulates under pressure, all connections must be tight. However, during long-term operation, hoses and gaskets lose their elasticity and burst. After inspecting the heating system and finding a leak, the worn part is replaced with a new one. When repairing, do not use Chinese-made clamps due to their poor quality.
Due to the loss of elasticity, the pipes of the stove crack over time and let the antifreeze pass. The coolant can also flow out of the heater radiator itself. In this case, it will have to be replaced with a new one.
Replacing the heater radiator Chevrolet Niva Chevrolet
https://youtube.com/watch?v=PgDz4rJ2GJ0
The stove does not heat well To diagnose a malfunction, turn on the ignition, start the stove and try to change the intensity of the air supply. If the air is not supplied at the first three speeds or is supplied cold, the reason for this is a faulty resistor, which must be replaced.
The reason for the inability to switch speeds is the failure of the resistor. If the resistor is good, the diagnosis continues. If it is low, the antifreeze is topped up to normal and checked after a few days.

If the level has dropped noticeably, you should pay attention to the hoses and pipes, the wear of which is usually the cause of coolant leakage. One of the reasons for poor interior heating by the heater may be a low coolant level in the system. If the control unit malfunctions, it will have to be dismantled
Faucet replacement process
Repair of the block at home is possible only if you have the appropriate tool - it's easier to contact a car service.
Another reason for stopping the stove may be a dust-clogged cabin filter.
In this case, the load on the electric motor increases, which, in turn, leads to the failure of the stove fuse. In this case, it should be washed. This is true when buying and operating used cars. However, it can sometimes fail. Replacing the stove cable Sometimes it is not possible to change the position of the stove damper.
The reason for this is a cable break.To replace it, you will need a standard set of tools and a headlamp. Cable replacement is carried out as follows. The driver's seat moves back. Handles are removed from the damper control panel and screws are unscrewed.
The panel is dismantled on the left side at the location of the driver's feet. To access the cable, you will need to remove the heater control mechanism. The latches for fastening the cables are removed. The recirculation damper mechanism is dismantled, and the cable is removed.
Each end must be twisted into a ring and securely fixed. With the help of a cable, the position of the air supply damper is changed. Reassembly is carried out in the reverse order.
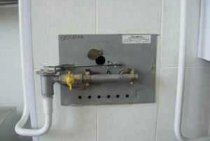
What is a stove faucet, its functional features and location
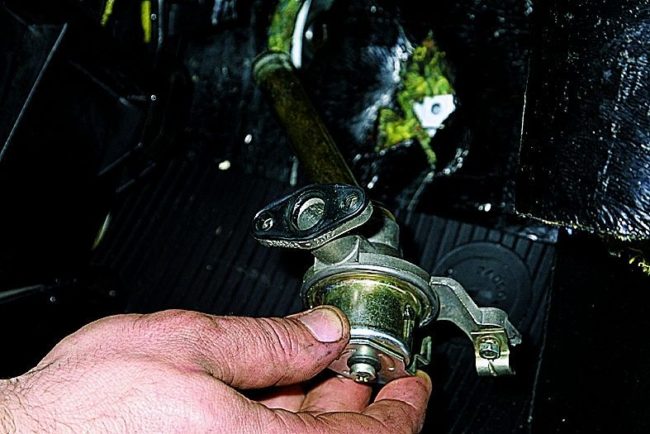
The stove faucet is a metal part that resembles the most ordinary water faucet. Antifreeze (coolant or coolant) constantly flows through it.
In the Chevrolet Niva, the coolant is able to flow through 2 cooling circles: winter and summer. The heating tap gives the driver the opportunity to switch to one of them. For example, with the onset of summer, with a fully open tap in the car, due to the heat, it is almost unbearable to be, so it is closed for this period of time, and with the onset of cold weather, the tap is opened again. Due to active operation, the part eventually becomes unusable and leaks coolant.
It is very simple to determine the malfunction of a part - lift the cover in the Chevrolet Niva salon. If there are obvious signs of leakage, the assembly must be replaced.

On the diagram you can see where the stove tap is located, and the circulation of antifreeze in two circles
It is best to replace the metal faucet of the stove with a ceramic one, which will increase its service life several times.
How to remove and install the stove tap
To replace a part, you must first prepare the appropriate consumables, as well as tools:
- open-end and socket wrenches;
- pliers;
- flat screwdriver;
- a five-liter tank into which you will need to drain the liquid from the radiator;
- new faucet.
After preparing the necessary tools, you can begin to replace the crane, while the sequence of actions should be as follows:
- We install any container with a volume of about five liters under the radiator and unscrew the plug on it. We wait about 10 minutes until all the coolant has drained.
- Next, open the hood of the car and loosen the pipe clamp on the faucet pipe.
- We take pliers, gently unbend and pull out a short cotter pin.

Remove the heating tap clamp with pliers
We unscrew the screws for fastening the seal with a 7 "key
Removing the sealing plate from the faucet
In order to get to the stove tap, unscrew the nuts and remove the glove box
Using an open-end wrench, loosen the fasteners of the nut to remove the traction cable
We unscrew the fixing bolts of the heating tap
A pipe is installed on the part, as well as traction mounts, while new gaskets must be used, which are pre-coated with sealant.
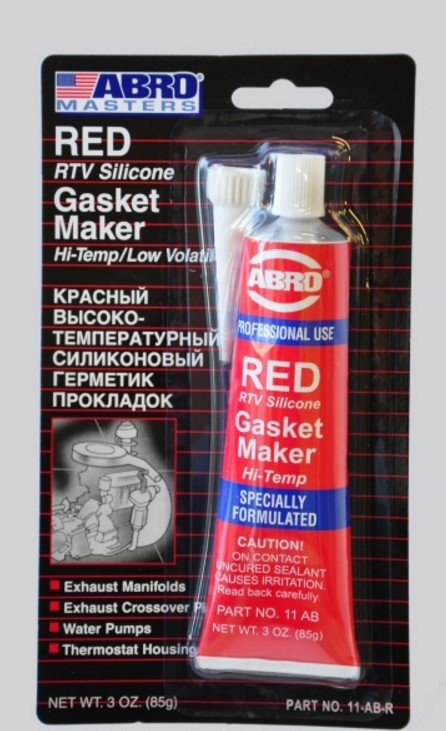
Sealing plates are coated with sealant to reduce the risk of coolant leakage
The crane is put in place in this way:
- We twist the key to "10" two nuts on the branch pipe with traction.
- We put the part in place and tighten the mounting bolts located on the crane.
- We put the rod and fasten the clamping bolt with the key to "7".
- We twist with a key on "8" the screws that hold the sealing gasket.
- We insert the nozzles into the fittings and tighten the clamps.
The new heating tap is installed in the reverse order.
Check whether the second branch pipe is tightly connected to the radiator, if not, then replace the gaskets there as well. In addition, we strongly recommend installing new hose clamps.
When filling the system with liquid, fill it slowly so that air pockets do not occur.Antifreeze is poured in until it flows out of the pipe. Moreover, the heating valve must be in the open state.
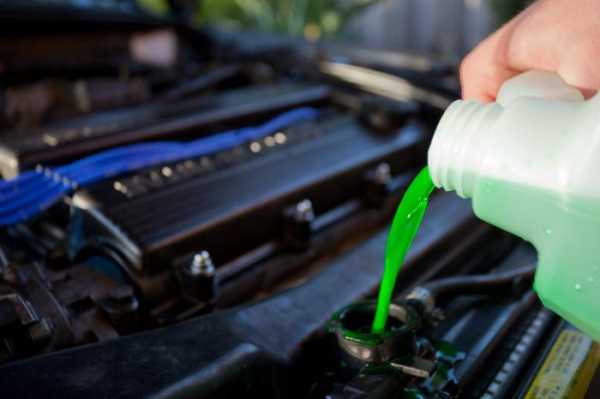
Antifreeze in the heating system must be poured carefully, avoiding the appearance of air pockets
Video: how to install a stove tap on a Chevrolet Niva
Replacing a broken crane with a new one on a Chevrolet Niva is easy. To do this, you need to acquire the usual set of tools that can be found in every car, and buy a new faucet. After that, even an inexperienced driver will be able to install it on a car.
Types of radiators
Radiators are made of two types of material: copper and aluminum. Each has its pros and cons. The aluminum radiator heats up quickly, is inexpensive and has good rigidity with low weight. However, such a device cannot be repaired, since it is very problematic to solder it. Also, aluminum does not hold heat well, so it cools quickly.
Copper radiators are more expensive in price, but have their positive characteristics:
- Unlike aluminum, they last longer because copper does not corrode.
- They keep the set temperature for a long time, despite the fact that they heat up slowly. At the Niva SUV, the stove requires more space to heat than conventional sedans. That is why it is worth choosing a high-quality radiator.
The downside of a copper radiator is one thing: it is not very easy to purchase parts of acceptable quality. A device made of copper is more expensive than aluminum. Its price is in the range of 2000-2500 rubles.
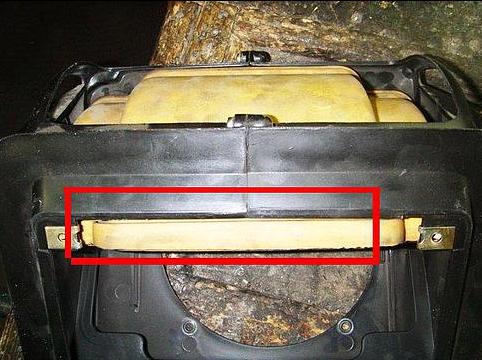
Symptoms of a malfunctioning oven fan
The main signs of failure of the stove fan are as follows:
- the electric motor does not work;
- the speed of rotation of the electric motor decreases;
- the fan starts to squeal.
Depending on the symptoms that appear, the procedure for correcting the problem is determined.
Electric motor not working
If the electric motor stops working, the noise in the cabin disappears when the heater is turned on.
Often the reason for this is the failure of the F18 fuse with a rating of 25A in the corresponding block, through which voltage is supplied to the stove motor.
Another reason may be damage to the winding of the fan motor - if the insulation of the wires is broken, an interturn short circuit is possible. In this case, the motor must be replaced.
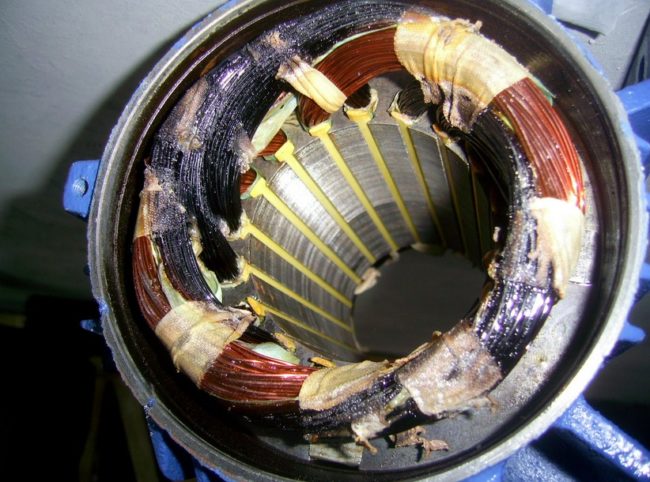 In case of an interturn short circuit, the electric motor stops working.
Decreased motor speed
With a decrease in the speed of rotation of the motor shaft, it is somewhat more difficult to determine the source of the problem. The noise level with decreasing motor power becomes noticeably lower. This may be due to severe wear of the armature or brushes. In addition, the fan begins to consume much more current, and this can lead to the failure of the F18 fuse.
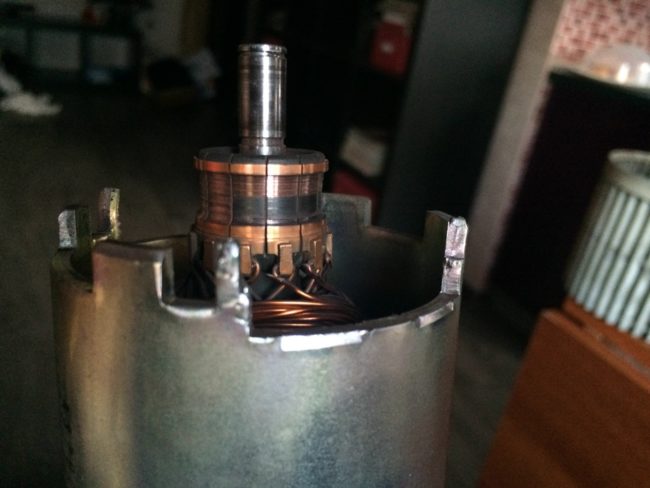 With strong armature wear, the electric motor will rotate much more slowly.
The fan starts to creak
The fan begins to creak when the motor bearings are worn. The more wear, the stronger the creak. If you do not take any action, the stove fuse will burn out, and the motor itself will jam. In this case, the motor must be replaced with a new one.
Replacing the heater fan fuse
Almost any malfunction of the stove motor leads to the replacement of the F18 fuse. On a Niva Chevrolet car, the fuse box is located in the passenger compartment under the instrument panel and is closed with a lid fixed with two self-tapping screws. When replacing F18, it is recommended to check and, if necessary, replace other fuses.
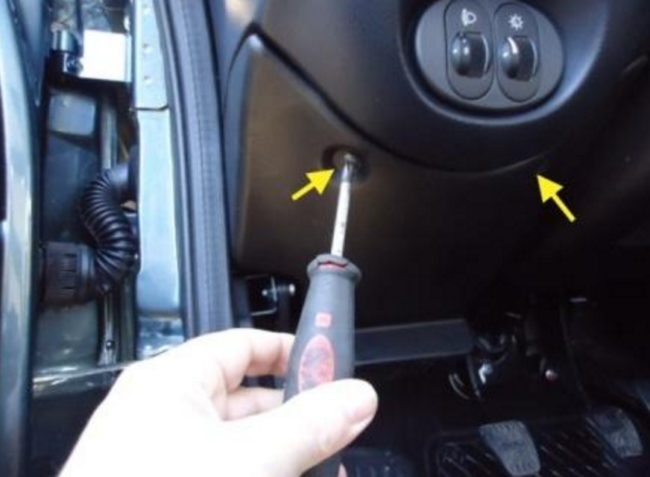 The heater fuse is located in the fuse box under the instrument panel.
If fuse F18 has to be changed quite often, then the problem should be looked for elsewhere. It is possible that there is a short circuit somewhere in the power supply circuit of the electric motor. Sometimes the fuse blows as a result of severe contamination of the cabin filter.In this case, the electric motor does not have enough power for normal ventilation of the air, and the fuse fails.
 Often the reason for stopping the stove engine is a blown fuse.
A suspicious fuse is removed from its seat in the block with special tweezers. If it burned out, a new one is installed in its place. When checking, it is better to use a multimeter, since it can be difficult to visually determine the integrity of the fuse.