Step by step installation algorithm
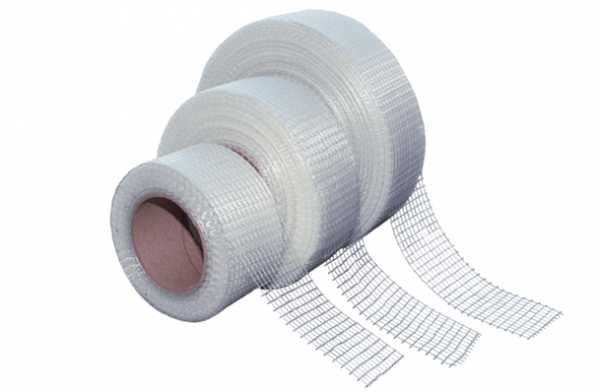 Silicone tape promotes better sealing of joints
After making calculations of all the necessary values and choosing a connection method, you can proceed to the installation of radiators. All work must be carried out in accordance with the requirements of SNiP. You also need to follow the manufacturer's instructions. If the instructions are violated, there is a risk of loss of warranty service. According to the norms, you can not remove the protective film from the devices during installation. Thus, the device will be protected from dust and scratches during installation work.
Elements required for connection:
- Hooks with plastic dowels - at least 3 pieces. Needed for wall or floor mounting.
- 2 side plugs with right hand thread. They are marked D.
- 2 plugs with left-hand thread with the letter S.
- Stub.
- Thread silicone sealing or linen.
- Elements required according to the scheme - faucet, valves, valves.
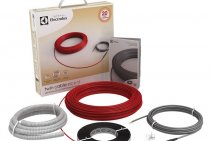
- Pipes. Metal or polypropylene are selected. Metal products are of high quality, durability and long service life. Polypropylene pipes are cheaper.
From the tools you will need:
- Electric drill and drill. Selected according to the hardness of the wall.
- Screwdriver.
- Building level.
- Key.
- Roulette and a simple pencil.
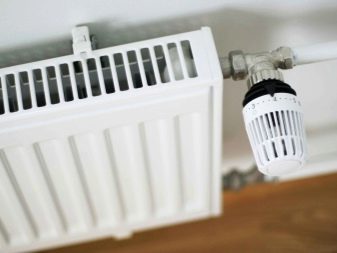
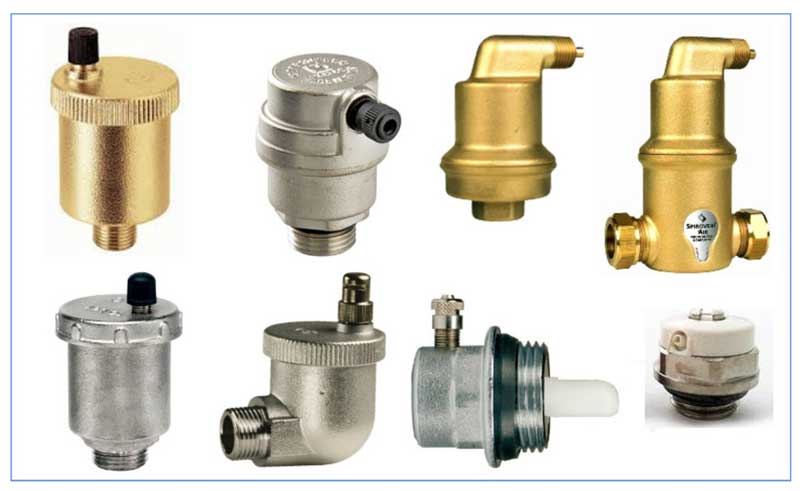 Depending on the design of the radiator, an air vent is selected
The general installation procedure for different parts of the heating system is also regulated by SNiP.
- Marking for brackets. This is done with dowels or cement mortar. There must be at least three brackets in total.
- Installation of plugs, adapters, Mayevsky taps and other parts.
- Installation of the radiator itself. It is necessary to connect its pipes to the heating system.
- Installing an air vent. It must be automatic.
- Removing the protective film.
If these requirements are met, the installation of the system will be of high quality and durable.
wall mount
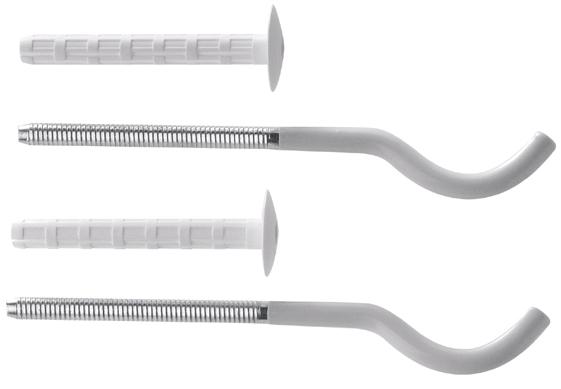 Wall fixing material
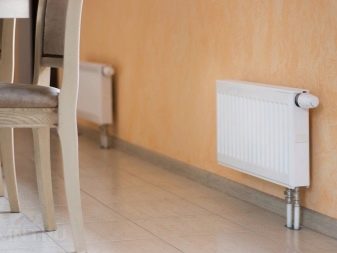
Wall mounts are easier to make than floor mounts.
Installation is carried out as follows:
- Mounting site preparation. First, the heating circuit pipe is connected. The wall behind the radiator must be pasted over with foil material.
- Preliminary marking of the place of fastening of the clamps.
- Installing fasteners with dowels. The recess in the wall must be at least 6 cm to securely fix the battery.
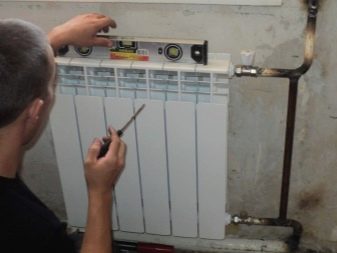
- Attaching the radiator to the brackets. Fixing and leveling the device.
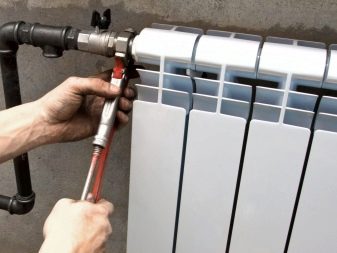
- Connection to pipes. Check the tightness of all connections.
- Test run of the system.
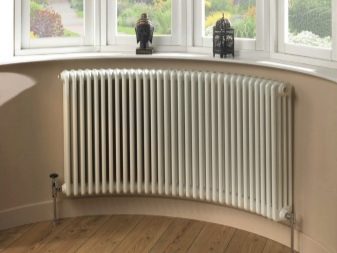
During installation, it is important to make the horizontal alignment of the battery. Otherwise, air will accumulate in the device, which reduces the heating intensity and leads to corrosion.
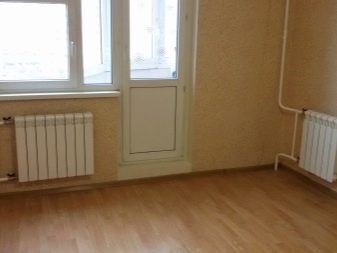
It is also important to observe the condition of the location of the battery. It should be installed strictly in the center of the window.
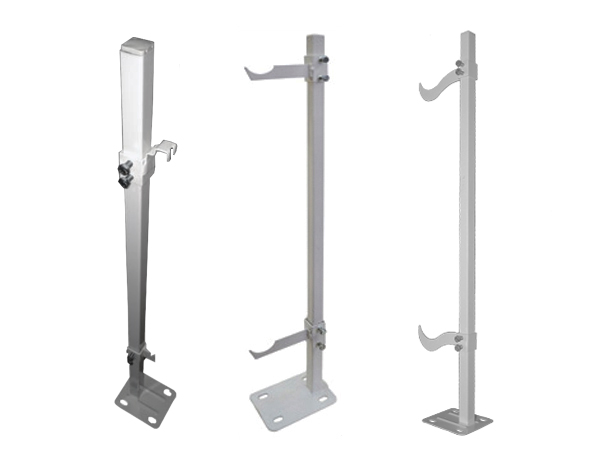
Fasteners are different. They can be made in the form of suspensions, brackets and other structures. Regardless of the type, they have one task - to securely fix the radiator on the wall. Instructions for fixing the clamps are attached along with the elements themselves.
floor mount
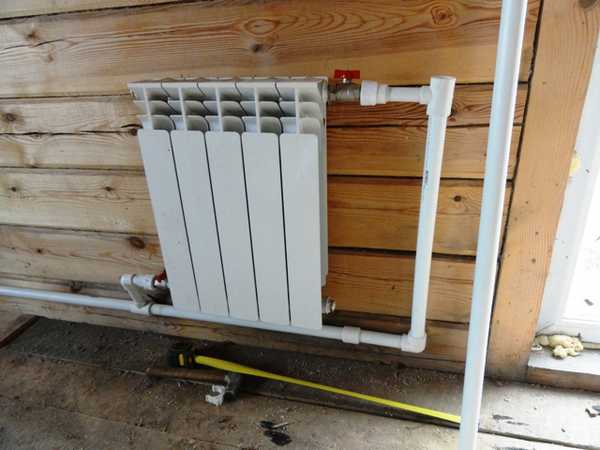
 Floor mount for large heavy radiators or thin walls
Heavy and massive radiators can not always be hung on the wall. Not every latch can withstand such a load, so they use the floor installation method. For this, special brackets are used. They are more expensive, but their fastening reliability is higher than that of wall-mounted models.
Stages of outdoor installation of the radiator:
- Selection of brackets that are designed for the weight of the battery.
- Installation on the place of the base allotted for the radiator.Fixation is made on anchor bolts at a distance of at least 6 cm from the wall. The height of the radiator from the floor must be respected.
- Execution of concrete works. Pouring the base of the brackets and bolt heads with a screed.
- Putting on hooks on racks. They are adjusted to the desired height and fixed with bolts. If provided by the package, protective metal gaskets are installed.
- Installation on hooks at a pre-calculated height of the battery from the floor. The radiator, as in the case of wall mounting, must be aligned horizontally.
The floor system has an important advantage. All the weight from the battery falls on the floor, and is not distributed along the wall
Due to the distance from the floor, a gap will be created, allowing air to circulate. Typically, this scheme is used for heavy cast-iron heating radiators, but aluminum or bimetallic devices can also be mounted on the floor.
Connection methods
SNiP prescribes the basic rules for installing radiators
The ability of the radiator to withstand pressure is important. The material of manufacture should not react with the pipes that are connected to the product in order to avoid corrosive processes.
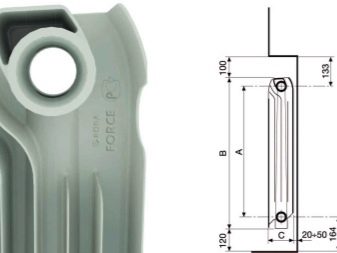
The battery should be placed 10 centimeters below the protruding part of the window sill to release the heat flow.
The distance between the floor and the bottom of the radiator must be more than 10 and less than 15 centimeters. This is a fundamental issue, otherwise the processes of uniform heat transfer will be violated. All sections must be connected evenly and not have significant differences in height.
In order for heat transfer to take place most efficiently, it is important to correctly place the heating radiator. Experts recommend placing it under the windows in order to minimize the heat output through these areas.
In the case where there is an external cold wall, it is recommended to place additional devices on it.
In general, batteries in an apartment can be located in several ways:
- lateral location;
- bottom;
- diagonal;
- consistent.
The most popular is the lateral arrangement of the batteries. It is characterized by high heat transfer. The pipe through which hot water flows is inserted into the upper pipe, while the outlet comes from the lower one. In the case of bottom placement, both nozzles are located at the bottom. The scheme is relevant if the pipes are placed in the floor or under the plinth.
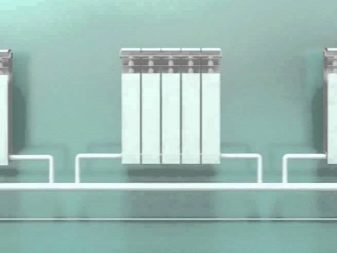
Diagonal is used when the battery has a large number of sections, 12 or more. The coolant enters through the top pipe, and exits from the bottom. Consistent is relevant when the plumbing system has enough pressure to allow hot water to pass through all the batteries.
In cases where it is necessary to install an additional radiator, the coolant must first be removed from the system. After fixing the brackets, the radiator is attached, the connections are fixed with a special key. On the free hole, you need to install the Mayevsky crane, close all the rest with a stopper. Next, attach the battery itself and carefully align. After that, the remaining elements are brought in and everything is connected into a single system, which must be absolutely tight.

How to place batteries
First of all, the recommendations relate to the installation site. Most often, heaters are placed where heat loss is most significant. And first of all, these are windows. Even with modern energy-saving double-glazed windows, it is in these places that the most heat is lost. What can we say about the old wooden frames.
If there is no radiator under the window, then cold air descends along the wall and spreads across the floor. The situation is changed by installing a battery: warm air, rising up, prevents cold air from “draining” onto the floor. It must be remembered that in order for such protection to be effective, the radiator must occupy at least 70% of the width of the window. This norm is spelled out in SNiP.Therefore, when choosing radiators, keep in mind that a small radiator under the window will not provide the proper level of comfort. In this case, there will be zones on the sides where cold air will go down, there will be cold zones on the floor. At the same time, the window can often “sweat”, on the walls in the place where warm and cold air will collide, condensation will fall out, and dampness will appear.
For this reason, do not seek to find a model with the highest heat dissipation. This is justified only for regions with a very harsh climate. But in the north, even of the most powerful sections, there are large radiators. For the middle zone of Russia, an average heat transfer is required, for the southern ones, low radiators are generally needed (with a small center distance). This is the only way you can fulfill the key rule for installing batteries: block most of the window opening.
In cold climates, it makes sense to arrange a thermal curtain near the front door. This is the second problem area, but it is more typical for private houses. This problem may occur in the apartments of the first floors. Here the rules are simple: you need to put the radiator as close to the door as possible. Choose a place depending on the layout, also taking into account the possibility of piping.
Distance from the floor for the office and kitchen
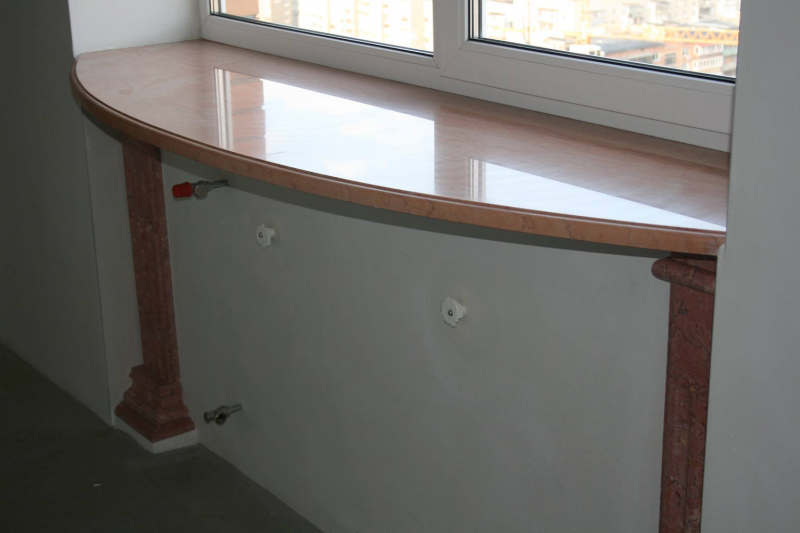
A wider window sill will allow you to use the surface for utilitarian purposes
In such rooms, the placement of the window sill board largely depends on the location of the furniture. In the offices, the main natural lighting of the working space, so the dimensions should be selected to ensure this condition.
Some specially make wide window sills and use them as a desk. On average, the distance from the floor should be about 60-65 cm. These are the optimal dimensions, with them most of the cabinet will be illuminated.
In the kitchen, the window sill is often combined with furniture, increasing the usable area.
In the kitchen, the window sill is often located at a distance of 90 cm from the floor. Most of the kitchen furniture has the same height. With such dimensions, if you place the dining table in the center, it will be fully illuminated.
If you plan to install a bar counter, the height will need to be increased. Under such circumstances, it should be about 120 cm from the floor.
The choice of accommodation in the corridor is not so critical, because no one lingers there for a long time. Landing at the level of 80 cm is considered optimal.
Expert answers
drinker in the thorn bush:
It doesn't matter, circulation matters.
Uncle from the Future...
not regulated..
Grandfather Au:
Ask more specifically
GM:
It is recommended to put under window openings ... otherwise, as much as the design allows. finance and coolant.
BASIL:
if the pipe enters and exits from the back side, then there is no difference, I think it's like a pipe, no matter how much you lead, as long as there is no air
Chuck Norris:
do whatever you want, only under the window there must be a battery. The window is always cold in winter, the battery eliminates fogging of windows (if the dew point is normal)
Vladimir Petrov:
The main thing is that you feel comfortable. And how you want to put
Nature:
low ones are usually attached to the floor. If there is a place next to the window, you can put a vertical one.
like this:
narrow
A.N.G.:
Radiators with a center distance of 200 mm are perfect. Or consider installing underfloor heating
Hero of the day:
CONVECTOR RADIATORS Wall mounted convectors are an alternative to conventional heating radiators, as they provide better heat transfer at lower surface temperatures.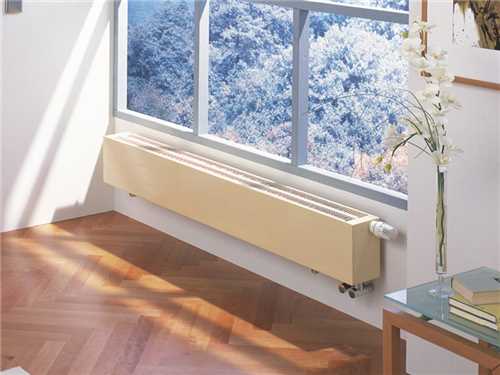
La Nochka:
50 cm is fine. For such a distance, the mass of various low radiators.
Vyacheslav Yaga:
refar 30
Vladimir Petrov:
There are radiators with center distance 350 mm. It is aluminum and bi metal.
Alexander Khlystov:
yes, there are a lot of options: there are radiators with a narrow center-to-center, underfloor heating, floor-standing radiators built into the floor, it’s not a problem to choose from this
Ivanov Ivan:
Don't know where to start or how to make repairs? See useful tips and recommendations about repair, construction, architecture on the website:
Julia Tso:
Warm floors will do.
good spirits:
What type of heating are you interested in? Water or electric? You can put a baseboard heater, it takes up quite a bit of space. You can put an electric if there is no central heating, or a water plinth heater. Alternatively, you can consider vertical radiators. In general, there are a lot of options, look at different types of heating poluchi-teplo /
Artem Kovalev:
Good day. In this case, it would be best to install a convector, so I can recommend you this spbteplodom m center, for detailed information, go to the site already and read, I hope it helped you.
Requirements for the installation of heating radiators
Create an account
Register in our community. It's very simple!
Already have an account? Sign in.
Or sign in with one of these services
Google recommends
Our recommendations
Slab table. Swallows Hoffmann
Sano posted a blog entry in Slab Furniture, Sunday at 8:28 pm , blog entry
I make a table to order, I make a tabletop from elm slabs or, in other words, elm.
In one of the slabs there is a rather extensive and sometimes through crack. I cleaned it, and also filled it with epoxy, it will seal the crack and also level the surface of the countertop.
As an additional blockage from opening a crack, Hoffman swallows are embedded, which not only enhance, but also create a decorative effect.
Someone will say that they spoil the appearance, and they should have been placed on the back of the countertop. But the fact of the matter is that they just can’t be put there because of the features of the countertop.
I personally like these swallows and besides, their presence was approved by the customer of the table.
They were made from scraps of the same tabletop, two dark swallows lay on the light half, and one light one was cut into the dark half of the tabletop.
A brief digression where this piece of furniture came from. For me, this Homphan did not invent anything, but simply took what has been used for centuries in carpentry and not only art. In fact, this is the same dovetail connection.
Let's leave it to the author's conscience, besides, this name swallow or Hoffmann's butterfly stuck to this type of connection, as for example all copiers are called Xerox.
In 1985, while still a student at Harvard University, Thomas Hoffmann developed a system for joining parts made of wood and wood-based materials (MDF and chipboard), which was named "Hoffmann Swallow" and was soon adopted by the entire woodworking industry.
Ceilings yin and yang
ramon posted a topic in Our Works, December 12, 2008 , topic
One of our first works supported the oriental theme with a sakura branch
Suvel birch
Sano posted a blog entry in Slab Furniture Jan 23 , blog entry
Here is a cut of the birch tree that was brought to the workshop, while we are preliminarily planning to make a coffee table.
The very preparation of such material was not the easiest thing, not only was it found in the forest, it was also taken out with difficulty, then the suvel was cut into pieces, but even after that they cooked it for a couple of weeks using a special technology, and then also dried for a couple of years.
In general, this is a whole epic, and in view of the fact that so much has been done only for harvesting and based on the size, the price of such material is already becoming very high. And it's not the table itself.
It is necessary to deliberately approach the work, and with minimal losses in the thickness of the workpiece, make a flat tabletop.
What is it for?
Phoenix posted a topic in Tools and Equipment, January 15 , topic
I suggest to warm up, to whom it is interesting.
Does anyone have any guesses as to what this is for?
Features of installing radiators in an apartment
The above rules for the installation of heating radiators are common for both individual systems and centralized ones. But before installing new radiators in you must obtain permission from the management or maintenance company. The heating system is common property and all unauthorized alterations have consequences - administrative fines. The fact is that with a massive change in the parameters of the heating network (replacing pipes, radiators, installing thermostats, etc.), the system is unbalanced. This can lead to the fact that the entire riser (entrance) will freeze in winter. Therefore, all changes require approval.

Types of wiring and connection of radiators in apartments (click on the picture to enlarge it)
Another feature is technical in nature. With a vertical one (one pipe enters through the ceiling, enters the radiator, then exits and goes to the floor), when installing the radiator, install a bypass - a jumper between the supply and discharge pipelines. Paired with ball valves, this will give you the ability to turn off the radiator if you want (or in an accident). This does not require the approval or permission of the manager: you turned off your radiator, but the coolant continues to circulate through the riser through the bypass (the same jumper). You do not need to stop the system, pay for it, listen to neighbors' complaints.
A bypass is also needed when installing a radiator with a regulator in the apartment (the installation of the regulator also needs to be coordinated - it greatly changes the hydraulic resistance of the system). The peculiarity of his work is such that he blocks the flow of coolant. If there is no jumper, the entire riser is blocked. Imagine the consequences...
Distance from window sill to radiator
Almost all modern radiators and sectional heating batteries amaze with their high efficiency, efficiency, providing such indicators due to air convection, its natural flow through the heat exchange system. It is precisely because of these design features that it is not enough just to buy highly efficient radiators and supply them with a coolant, it is necessary to provide conditions for convection - the natural transfer of heat by air. Let us designate the required distance from the window sill to the radiator, as well as the main installation recommendations, as conditions for maintaining high efficiency.
Window board.
When installing marble window sills in an apartment or a private house, many people focus only on an upper gap of 100 mm, completely forgetting that choosing an overly protruding, wide window sill can not only disrupt the thermal cutoff of cold air, but also change the overall air circulation along the windows. The window sill should not overlap the radiator, creating a kind of niche for the battery, assuming an envelope of heat movement along it. A specific size, unfortunately, cannot be recommended, and the ledge of the board should minimally impede air convection near the radiator and move it away from the glass.
Radiator hanger.
Before drawing the first fixing point on the wall, carefully study the attached instructions for the radiator, because. most manufacturers inform about the recommended installation clearances that ensure high heat dissipation of this particular battery. In the absence of such recommendations, they use the general ones, according to SNiP 3.05.01-85. "Internal sanitary systems":
From the bottom of the window sill to the radiator, the minimum distance is 100mm, since its reduction reduces the heat flow of air. From the floor to the bottom of the radiator, the gap is in the range of 100-150mm, and an increase in the distance increases the temperature difference throughout the room, and a decrease again reduces the intensity of heat transfer
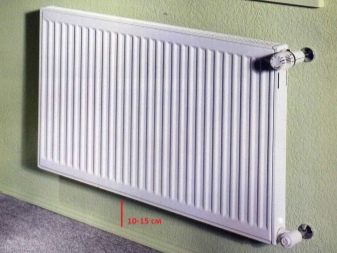
It is also important to take into account the distance from the wall to the radiator, it is made 25-30mm, because. the rear surface is also actively involved in heat transfer
If factory recommendations differ from SNiP, they are guided by the manufacturer who developed the battery.
The efficiency of its operation and the comfortable temperature in the room depend on the correct installation of the heater. For the efficient operation of the heating system, not only the correct assembly, the quality of the equipment and the tightness of the connections are important, but also the observance of the normalized distances from the heating devices to the surrounding structures (floor, walls, window sill)
It is especially important to observe the distance from the battery to the window sill, because obstacles from above can interfere with the normal circulation of convection currents. We will list the norms for installing heating radiators in an apartment and a private house
Today on sale you can find radiators in different versions and from different materials.
They are also divided by installation methods and are of the following types:
- Floor devices have special legs for installation on the floor in the room. In any case, such radiators are installed at some distance from the wall surface and the protruding horizontal structures of the window opening.
- Mounted radiators are mounted on bearing brackets fixed on the walls of the room. Usually they are mounted under window openings so that ascending convection currents create a thermal curtain in front of the window, because it is through the glazing that the room loses the most heat.
In any case, when installing the heater, you must follow the rules for installing batteries. The easiest way to observe the required distance from the wall to the unit is when hanging on the walls, because in this case special brackets are used, which, due to their configuration, provide the necessary clearance. When installing a floor unit, the distance will have to be adjusted manually.
Primary requirements
The distance from the floor to the window sill may vary depending on the type of window. However, GOST is provided for the permissible coefficient at which heat is best retained in the room, and the indicator is 0.55 W / ° С × m². This means that in order to achieve the desired effect, you need to use a plate that will have low thermal conductivity.
An important role is played by the distance of the radiator to the window sill: in that case, there is a SNiP, the main provisions of which require:
The window sill should have a slight inclination into the room - at least 1˚.
There must be thermal insulation between the wall and the structure.
During installation, the height from the floor is taken into account. All window sills must be on the same level.
The length of the window sill should not be more than 3 meters.
The length relative to the window opening is set, with a difference of 4 mm.
The distance required to retreat from the battery to the window sill should not be less than 8 cm.
It is recommended to saw off excess parts at room temperature.
Calculation corrections and advice
The above methods for calculating the number of radiator sections are perfect for rooms whose height reaches 3 meters. If this indicator is greater, it is necessary to increase the thermal power in direct proportion to the increase in height.
If the whole house is equipped with modern plastic windows, in which the heat loss coefficient is as low as possible, it becomes possible to save money and reduce the result obtained by up to 20%.
It is believed that the standard temperature of the coolant circulating through the heating system is 70 degrees. If it is below this value, it is necessary to increase the result by 15% for every 10 degrees. If it is higher, on the contrary, decrease it.
Premises with an area of more than 25 square meters. m. to heat with one radiator, even consisting of two dozen sections, will be extremely problematic. To solve this problem, it is necessary to divide the calculated number of sections into two equal parts and install two batteries. Heat in this case will be distributed throughout the room more evenly.
If there are two window openings in the room, heating radiators should be placed under each of them. They should be 1.7 times more than the nominal power determined in the calculations.
Having bought stamped radiators, in which sections cannot be divided, it is necessary to take into account the total power of the product. If it is not enough, you should consider buying a second battery of the same or slightly less heat capacity.
Many factors can influence the final result. Consider in what situations it is necessary to make correction factors:
- Windows with conventional glazing - magnification factor 1.27
- Insufficient thermal insulation of the walls - increasing factor 1.27
- More than two window openings per room - increasing factor 1.75
- Bottom-wired manifolds - multiplying factor 1.2
- Reserve in case of unforeseen situations - increasing factor 1.2
- Use of improved thermal insulation materials - reduction factor 0.85
- Installation of high-quality heat-insulating double-glazed windows - reducing factor 0.85
The number of adjustments to be made to the calculation can be huge and depends on each specific situation. However, it should be remembered that it is much easier to reduce the heat transfer of a heating radiator than to increase it. Therefore, all rounding is done up.
If you need to make the most accurate calculation of the number of radiator sections in a complex room, do not be afraid to contact specialists. The most accurate methods, which are described in specialized literature, take into account not only the volume or area of the room, but also the temperature outside and inside, the thermal conductivity of the various materials from which the house box is built, and many other factors.
Of course, you can not be afraid and throw a few edges to the result. But an excessive increase in all indicators can lead to unjustified expenses, which are not immediately, sometimes and not always, possible to recoup.
The importance of the gap between the wall and the battery
 The minimum distance between the wall and the radiator is 25 mm, no thermal insulation layer has been laid on the wall
When installing radiators, it is important to create a distance between the heating device and the wall. The outer wall is constantly in contact with the surrounding air, which causes significant cooling.
When the battery is fixed on the inner surface without a gap, most of the heat will be spent on heating the wall material, and not the room. The low thermal insulation properties of concrete walls do not allow creating an optimal microclimate, about 70% of the thermal energy will be wasted. By moving the heating system a short distance, air insulation will be created, which increases the heating efficiency.
There are other reasons why it is necessary to create a gap according to the given standards:
- Creation of a sufficient level of circulation of air masses. If this condition is violated, part of the energy will be lost.
-
When placed close to the wall, the appliance heats up faster. As a result, the radiator may fail.
- Dust and debris will accumulate between the wall and the battery, which also makes heat transfer difficult.
- In the absence of a heat reflecting plate, the radiator will heat the outer walls for nothing.
- If an electric battery is installed, there is a risk of a short circuit. Water heating systems can be susceptible to corrosion if there is no gap.
When installing heating devices, you must adhere to the following recommendations - the greater the power of the radiator, the wider the gap should be. Its specific dimensions are made up of two important parameters:
- Window sill width, niche dimensions. The ability to create a distance depends on these individual characteristics.
- The power of the battery itself.
Conclusion
For the high-quality operation of the entire heating system, it is necessary not only to properly install, monitor compliance with all distances, but also to properly operate the system during the season.
Therefore, in order to avoid any errors during the installation and placement of radiators, it is better to consult with professionals who will explain what's what and help with the installation of the system.
Installation of heating and water supply systems, replacement of heating batteries in the apartment - Company "NPR-Kont"
"NPR-Kont" - distribution of the latest technologies in the field of heating and water supply. Services of installation of systems of heating and water supply. Replacement of heating batteries in the apartment.
2012-02-18 New services on the site
Information about new services of NPR-Kont has appeared on our website.
2010-05-20 Costs for savings
More than 6 trillion rubles are required to be invested in the system of housing and communal services. The program for the development of housing and communal services does not take into account these amounts, so 2.5 trillion. will be attracted from private investment.
2010-03-26 The Moscow government asked Sberbank to reduce the commission for paying for housing and communal services
The scandal associated with the increase in prices for housing and communal services in early 2010 had not yet subsided, when information appeared that heating, gas and water supply would rise in price by another 3% due to the transfer of commission from organizations providing
2010-02-15 In 2010 MIPC will shift 12 km of heating networks
In 2010, 1.5 times more funds will be spent on the repair of heating networks in Moscow. The total length of networks to be replaced is 12 kilometers. It is hoped that these investments in housing communications will reduce heat losses and minimize the impact
2010-01-13 A thermostat in every home will save nature
Automatic thermostats allow you to set a comfortable temperature in each room, thereby reducing fuel consumption. If 500 million thermostats are installed in the European Union, greenhouse gas emissions will decrease by 50 million
For any type of radiators, there are general rules for placing them indoors. There is also a certain sequence of actions that must be followed. The technology is simple, but there are many nuances.