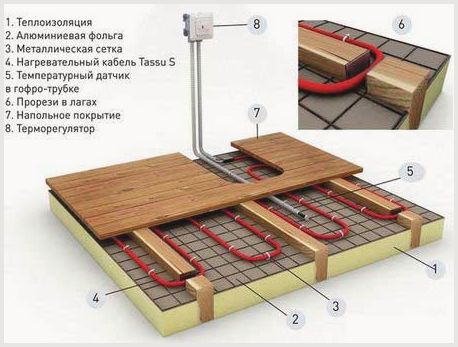
Preparatory work
It is necessary to perform a number of preparatory work before laying pipes for a warm water floor. Moreover, they occupy the lion's share of the labor costs of the entire installation.
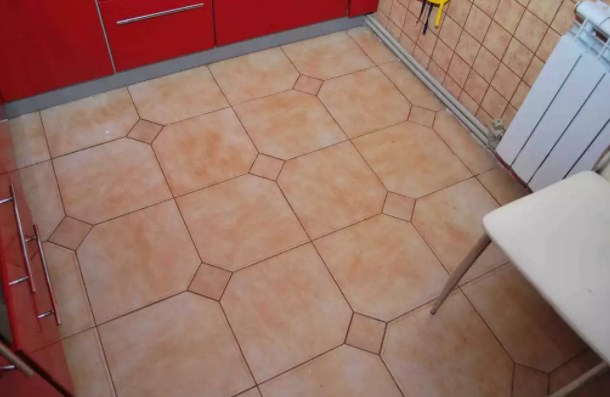
 floor leveling
First of all, the old screed is completely removed. If the base of the surface is not even enough, a new layer of leveling screed is needed. Floor differences should not exceed 7-8 cm. This rule also applies to bulk floors. Minor differences in the floor can be covered with sand, thereby avoiding filling the leveling screed.
A layer of waterproofing is laid on a leveled surface. In this case, it is necessary to make a launch on the walls of 15-20 cm, and overlap the strips of material. The joints of the film are glued with adhesive tape or a special tape.
Following the waterproofing, they begin to install the damper tape around the perimeter of the room. Attach it to the walls. If the warm floor will be mounted from several circuits, a layer of damper tape is also required between them.
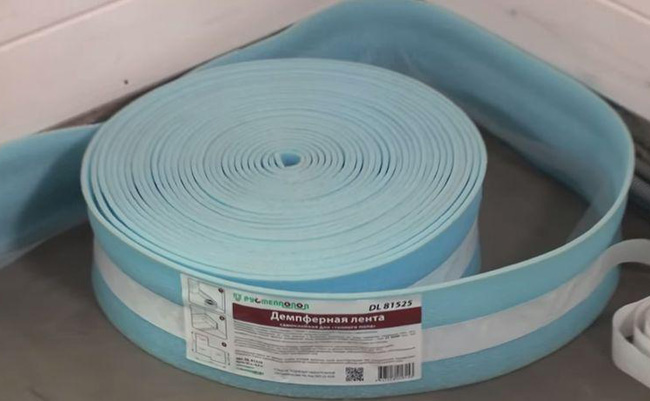 damper tape
Styrofoam thermal insulation boards are laid "butt-to-butt". If the slabs have a slot lock, no further action is required. If there is no lock, the joints of the plates will have to be covered sand-cement mortar and wait for it to dry completely.
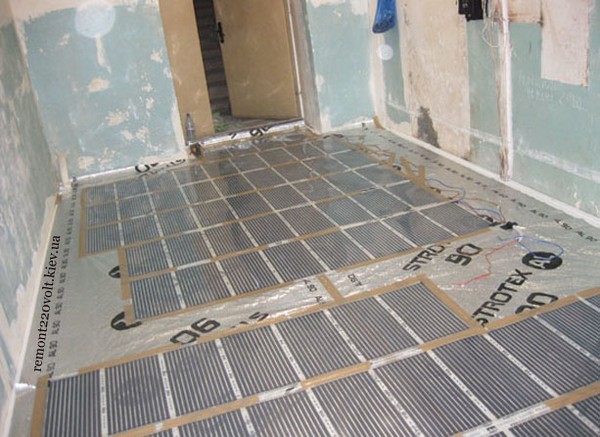
The last stage of preparation for the installation of a warm floor will be the laying of foil mats, which will serve as a heat-reflecting screen.
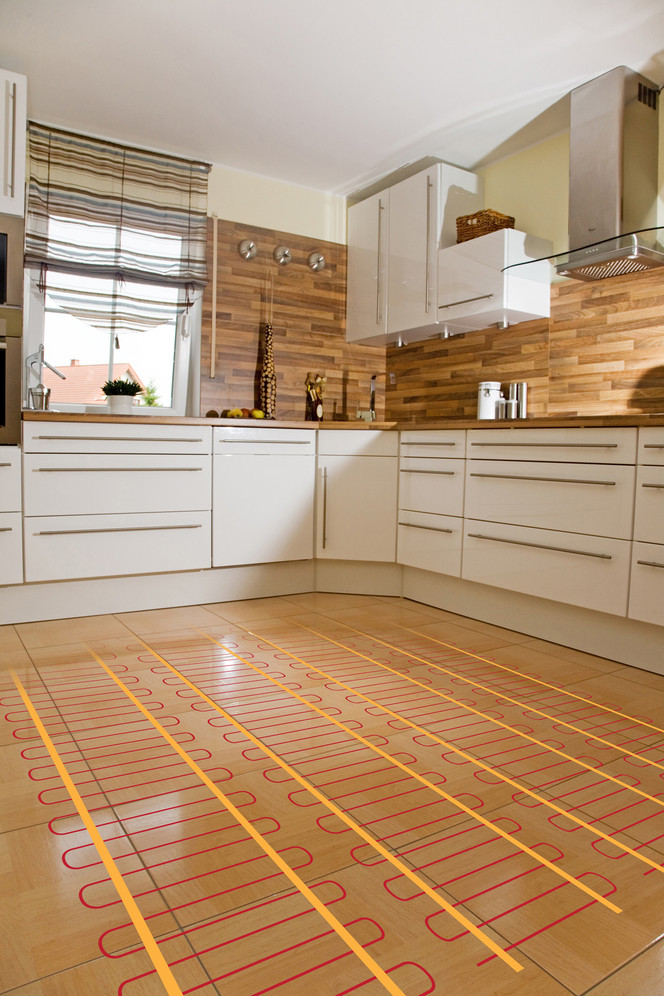
Heated cable floor fixture in the kitchen
Preparing for installation
The adaptation of the cable floor begins with the calculation of the area of \u200b\u200bthe heated surface. For this, a kitchen plan is prepared with the placement of stationary furniture and appliances, however, this does not apply to furniture with legs.
The required area will be equal to the difference between the areas of the kitchen and the surface occupied by these items.
To calculate the length of the heating part, the value of the specific power is multiplied with the calculated value of the area. The specific power value is normalized and cannot be more than 120 watts per m2 when the system is used for additional heating and be more than 150 watts per m2 if it is the main heat source.
In a number of works of the preparatory type, it also makes sense to note the demolition of the floor, which is already outdated, with further leveling of the base. If necessary, you can use specialized mixtures for leveling.
The next step is to prepare a place to install a thermostat. Using a perforator, a niche is prepared in the wall, necessary for the dimensions of the mounting box of the device, and further down the wall surface and the floor, a strobe for cables - power, sensor, etc. Into the channel along the surface of the base parallel to the laying direction TENA lay a corrugated tube - a place for the sensor. The plugged end of the corrugated tube should be approximately 6 cm from the wall surface. The strobe is sealed with plaster.
Cable laying
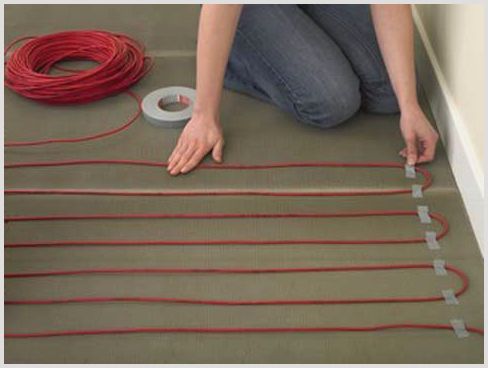
A reflective heat insulator is laid on the cleaned and leveled black floor with the foil side up, gluing the joints with tape. A tape for installation work is attached to the insulation, with the help of which the heating sections will be fixed. For this, specialized brackets are provided on it. The tape is attached to the base using dowel-nails. Cable laying is performed in the same way, smoothly, without kinks and intersections. After that, the parts are poured with a concrete screed with a layer of 3–5 cm. After the final curing screed a decorative coating is applied according to standard technology.
The first switching on of the heating system is done after at least 28 days - the period required for the final hardening of the screed.
Floor with underfloor heating
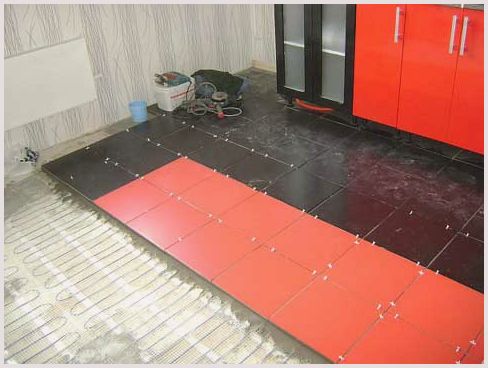
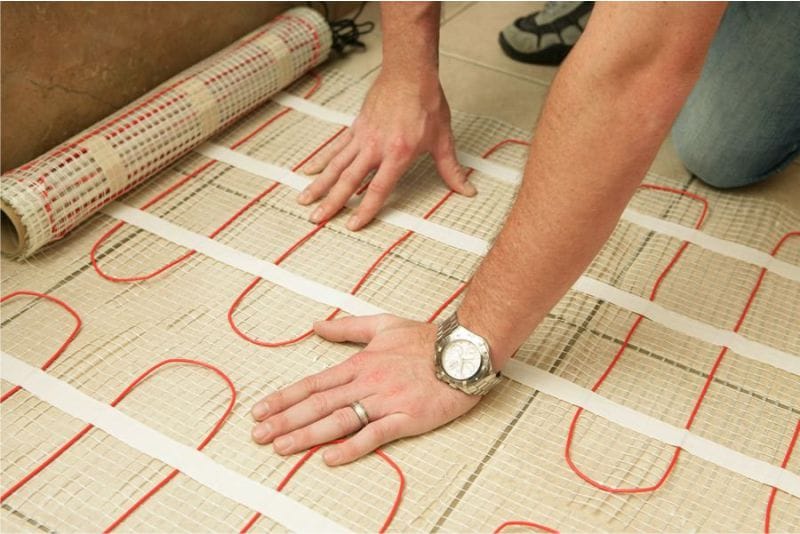
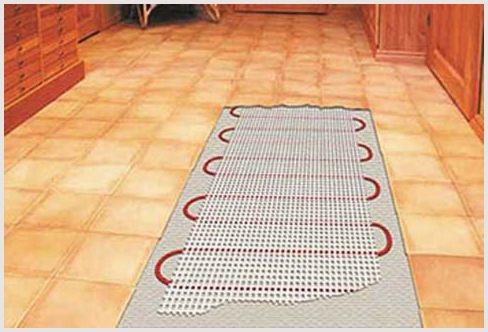
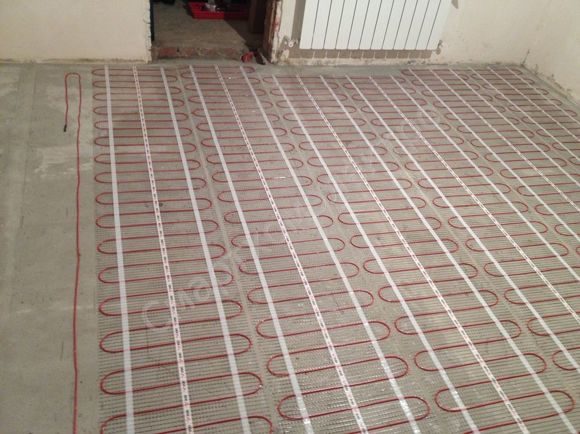
Tiles are a special material, because due to their high heat conductivity, they are suitable for any type of underfloor heating.Thermomats are recognized as the best option for heating a tiled floor. The mat used for heating is a fiberglass mesh on which shielded parts made of TENA are fixed. In the process of manufacturing the latter, a technique is used, thanks to which hot and cold pieces are combined without the use of couplings. This option ensures complete reliability of the sections.
The thermomat device is performed in stages:

Make up the layout of thermomats
At the same time, it must be taken into account that electrical heating parts are not located in the places where furniture is placed.
They select a place for the thermostat, where they equip the junction box. Then a groove is punched in the wall and on the base, along which the connecting wires and the sensor will be laid.
The floor surface is prepared: third-party objects are removed, debris, if necessary, is leveled and carefully primed with a good penetration acrylic primer
The primer is applied using a paint roller.
Thermomats are rolled out in accordance with the developed scheme, starting from the thermal converter, and the system is calibrated for working capacity.
Attention
If necessary, for example, when going around corners, the fiberglass mesh is carefully cut so as not to damage the heating component. These actions require special care, as there is a risk of damage to the heating cable. When turning the mat, the mesh must remain at the bottom. It is impossible to allow crossing or overlapping thermomats one on one.
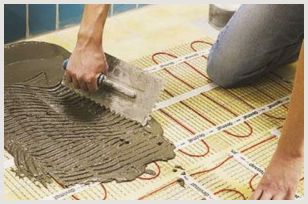
Installation of tiles on the mat is carried out according to the standard technology for working with tiles. When laying tiles, it is best to use plastic spatulas - they are much safer for insulating a thermal cable.
There should be no empty spaces in the tile adhesive, because air bubbles significantly reduce the conductivity of floor heat.
Grouting and gluing are best done with elastic mixtures that are resistant to thermal deformation.
The system is started after the final drying of the glue.
Now thin infrared floors are becoming more and more popular, the laying of which is reduced to a few easy procedures, similar to the installation of thermomat floors. An indispensable requirement for the operation of this variation is the laying of reflective thermal insulation to reduce the expected heat loss.
Pros and cons of underfloor heating
The advantages of underfloor heating are quite obvious. To begin with, it should be canceled that cold air, as everyone knows, is concentrated in the lower part of the air layers, so heating it by just a few degrees with a warm floor will certainly lead to a noticeable warming in the entire room.
An important advantage of underfloor heating is its alternative as a source of heating. Such a system can be installed independently of traditional steam heating. At the same time, the temperature regime can be easily adjusted separately for each room. This function is especially indispensable in those periods when there is no heating yet or no longer exists. It is also convenient that you can turn on the heating selectively in any room, plus it is possible to set a heating timer for any day and hour.
Another indisputable advantage of a warm floor is a distinctive feature of the concept of a warm floor - its ability to prevent high humidity in the room. This feature becomes especially relevant in those rooms and premises where there is often high humidity. Usually this is a bathroom, bathroom, vestibule, hallway, basement, etc. In such rooms, only a floor heating system can give the best possible drainage.

If you understand the shortcomings more specifically, the result may surprise. You can start with the first minus - electromagnetic radiation.This drawback is more of a myth than the truth, because it arose in those days when the underfloor heating system was considered a rarity and was carried out mainly only by self-taught masters. They usually had no idea about quality standards and GOSTs. If we talk about modern electric floor heating systems, then they undergo regular test checks, where it is absolutely proven that the radiation emanating from the warm floor is no higher than in ordinary electrical wiring in the walls.
If we consider such a disadvantage as the dryness of the air in the room, then we should recall the traditional radiators, which dry the air even more. In such cases, it is necessary to regulate the level of humidity in the room not with a warm floor, but with air humidifiers specially designed for this purpose.
Advantages are obvious
An ordinary apartment is supplied with heat through central heating, which is the minimum necessary for a dwelling. Somewhere this is more than enough, but somewhere they don’t even feel it. And then radiators, heaters and other heaters are taken into the light of God, which make up the second front of heat. But with all these tricks, it is often not possible to regulate the temperature in the room to a comfortable one. Having overdone with the temperature, we will have to open the windows in the thaw in order to somehow ventilate the room. So it turns out - sometimes too hot, sometimes too cold.
This is where the work of a warm floor comes to the fore, which, with the help of a thermostat, will allow you to regulate the temperature in the room to exactly the temperature that is comfortable for you. Using the sensor, you can find out the temperature of the floor and the air in the room, and the thermostat will help you adjust the daily temperature cycle. In the evening and at night, you need a higher temperature, and during the day, when there is usually no one in the apartment, you can reduce the heat to a minimum.

It so happens that other sources of heat do not warm our legs, which should always be warm. But the warm floor primarily affects them. As a result, even a point effect on the feet alone could be enough to make you feel protected. And here is also excellent protection not only for the legs, but for the whole body. If the legs are well warmed, the temperature of the whole body will be in the right range. And at the same time, you don’t have to hold your legs over some kind of heating unit to warm them up, and then freeze them again until you unlearn somewhere away from the heat source. You just walk on the floor and get warm.
Unlike other heat sources, this type of flooring is not spotty.
The floor is heated over the entire area, and due to the good level of heat transfer, the entire room is evenly heated. By the way, this will also save on electricity.

Way out
But not so long ago (the time frame is of course very relative, but still) humanity learned about underfloor heating, which became a real breakthrough in the field of construction and finishing works. Installed such a floor - and with much more enthusiasm you can go to the bathroom with bare feet, let the child play on the floor in his room and cook dinner on in one pair of socks. And all this without fear of catching a cold and earning a lot of trouble. Warm floors are so attractive and pleasant that they can even make you sit and lie down on this floor, if you are tired of using chairs, armchairs and sofas for this purpose.

Electric underfloor heating pitfalls
As a rule, even the very first frosts can show that, in proportion to the decrease in temperature outside the window, the central heating radiators are also cooled. The way out of this situation is the installation of a classic electric floor heating. You can install it even in a new apartment, even in an old house.But, of course, it should be remembered that its installation is still better to carry out at the stage of repair, so as not to dismantle the old floors.
The installation technology includes, first of all, the laying of a heat-insulating layer on the floor, after which - a separating screed, and on it - the installation of a floor heating system. It looks like an electric cable laid out in a certain step. A step is usually called the distance between its zigzags. An ideal step is considered to be a step equal to 10-15 cm. A screed is poured on top of this floor, and a floor covering is placed on it. It looks simple, but it's only at first glance.
In the case of legal actions, you should call a company that has the appropriate license from the Ministry of Construction. Perhaps this fact can be attributed to the disadvantages of a warm floor, but only because of the duration of the entire permit procedure. This problem can be solved, of course, at the expense of "left" firms that will install a warm floor without paperwork. But this is already a double-edged sword.
First of all, such firms offer customers only the installation of the cheapest heating systems, often Chinese ones, which do not even have a quality certificate. This will mean that your warm floor will not meet state standards, and will most likely fail after a certain period of time. The second serious disadvantage, which follows from the previous one, is the fact that hardly anyone will undertake to repair your equipment.
Screed for warm floor
When the warm floor is mounted, it is poured with a layer of screed on top. Do it on pipes under pressure. So they can easily withstand a significant load.
Concrete for screed is prepared with the addition of fine crushed stone or profile mixtures are used. The grade of the mortar is preferably not lower than M300, it should not delaminate and set quickly.
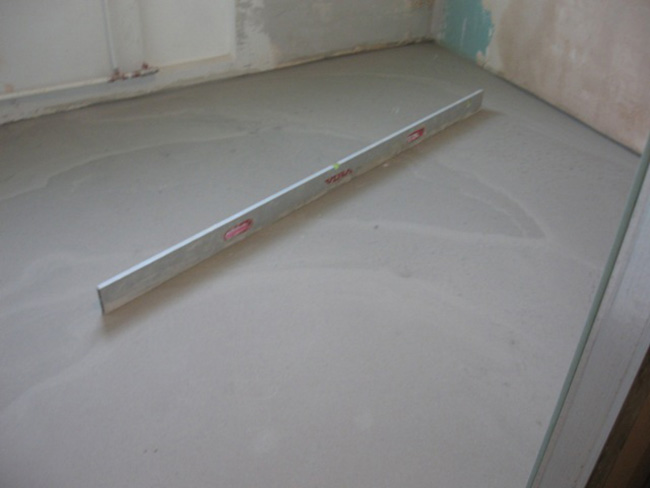
 Screed on a warm water floor
A screed on a warm floor is performed in the following order:
- Metal beacons are fixed to the solution by the level with a step suitable for the size of the existing rule.
- The prepared solution is poured in parts onto the floor, starting from the far wall. With the help of the rule, it is stretched in the direction "toward itself", leveled, lightly rammed with tapping movements.
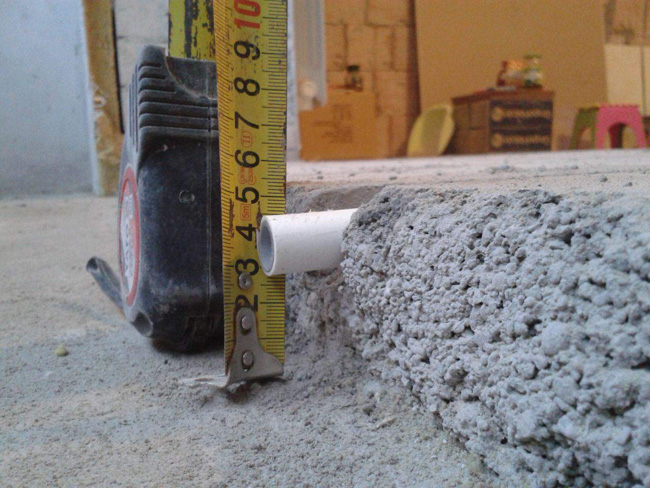
Attention! The thickness of the screed above the pipes must be at least 30 mm. This will allow the concrete to heat up evenly.
The maximum allowable thickness is 100 mm.
The next day after pouring, the beacons are removed, and the grooves from them are sealed with a garco (a semi-dry mixture of sand and cement). On the same day, all fill flaws are cleaned - sagging, traces of the rule, etc. This is done using a conventional wooden floor polisher.
 Underfloor heating under laminate
The screed will fully “ripen” no faster than after 4 weeks. Until this time, the new heating system cannot be turned on. This is fraught with the appearance of cracks in the screed. Forcibly drying the screed with heating is strictly prohibited. Remember, the longer concrete dries, the stronger it becomes.
Now it's up to the flooring and you can enjoy the warm floor in a new cozy apartment.
It is quite possible to install a water heated floor with your own hands in an apartment if you have minimal building skills and responsibly approach the study of all the nuances and subtleties of the process.
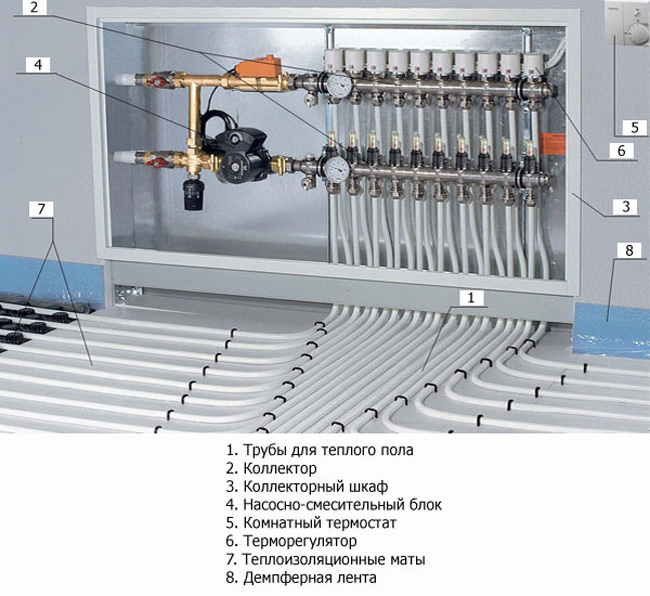
Collector assembly
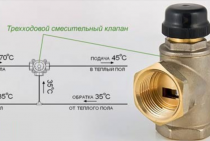
Before piping, a manifold must be installed. It is selected based on the number of circuits and the desired possibility of heating control.
 Collector assembly
The simplest collectors are equipped with only shut-off valves. Regulation of their work and adjustment of heating parameters is almost impossible. For these purposes, collectors with additional control valves are selected.
Attention! The collector must be equipped with an air vent valve and a drain pipe.
The collector is installed in a special metal cabinet, the dimensions of which are selected individually. The standard thickness is 12 cm, which allows you to "drown" it in a wall niche.
The main rules for installing the collector:
- It is forbidden to deepen the manifold cabinet into load-bearing walls.
- The cabinet is positioned so that it is equidistant from all circuits. If the contours are of different lengths, the cabinet is brought closer to a longer one.
- The cabinet is raised above the floor level for the operation of the air vent system. Enough space must be left under the cabinet to accommodate and bend all pipe outlets.
For details on the assembly of the collector and its operation, see the video below.
You can do without a warm floor if
- Your kitchen has wood or linoleum flooring. In this case, there can be no question of any heating. The high temperature of the heating system will adversely affect the flooring, the wood will dry out, and linoleum, due to its chemical composition, will emit phenol, which is harmful to human health;
- The kitchen faces south. This arrangement will allow the sun's rays to warm the room and maintain a comfortable temperature without additional heating systems;
- You have just completed a renovation. Laying a warm floor is a dirty and dusty business. The work requires the complete removal of the top deck and floor preparation. If you did not think about laying a warm floor in advance, at the planning stage of the repair, then after it is completed it is unreasonable to start repair work again and spoil the coating;
- The house has old wiring. Since old wiring may not be able to cope with the load, experts strongly advise replacing the entire electrical network in the house before laying a warm floor. If this is not possible now, then it is better to refuse the system of additional floor heating in the kitchen.
As you can see, there are enough arguments for and against laying the underfloor heating system. Weigh each of them and decide if you and your kitchen need such a floor?


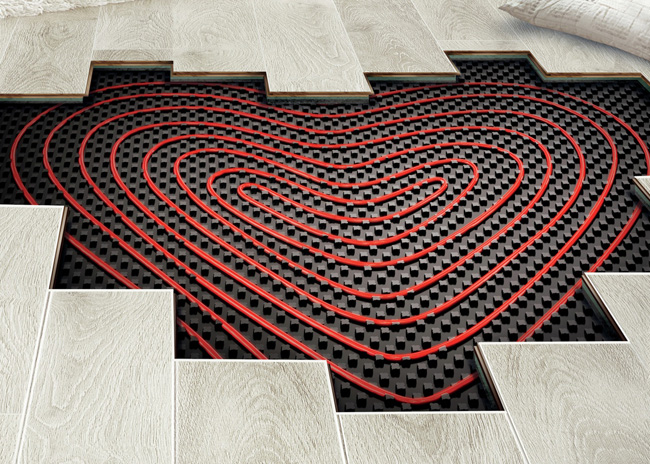
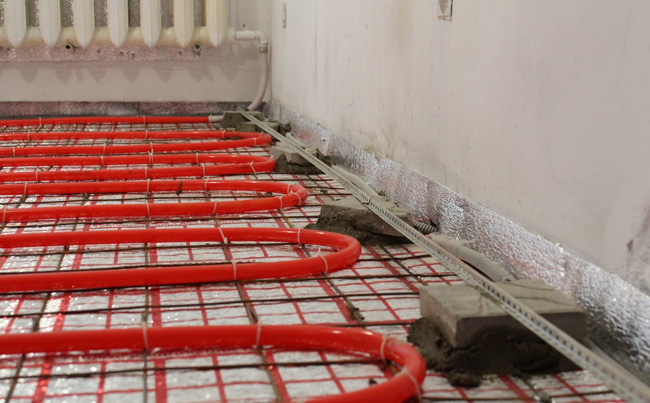
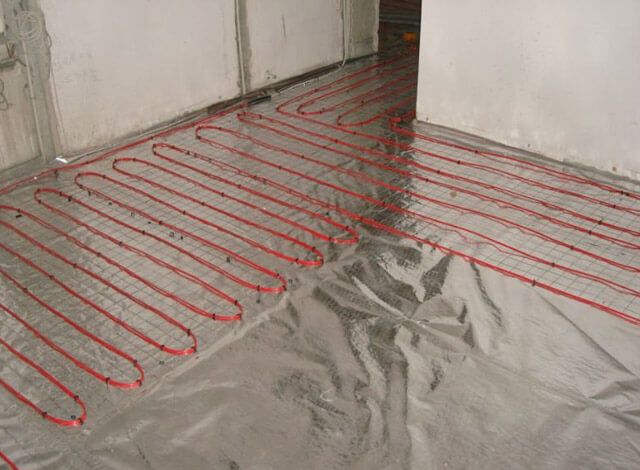
Pipe laying
Before installing the pipes, a reinforcing mesh is laid on the prepared surface. The size of its cells should correspond to or be a multiple of the step size for the convenience of further work. The cross section of the rods is 3-5 mm. Between themselves, the fragments of the grid are fastened with wire.
 Pipe laying
The layout of the pipes of the water floor, oddly enough, is the easiest stage in installation. They start it from the street wall, stepping back 10-20 cm. Next, the pipes are laid according to the prescribed scheme. Pipes must be bent carefully so that stretch marks (white transverse stripes) do not form on them, otherwise they will be unsuitable for further operation.
Attention! It is impossible to unwind the entire bobbin of the pipe at once. They do this gradually, as the installation progresses .. When all the pipes are laid according to the scheme, they begin to fix them on the reinforcing mesh
To do this, use nylon clamps with a frequency of 30-40 cm
When all the pipes are laid according to the scheme, they begin to fix them on the reinforcing mesh. To do this, use nylon clamps with a frequency of 30-40 cm.
You can see the process of laying water pipes for heating in more detail on the video.
By means of clamp fittings, the ends of the pipes are connected to the supply and return pipes of the collector, after which a leak test is carried out. To do this, the system is filled with water and, using a household pump, a pressure of 5-6 bar is created inside the pipes. When checking the tightness of the system, all air valves on the manifold must be removed, and the holes under them must be plugged. They are not designed for high pressure and may fail during testing.
Pros of electrical systems
These systems are highly efficient, as they provide heating to the surface of the entire floor.
The use of screened cable with good multi-layer insulation makes electrical heating completely harmless.
Due to the temperature adjustment of the floor, you can reduce the consumption of electricity and save money due to this.
Underfloor heating in the kitchen guarantees a comfortable indoor climate, as the temperature at the feet is higher than at head level. In addition, the level of humidity in the room is regularly kept at the required level, the presence of dust in the air is reduced.
Underfloor heating should be installed if
- The kitchen is adjacent to the balcony. In this case, the underfloor heating system will provide a comfortable microclimate in both rooms. You will be able to regulate the temperature level in the room on your own, and even the balcony glazing of average quality will not interfere with maintaining the optimal mode in the room;
- The child lives in the house. Children spend about 80 percent of their time on the floor: playing, crawling, lying down, etc. And if in the living room and bedroom there is often a carpet or rug on the floor, on which the child can comfortably sit, then in the kitchen the floor is usually bare. This is where the warm floor will come to the rescue, it will protect the health of the household and protect children from hypothermia and colds;
- It is planned to finish the floor with ceramic tiles. One of the most common kitchen flooring options is tile. It is no secret that this material is beautiful in appearance, practical in everyday life, but unpleasant to the touch due to its coldness. If you and your household do not like to walk around the house in slippers or socks, then underfloor heating is the perfect solution to the problem of ceramic flooring in the kitchen;
- The apartment is located above the basement. If you live in an apartment building, then you probably know that basements are not heated additionally. Therefore, the inhabitants of the first and second floors often suffer from cold in their own dwelling, coming from below. The underfloor heating system will partially help to solve it. Experts recommend installing it not only in the living room or bedroom, but also in the kitchen, because. the cold will spread from there too;
- The main heating system is defective. It is not uncommon for cases when the central heating system was carried out poorly, and because of this, it is cold in the apartment in winter. In such a situation, the insulation of the kitchen floor will be an excellent alternative to the heating system, its laying will cost many times less than a major overhaul and replacement of pipelines and batteries.
After these advantages, the underfloor heating system seems to be an indispensable thing in every home. But in contrast to all the advantages, arguments can be made when the warm floor loses its relevance.


How to choose the right coverage
First of all, you should focus on the type of the selected room where you plan to install a warm floor under the tile. The selected material must have a number of characteristics, such as resistance to possible deformations, durability, strength and fire resistance. Maintenance of the coating should be minimal, and it is recommended to choose a non-slippery surface. This will help to reduce the possible risk of injury in the future.
Installation can be carried out on such coatings:
- bulk;
- cork;
- tiled.
self-leveling floor
It is considered to be the main competitor of ceramic coatings. It is quite environmentally friendly and functional, while not afraid of temperature changes and mechanical damage. Elastic, which will allow you to drop the dishes without harm to the latter. Such a coating has a considerable operational life, which is calculated in decades. At the same time, the choice of material used is quite extensive. The main disadvantage can be called the cost, and not every master can carry out the installation on their own.
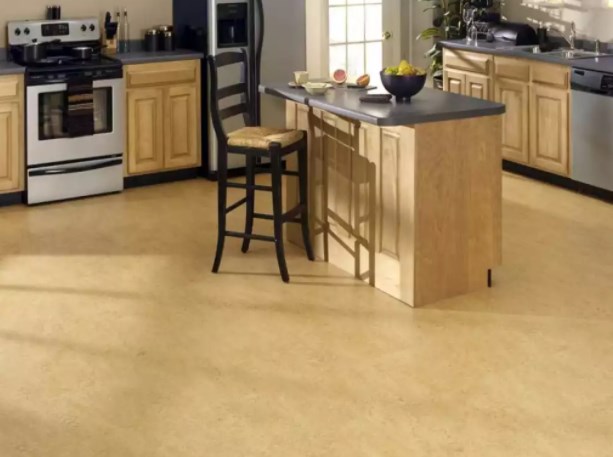
cork floor
It is made from a cork tree, or rather from its bark. Able to give the room the necessary comfort, like any other natural material. Such material will not only keep the heat in the room, but also positively affects the well-being of a person. Does not belong to the category of materials containing allergens. Repels moisture and practically does not burn.Often used as high-quality and most importantly cheap sound insulation. It does not absorb odors, so you can safely use it in the kitchen. Expensive breeds will cost a lot, so it is better to entrust their installation to specialists. If cracks form at the time of installation, then the integrity of the coating will be violated, and moisture will penetrate into its base, which will eventually destroy it.
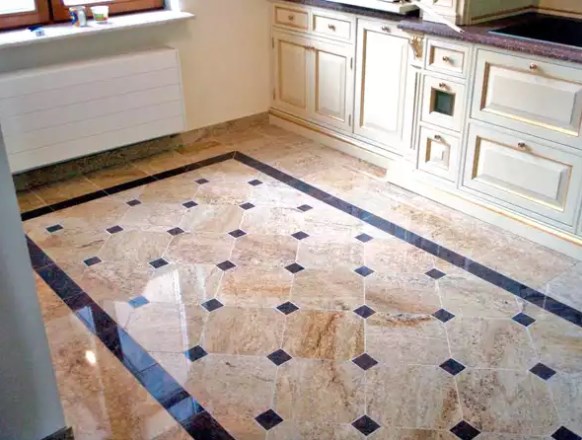
Tiled floor
Using tiles or ceramics can be prestigious, because its cost can be sky-high. Experienced craftsmen are able to lay out whole pictures, making the tiled floor almost an exhibition or museum exhibit. An amateur can also do its styling, because it is not necessary to make a masterpiece, the main thing is to lay out the material used evenly. The top layer of the floor covering is resistant to shock, sunlight and household chemicals. Choosing the right color is not difficult, as its diversity can amaze everyone. The disadvantages include a rather slippery surface, and it will be possible to immediately say goodbye to the fallen dishes. If it is not heated, it will always be cold. For installation, a clean and even base is required.