Insulation of a wooden house for siding
 follow the instructions. fill with tow
The walls are treated with a moisture-proof agent and a fire-retardant primer, followed by drying. Facing the house with siding is carried out at any time of the year, provided that the air temperature should not be below 10ºС, since the siding crumbles in the cold when cut.
To work, you will need the following tools:
- saw blade with fine teeth;
- square;
- metal scissors;
- hammer;
- building level;
- screwdriver;
- roulette;
- stairs;
- Bulgarian.
The technology of facing a wooden house with siding, in addition to panels, involves the use of the following elements:
- starting rail - mounted under the first row of panels;
- J-panel - necessary when installing spotlights and for edging vertical sections;
- H-profile - used to connect panels;
- wind panel - mounted on the ends of the roof to protect them from the wind;
- internal and external corners - used for sheathing the corners of the house;
- platbands and ebbs - used for decorative design of windows and doorways.
The technology of warming a wooden house and siding is not complicated:
- a vapor barrier film is attached;
- heat-insulating material is laid in a wooden crate;
- cover the thermal insulation with a windproof film;
- installing panels.
Before sheathing the house with siding with insulation, it is necessary to carry out a vapor barrier, which we attach to thin slats with a section of 30 × 20 mm. The vapor barrier film cannot be fixed directly on the walls. Next is the installation of the crate. It is made from dry wooden slats, which are treated with an antiseptic. Reiki are placed in increments of 1-2 cm less than the width of the insulation plate, their thickness depends on the insulation material. Then, heat-insulating material is laid in the crate, which is covered with a windproof film. After the completion of thermal and waterproofing, they begin to fasten the rails on which the panels will be mounted. The slats are placed after 30-40 cm.
Sheathing the house with siding is carried out in the following order. The installation of panels begins with the installation of a drainage system that protects the basement of the foundation from water and snow. Install the drainage system strictly according to the level, since the quality of the installation of the panels themselves depends on it. On top of it, a starting rail is attached to the crate with self-tapping screws. The screws are screwed in such a way that there is a gap of 1 mm between the cap and the mounting plate.
The first panel is applied to the starting rail and snapped into the lock until it clicks. The panel is fixed by screwing it with self-tapping screws in the center of the holes to the crate. And so on, carry out the installation of panels. After sheathing the walls with siding, they begin to install its additional elements. Internal and external corners are mounted, windows and doors are trimmed with J-slats or platbands, and finishing strips are attached under the roof. From below, a special perforated bar is attached to the visors, into which spotlights are inserted.
We have provided information on how to insulate a wooden house from the outside, what heaters are used. From this information, we can conclude that proper insulation of the house will give it a comfortable microclimate, reliably protect it from the effects of precipitation, and since the insulation of a wooden house from the outside provides for surface cladding, thanks to it the house will have an aesthetic appearance.
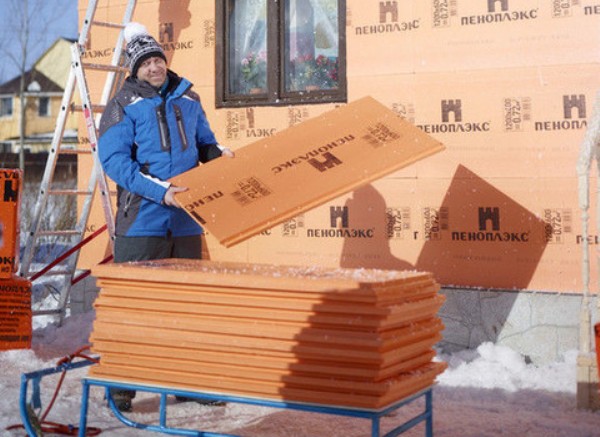
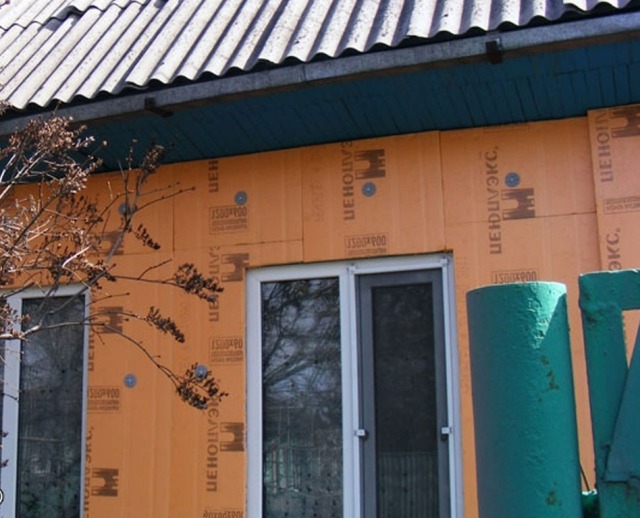
Characteristics of penoplex
This is the name of extruded polystyrene foam. It is the most productive heat insulator due to its qualities:
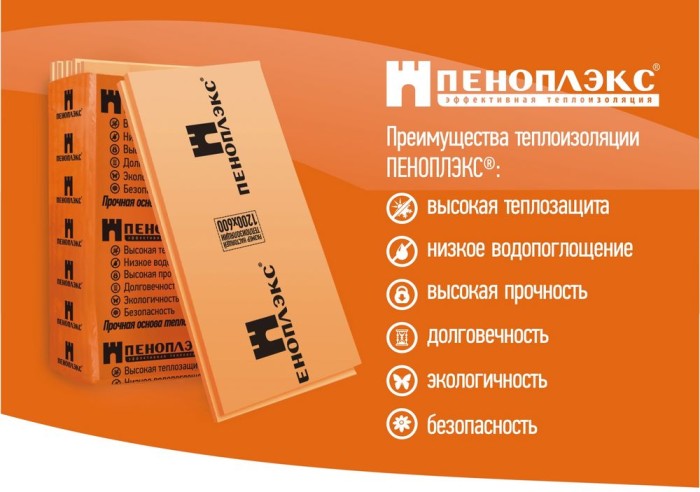
- low moisture absorption, its cellular structure practically does not absorb water;
- high thermal efficiency allows the use of a smaller thickness of the insulating layer;
- fire safety, expanded polystyrene does not burn and does not emit toxic substances;
- ease of installation;
- good strength and resistance to mechanical stress;
- resistance to the formation of fungi and mold.
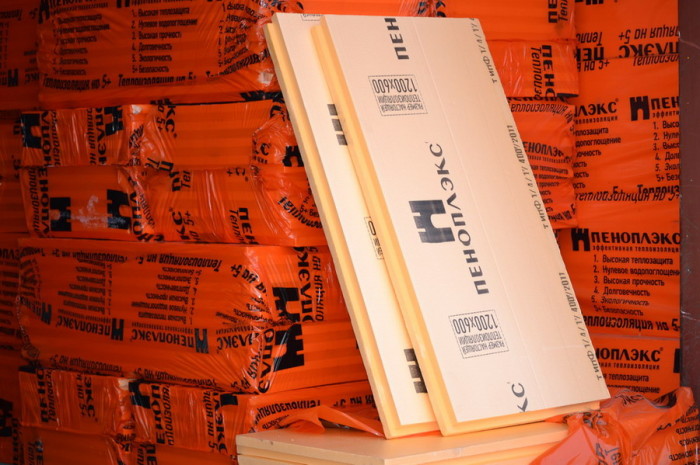
Types of extruded polystyrene foam
Penoplex can have a different density, its value is in the range of 25.0–45.0 kg / m³. Depending on this indicator, the material has a different purpose and is divided into five types:
- the first - for the roof (28.0–33.0 kg / m³);
- the second - for the foundation (29 kg / m³);
- the third - for walls (25 kg / m³);
- the fourth is universal (25.0–35.0 kg/m³);
- fifth - industrial (45.0 kg / m³).

Each of them has its own purpose depending on the name. The universal option has collected all the best indicators, so it can be used for any part of a wooden building.
Material selection
Before you start insulating work with your own hands, you need to choose the right insulator. The choice is determined by three main indicators:
Density
For work on a wooden building, a heat insulator is suitable, which has a density value of 25 kg / m³. As the density increases, the strength of the material also improves. But the main indicator is still thermal conductivity. With an increase in density, the thermal insulation qualities of the material will decrease.
The thickness is calculated depending on the location of the house and climatic conditions. To clarify this indicator, it is better to contact sales consultants. Consider the advantages of using and equipping a wooden building with foam insulation.
Styrofoam insulation technology
To insulate a wooden house with polystyrene foam, you will need:
- Styrofoam;
- boards 40 mm thick;
- diffusion membrane;
- staples;
- stapler;
- nails;
- hammer;
- saw and axe.
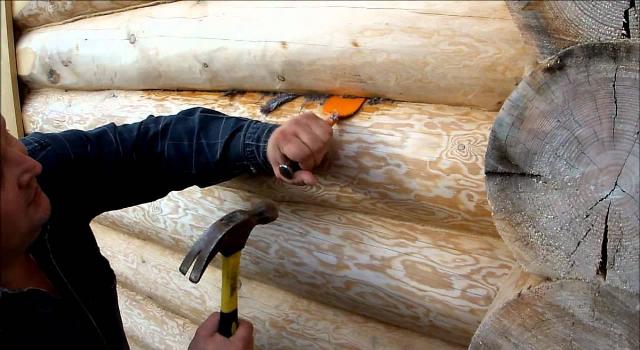
Before warming the house, first of all, check the joints between logs or beams. If the insulating material does not fit snugly, it must be laid again. Then the boards are vertically attached to the walls so that the distance between the centers corresponds to the width of the foam board. To do this, it is necessary to accurately maintain the fastening step of the boards, which will be equal to H + S-5. H - means the thickness of the board; S is the width of the foam sheet; 5 mm - the value that provides the tightness of the foam during installation. The main thing is that all boards are in the same vertical plane.
Further, wooden slats are nailed into the fixed boards in the center, the height of which corresponds to the thickness of the foam board, and the distance of the fastening of the rails should be 0.5 cm less than the width of the foam sheet.
Styrofoam plates are laid from below and fit tightly into the frame without the formation of cracks. If the plates are not laid tightly, they are fixed with foam wedges or nails.
After laying the foam plastic in horizontal stripes, a diffusion membrane is laid from top to bottom, which overlaps the foam plastic joints by 10–15 mm. The membrane is attached with a stapler to the frame, and the joints are glued with ordinary adhesive tape. When laying waterproofing material, read the instructions for its use.
Then comes the final stage - sheathing the house with facing material. The lining material can be whatever you choose.
The importance of insulation
Due to the fact that building technologies for log houses came to us from Western countries, where, as you know, winters are much milder, houses made of this material turn out to be quite cold for our conditions. Although timber 150x150 is an inexpensive material, and this explains its popularity, but, on the other hand, if you live in such a house without high-quality insulation, then in frosty winters you can “compensate” this savings with huge electricity bills and go broke on heating.
Therefore, it is a necessity to insulate houses from a bar 150x150.But after the work done, it will be possible to enjoy a wonderful warm house for many years, and get by with a short (and therefore profitable) heating of the room even in cold winters. But how the facade of the house is insulated with modern materials, this information will help to understand.
Varieties of materials for external insulation
 strength properties, destroying them.
Mineral wool is a fibrous heat-insulating material on a synthetic basis. Contains formaldehyde adhesive.
Advantages:
- has a high temperature threshold;
- does not melt or burn.
Flaws:
- does not protect the tree from mold;
- releases toxic substances at high temperatures.
Glass wool is a type of mineral wool that contains components such as quartz sand, recycled glass.
Advantages:
- has strength;
- does not burn.
Flaws:
- melts at high temperature;
- releases toxic substances;
- encourages fungal growth.
Penoplex is a heater with a cellular structure, and is made of expanded polystyrene.
Advantages:
- strength;
- retains heat well;
- low moisture absorption;
- environmental friendliness;
- not subject to decay;
- fire resistant;
- ease of installation;
- durable.
Flaws:
- easily destroyed when exposed to solvents;
- difficulty in fitting and cutting;
- vapor tightness is often a disadvantage rather than an advantage.
Styrofoam - insulation consists of a large number of balls filled with air.
Advantages:
- excellent sound insulation;
- ease of installation;
- withstands temperature changes;
- density;
- not subject to swelling and decay;
- durability.
Flaws:
- low vapor permeability;
- not fire resistant;
- is not environmentally friendly.
Ecowool is a modern insulation material, made of 80% cellulose and 20% antiseptic, a substance that protects it from rodents and mold. They can insulate any room.
Advantages:
- reliability;
- inedible for rodents;
- prevents the formation of mold and fungi.
- low thermal conductivity;
- environmentally friendly.
Flaws:
- installation requires special equipment;
- undergoes shrinkage;
- smolders when exposed to high temperatures.
There are other heat-insulating materials that can be used to insulate wooden houses from the outside.
The choice of insulation
On which heat-insulating material to stop in this case, we will consider.
Specialists-builders advise choosing one of the following types of material for external insulation of houses made of timber 150x150:
But how the basement of the foundation is insulated from the outside, and which insulation is the best, can be found in this article.
Each of these heaters has its own characteristics, pros and cons. Let's dwell on this in more detail.
Styrofoam
One of the most convenient, and at the same time - inexpensive options for insulation. But it also has disadvantages, the main of which is a low coefficient of thermal conductivity. Therefore, the foam will not be able to make the house really very warm. You can, of course, lay the foam in a thick layer, however, this will not significantly save the situation. The thing is that this insulation is more suitable for brick or stone houses, but it is not very good for wooden buildings.
Styrofoam does not let air through - this is its main problem. A wooden house must "breathe", even if it is built of timber. Otherwise, the walls of the building will begin to mold, rot, deteriorate. As you understand, after years the walls of the house will already be significantly damaged. After all, the formation of winter condensation under a layer of insulation is inevitable, and this moisture will not be able to go outside.
But what is the procedure for warming the foundation with penoplex, and what you should pay attention to, is set out here
Mineral wool
Unlike foam plastic, this soft material retains heat remarkably in a wooden house, therefore it is the best choice for insulating buildings made of 150x150 timber. In addition, mineral wool also provides excellent breathability, thanks to which the wooden house “breathes”.
Thanks to this, a healthy microclimate is ensured inside the building. It will also be useful to learn about how the foundation is insulated with polystyrene foam with your own hands.
Penoplex
A modern material created on the basis of polystyrene, but devoid of the shortcomings of the latter. The correct name for foam is extruded polystyrene foam. It is made by foaming the original raw materials. As a result of processing, a light, porous material is obtained, completely permeated with air bubbles. Penoplex allows the house to breathe, so it is great for insulating buildings from a 150x150 bar.
This material is quite expensive, however, its technical characteristics are so high that more and more people choose penoplex to insulate their homes. But here is how the bathroom is insulated from the inside in a brick house, and what materials are best used, you can read here.
Material selection
In order to properly insulate the facade of a wooden house, it is necessary to carefully consider the choice of heat-insulating material.
Styrofoam finishing is one of the simplest options, moreover, its cost is somewhat cheaper than analogues made from other raw materials. But it has several significant drawbacks that negatively characterize it in our case. This is a low vapor permeability coefficient, as well as the fact that when exposed to fire, it melts and releases dangerous fumes.
Do-it-yourself external insulation of the facade of a timber building using mineral (basalt) wool will achieve better vapor barrier of the walls.
Exterior finishing of any wooden facade with foam reduces its "breathing" characteristics.
Penoplex characteristics and features
This material is an improved version of foam. Produced from granulated polystyrene: under conditions of high pressure and temperature, the mixture of granules foams and forms a cellular structure of low density.
The finished insulation is a sheet material with a uniform cellular structure. The pores are the same, very small in size - up to 0.2 mm. The top layer is non-porous.
Several types of heat insulators are produced, differing in density and thermal conductivity. To insulate the facades of a brick building from the outside, foam 31 C and 35 are used. In the photo - material samples.
External thermal insulation
Do-it-yourself wall insulation can be divided into five main stages:
- wall preparation;
- vapor barrier sheathing;
- arrangement of the crate;
- installation of penoplex;
- home decoration.
Before starting work, it is necessary to check the foundation. The base for the heat-insulating device must be reliable.
Wall preparation
The wood must be dry. If there is paint on the surface, it must be removed. The joints between the bars are also checked. They must be caulked along the entire length.
If there are protruding parts outside, they are subject to sawing. The last step in surface preparation should be the treatment of wood with special impregnations.
Vapor barrier sheathing
Along the entire perimeter of the walls, wooden slats 25-30 mm thick are stuffed. The step between them should be no more than 1 meter. A vapor barrier is laid on the rails and fixed with nails or a stapler.
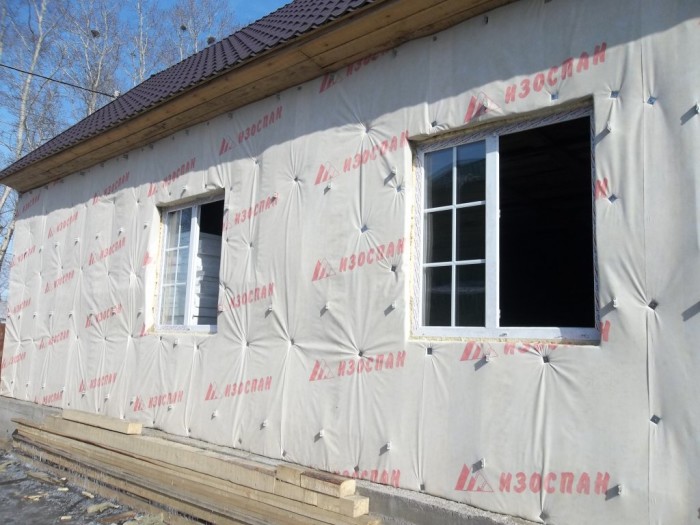
Due to the stuffed rails, a gap is formed between the logs and the vapor barrier material for ventilation.
Arrangement of the crate
It must be made of bars with dimensions of 25 × 50, 50 × 50 or metal profiles.The arrangement of the crate is necessary for the installation of heat-insulating material. The step between the stuffed bars is selected according to the width of the insulation sheets.
In order for the penoplex to be firmly installed in the formed openings, the size between the bars should be 5 cm smaller.
Penoplex installation
A heat insulator is placed in the openings between the guides. If the outside uses two heat-insulating layers for insulation, then the insulator can be laid in two ways:
- sheets of two layers are placed with an offset to avoid cold bridges;
- the arrangement of two layers is carried out in perpendicular directions.
Consider the second option for laying your own hands in more detail. The crate is first stuffed on the vapor barrier in a horizontal direction and the first layer of foam is laid into it. Then, on top of it, vertical bars are arranged perpendicularly for the second row of thermal insulation.
Finishing
Before proceeding with the finishing work at home, it is necessary to install another row of crates. It is nailed directly to the base of the building. This crate is necessary to create ventilated channels. After its arrangement, you can begin to sheath the building from the outside with finishing materials, most often siding is used for these works.
Penoplex is widely used for insulation of various industrial and residential buildings. It has a number of advantages, but it also has its drawbacks.
As a result of shrinkage of the walls of wooden houses, significant heat losses occur. Such houses especially need high-quality insulation.
Consider whether it is possible to insulate a wooden house with foam plastic, how to install it, the advantages and features of working with materials.
Features of warming wooden houses
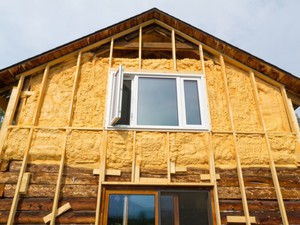
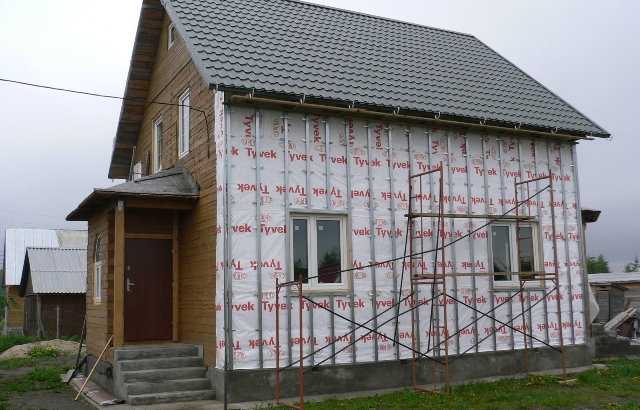
The wood from which the house is built evaporates moisture. Therefore, when carrying out work on the insulation of wooden houses from the outside, it is necessary to ensure ventilation of the walls in order to avoid covering the wood with mold, fungus. Insulation of a wooden house from the outside helps to protect it from exposure to low temperatures, condensation. Before starting the insulation of the house, a vapor barrier is laid and a frame is installed.
It is mounted vertically from dry wooden slats or a metal profile. The height of the rails should correspond to the thickness of the insulation, and the installation step of the rails is 1-2 cm less than the width of the insulation, so that the insulation material fits snugly into the frame and does not form cracks. To fasten the heat-insulating material, construction staples or nails are used. A windproof film is attached over the insulation, which has the properties of releasing moisture from the walls and does not let moisture in from the outside. the last stage involves wall cladding.
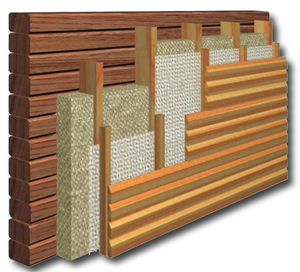
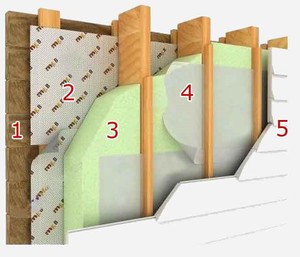 Scheme of insulation of a wooden house from the outside: 1 - insulated wooden wall; 2 - layer of vapor barrier; 3 - insulating material; 4 - waterproofing; 5 - facing material.
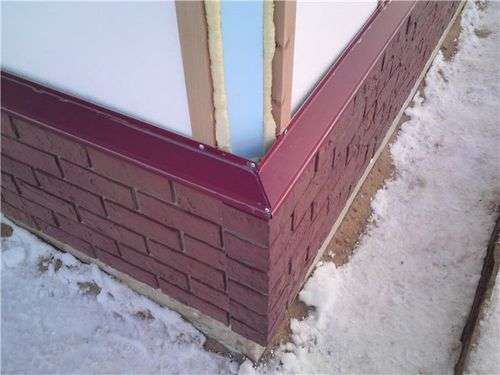
If a wooden house is faced with brick, it is necessary to provide holes with stone slabs so that air enters the ventilation space.
When choosing a material as a heater for a wooden house, you need to know their properties, which play an important role.
Material Features
Penoplex is an extruded polystyrene foam. It is widely used for insulation of walls, floors and foundations of various structures.
It can also be used for warming wooden houses, cottages and other structures.
The material has a similar structure with foam, but they are produced using different technologies. Penoplex is made using high temperatures and pressure.
Therefore, it turns out to be extremely light, but at the same time very durable. And the excellent thermal insulation characteristics are explained by the presence of air microgranules in the structure of the material.
Insulation from the outside and myths about the insulation of a wooden house with polystyrene foam
Internal insulation is tempting because you can do it yourself, saving on the call of the master (if you need to insulate the second or third floor of the house). At the same time, many forget that it contributes to:
- Loss of useful area.
- Deterioration of the internal microclimate.
- Moisture disturbances in the room.
In addition, the internal wall insulation provides food for the most popular "horror story" about the insulation of houses with polystyrene foam.
According to popular belief, the low vapor permeability of polystyrene foam when insulating a wooden house can have an unpleasant effect in the form of moisture condensation.
Indeed, with the internal insulation of the house with polystyrene foam, condensation takes place. This is due to the temperature difference.
In winter, the air in the room is warmed up to an average of +20. Outside the window, the thermometer shows -20. The expanded polystyrene installed from the inside is heated by room heat, and at the point of contact with the frozen outer wall, a temperature contrast is created that will cause moisture to accumulate. And with it - the development of fungus, mold and the gradual destruction of the outer walls of the building.
Thus, insulation of the house with polystyrene foam from the outside is a more advantageous option. True, it is worth noting that the external insulation of the building with polystyrene foam will cost a little more than a similar procedure using rolled materials. But in return you get reliability and efficient heat saving. And it will be much easier to do the insulation yourself.
To avoid problems with the neighborhood of "breathable" material - wood - and low-permeable polystyrene foam, the insulation process must be carried out as carefully as possible, observing all the subtleties of this matter and the relevant standards. We will talk about them further.
Read about floor insulation in a frame house (and other houses) in our next article.
And this article talks about the insulation of a wooden house from the inside.
Why Styrofoam
There is a considerable number of various heaters with certain advantages. They are selected according to different parameters - cost, origin, level of vapor permeability, but the degree of thermal conductivity remains the most important.
- The colder the climate, the thicker the thermal insulation layer should be or the higher the thermal insulation index should be. An 8 cm thick slab of foamed polymer replaces a 10 cm thick layer of mineral wool, a 27 cm thick layer of wood, and a 76 cm thick brick wall. It is clear that foamed plastics are much better in this indicator. In the photo - plates with different densities.
- The material is easy to cut and join. The technology of laying the outside with your own hands is extremely simple.
- Foamed plastic is very light, insulation does not create a load on foundations and walls.
- It does not absorb moisture at all, and, accordingly, does not rot, does not become moldy and does not lose performance.
The disadvantages include low vapor permeability. However, if plastic or metal siding is used for cladding, and there are metal-plastic windows in the house, this no longer matters: you still have to install exhaust ventilation, according to expert reviews.
Mounting technology
PSB-S-25 brand foam is chosen as a heater - it is used everywhere. PSB-S-35 has a high density and is used for thermal insulation of a foundation or building during severe winters.
The size of the sheet is determined by the needs. In temperate regions, as a rule, plates with a thickness of 8-10 cm are used, and in cold climates, the thickness can reach 15 cm.
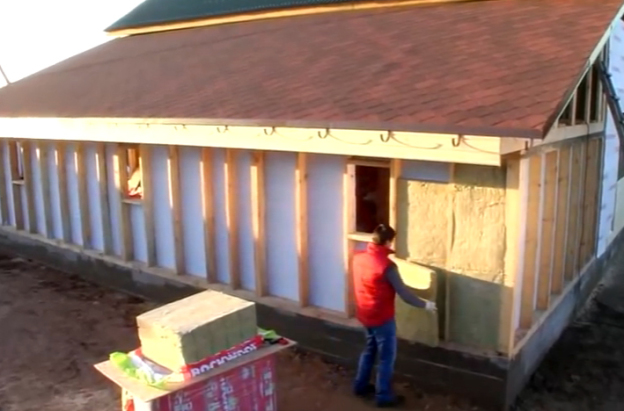
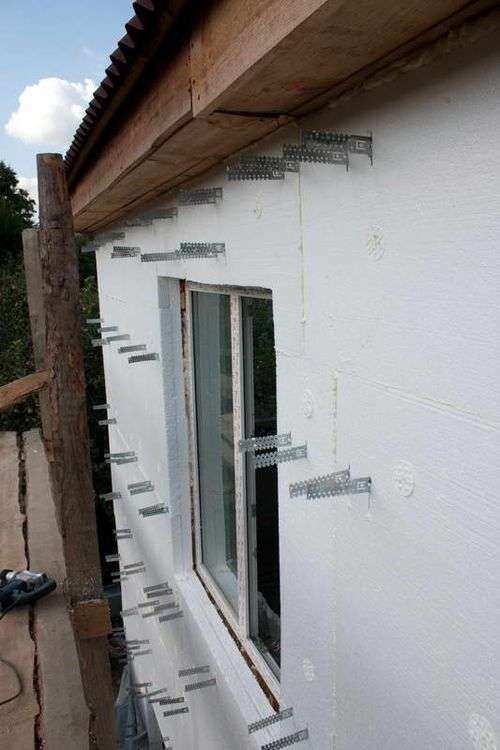
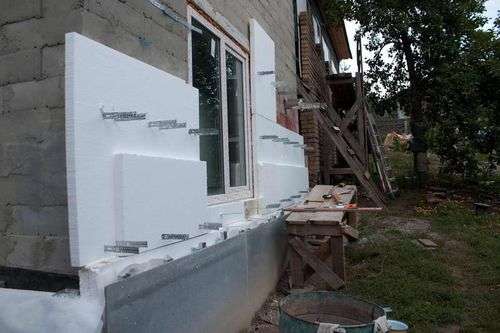
- Do-it-yourself insulation of the house with polystyrene foam for siding begins after installing a galvanized metal profile crate - if the climate is humid, or wood if it is dry.
- Facade glue is applied to the plate.
If the surface is even, then the glue is applied evenly to the entire sheet, if uneven, then to the areas where the insulation is in contact with the surface. You can see an example in the photo.
The sheet is glued in a horizontal position, first the lower section, and then the upper one.
Plates must be joined tightly, without gaps. If they do appear, they are sealed with mounting foam, sealant, and for large sizes - with pieces of insulation.
If necessary, fastening with glue is duplicated with cup screws. This operation is recommended to be carried out when insulating door and window openings.
The video on how to insulate a house from the outside with polystyrene foam for siding is described in more detail.