Do-it-yourself warming of a change house
The owners sometimes carry out thermal insulation of the change house on their own. A simple insulation technology allows even an inexperienced person to properly fix the heat-insulating material, the main thing is to observe the main points and first consult with an expert.

Thermal insulation of the change house outside
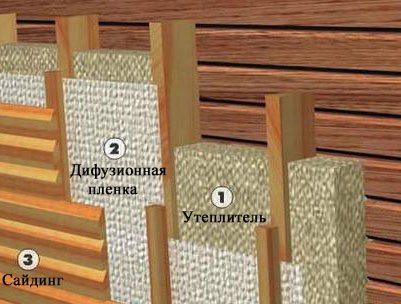
In order for the wall insulation to be successful and without additional costs, the owners carefully monitor the sequence of work being carried out. Thermal insulation of the outer side of the outbuilding begins with the installation of a layer of vapor barrier material. For this, materials such as polyethylene film, foil and others are used.
The main task of the vapor barrier layer is to ensure maximum ventilation of the facade of the building. If the mounting surface is too smooth, fasten the rails vertically, with their help the vapor barrier material will hold.
Now proceed to the installation of thermal insulation. Experts recommend using mineral wool or fiberglass products. For optimal protection of the building, two layers with a thickness of 10 centimeters each are enough, although when insulating a change house for living in winter, an additional layer is fixed. Mineral wool does not need special attachment to the main surface: due to the rigidity of the slab, it fits tightly to the vertical battens. Slots and solid joints are not allowed between them.
A special film is mounted on the heat insulator to provide waterproofing, which will prevent moisture from entering inside. The waterproofing material is fixed with a furniture stapler. The film is overlapped by 10 centimeters to ensure maximum protection, the joints are sealed with special adhesive tape.

Internal thermal insulation
The next stage is the insulation of the interior of the change house. Each owner of the outbuilding chooses the methods of insulation independently. Among insulators for internal thermal insulation of household structures, their cotton insulation is common. It is environmentally friendly and safe. Such material is difficult to cut, so the work will take enough time. Some owners use thermal insulation materials similar to products for external insulation.
When installing insulation, it is important to remember about the arrangement of air ducts to quickly remove the resulting condensate. Air vents are located at the top and bottom of the wall
To enhance thermal insulation, the insulation is covered with a special material - penofol. Its surface creates a "thermos effect".

Thermal insulation with foam
For high-quality insulation, penofol is fixed in one piece, which significantly reduces the number of joints between pieces. All resulting seams are carefully sealed with special adhesive tape to ensure maximum tightness.
To ensure maximum heat savings, experts advise insulating the floor and ceiling. The whole process is similar to thermal insulation, which was described earlier. After finishing work on internal insulation, they think over the aesthetic design. Drywall sheets are attached to the insulation, which level the surface and increase the quality of sound insulation. Fasteners are self-tapping screws and dowels. Instead of GKL, fiberboards are sometimes used. The last stage is the finishing of the change house according to the preferences of the owner.
To give you can on the official website. The quality of the product is guaranteed!
A special frame made of metal parts makes our change houses reliable and durable, and galvanized sheathing on the outside makes the change houses durable and increases their service life. It also protects against precipitation and high humidity. Change houses metal warmed
are equipped with insulation, which makes them reliably protected from the cold, so our metal insulated cabins
can perform well in extreme temperatures. In conditions of constantly low temperatures, this offer will be an ideal solution for business and personal needs.
1 Features and design of change houses
The scheme itself is very simple. It is a small structure made of panels and frames. The building is of medium size. As a rule, the change house has a width of about 2-3 meters and about 5-7 meters in length.
Its shape is the most trivial - that is, rectangular. If you look at it from afar, you can confuse it with a refrigerator trailer. However, change houses have doors, windows, openings for communications.
They are made from several layers of material. Plastic is used on the inside, metal is used on the outside.
As you can see, change houses are a mobile convenient solution for those who need to quickly place something like a transshipment base with on a cut-off site. Builders use them to place their tools, provide basic needs, including recreation.
Summer residents buy change houses in situations where it is necessary to organize something like a barn. Sometimes they even live in them. If they are insulated and put on a normal foundation, then the change house turns into a rather useful residential block.
Outside, it is protected by a metal corrugated board. Interestingly, you can insulate the change house with your own hands. Moreover, the heater is selected the cheapest. The most commonly used foam.
As for the design, standard change houses are assembled from an internal frame. That is, the frame itself is first mounted (most often made of wood), and then the interior and exterior trim is laid on it.
As we have already said, metal sheets are used outside according to standard technology. From the inside, the number of options is increasing.
The floor surface is covered with boards or something similar with. It all depends on the specific purpose of the change house.
1.1
Insulated cabins
Initially, change houses were not insulated. They were produced as temporary structures that can be quickly assembled and mounted anywhere. Wintering specimens were, of course, present, but rarely used.
In addition, the cost of the structure also has a certain influence. Think for yourself, because the frame, plus a metal sheet and other materials (for example, for finishing the floor) is already an impressive expense.
And if you add a layer of insulation to them, then the design will become simply prohibitively expensive. Yes, and the fact is that we do not always need a warmed change house.
However, recently the market has expanded significantly, so all kinds of working variations of household modules have appeared on it, moreover, in mass access.
In fact, all that manufacturers do is warming the change house in the conditions of manufacture. The frame of the module is additionally strengthened, and then a heater is mounted into it.
The result is a more expensive, but also more functional option with. In such a change house, you can spend the winter and spend the night. And in summer it will be much cooler.
Materials and methods
Inner or outer lining

There are three ways to position the heater:
- external,
- interior,
- intra-wall.
The latter, of course, is preferable, but it is possible only in frame structures. In addition, it is desirable to produce it at the construction stage, since dismantling the entire inner lining is very problematic and expensive.
If we talk about the remaining two, then it is better to dwell on the external location of the thermal insulation, and here's why:
- Firstly, with an internal arrangement, the already limited internal volume of the room will decrease;
- Secondly, wall structures will not freeze, which will increase their service life;
- Thirdly, it is undesirable to use many materials for interior work because of their chemical composition and influence on the atmosphere of the room;
- Finally, thermal insulation with sheathing will additionally protect the walls from the influence of atmospheric phenomena, corrosion, solar radiation and pests.
If you do not want to mess with the skin, or there is no such possibility, you can place the insulation from the inside. In the case of using polystyrene foam or polystyrene foam, this completely simplifies the task, since these materials do not need waterproofing and can remain open, but this option is only acceptable as a temporary measure, for example, as a change house insulation for builders or workers.
Ecowool
If the insulated change house will be used as a country house or other permanent habitat, then additional requirements are imposed on thermal insulation:
The material must be non-combustible, otherwise there is a serious danger to the life and health of people, as well as the safety of things and furniture;
The heat insulator must be non-toxic
The change house will be your bedroom, kitchen and shower at the same time, so it is important that the material does not emit any toxins and chemical compounds harmful to humans;
The heater must have a long shelf life. Country houses are used for years, so it is advisable to use a material with an adequate service life.
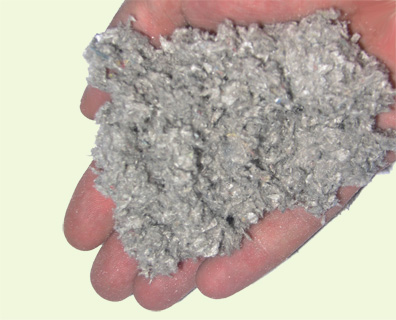
Best of all, ecowool meets all these requirements - a modern heat-insulating material consisting of 80% recycled waste paper or recycled cellulose, as well as boric acid (12%) as an antiseptic and seven percent impregnation with flame retardants.
There are several ways to lay this material:
- Manual;
- mechanized dry;
- Mechanized wet.
In the case of small volumes (our case), manual stacking is used. This allows you to do the work yourself and significantly reduce costs.
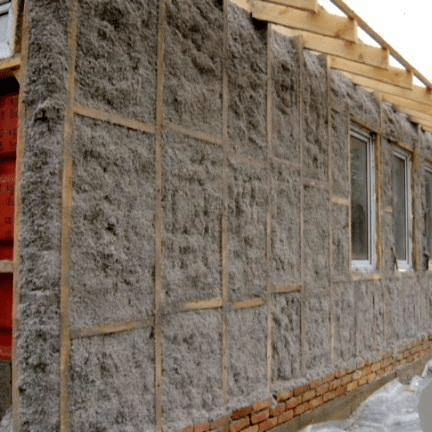
Now about how to insulate a change house with your own hands using ecowool. The installation instructions are quite simple:
A vertical crate is stuffed on the wall. The distance between the slats is 40 - 50 cm.
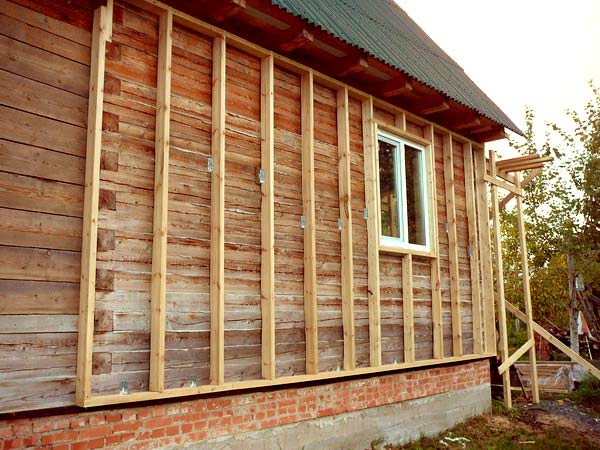
- Starting from the bottom, the crate is sheathed with clapboard to the level 50 cm
- Ecowool is removed from the package and fluffed up so that its volume has tripled.
Fluffy cotton wool is poured into the gap between the lining and the wall and tamped with hands until the material begins to spring.

- Next, the next line of lining is stuffed, again by 50 cm
, and the process is repeated. - In this way, the entire wall is closed.
- Lignin, which is part of cellulose, after interacting with atmospheric moisture, forms a hard crust that will protect the cotton wool from moisture and wind.
Styrofoam
Styrofoam or expanded polystyrene can be glued to the metal on liquid nails, and covered with roofing material on top. As a temporary measure, it is quite an acceptable option, and the insulated metal change house is ready.
You can also use this material for interior cladding. Liquid nails can also be used for this. After fixing the sheets on the wall, the gaps and gaps between them should be closed with mounting foam.
If we compare polystyrene foam and polystyrene foam, then polystyrene foam will be a more effective material:
- it is stronger;
- has a lower thermal conductivity;
- in addition, sheets of this material are equipped with locks that will save you from processing the joints with foam.
The price of expanded polystyrene is slightly higher,
Ceiling insulation
A significant part of the warm air rising up is lost through the ceiling, so its insulation is a necessary step.
- From the outside, a waterproofing material is laid that protects the roofing crate.
- Heat insulator plates are laid in the gaps between the beams and fastened with heat-insulating glue or mounting foam.
- Penofol is laid.
- A lining or sheet decorative material is attached.
Two options to choose from will help to avoid heat loss through the windows of a trailer insulated for the winter:
- Mount the third glass in the frame of an ordinary wooden window with two glasses;
- Replace standard windows with effective metal-plastic double-glazed windows.
Heating in a change house
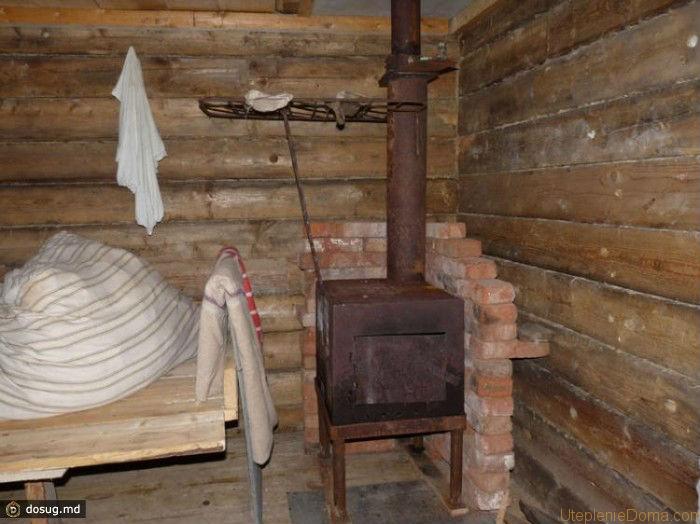
A heat shield must be installed around the stove.
How to heat the change house, no matter how the stove? Today there are many models on sale, the leader among which is the Buleryan pyrolysis furnace.
. It is very economical, as it works on the principle of afterburning pyrolysis gases. It quickly warms up the air due to convection pipes and practically does not burn out oxygen, one load is enough for 6 hours.
If electricity is supplied to the change house, then the best option would be either a heat fan with a ceramic heating element. Both devices allow you to warm up quickly. The disadvantage is the same rapid cooling. At the same time, it is not necessary to prepare a place for installing a heater, unlike a stove.
The installation of the furnace must be carried out according to certain rules:
- a metal plate is laid on the floor with a minimum distance of 30 cm in front of the firebox door;
- to the walls should be at least half a meter;
- heat shields should be installed on the walls;
- chimney required.
By the way, the chimney is one of the most important elements. The use of penoizol is much faster than the insulation of the change house with foam plastic. You can see about it in the video below.
Construction trailers are temporary mobile housing that has become popular on construction sites, for geological or oil and gas operations. These change houses solve many problems, the main of which is the accommodation of workers at remote places of work on a rotational basis. The functions of wagons in modular construction are diverse, because the change house also serves as a home, it is converted into a workshop, a laboratory, a place to store a diesel generator, it is turned into a moving office or a foreman.
The production of trailers is carried out taking into account the requirements for the premises, which can accommodate from 1 to 8 people. The advantage of these designs is complete readiness for operation after shipment from the manufacturer. The change house is equipped with ventilation systems, heating (water or oil radiators or electric heaters), electricity, security or fire alarm systems. The metal frame makes the construction of the trailer more reliable than a wooden building. But in an insufficiently insulated car it can be quite cold in harsh weather conditions.
Heating of change houses
Heating of a change house in a cold season is done by devices without open flame.
These are mainly oil radiators, closed-fired ovens and heat guns.
- Heat guns are compact and powerful devices. There are electric, gas, water, infrared, diesel, and versatile multi-fuel options.
- The lockable oven is safe and economical. To equip it with a protective cover, which improves the conversion of warm air and eliminates thermal radiation inside the trailer.
- The oil cooler is energy efficient and has a horizontal position sensor that shuts off the device if it falls.
Proper insulation of all elements of the trailer will create comfortable conditions for staying in it in the winter.
Part 2
I have a kind of frame structure, popularly called a "change house", and I proudly call it a "house", with a 50 mm insulation. Arriving at the dacha in the spring, it became clear to me that it would be impossible to stay overnight in the house. The temperature, even after intensive attempts at heating, did not rise higher than 15 degrees. Cold walls, icy floor... The wood did not heat up at all. It was decided to stop this outrage with the minimum expenditure of forces and means.
By asking the same happy owners of change houses and searching the Internet, I stopped the choice of material for insulation on foamed polyethylene.
Foamed polyethylene is a sheet (roll) combined heat and sound insulating material. Available with foil sides and without foil. They say it reflects radiant energy and works even faster and more efficiently.
I didn't care, you'll see why below.
So, the process of warming with explanations:
In the hardware store were bought: polyethylene foam 5mm. several rolls, furniture stapler + staples, adhesive tape, stationery knife. The amount of polyethylene was calculated along the inner perimeter of the change house, along all walls, floor and ceiling. Well, according to the capacity of the machine, of course.
polyethylene
a roll of polyethylene another roll
work front, room 2x2x2 meters
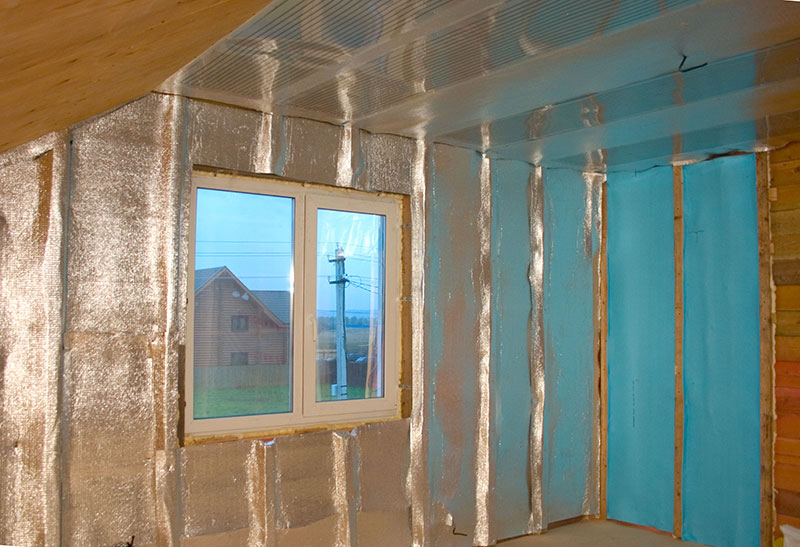
The insulation is cut into strips to the height (or length) of the walls, attached with a stapler. I did the overlap, it's easier and faster.
As you can see, I made the foil side out. Simply because I have a bad idea of how to be in a room sparkling with silver, like a Christmas tree. Radiant energy did not inspire me, to be honest.
Sheets on the wall On the floor and ceiling, I also made an allowance, wrapped the corners and nailed it with a stapler. She cut off the sheets not in advance, but directly on the floor an already nailed sheet on the floor. Those. I did it from top to bottom from a whole roll.
Half-ceiling I'll explain why
The most important thing is to remove the draft from the cracks between the boards and prevent warm air from escaping the room. Therefore, I did so that for sure and, again, quickly
After all the work with polyethylene is done, it must be glued at the seams with tape. To leave as few places as possible for warm air to escape.
This is how we glue it
Walls Floor
The most difficult thing is to make the ceiling, the material falls down, it’s hard to hold with your hands. And you still need to attach it with staples and try not to mow. I did not dare to glue the wiring and fixtures, I left a strip.
ceiling in the kitchen
I hung straw blinds on the wall in the room, put two carpet tracks on top of the polyethylene on the floor. In general, it is customary to cover this polyethylene with something, i.e. the floor is hard-surfaced (plywood, laminate), the walls are plasterboard or something similar. Everything is simpler and without frills, I didn’t close anything. By the way, it’s not so easy to damage it and you won’t pierce it with your finger, if you don’t try on purpose.
Seasonal results:
- The temperature in the room rises after turning on the heater for 15 minutes from 15 degrees to 24 °C. And it stays that way until you open the door.
- Polyethylene accepts the temperature of the room, blocks the exit of heat to the outside, and does not let in a draft. Both the floor and walls heat up very quickly.
- If you remove the heat leakage from the windows and the front door, then the result is excellent! At an outside temperature of 10 °C. at night, in the change house it was in the morning - 20 ° C. and in a room with a heater at a minimum - 24 ° C. (without interior doors, which I removed).
This is a very good result of insulation, because without insulation with room heating at full power and with the door closed, it was 20 ° C, and where there was no heater, the temperature was 12-15 ° C.
Thank you for your attention, I hope my experience will be useful. If you have any questions please ask
Do-it-yourself materials for warming a change house
A winter country change house should be warm even in severe frosts, especially if these are residential trailers for living
It is important in such a design to insulate everything:
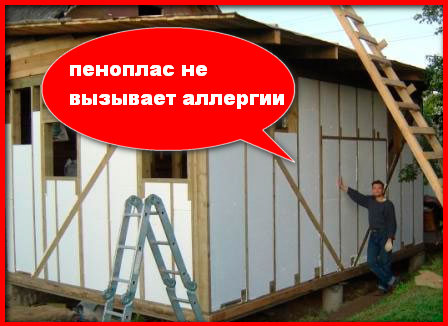
Styrofoam
Various materials are used to carry out such work. The most popular is foam. Such thermal insulation does not cause allergies, does not absorb moisture, can last a long time with proper installation, and also does not burn.
- Moisture resistance.
- Durability.
- Not afraid of temperature changes.
- Does not burn.
The disadvantage of the material is that it is quite difficult for them to finish round bases. Its sheets do not bend. Therefore, pockets of air can remain under the panels, which will cause moisture to accumulate there.This can lead to rotting of the frame.
Before choosing foam, you should familiarize yourself with its parameters, since with the help of certain types of it, it is impossible to insulate the trailer for living there in the winter. It is recommended to purchase polystyrene brand PSB-S40.
Also, the masters advise not to use foam to insulate the trailer from the inside. Although it does not burn, it melts when heated and releases toxins into the air, which are harmful to humans.
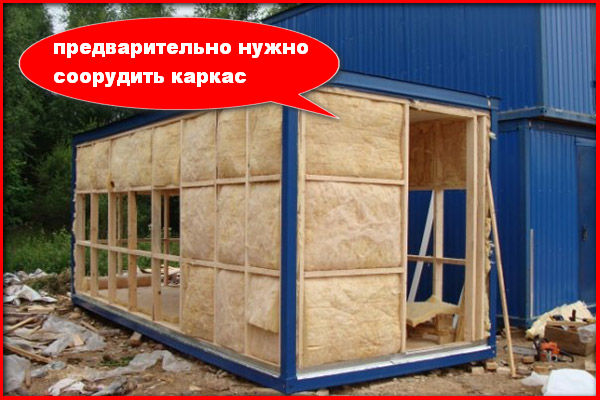
mineral wool
This substance is characterized by high quality thermal insulation and does not burn.
- The material is soft but durable.
- Does not burn.
- Retains heat and keeps cold out.
- The vapor permeability coefficient is high.
- Can last an average of 20 years with proper installation.
When working with such material, it is important to follow the rules. Events should be carried out in protective equipment
To install a thermal insulator, you will first need to build a frame made of wood or aluminum. Many summer residents prefer mineral wool for insulation, but it costs more than polystyrene foam.
Cotton thermal insulator
This substance is the safest for today. It is high quality and environmentally friendly. It can be used to insulate walls inside the trailer and does not require special skills during installation. It is often used for thermal insulation of change houses in which it is planned to live. The downside is that the tool is hard to cut.
Materials for insulation
A change house without insulation will not perform all the functions and tasks for which it is intended. Therefore, you should carefully consider and select the insulation technology, as well as select the appropriate insulator.
The modern market provides a variety of thermal insulation materials. Let's consider the most common in detail.
Such a heat insulator is mainly used to insulate the walls of outbuildings. Styrofoam insulation is beneficial when finishing wooden cabins. The material is resistant to moisture, simple and easy to install. Styrofoam insulation has disadvantages: a short service life and a large volume for good insulation, and with low-quality products - significant heat loss. Several layers of foam plastic will reduce the area of \u200b\u200bthe room, and improper operation of the structure will lead to a fire.

Mineral wool and fiberglass
The advantages of materials are fire safety and excellent thermal insulation characteristics, subject to all the requirements of the technological process. If you mount several layers of heat insulator, then the acoustic properties of the rooms will increase. Disadvantages - the constituent components are harmful to health.

Such fibers are produced by careful processing of basalt rocks. In the construction market, a common form of material is slabs, which are easy to cut to size and lay. The heat insulator is completely resistant to fire and does not lend itself to deformation processes for a long time. Easy-to-use material will not take up much free space, so the area of the change house will remain almost the same. The disadvantage is the many seams that remain after the installation of thermal insulation.

This heat-insulating material is the most widespread and effective for warming of economic constructions. There are 2 types: liquid and hard. Experts recommend using the second option to increase the heat capacity of the exterior finish of the building. It is great for strengthening the roofing system and the outer part of the walls. Using the unique structure of polyurethane foam, it is possible to mask possible defects in the roofing system and increase the temperature in the building.

PPU is sometimes applied in a different way - by spraying on the lining inside the premises. It fills all places where cold air enters, thereby providing maximum thermal insulation.
Advantages
:
- high level of heat resistance;
- the material quickly becomes solid, which instantly stops heat loss;
- fits evenly, without seams and fasteners;
- does not contain chemicals, safe for health;
- protects the coating from mechanical and other influences;
- service life - from 30 years with proper use.
To carry out the correct insulation, it is necessary to know the detailed technology and act in strict accordance with all stages of the thermal insulation process.
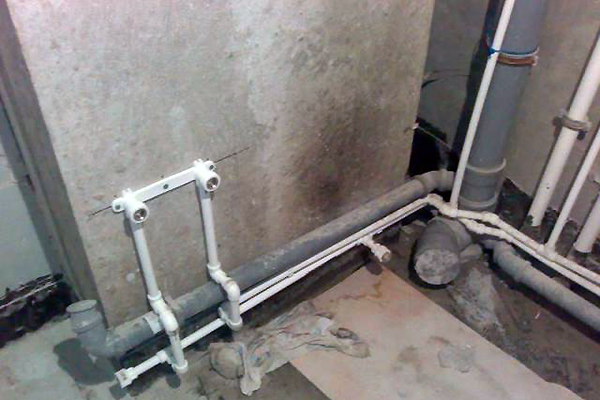
Features of gas connections
When connecting gas stoves, columns and other types of equipment, flexible connections are also used. Unlike models for water, they are yellow and are not tested for environmental safety. For fixing, end steel or aluminum fittings are used. There are the following types of devices for connecting gas appliances:
- PVC hoses reinforced with polyester thread;
- synthetic rubber with stainless steel braid;
- bellows, made in the form of a corrugated stainless steel tube.

Holding "Santekhkomplekt" offers engineering equipment, fittings, plumbing and accessories for its connection to communications. The assortment is represented by products and materials of well-known foreign and domestic manufacturers. Discounts apply for bulk purchases, and product quality is confirmed by standard certificates. For information support and assistance, a personal manager is assigned to each client. The ability to arrange delivery within Moscow and other regions of the Russian Federation allows you to quickly receive the purchased goods without any hassle.
At the end of the technological and production tasks associated with the arrangement of the sewer system in an apartment building, an industrial building, as well as in a private household, it is required to test the system involved using the forced spill method. This task was applied to identify possible defects or improper installation of the entire sewer part involved, and the act of testing the internal sewerage and drain systems will be material evidence of work on the acceptance of the facility.
Visual inspection should be accompanied by entering into the act of testing internal sewerage and drain systems according to SNIP, which is currently represented by the current regulations of the appendix of the D series, which corresponds to SP 73.13330.2012 "Internal sanitary systems of the building", recently a new one has been applied updated working version according to SNiP 3.05.01-85.
The change house belongs to the category of technical structures of a temporary type, which are installed at the site of construction work, and serves to store a variety of equipment, building materials there, as well as to locate working personnel there. As a rule, construction is carried out during the warm season. Then it may be insulated. But if the construction is delayed and goes into the winter period, then you should think about warming the change house.
After the completion of the construction of any objects, most often the change house is dismantled due to uselessness. But enterprising owners of land plots often adapt it for other purposes.

After a slight improvement, it can turn into an excellent bathhouse or a good country house, barn or other utility room. It is here that the need for insulation of such a structure arises. They insulate metal and wooden change houses, as a rule, from the outside and from the inside. We will consider these questions in more detail.
door insulation
When insulating a change house, it is necessary to pay attention to the door, about 20-25% of heat can be lost through it
It is important to separate the door from the main room by building a vestibule that acts as a buffer between the street and the trailer
The most reliable in terms of thermal insulation are:
- Solid wood doors;
- Frame doors filled with mineral wool or polystyrene.
If standard doors are installed in the trailer, it is necessary to paste over the door frame around the perimeter with a special sealing rubber with a self-adhesive layer. A snug fit will significantly reduce heat loss.