Why do you need to insulate the walls from the inside for plastering and painting
External wall insulation today is a building standard, but it may not be enough - and then the temperature in the apartment or house remains uncomfortable. There are also situations when it is simply not allowed to insulate a room from the outside - for example, if one of the walls goes into an elevator shaft, or if the building has the status of an architectural monument and facade work on it is limited.
In such cases, internal wall insulation will help create a favorable microclimate in housing. If you approach this issue responsibly, you can not only improve living conditions, but also use the resources of the heating system more rationally.
With internal insulation for plastering, you should first of all find out what the wall is made of (concrete, brick, with insulation integrated inside (layered masonry) or heat-insulating backfill (well masonry), with heat-insulating filler (for single-layer concrete wall panels), etc.). e. The required thickness of the internal insulation depends on the wall design, the second factor that directly affects this parameter is the selected heat-insulating material.
The correct material for internal wall insulation must meet the following requirements:
• low thermal conductivity - to minimize heat loss; • high moisture resistance and low vapor permeability - thanks to this, condensed moisture does not accumulate in the insulation, the risk of mold and fungus damage to the walls, which can be dangerous for allergy sufferers, is reduced; • strength, durability, ability to retain shape and volume; • environmental friendliness and safety for human and animal health; • good fire safety characteristics.
All these properties have a modern polymer insulation based on polyisocyanurate foam - PIR-plate PIRRO.
The most obvious "side effect" of wall insulation from the inside is a reduction in the useful area of \u200b\u200bthe room. To minimize it, it is recommended to use products of the Pirro Wall brand with fiberglass lining, specially adapted for applying plaster mixes, including decorative coatings, directly on the insulation. 
- Insulation features
- Advantages and disadvantages
- Preparatory work
- Warming technology
- Manual way
- mechanized method
- Finishing layer
Insulating walls from the inside with warm plaster is one of the many ways to reduce heat loss at home. In addition to its main purpose, warm plaster for walls can sometimes be their final finish. You will learn how to properly perform such isolation by reading this article.
Mineral wool facade insulation
The name of this material is due to the fact that it contains mineral fibers. Stone wool is a variant of rock-based insulation.
Mineral wool is a popular insulation for the walls of the house outside under siding and plaster (hard version). It is distinguished by its fibrous composition and the presence of a reliable synthetic binder. From this material, products are made in the form of mats used to work on large areas, and plates.
Mineral wool is different:
- resistance to mechanical damage;
- inflammability;
- vapor permeability;
- incombustibility;
- moisture resistance;
- resistance to moisture and insects.
Compared to expanded polystyrene, cotton wool has some disadvantages, which include more weight, higher cost, and certain inconveniences in use. To insulate houses with mineral wool, flexible as well as lamella plates with a perpendicular arrangement of fibers in relation to their surface are used.They are easier to mount due to their tight connection to the walls.
External insulation for the house in the form of plates does not have to be fixed with dowels. Installation can be done with glue. Exceptions are the outer corners of the house, door and window openings. The top layer of mineral wool boards is hard and resistant to deformation, while the bottom layer is soft and has good thermal insulation properties.
Basalt wool is characterized by vapor permeability and resistance to the process of decay, temperature extremes. It is the optimal insulation for a ventilated facade.
Issue price
In conclusion, let's say, the insulation for the facade under the plaster can be either ordinary expanded polystyrene, or extruded, or mineral wool. There are no better or worse materials, each insulation suits you relatively. Knowing the properties of each material, it is necessary to think about how to compensate for the shortcomings
If it is important for you to live in a house with natural ventilation, a good indoor climate, then it is better to use vapor-permeable mineral wool than polystyrene foam. If you want to save money, but are ready to lose quality, use polystyrene foam, but consider forced ventilation in the house
Extruded styrofoam is denser and lasts longer, but regular styrofoam is cheaper and may be easier for you to replace when it wears out.
Mineral wool is vapor permeable and does not burn, but costs three times as much and can absorb water if installed incorrectly. If stone wool gets wet, it will lose all of its energy-saving features.
- Ordinary expanded polystyrene PSB-S 25 costs 1500 rubles / m3;
- Extruded polystyrene foam costs 2800/m3;
- Mineral wool of high density (not less than 120kg/m3) costs 4800/m3.
Each insulation is certified for use, and can be used in plaster facade systems. Now you know the properties of each, choose according to the set of characteristics you need.
Preparatory work
The preparation of walls for insulation with plaster to insulate the walls from the inside is carried out in the same way as before applying a conventional cement-sand mixture to their surfaces. If the old plaster peels off, it should be removed. If not, warm plaster can be applied over the existing layer.
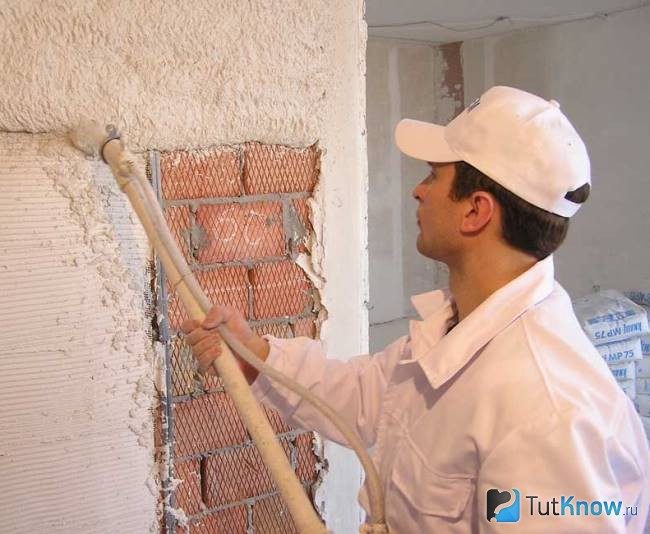
The purpose of the preparatory work is to improve the adhesion of the insulation coating to the base surface of the walls. To do this, each of them needs to be stuffed with shingles or narrow slats t.5 mm, thus obtaining a space on which the plaster mixture will be well held. After that, on the fabricated frame, it is necessary to stretch the mesh and fix it with nails, hammering them into the slats.
The fastening step is taken as 10 cm, it must be carried out in a checkerboard pattern. The grid can be woven or metal with cells of 50x50 mm. It is recommended to use metal mesh, as woven mesh is less durable and adheres too tightly to the wall surface.
To implement the possibility of leveling the plaster layer on the walls, it is necessary to install beacon profiles. They must be pressed into a mortar mixture such as Ceresit or Rotband, applied with molds to the base every 0.3 m, and then leveled in a plane. Lighthouses should be installed vertically in increments of 0.2 m less than the length of the plaster rule.
Before plastering, the walls must be moistened with plenty of water. This is an additional measure to ensure high-quality adhesion of materials.
The technology of wall insulation from the inside with warm plaster
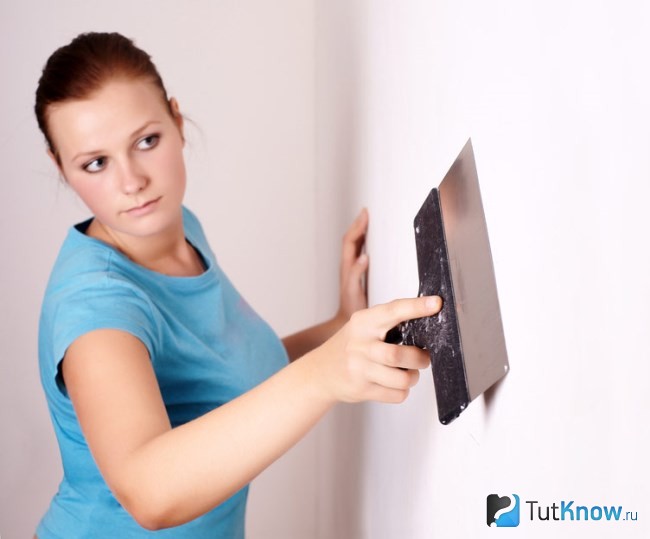
Warm plaster is applied to the walls manually and by machine. In the first case, a spatula, trowel, grater and other painting tools are used for work, in the second, a special mixing pump and mortar gun.
Manual wall plastering
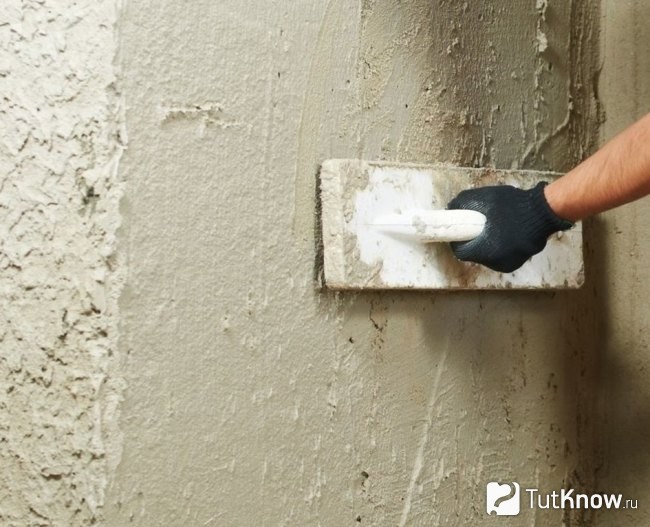
Before starting work, the contents of the entire package of warm plaster must be poured into a suitable container with a volume of 50-100 liters, add water in the amount specified by the material manufacturer, and then mix everything using a construction mixer. In this case, it is necessary to know that the performance of the finished mixture in time is 2 hours.
The required consistency of the mixture is easy to check. To do this, you need to scoop up a little solution with a trowel and tilt the tool strongly. If the plaster does not fall off its surface, then it has acquired plasticity and is ready for use. Its consumption with a layer of 25 mm will be 10-14 kg / m 2 of the dry mixture, with a thickness of 50 mm - 18-25 kg / m 2, respectively.
The insulating mixture should be applied manually on the walls in layers, the thickness of each layer should not exceed 20 mm in order to prevent the solution from slipping from the surface under its own weight.
Each next layer of plaster should be applied no earlier than 4 hours after laying the previous one. The drying time of the coating may increase at high humidity and low air temperature, for example, in autumn.
The working mixture must be applied to the primed surface of the wall from the bottom up, using a wide spatula, beacon profiles and a rule. The process of applying warm plaster without beacons and the quality of the resulting coating must be controlled using a 2 m long rail, a plumb line and a hydraulic level. The even plane of the plaster coating can be checked by attaching a two-meter rail-rule to it with an edge, there should be no gaps between the tool and the wall. Small deviations of the finished coating from the horizontal or vertical are allowed, no more than 3 mm per 1 running meter.
Lighthouse profiles should be removed from the coating 4-6 hours after the completion of the main work. The vacated cavities must be sealed with a plaster mixture and leveled with a trowel.
It is recommended to check and accept the work for delamination, curvature and cracking of the coating no earlier than 3-4 weeks after the completion of the plastering of the walls.
Mechanized method of plastering walls
To apply a warm plaster coating in a mechanized way, it is necessary to first prepare the mixing pump for operation, and then pour the dry mixture into the hopper of the machine. After that, in accordance with the desired consistency of the mixture, the dosage of water by the pump should be adjusted. It should be about 500 l/h. Its exact value depends on the temperature in the house and the material of its walls.
After preparing and turning on the pump, the mortar gun must be held at a distance of 30 cm and perpendicular to it when distributing the mixture over the wall surface. The thickness of the plaster layer during application can be easily adjusted by the speed of movement of the mortar gun. The smaller it is, the more powerful the layer and vice versa.
Surface treatment should be carried out from the top corner down and then from left to right, forming 0.7 m wide patches. The reciprocating movement of the gun should be such that the center of the mixture spray is located on the lower edge of the already applied plaster. The previous and subsequent grips should be overlapped on the left side by 10 cm.
As in the previous case, the plastered surface must be leveled with a rule, and after the mixture has dried, remove the lighthouse profiles and fill the empty channels with mortar.
After finishing the spraying of the plaster, the supply of mortar should be stopped by closing the air valve on the gun. The pump, hoses, gun and tools should be flushed with water immediately.
Finishing device
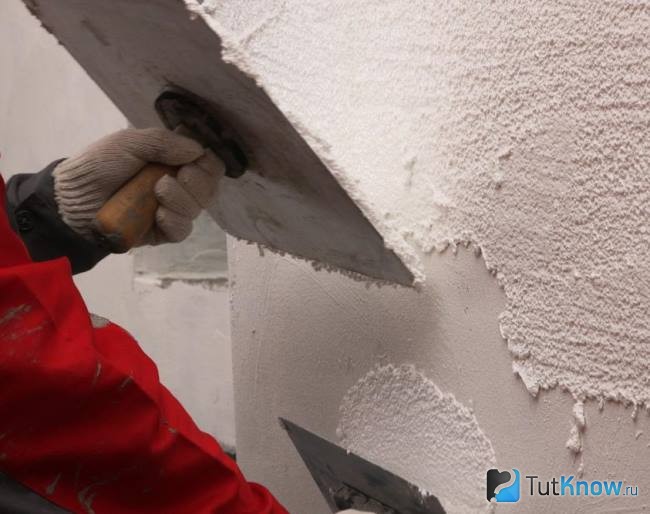
As mentioned above, the finishing needs to be insulated with warm plaster, made on the basis of foam granules.Before applying the finish coating, the floats and the container intended for preparing the working mixture in it must be cleaned of all foreign particles that can disrupt the appearance of the coating during its processing.
The finish coat should be applied to obtain a uniform and presentable wall surface. Its thickness usually does not exceed 5 mm. After applying the finish coat, it should be grouted with a trowel 300 mm long, made of metal or plastic.
How to insulate walls with warm plaster - look at the video:
Advantages of plaster mixtures
Despite the fact that the market of finishing materials today is represented by a huge variety of modern products from tiles, siding, stone, plaster is still at the peak of its popularity.
And all thanks to such qualities:
- Ideally protects the surface of the walls from moisture;
- Creates a ventilated facade system;
- Allows you to get a choice of both smooth and textured surface;
- Makes it possible to create unimaginable relief compositions;
- Flawlessly lay down on any type of insulation.
Plaster, unlike other finishing materials, is the most profitable investment.
Since, if desired, and without special financial investments, it can be easily repainted, quickly dismantled and even, if necessary, change the texture.
All plaster mixtures are divided into four main types, each of which has its own composition, method of application and conditions of use:
- Mineral plasters, the most economical, durable and strong, since they are based on cement;
- Acrylic plasters, elastic and moisture resistant due to the high content of acrylic resins in them;
- Silicate plasters, plastic and very porous, basically have liquid potash glass;
- Silicone plasters, universal and able to protect against any kind of impact, are made on the basis of silicone resins.
Therefore, when choosing a certain type of plaster, it is very important to follow not only the recommendations for their use, but also take into account the properties of the insulation on which it will be applied. Neglecting these facts, instead of a qualitative result, you can get a poorly functioning system with an ugly and cracked surface.
Neglecting these facts, instead of a qualitative result, you can get a poorly functioning system with an ugly and cracked surface.
And yet it is worth noting that the plaster in the insulation of the facade is the most important element.
That is why, without a protective layer of plaster, it ceases to fulfill its important heat-saving function and becomes simply useless.
Please watch the related video:
But still, the main thing in this technology is that with the help of plaster truly beautiful and durable architectural compositions are created.
Share this article with your friends on social media. networks!
Universal technology of plastering on insulation
Let's briefly go over the main stages of the installation of thermal insulation and subsequent work on applying plaster. We consider this in a complex, because the quality of the result of work at both stages is interconnected.
 The reinforcing mesh is fixed on a pre-applied base layer of plaster - it is recessed into it. It is unacceptable to attach the mesh to the insulation and apply a plaster solution to it.
- cleaning the base and applying a primer layer. The primer is responsible for strengthening the material on the wall surface and increasing its adhesive properties;
- fixing the starting profile. It is needed as an additional support for the lower sheets of thermal insulation. Among other things, the profile serves to protect the insulation from dripping moisture;
- application of the adhesive composition along the perimeter of the thermal insulation and dotted - in its middle part. The plate is pressed tightly against the wall, the squeezed out excess glue is removed with a spatula;
- after the glue dries, the slab is additionally fastened with dish-shaped dowels (5 fasteners per slab - in the corners and in the middle). An important point: the screed with mechanical fasteners should be carried out moderately in order to avoid violating the geometry of the insulation;
- applying the base layer of plaster with a 10 mm toothed trowel. A reinforcing mesh is recessed into it, which will prevent the formation of cracks in the finish;
- leveling the surface with an additional layer of plaster, after which the decorative work follows after drying. This can be painting with a preliminary application of a primer or decorating the wall with decorative finishing mixtures.
The above stages of work are relevant when plastering walls insulated with foam plastic, foam plastic and any other heat-insulating material suitable for facade insulation. The video below shows the full cycle of work. for the installation of an insulated wet facade. Don't be put off by Rockwool's "unobtrusive" ads. Any other analogues made of mineral wool or expanded polystyrene can act as products indicated in the video.
A few tips to make your life easier:
Try to accustom yourself to work with both hands. This is especially true in the case of a large area of \u200b\u200bthe walls of the house, as well as tight deadlines;
- mesh on the reinforcing layer. If you are looking for a durable facade finish, you simply cannot do without the use of fiberglass mesh;
- mesh overlaps should be 10 cm. Avoid the common mistake of attaching mesh pieces end to end. A crack will definitely appear in such a place;
- select a spatula individually. A tool that is too narrow will affect the speed of work, too wide - the loss of solution and rapid fatigue.


The choice of insulation
In order for the plastered surface to perform its protective and aesthetic functions with high quality, it is necessary to choose the right insulation.
And for this it is necessary to pay attention not only to the price and quality of the chosen material, but also to the basic characteristics of the wall on which it will be attached. So, a facade made of a material with low thermal conductivity is better to be insulated with mineral wool.
So, a facade made of a material with low thermal conductivity is better to be insulated with mineral wool.
And for walls made of porous materials, or erected by the frame method, it is desirable to use vapor-tight expanded polystyrene as a heater.
If the outer wall has a high degree of thermal conductivity, then it must be insulated with foamed polymers.
For finishing the facade, one type of insulation is usually chosen, but sometimes situations arise when a combination of two different materials can be used, compensating for the shortcomings of one with the advantages of the other.
Also, when choosing a heater, it is worth considering its properties such as flammability and soundproofing.
Master class on the topic of the article:
But still, one important rule must be remembered: there are no bad heaters, but there is a violation of the technological process during their installation