Some floor coverings, such as laminate, linoleum, tile, require a perfectly level base. With a conventional cement screed, getting such a coating is incredibly difficult, especially if you are not a professional. The best solution in this case is to fill the self-leveling floor with your own hands, creating an impeccable base for the top coat. Compared with the arrangement of the screed, the installation of a self-leveling floor can be quite a simple matter. For those who do not know how to fill the self-leveling floor with their own hands, video tutorials will allow you to understand in detail the intricacies of the process.

The choice of mixture for self-leveling floor
The first thing to do before you start equipping the finishing self-leveling floor with your own hands is to choose the right material. Mixtures for self-leveling floors are presented in a huge number of varieties and options that differ in characteristics, quality, price. How to understand which composition to choose?
Criteria by which you should choose a mixture for a self-leveling floor:
- Compound. Self-leveling mixtures can be based on a cement or gypsum binder, in addition to which the composition contains sand, mineral fillers, and special modifying additives. Self-leveling floor made of cement is the most inexpensive and versatile option, characterized by high wear resistance, strength, moisture resistance. Gypsum floors dry quickly, allow you to create a thicker layer, but are afraid of moisture, so they are only suitable for dry rooms.

- Layer thickness. Varies from 1 to 100 mm for different formulations. For cement - up to 10 mm, for gypsum and complex - more.
- setting and curing speed. All screed floors dry quickly, but gypsum floors can be walked on earlier than cement floors, about 3-4 hours after work is completed.
- Mixture consumption. Varies between 13-18 kg per sq. m. with a layer thickness of 10 mm. For a cement floor, it will be larger than for a gypsum one.
If you are thinking about how to make a filler floor with your own hands, first of all you should be interested in the composition and approximate thickness of the fill. When choosing, you should be well aware of the irregularities, differences and slope in the room in which you will make the self-leveling floor for the finish coating with your own hands, it is from their size that you need to start.

Many mixtures for the filler floor successfully replace the screed, and are also used when pouring pipes of the "warm floor" system.
Calculation of material consumption
Before you make a self-leveling floor with your own hands, you should correctly calculate the consumption of the dry mix, leaving a small margin. The norm is from 1.3 to 1.8 kg per 1 sq. m of area per 1 mm of layer thickness. It turns out that if you need to fill in a layer of 8 mm, the calculation will be as follows:
1.8 × 8 = 14.4 kg / sq. m.
Foundation preparation
Before making self-leveling floors, it is necessary to prepare the surface in stages. Anyone who is still unfamiliar with pouring a self-leveling floor can watch video tutorials. The general rules are the same everywhere.
- Floor preparation begins with the removal of everything superfluous from it, including skirting boards.
- The surface is thoroughly cleaned from any dirt, dust, oil stains.
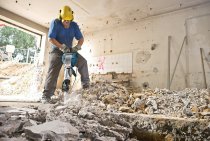
- The old peeling coating is removed.
- Before pouring the floor with mortar, potholes and cracks are sealed. This must be done in advance, no later than 24 hours before the start of work.

[smartcontrol_youtube_shortcode key="preparing the floor for the self-leveling floor" cnt="2" col="2" shls="true"]It is possible to pour a self-leveling floor in an apartment at a temperature from +5 to + 30 ° C.
- The base must be treated with a deep penetration primer without fail.Porous materials are processed several times. Large pores are closed with a high-viscosity primer. Dust must not be deposited on a freshly treated surface. Start filling no later than a day later.
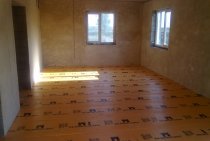
- A special damping tape for poured floors should be laid along the perimeter of the walls on all sides, otherwise the layer will crack from temperature deformations. Polystyrene strips up to 10 mm thick can be used. The width of such a strip or tape must correspond to the thickness of the poured layer.
- When leveling the surface, it is checked using a level and a rule. The highest point and the lowest point are found, after which beacons are set.
The beacon for the self-leveling floor is a dowel screwed into the base, which is then easily removed. Installing beacons in height allows you to correctly determine the thickness of the fill.

Before you make a self-leveling floor with your own hands, you need to select the necessary equipment, and then calculate the consumption of the dry mix. To qualitatively align the base under the laminate or tile using a self-leveling floor, you must follow the step-by-step instructions. This will help you not to miss anything.
Required Tools
The self-leveling floor is made using special tools, including:
- Containers for the preparation of the solution.
- Drill with a nozzle for mixing mortar or a construction mixer.
- Large spatula.
- Squeegee for self-leveling floor.
- Needle roller.
- Shoes for walking on a fresh surface (paint shoes).
- level and rule.

Solution preparation
When self-leveling floors are made in an apartment with their own hands, the solution is first prepared.
Important! Many people ask the question: “why does the self-leveling floor crack?”. The reason is simple: it's all about excess water. Therefore, do not pour water "by eye", follow the manufacturer's instructions.
- In a given ratio, water should be poured into the container and the dry mixture should be added.
- Mix the solution with a mixer until a homogeneous mass is obtained.
- Allow 5 minutes for the leveling mortar to mature.
- The technology of pouring a self-leveling floor provides for a test for spreadability. The solution is poured into the cap of a shaving can with a cut off bottom, placed on a horizontal plane. The lid will lift, and the solution should form a spot with a diameter of 16–18 cm. If the dimensions are not correct, the composition of the solution is adjusted.

Important! Freshly prepared mixture must be used within 60 minutes. Portions are applied in parts with an interval of at least 10 minutes. If you look at how the self-leveling floor is made (video), then you will notice that the number of workers must be at least two.
Filling the floor
How to make a self-leveling floor? The first time you can pour the self-leveling floor in a small utility room to develop the necessary skills. The process of filling the self-leveling floor is not difficult and is done as follows.

- Work begins from the wall farthest from the front door. There should not be long breaks between each operation, otherwise the surface will be uneven. The solution is applied to a separate area parallel to the wall, and then leveled. The squeegee regulates the thickness of the layer. Then they move on to the next section.
In the process of work, you will need special shoes for pouring the self-leveling floor. A worker wearing boots with special spikes will not damage the leveled floor while walking on it.
- To remove air bubbles, the solution is rolled with a spiked roller.
- Similarly, the following layers are poured and leveled until the floor to be poured is complete. It is better to do the work with at least two people: while one fills and levels the floor, the other prepares the next container with the solution.
Attention! After pouring, it is important to protect the surface from drafts and direct sunlight.
To better understand how to make a self-leveling floor with your own hands, it is recommended to study photos and videos with detailed descriptions.

Note! When self-leveling floors are made, the technology for preparing solutions and pouring from different materials may differ slightly. Before pouring the self-leveling floor, it is necessary to study the instructions for use.
Conclusion
Now you know how to properly fill the self-leveling floor. The procedure includes sequential operations: preparation, preparation of the solution and its application. A well-made coating will be an excellent basis for the finishing floor - tiles, laminate, linoleum or parquet boards. The timing of laying these materials will be as follows:
- tiles can be laid after 3 days;
- linoleum - after 7 days;
- laminate and parquet board - after 28 days.