Modern technologies offer different flooring options. One of them is the floor covering on the logs. Let's find out what logs are and what their advantages are, and also get acquainted in detail with the features of working with them, starting with the selection of tools and calculating the amount of materials and ending with the installation and thermal insulation of the floor.

Advantages of the floor on the logs
To begin with, we recommend that you evaluate the advantages of this method of arranging the floor:
- The floor is warm.
- The noise of the neighbors from below does not penetrate into the apartment.
- The cost is quite acceptable.
- You can overpower the installation with your own hands.
- Under the floor on the logs, you can hide ugly, but necessary wires and pipes.
- The work will be accompanied by a pleasant smell of processed wood in the apartment.
- The floor on the logs is the most environmentally friendly of the existing ones.

What do lags look like?
Logs are bars used as a support for hard flooring or roofing. Logs are made of metal, reinforced concrete, polymers, but most often of wood. The reason is simple: it is easier to work with a tree, its price is much lower. The difference between the floors on the logs of different types is in the service life until the overhaul. Under standard conditions, wooden logs are designed for 40 years, iron - for 80, for concrete, the period is not limited.
The most practical wooden logs for the floor are made of coniferous wood.
The humidity of the bars intended for arranging the floor, according to the standard, is 18–20%. Before laying, they are impregnated with an antiseptic from pathogens of various types of rot and coated with a flame retardant, reducing the risk of fire. It will be possible to mount them after complete drying.

Log size and quantity calculation
The ideal size of a beam for a log is 50 x 50 mm, with a length equal to the width of the room. When using bars with a rectangular section, the desired ratio of width to height is 1: 2.
To simplify the work with our own hands, we distribute the logs at a distance of 60 cm from each other, that is, the width of the insulation mats. Such laying from above is sewn up with a board 30 mm thick.
If the top flooring has a different thickness, the distance between the lags changes. To calculate it, we use the following formula:
L = Ld x 20.
L - clearance between lags in cm,
Ld is the thickness of the floor in cm.
Now, using a simple arithmetic operation, we consider the number of lags required for a solid floor:
room width: distance between lags +1 extreme.
So, with a room width of 5 m (500 cm) and a distance between the lags of 60 cm, their total number will be 9 pieces.
500 : 60 + 1 = 8,3 + 1 = 9,3

Pay attention to the following nuances:
- When using a rectangular beam, it is placed on the edge: this way it bends less.
- In the absence of bars of the required length, the available ones are spliced, connecting them to each other in half a tree. When laying it is necessary to ensure that the joints are not located on the same line.
Mounting tools
The list of tools is quite small:
- Level.
- Hammer.
- Drill or screwdriver for driving screws.
- Knife for cutting waterproofing or insulation.

Consumables
From the materials you will need:
- Small pieces of plywood or chipboard (for leveling the floor).
- Insulation. Bulk, sprayed or rolled.
- Self-tapping screws, dowels or anchor bolts.
- Corners or U-shaped fasteners.

Preparing for installation
The procedure begins with the device of a large mess with your own hands, that is, with the dismantling of the old floor.
- We completely free the entire floor area.
- We check the old screed. We remove all exfoliated pieces, we embroider cracks. Blisters are tapped to detect cavities under them. We found it - we open it and clean it to a solid monolith of the floor slab.
- We carefully remove debris and dust, preferably with a vacuum cleaner.The apartment must be clean.
- Next, we eliminate all the defects found in the subfloor. First, prime them and wait for the primer to absorb and dry. We fill the flaws flush with the common surface with a cement-sand mortar. A ready-made repair compound sold in hardware stores is also suitable. After drying, prime again.
- Using the level, we calculate the highest point of the surface in the room. We make a mark - this will be a guide for future work.

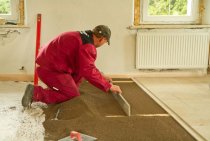
Filling the screed
There are two options for moving forward.
- Make a screed, while bringing the surface to one level.
- Set the logs to the level with the help of small plywood spacers.
A screed is highly desirable to do in any case. The question is how much effort and resources will be needed for this.
- If the difference in the level of the base is small, then pouring with a solution is more profitable. With the correct result, the logs are placed directly on the floor.
- If the difference reaches 5 cm or more, then a three-centimeter screed is made and the log is installed on chipboard substrates or even on bars.
When the screed has stood and gained strength, we continue the arrangement of the floor. On top of it we spread a plastic film or waterproofing material. We glue the joints with adhesive tape.

The apartments on the first floor often smell from the basement. To prevent such an attack in the future, we additionally process the screed with bitumen, diluted with diesel fuel. Three days will have to wait until the smell disappears. But for many years you will forget what smells from under the floor. By the way, this solution is a powerful antiseptic.
Lag installation stage
Let's start installing the log for the floor with our own hands.
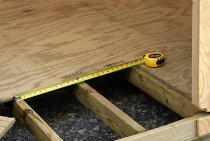
- We lay out solid or connected bars along the width of the room. The first and last are located 20–25 cm from the wall. The distance between the lags was calculated earlier.
- Now the most crucial moment is to remove the floor level with your own hands. The quality of the finish depends on this. All bars must be in the same, strictly horizontal plane. For lifting, we use linings from scraps of boards, plywood or bars of the right size.
- Need securely fix floor joists. To do this, we use powerful self-tapping screws or anchor bolts. The fastening pitch is 60–80 cm. We select a drill that matches the diameter of the screw in size. We drill a beam, capturing the concrete base. We twist the self-tapping screw.

There is another way to achieve a perfectly flat floor - installing a log on adjustable bolts. By turning them, we achieve the desired result.
If small ceramic tiles are used as a finishing floor covering, the distance between the bars must be reduced to 30 cm. In this case, transverse logs will also be needed at the same distance. We fix them on the same level with the longitudinal bars with a corner; a U-shaped profile is also applicable. This strengthening of the structure is caused by the small size of the tile.
Heaters
The next step will be the laying of insulation, which is also noise insulator. On sale there are several types of insulation:
- Bulk insulation for the floor. It can be expanded clay, sawdust, ecowool, vermiculite. Low price, thermal conductivity and environmental friendliness make it very popular. But it requires good tamping during installation.
- Sprayed insulation. The process of applying such a heater is quite complicated. You will need special equipment, rather expensive components. But if you have the necessary skills, you can do this operation yourself, while removing the problem of noise, hydro and vapor barrier. Such insulation penetrates into the most inaccessible places, forming a continuous mass.
- Roll heater.Mineral wool, penofol, expanded polystyrene. Such material is convenient for floor insulation. It is laid out or rolled out directly on the floor, adjusting in size so that it fills the entire space between the lags.

Between the insulation and the floor finish, you need to leave a small gap for ventilation.
Last step

The basic structure of the new floor is ready. Now you can lay top coat. Will it be plywood slabs covered with carpet, boards or ceramic tiles - it doesn’t matter. It is important that the base of the floor turned out to be reliable, and the apartment will be warm and quiet.