When cladding walls with drywall, sheets can be mounted on a frame or simply glued to the walls. Depending on the option chosen, electrical wiring under drywall can be laid in different ways, which you will learn about later.
If the GKL is installed on frame, there is enough space for cable routing. Wall chasing is not required here, which is a noisy, dusty and time-consuming operation. The frame plasterboard construction in this case has the following advantages:
- no special tools needed;
- hidden communication;
- ease of installation of wiring with fittings.
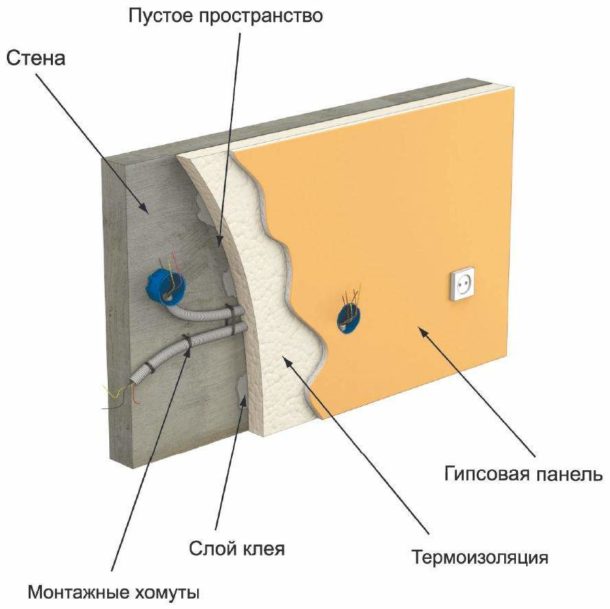
If there is no need for noise and sound insulation, the unevenness of the walls is not too large, and besides, you don’t want to lose the usable space that the frame will “eat”, you can simply stick the sheets on the walls. In this case, the electrical wiring is laid in the same way as under a layer of plaster: it is necessary to ditch the walls and lay hidden wiring inside.
Installation of electrical wiring in drywall
Consider the procedure for installing electrical wiring in the most common case, when drywall is installed on a frame.
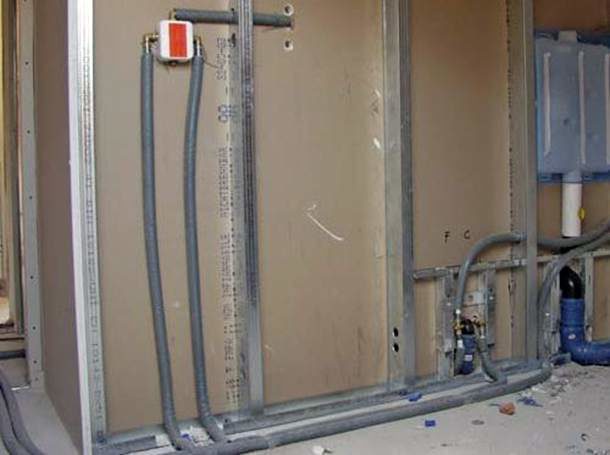
A corrugated hose is required for safe laying of hidden wiring under drywall. In addition, if you stretch the cable through the corrugation, then it will be easier to replace it when it fails.
Preparatory work
Before starting installation, you need to prepare the necessary materials and tools, and then perform some manipulations with the cable and corrugation.
Mounting materials:
- corrugated hose;
- cable;
- clips;
- dowels;
- terminal blocks for connecting the ends of the wires;
- junction boxes, drywall sockets, switches, sockets.
Cable for electrical wiring should be used non-flammable with marking VVGng. If you take the type with double insulation VVGngLS, it is not necessary to use corrugation.
Of the tools you will need a puncher, drill, screwdriver.
Before installation, the cable is pulled into a corrugated pipe.
- The corrugation and cable are measured, after which they are cut to the desired length.
- The wire inside the corrugation is twisted around the cable and wrapped with electrical tape.
- The free end of the wire is attached to a fixed object, after which a broach is performed: the corrugation is stretched along the entire length, after which it is put on the cable.
Wiring is done after installing the frame under the drywall.
Mounting order
Wiring is carried out in the following sequence:
- A laying diagram is drawn up with markings on the base wall of the position of the route and fittings. The cable is laid only vertically and horizontally. Compliance with this rule will help to easily determine its location under the cover - opposite the sockets with switches.
- Holes are drilled in the walls, the first - at a height of 20 cm from the floor, the next - in increments of 40 cm. Clips are attached to the dowels in them. Fixing the hose prevents it from sagging.
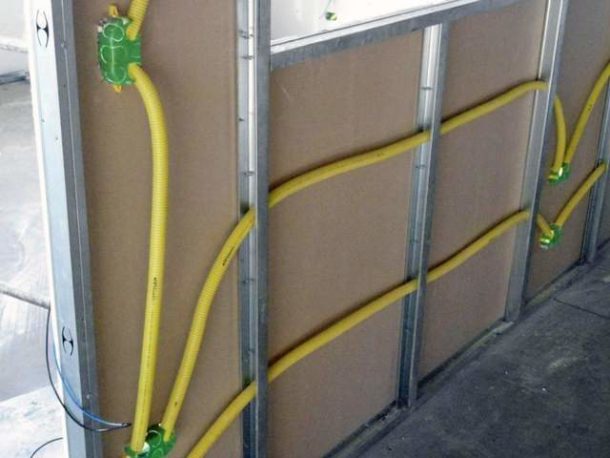
- A corrugation with a cable stretched through it is mounted on the clips. She follows the profiles. If they are located close to the wall, the cable is passed through the frame holes, which should be cut out. The corrugated pipe is located at a distance from self-tapping screws that can pierce the cable. If sharp ends pass near the wire, they should be cut off.
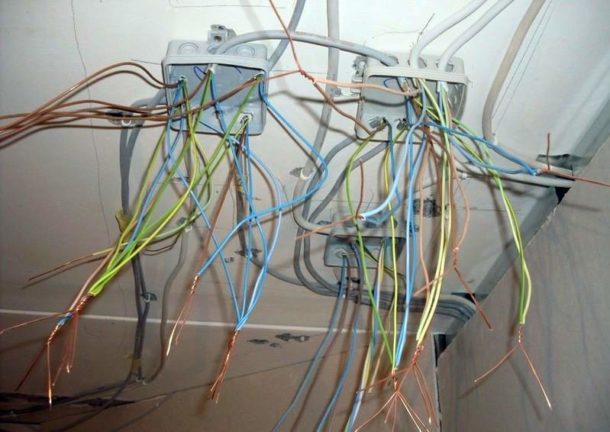
- Junction boxes are mounted on walls or ceilings with dowels. It is better to install them in drywall later, along with sockets and switches.
After the wiring is completed, gypsum boards are mounted on the profiles.
Placement of switches and sockets
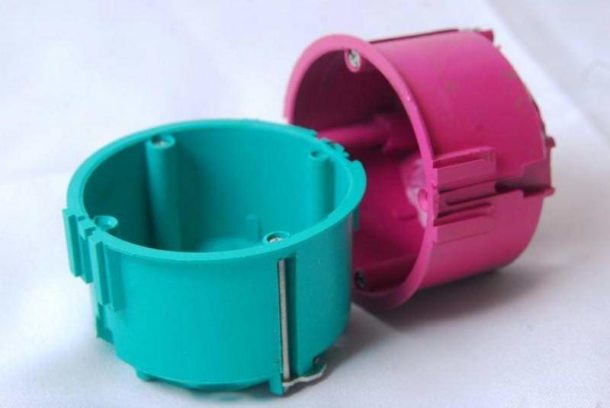
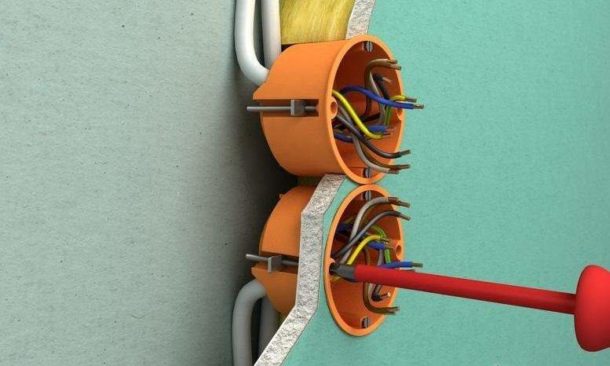
Under sockets and switches on drywall, socket boxes are mounted, specially designed for it. They are made from self-extinguishing plastic.
- Holes of the desired diameter in the sheets are made using a drill with a crown.
- Cut edges should be treated with a primer and putty solution. This will increase the strength of the sheet.
- The ends of the cables are brought to the holes.
- The socket box is inserted and fastened in the hole with screws with paws, after which the wires are pulled out through it. Do not overtighten: fragile base material or plastic may be destroyed.
- Sockets and switches inserted and connected after finishing GKL.
Distribution boxes are also conveniently mounted in drywall. Then the wires will be accessible from the outside.
Features of electrical wiring in the bathroom
In wet rooms, wiring in drywall constructions differs from the usual one. It does not hurt to consult a qualified electrician.
Wiring requirements are as follows:
- junction box and switch are installed outside the premises;
- sockets are placed no closer than 65 cm from the water source;
- electrical appliances are selected waterproof type and grounded;
- the line is powered by a separate circuit breaker with a residual current device;
- ground bus and metal conductive elements (towel dryer, pipes, drain, electrical appliances) are combined into a potential equalization system.
Wiring in false ceiling
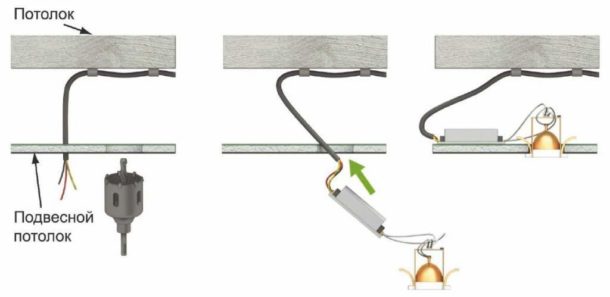
The method differs from installation inside wall structures. For connection to a single luminaire, the cable is led to the upper edge of the walls. Holes are drilled in the ceiling GKL, a cable is inserted into them and pushed to the exit. Thus, it can be stretched for several meters.
If there are many exit points, work is done after the installation of the frame and before fixing the drywall. If the ceiling is already mounted, the sheets will have to be removed.
The sequence of work will be as follows:
- A wiring diagram is drawn up, where all points of distribution of electrical elements are marked. Then it is transferred to the place of installation in the form of markings.
- The cable can be laid along the walls, but it is better to mount it on clips or perforated metal tape to the ceiling. Then it descends vertically to the lamps, sockets, switches.
- The last step is to connect the wires to electrical outlets through the installed sockets.
Conclusion
Hidden wiring in drywall will be successfully laid if all installation steps are correctly performed. The work is being done in the process of the next repair. The wiring will serve for a long time if the scheme is preliminarily drawn up and calculated and the components are correctly selected.
