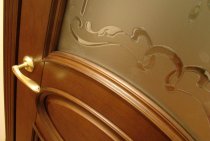
Initially, the installation of interior doors begins with the choice of materials. There are three types of door frames:
- from fiberboard;
- from MDF;
- from natural wood.
After selecting the material, the installation begins. You can do everything yourself by carefully studying the diagram, but a quick installation is fraught with consequences such as skew.

For installation you will need:
- hand tool;
- power tool;
- accessories;
- self-tapping screws, nails and mounting foam.
To better understand how the door is attached to the box, consider the diagram:

The diagram shows that the door frame (1) is attached to the opening with self-tapping screws (3). The space between the wall and the box is filled with foam. Door number (2). Thus, it turns out that the whole process comes down to fixing the box with self-tapping screws and blowing voids.
Installation of door hinges

Hinge installation must be carried out with special care. Here you need to follow the instructions exactly and withstand all sizes:
- Make a mark on the inside of the rack - 20 cm from the top edge.
- Place the loop on the mark and circle with a pencil.
- Take into account the dimensions of the hinge and the gap from the web when calculating the installation depth.
- Make a platform for the loop using a milling cutter or chisel.
- In a similar way, make a place for the bottom loop. Distance 21 cm (1 cm is reserved for the lower gap).
- Attach the rack to the canvas and make seats on it in the same way.
Door frame installation
The first step is to fasten all the parts and make a fit under the doorway. All due to the fact that at the factory they are produced in excess of standard sizes by 5–6 cm.
- The best solution would be to assemble on the floor along with the door itself. This is done in order to avoid sizing errors.

- The hinge pins that are on the box must be looking up.
- The direction in which the door will open is often determined by the layout of the room. For example, the door to the bathroom is best made to open outwards. This is because there is not enough space in it, and there will be nowhere to turn around.
- The assembly of the box begins with fixing the top bar with screws. End strips should be parallel. They are fastened with screws.
- If the box is made of fiberboard, then it has low strength and you need to pre-drill holes to avoid splitting.

- For fastening, 4 screws will be enough, 2 on each side.
- Height adjustment is made by taking measurements with a tape measure. After that, you need to transfer the dimensions to the box.
- It is necessary to take into account a gap of 1 or 2 cm to be able to seal the seam.
- To avoid damage to the box, it is better to cut off the excess with a hacksaw.
- So it turns out the design in the form of the letter "P". It can be securely fixed in the doorway. First, place the box in the opening and stabilize it with a building level. After that, hang the door and close it several times. If the door is made of fiberboard, then you can hang it yourself. In such a simple way, you can check the correct assembly of the box.
- After installation and stabilization, it must be fixed with screws. To do this, the decorative strip is removed and several holes are drilled on both sides. Holes are made in increments of about 25–30 cm.
- Next, you need to drill holes in the wall. Marking is pre-applied.
- Also those who have brick walls, must choose the correct position for the holes. It is worth noting that they need to be done in brick, and not in the seams. Then the dowels will hold well.
- The next step is the installation of plastic dowels. Next, the box must be fixed to the wall with self-tapping screws.
- When everything is screwed, you need to re-check everything with a building level.Next, the door is put on and a check is made: you need to open and close it several times.
- Now the seam is blown with mounting foam. But it is worth considering an important point: blowing must be carried out with the door closed. This is important because the foam expands during the curing process and can pull out the dowels and bend the box.

Before foaming, you need to take care of the gaps - they need to put a dense material that will protect the box and the decorative layer from the expansion of the mounting foam. In addition, you do not need to buy anything, you can get by with packing cardboard.
Following the instructions given, you can install the doors yourself in about three hours. This does not take into account the time required for preparatory work.