Features of installing a skirting board for a bath
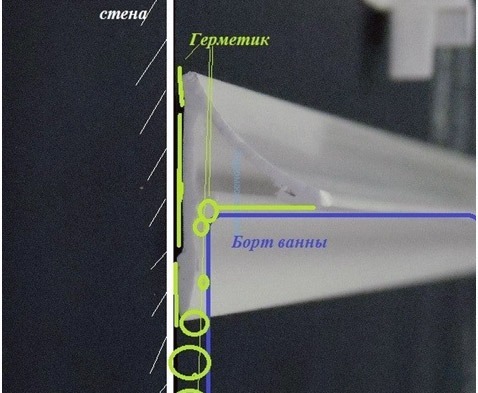
Installation of the plinth is carried out on a special sealant
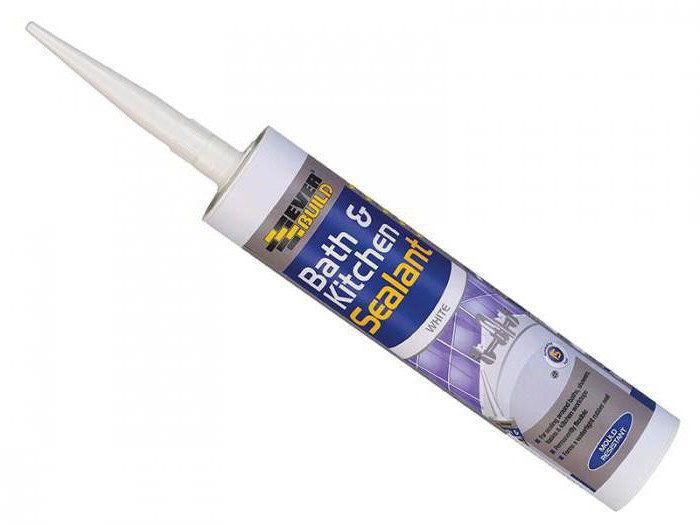
The choice of sealant here must be given special attention. The fact is that if you take ordinary silicone, then its service life may not be long enough.
Now manufacturers have begun to produce formulations in which, in order to save money, there are cheap and unreliable components. With regular contact with water, they are gradually washed out of the material and form pores in it, contributing to the formation of fungus.
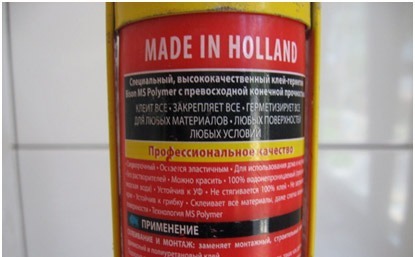
At the moment, the optimal sealant for a bath is a sealant based on MS polymers (MS Polymer).
The plinth is attached to both the wall and the bathtub so that water does not have the opportunity to penetrate under it. However, if the bathtub is not fixed enough and moves a little each time during use, then the plinth is glued only to the wall. This ensures the integrity of the connection between the curb and the wall. If the plinth glued to the tile is well pressed against the bathtub, then water will practically not leak under it, even when there is no sealant. And a good connection with the wall is guaranteed to exclude cases when the bathtub flows between the wall.
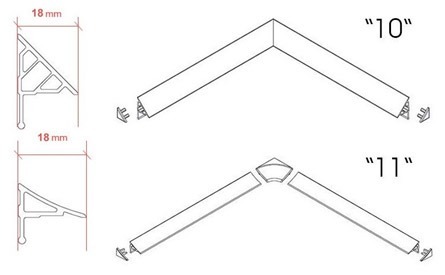
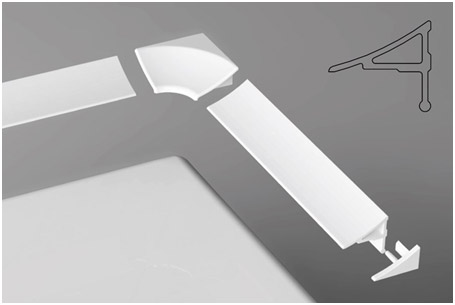
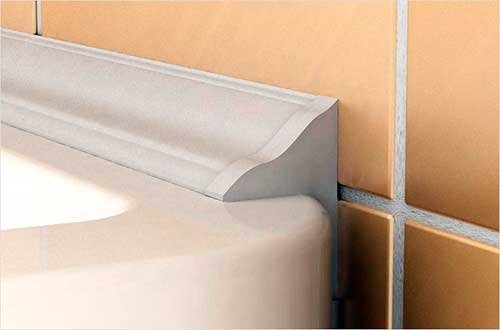
Borders come in various shapes and some models allow not only to close the outer corner from water ingress, but also fill the gap between the bathroom and the wall.
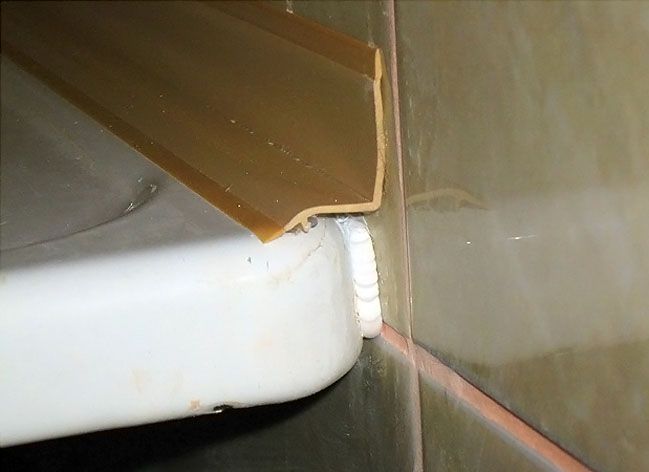
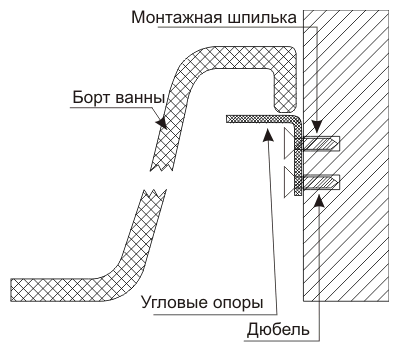
With it, you can achieve additional fixing of the bath in its place. The lower plank, previously treated with sealant on both sides, of the plinth is inserted between the bathroom and the wall. This solution adds stability to the structure and serves as a kind of latch, which is very convenient if the bath is located at a short distance from the wall.
How to close the gap between the wall and the bathroom basic options
This article will discuss how and with what to close the gap between the wall and the bathroom, as well as the main ways to close this gap.
Causes of the gap
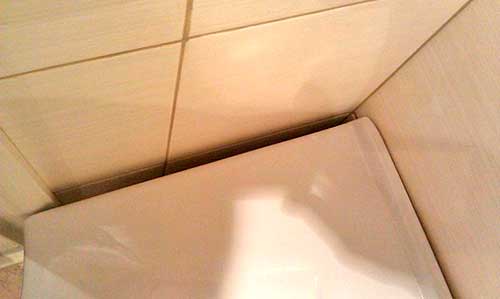
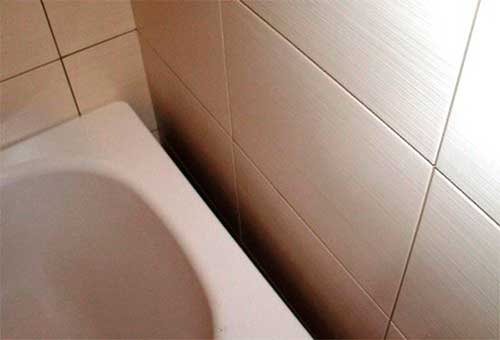
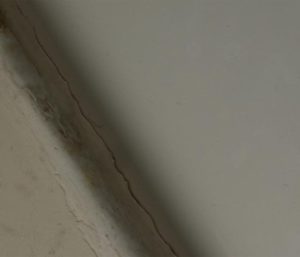
Most often, a gap that appears between the bathroom and the wall is a sign of the following situations:
- The dimensions of the installed bath do not fit the dimensions of the bathroom;
- The geometry of the bathroom does not meet the standards, that is, the walls intersect at an angle other than 90;
- Incorrectly observed technology for the repair of the bathroom - small or large.
If the installation of the bathtub was carried out after laying the tiles in the bathroom, then this gap appears quite logically, and it is necessary to somehow solve the issue of its elimination.
In the case of installing a bath, proceed in a slightly different sequence:
- The first step is to lay the floor of the bathroom;
- Complete the installation of the bath;
- Only after installing the bath, start laying tiles on the walls.
In this case, the tile will rest on the edges of the bath, which avoids the formation of this gap and the question of how to cover the gap between the wall and the bath will not arise.
Considering this problem, first of all, you should deal with various methods for eliminating the resulting gap - there are different ways to eliminate free space of certain sizes
In addition, you should take into account what material the bath is made of.
In this case, it is necessary to fasten the acrylic bathtub to the walls with high quality and securely using ordinary hooks screwed into the walls: two hooks are screwed along the long side of the bathtub, and one at a time along its ends. Such a fastening is sufficient to ensure that the sealing of the gaps between the bathroom and the wall is sufficiently reliable.
Three ways to close the gap
As already mentioned, the connection method baths and walls depends in first of all, on the size of the existing gap, it is by this criterion that it is determined how to close the gap between the wall and the bathroom.
closed gap
- Sealing small gaps less than 10 mm in size:
- This will require an outer white tile corner and sanitary white silicone;
- The ends of the corner are measured strictly to the dimensions of the bath and cut at an angle of 45 degrees;
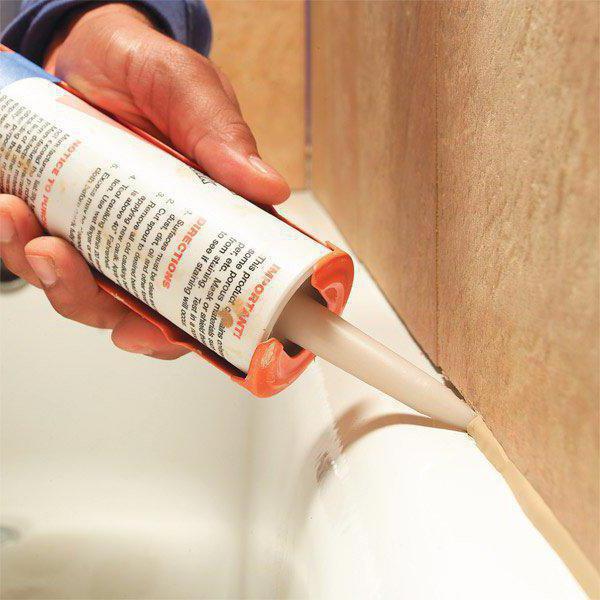
- Next, the gap between the bathtub and the wall is tightly filled with silicone and closed with a plastic corner. In this case, such an amount of silicone should be pumped up so that pressing the corner causes it to crawl out both near the wall and near the bathtub. The excess silicone is then removed with a damp cotton rag.
plinth
- Elimination of a gap of 10-30 mm in size:
- To eliminate such gaps, ordinary tile corners are not suitable, since their maximum width is 12 mm. In this case, a self-adhesive border or a special plastic plinth should be used;
- The installation of skirting boards is carried out similarly to the installation of a corner, the main difference is that a gap more than 1 cm wide cannot be completely filled with silicone - this is not necessary, the main thing is to reliably and efficiently glue this skirting board to the wall and bath;
- Before gluing the plinth, the surfaces to be glued must be thoroughly degreased and dried;
- Closing the gap is carried out taking into account the same rule in the case of a self-adhesive border, which is sold in rolls by linear meters. Gluing a border is a more complicated procedure than it might seem, to facilitate the process, it is recommended to glue one side first (for example, to a bathtub), and only then another.
closed gap
- Closing large gaps. The first two methods are not suitable when the gap size exceeds 30 mm. In this case, you will have to use another method that requires certain concreting skills:
- From below, under the bath, a kind of formwork is installed in order to prevent the solution from getting under the bath;
- The resulting recess is filled with a solution;
- After the mortar dries, ceramic tiles (white or in harmony with the tiles on the walls of the bathroom) are laid on top of it.
When solving the issue of closing the gap between the bathroom and the wall, other methods and materials can be used that differ from those described in this article. With imagination and the ability to use tools, you can come up with your own way to solve this problem.
At the same time, the main thing is to remember that regardless of the chosen method of eliminating the gap, tightness and aesthetics should come first.
How to avoid a gap near the wall
The bathroom is a room with high humidity, so it is necessary by all means to prevent water from getting on the surface. The installation of an exhaust device helps with this. Of great importance is the correct adjoining of the bath to the wall. The outer side of this plumbing is covered with a screen that limits access to surfaces behind and under the bath. If there are gaps, water will get into them. It is difficult to remove it, because mold often starts behind the screen.

It will not work to avoid the formation of cracks between the bathroom and the wall. But you can choose a way to install it, in which the gaps will be minimal. They are easily removed with a silicone moisture-resistant sealant, since the distance between the bath and the wall is small.
Masters disagree on when to install plumbing: before laying tiles or after. Experienced people advise doing this last, but they recommend preparing the walls in advance for installing the bath: make strobes under the sides in them. Thus, they (sides) will be able to "embed" directly under the first row of tiles. This method of installing plumbing equipment has its advantages:
- The sides of cast-iron and steel bathtubs are rarely even. With acrylics in this regard, things are much better.By sliding the bathroom into the strobes, they get the minimum gaps between it and the walls.
- For the design of such joints, finishing materials are not required. The method is beneficial in terms of saving money and labor costs.

Slit up to 10 mm
Otherwise, false expectations can be provoked, which may even end up in a court charge of fraudulent deception. When installing bathtubs, washbasins, toilets, etc. mistakes are still being made in the field of wall and floor connections. The tool brings not only trouble, but, of course, costs.
Here are two examples from practice. In the first case, the artisan craftsmen installed all the porcelain objects directly on the tile or ceramic sheathing without backfill, and then wound them elastically. Due to the supposedly flat or planned surfaces of the ceramic wall and floor covering, there was no reason for proper backfilling.
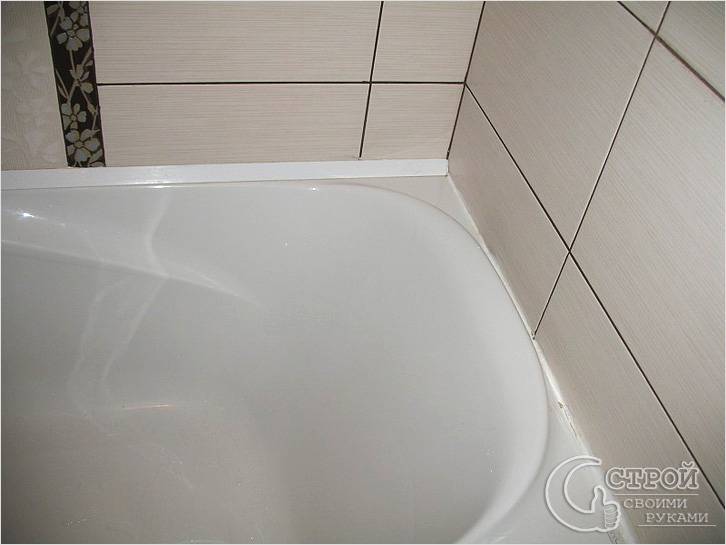
To close a gap of this size, you will need to prepare a white outer corner, usually used for tiles and white silicone sealant. Crack sealing operations are carried out in this case in the following order:
- We cut off the corner blank, measured exactly along the length of your bathtub, and cut its ends at an angle of 45 °.
- We fill the free gap between the bathtub and the wall with silicone.
- From above the seal is closed with a plastic corner.
There should be enough silicone in the voids so that when pressed with a corner, it appears not only against the wall, but also from the side of the bath. Excess silicone is then removed with a damp cloth. In the case of an acrylic bathtub, the gaps must be sealed after filling it with water and maintained for 12 hours.
In the second example, installers conveniently coated the back walls or support surfaces of the hygiene items with a permanently elastic silicone sealant and then attached them. Consequence: In the case of the subsequent dismantling of the object in connection with the repair, significant damage in the area of the surfaces of the glazed tiles occurred due to the very intense adhesion to the silicone material. As a result, the client demanded, as part of the guarantee, a free renovation of the incorrectly installed sanitary facilities.
The described cases are not, as you might think, the so-called "installation exotic" - quite the contrary! The reason for such erroneous versions is often due to the fact that professional wall connections are, firstly, expensive and time-consuming, and on the other hand, it is surprising that there is still considerable uncertainty regarding the correct installation of the version.
Making an unattractive joint at the border with the cladding
Many owners are interested in the question of how and with what to close the gap between the bathroom and the wall in order to increase the overall aesthetics of the bathroom and the practicality of the further operation of the room. To do this, you need to take into account some nuances.
First decide on the width of the gap
It is necessary to pay attention to the temperature regime of the room, the shape and material of the bath, as well as the surface finish of the walls. Previously, only a cement-sand mixture was used to decorate such a joint, but progress and technology are constantly developing.
To date, there are several options for solving this problem. Your choice only determines the distance from the wall to the edge of the bathroom and personal preferences.
Preparatory stage
A large gap between the bathtub rim and the wall occurs if the plumbing fixture of standard dimensions does not fit the format of the room. Problems can also arise if the room has uneven corners and this could not be fully compensated for in the process of finishing the walls.
It is important to waterproof the gaps with high quality, since water will flow down the wall and get under the bath, as a result of which:
- there is a risk of leakage to the lower floors;
- high humidity in the room provokes the development of mold, which is harmful to human health.
Important! Before sealing the seams, make sure that the acrylic bathtub is securely fixed to the wall using special hooks that are installed on the bottom edge of the rim. Otherwise, over time, the acrylic will bend, and the tightness of the seams will be broken.
Before sealing the gaps, fill the acrylic bath with water and do not drain it until the end of the work, until the silicone is completely dry!
For sealing wide gaps (15-30 mm), the combined method is best suited - a combination of mounting foam and bath sealant. With the help of mounting foam, a support is formed for the sealant layer, which in itself also serves as a waterproofing agent and is durable.
How to seal the joint between the bathroom and the wall
Moisture constantly accumulates in the bathroom, and it is highly undesirable there. In those places where it is constantly wet, mold forms, which is very harmful to human health. The place where the bathroom joins the wall is especially vulnerable to water, which is why poor sealing of the bathtub will lead to constant accumulation of water and serious problems, both in your apartment and in the next one, which is located under yours. Water from under your tub may seep into them. In order to avoid unforeseen repairs in both apartments, a bathroom sealant is needed to properly join the bathroom to the wall surface.
small clearance
If the gap does not exceed ten millimeters, it would be advisable to seal the seam between the bathroom and the wall with sanitary silicone, polyurethane foam, plastic corner or grout.
Silicone
The best solution to the problem of how to seal the joint between the bathroom and the wall is plumbing sealant. Such a polymeric material is designed to create a waterproofing layer. After application and drying, this substance forms a dense elastic coating similar to a rubber surface.
Sanitary silicone has sufficient adhesion, so it can easily be fixed even on the glossy finish of tiles and bathtub enamel. Remember that an acid-based substance will lead to the formation of corrosion on metal products.
Mounting foam
To seal the gap between the wall and the bathroom, it is a good idea to use waterproof building foam. The polyurethane which is its part promotes hardening of substance under the influence of air. When applied, the material fills all the irregularities, therefore it contributes to good sound insulation and prevents heat loss. The low cost of mounting foam and high adhesive properties will be another advantage of its use.
However, the gap sealed in this way will not be absolutely tight due to the porous structure of the substance. In addition, such a surface will require additional decor, as it looks extremely unattractive.
Grout and plastic corner
Both of these materials are not an independent waterproof coating. However, when, after applying silicone or mounting foam, the question arises of how to close the gap between the bathroom and the wall, the use of these products will be the best solution. As a rule, they are needed only for decoration after applying a layer of unsightly sealants. It should be remembered that the width of the corner does not exceed fifteen millimeters, so it is not advisable to decorate gaps of more than one centimeter with it.
How to properly seal a joint
The best way to seal the gap will depend on how the bath is installed in its place. You should also take into account the features of the joint itself. If there is a distance of 1-2 cm from the bathtub to the wall, then you can use a special plastic skirting board for the bathtub. They come in a variety of shapes and designs and are wide enough to fill up to 2cm of empty space in a corner.
For the convenience of connecting this decorative element in the corners, the manufacturer provides various corners and tips. When choosing a border, it is recommended to purchase one with which you can purchase these components. If the budget is limited, you can take the simplest plastic bath skirting board. Corner joints and decorative trim from the edges of such a border are sealed with silicone sealant of the same color (usually white).
A feature of installing such a curb is that under it there should be space for ventilation. Often, in order to fix the bath in a static position, the gap between it and the wall is filled with mounting foam. If you install a plastic plinth over such a joint, then an empty area is formed under it. In this place there is a high probability of the development of all kinds of fungi and mold. Over time, they will begin to spread and spoil the appearance of the wall decoration and the surface of the bath.
It's important to know
- Acrylic bathtubs are characterized by the ability to sag. So that the sealing work does not go down the drain, plumbing must be screwed on three sides with four fasteners - two fasteners from the ends and two more fasteners along the long side.
- Filling the gap between the walls and the acrylic bath is done by filling the case with water. Drain water only after all adhesive materials are completely dry.
- Steel and cast iron bathtubs are installed in such a way as to exclude possible vibrations and wobbles during operation.
- All bathtubs should be installed in level, adjusting the position by twisting the legs.
It is necessary to entrust the work of eliminating cracks in the bathroom to master tilers. They will qualitatively and quickly close up an unnecessary gap, and the owners will only have to accept the work. But if you have free time and strictly follow the instructions, even a woman can do this work on her own. Whichever method you choose, the main condition is water resistance and aesthetic appearance. You will learn about the pros and cons of this or that sealing method by watching the video below.
Silicone sealant
How to seal a bathtub with a wall using silicone sealant? Tools that will be needed for work:
- alcohol or solvent;
- scissors or a sharp knife;
- a tube with silicone sealant (transparent or matching the color of the walls in the bathroom);
- assembly (construction) gun;
- plastic or ceramic plinth.
Sealing a bathtub with a silicone wall provides for the following procedure:
- Thoroughly clean the joint and adjacent surfaces from dirt, debris, etc.
- Degrease the joint with solvent or alcohol. Dry.
- Cut off the tip on the sealant tube. In this case, it must be borne in mind that the sharper the cut angle, the thinner the line will turn out.
- Apply the sealant with a mounting gun in a continuous line as accurately as possible.
- Moisten the applied silicone with soapy water and smooth the line with your finger.
- If desired, a plastic or ceramic border can be glued over the sealant.
Slits of medium size up to 30 millimeters
Sealing between a bathtub and a medium-sized wall is usually done with a special skirting board, tile frieze, or curb tape. It is worth noting that these materials are not independent sealants, so for high-quality insulation, you should take care of additional purchase of silicone or foam.
decorative ribbon
Bathroom Sealant Tape – This is a strip made from polyethylene. Its width will mask the gaps of medium width, which are found in most cases. This material is cheap and very easy to use. High hydrophobic properties and a presentable appearance allow it to be used as an independent coating, and not just as a decoration.Many of these products have an antifungal additive that will prevent the appearance of mold at the junction.
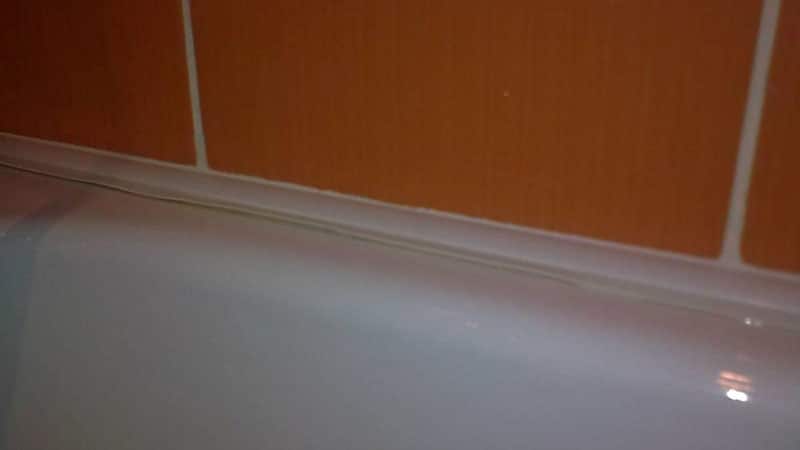
Perhaps the main drawback of this material will be its fragility. The junction of the bathtub and the tile, decorated in this way, will last very little, a maximum of two years. However, under the condition of careful operation, the period of its use is extended to five years.
Polymer plinth
Another solution to the problem of how to seal the joint between the wall and the bathroom is to purchase a plastic skirting board. This product has a decorative surface and very often it is used only for decoration. It is better not to purchase models that have a self-adhesive tape designed to secure the element. This adhesive is not waterproof.
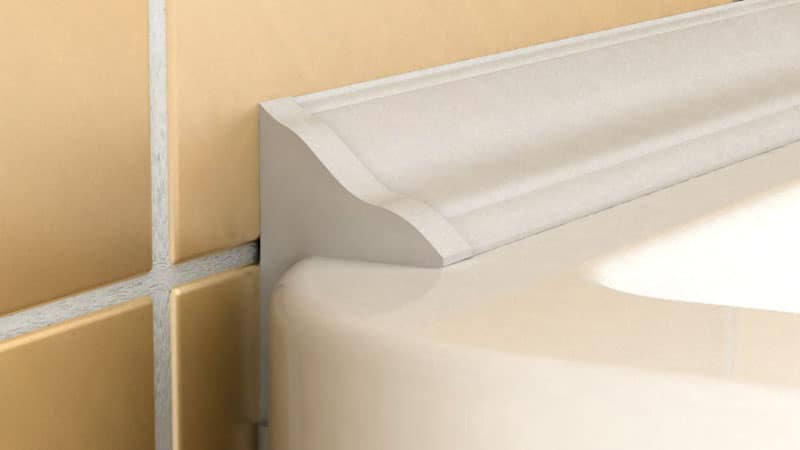
The best alternative to such a plinth would be a ceramic frieze. Installation with tile mortar guarantees excellent tightness and durability of the coating. In addition, a border purchased with wall tiles will be an unusual addition to interior design.
Mounting foam
Sealing a bathtub with a wall using mounting foam is one of the easiest ways to solve a problem. Tools that will be needed for work:
- alcohol or solvent;
- construction (dummy) knife;
- gloves;
- spray foam;
- finishing material.
- Thoroughly clean the joint and adjacent surfaces from dirt, debris, etc.
- Degrease the joint with solvent or alcohol. Dry.
- Put on gloves.
- Shake the can of mounting foam and evenly apply it to the joint, avoiding contact with the walls and the surface of the bath. When applying, be sure to take into account the fact that after drying, the volume of the foam increases significantly.
- Dry for an hour.
- Use a construction knife to remove excess dried foam.
- Depending on the type of bathroom wall decoration, you can putty the seam and then cover it with paint of a suitable color or glue a border made of tiles, plastic, etc.
How to close the gap between the bathroom and the wall
Immediately after the renovation of the bathroom, I discovered water under the bathtub. It turned out to be leaking between the wall and the bathroom itself due to the gap between them. How to close the gap between the bathroom and the wall so that water does not leak?
When installing bathtubs, for various reasons, gaps may occur at the points of contact with the walls.
According to statistics, the main influencing factors are: non-observance of the dimensions or geometry of the plumbing and premises, or errors were made during the installation work.
If gaps or gaps are not sealed in a timely manner, then in the future this threatens to accumulate moisture and develop mold or fungus between the wall and the bathroom, and also affect the deterioration of the decorative properties of the tile.
How to properly close the gaps formed at the junction of the walls with the bathroom will be described in this article.
Seam sealing and sealing
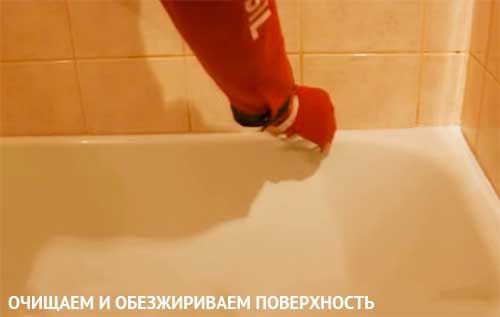
The side of the bathtub and the section of the wall along it must be cleaned of mechanical impurities, degreased with a suitable agent and dried well.
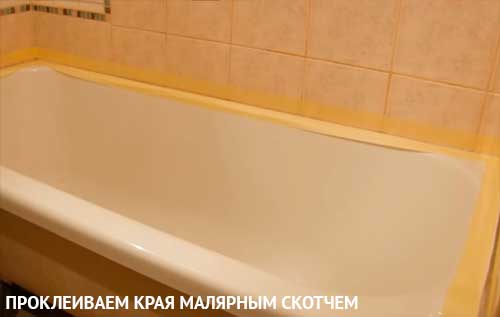
Then stick the masking tape on the edges of the bathtub and on the wall, starting from the mark to which the layer of mounting foam should reach
It is important that there is a little space left for a layer of sealant, which will have to fill the free space flush with the rim of the bath.
Tip: when working with mounting foam, it is recommended to use gloves, since this material is very difficult to remove from the skin. Masking tape will help protect the walls and bathtub from foam.
Apply the foam in small fragments - it expands approximately 30 times, filling the gap with itself. At room temperature, the mounting foam will take about 40 minutes to harden. Excess foam is cut off with a sharp blade. As a result, you should get a neatly sealed seam just below the rim of the bath.
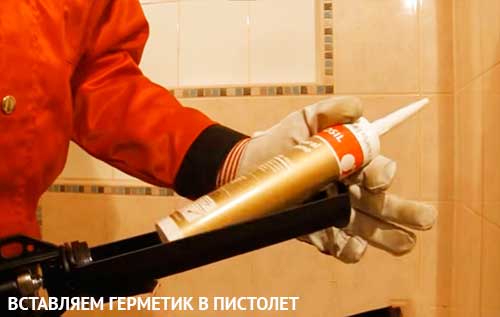
The next step is to apply a colorless or white silicone sealant. This material is packaged in cartridges or tubes and squeezed out of the container using a construction plunger gun.
Clean the edge of the bathtub and the section of the wall along the gap from dirt, degrease and dry. Insert the tube of sealant into the gun, remove the cap from the spout and cut off the spout at an angle with a sharp blade
It is important to note that the width of the strip when applying the material depends on the cut diameter. This parameter is selected independently - the tube spout is made in the shape of a cone, the cut is made at an angle
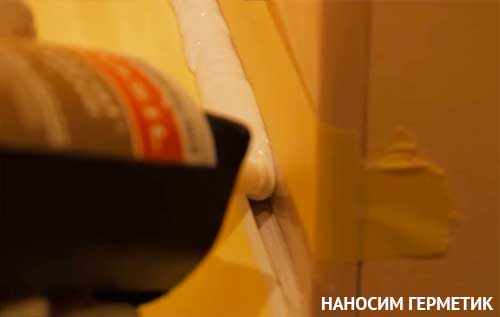
When applying sealant, it is important to take your time and act carefully. It is advisable to lay the silicone compound in a continuous tape
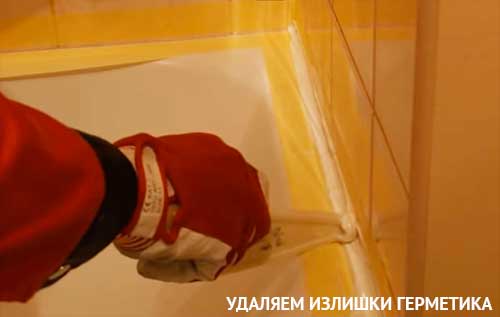
Then, using a spatula or spatula, the sealant is leveled - it must qualitatively fill the gap left under it. If there is no suitable tool, you can level the silicone material with a finger dipped in soapy water.
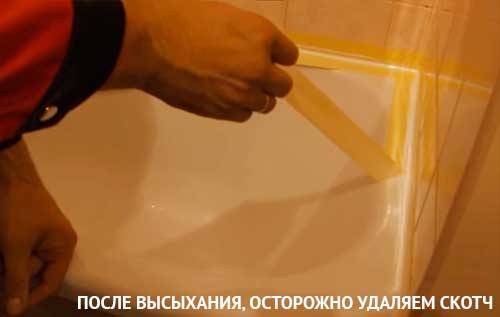
While the sealant has not hardened, its excess is removed with a damp cloth. Cured sealant can be trimmed with a sharp blade if necessary. After the material has dried, remove the masking tape. It takes about 12 hours for the silicone to cure.
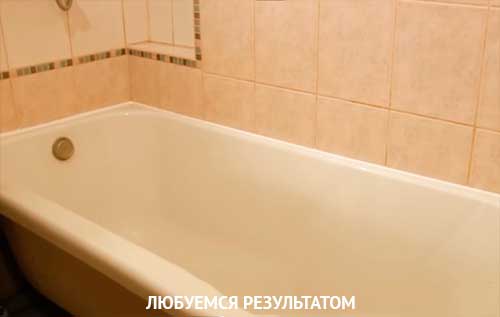
This work has been completed.
For aesthetics and additional protection, the closed gap is closed with a special plinth. Polymer skirting (rigid or self-adhesive tape) is suitable for acrylic bathtubs in combination with any cladding, as well as for indoor cast iron bathtubs with plastic paneling or painted walls.
It is better to close the junction of tiles and the side of the cast-iron bathtub with a special ceramic or marble plinth, if the width of the silicone-filled joint is relatively small and allows you to securely attach the plinth to the cement adhesive to the side and wall.
Conclusion. The combined method of sealing wide gaps is the most reliable and durable option.
Video on the topic "how to close the seam between the bathroom and the wall":
How to close the gap between the bathroom and the wall
Based on the width of the resulting seams, the appearance of the bath, its shape and material of manufacture, the best tool is selected for sealing large gaps and masking small seams.
Next, we recommend watching the video, which describes in detail how and what is better to close the gap:
