Preparatory work
No matter how modern and reliable the device is, sometimes there comes a moment that requires a professional approach to dismantling. Perhaps repairs are needed or a move is planned, or maybe the sealant just needs to be changed.
Undoubtedly, in the process of assembling a complex technical device, at some points competent outside help is simply required. But to disassemble - not to assemble, it is quite possible to cope with this on our own. There is no need for any special tools.
Of all the tools that will come in handy for the job, you will need:
- knife;
- screwdrivers;
- sealant remover.
Before starting to disassemble the shower, it should be washed, all the water drained, and then wipe the entire surface and other elements.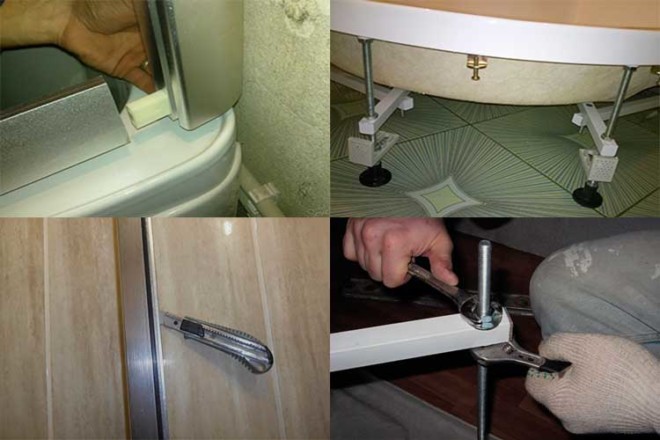
How to dismantle a shower
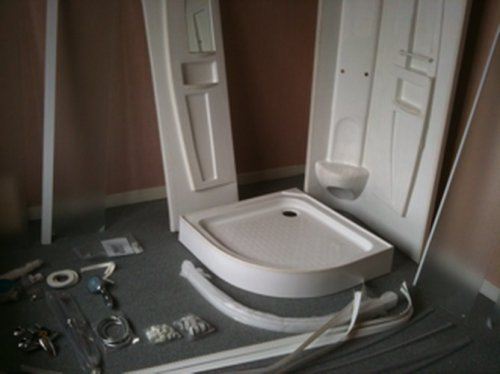
The need to disassemble and dismantle the shower cabin may arise in connection with the desire to install a new model or transfer it to another room, for repair work, etc. Moreover, you can cope with this task on your own, without the participation of qualified specialists.
A set of tools for work:
- a set of screwdrivers (screwdriver),
- sealant solvent,
- mounting knife.
The main stages of dismantling the shower cabin
- Disconnect the box from electricity,
- We shut off the supply of cold and hot water and turn off the equipment from the water supply system (disconnect the flexible hoses). Tees and valves can be left in the same place, they will come in handy if it becomes necessary to install a new cabin,
- We disconnect the box from the sewer. If a double siphon is installed, simply pull the drain pipe out of it. If an adjustable tee was used in the installation of the sewer, remove the clamps or unscrew the threaded connection (depending on the model),
- We disassemble the mixer and remove the shelves, detergent dispensers, towel holder, FM receiver, etc.
Before disassembling the shower cabin, using a special tool, we process the joints where the sealant is present. To do this, lubricate the joints with the composition, wait as long as indicated on the package, then quickly dismantle the box. If within 10-15 minutes you did not manage to remove all the parts “planted” on the sealant, the product will have to be applied again. If there is no special tool at hand, you can treat the joints with gasoline or thinner and, using a knife, remove the sealant.
You need to dismantle the booth in the following sequence:
- doors,
- side glass panels
- frame,
- pallet.
Doors hang on rollers mounted on rails. It is necessary to slightly loosen the screw on the rollers located at the top, and then remove the rollers from the lower guides. The doors will be held on top rollers. You should slightly lift the door up and try to remove it. This work is best done by two people, because the weight of the doors is quite significant.
Let's move on to the sidebars. This is one of the most difficult stages of dismantling the shower cabin. Panels are attached to the frame quite simply. The panel is pressed by the central post on one side, and on the other side it is inserted into the wall plank. Top and bottom side panels are held by fasteners.
These fasteners should be unscrewed and try to squeeze the glass into the cabin. You can try to move the rack to the side and try to free one side of the panel. If all the measures taken are unsuccessful, the wall lath panel can be cut with a knife.
Next, we proceed to the dismantling of the frame of the shower cabin.To do this, we unscrew the screws with which the frame was attached to the wall, then remove the sealant using a special tool or a knife and remove the side bars of the frame.
Removing the guides, you will find the screws that tighten the frame. After the screws are removed. Your attention will be presented to the side rails, wall rails, top and bottom arches, as well as the central pillar. We carry out dismantling very carefully, trying not to damage the details of the structure.
The next step is to remove the pallet. If the pallet is placed directly on the floor, it is quite easy to dismantle it. But if the design is installed on the screed, you have to work hard. So, tear off the protective tape around the perimeter of the pallet and remove the sealant. If the pallet cannot be moved, use the mount to tear it off the metal frame.
If all dismantling operations are carried out carefully, the shower stall can be installed in the right place.
How to dismantle the shower cabin with your own hands
Before starting to disassemble everything, you need to clean the entire silicone seal. For this, a special tool is used. Of course, it is quite possible to use a knife, but it can scratch the plastic.
Many "professionals" recommend cleaning the sealant with gasoline or another solvent, in cases where there is no special composition. This can be done if you plan to throw away the cabin. It is better to use a regular knife, because it does less harm.
To disassemble the cabin, you need to start with the doors. And only then remove the side partitions, and then deal with the frame and pallet.
Removing the doors
The device of all doors in shower cabins is absolutely identical. The upper and lower sides have an emphasis on the rollers, under them there are guides along which they move.
To remove the door, you need to unscrew the fixing screws of the upper rollers, as soon as you feel the play, you can squeeze the door out of the side of the guide. The lower part is then easy to pull out of the groove. After that, the door must be slightly lifted and squeezed into the cabin.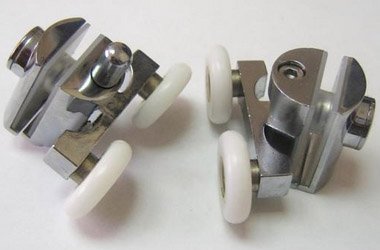
All actions during the removal of the door must be carried out especially carefully. Tempered glass cracks easily, even from minor impacts.
Removing the side walls
Despite the fact that the side partitions have a simple fastening, it is very difficult to remove them. They are inserted into the grooves of the side profile of the frame facing the wall. On the opposite side, they are supported by a stand located in the center. Above and below they are fixed with fasteners.
First of all, you need to remove this particular fixing fastener. After that, the screws that hold the rack in the center are unscrewed and it moves back to the central part of the cabin. Now the partitions can be pulled out of the side slot and pressed into the cabin.
Silicone can affect the speed of work. It would be better to remove it. This is easy to do with a knife. The main thing is to treat the surface from the side of the metal elements, and not vice versa.
Frame disassembly
First of all, you need to unscrew the fixing fasteners that hold the partitions, the pallet and the ceiling on the frame. Next, the sealant is cleaned at all joints. Now you can remove the top half of the case.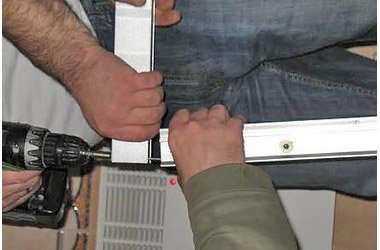
To make the frame easier to disassemble, it is recommended to remove it from the pallet.
Once the sealant is removed, it will be possible to remove the sidewalls, remembering to unscrew the screws that hold them to the arcs. After that, the clamps are removed from the wall guides.
Here you need to be especially careful and careful, it is important not to damage the slots of the screws and other elements of the case. The upper and lower arcs are fixed with self-tapping screws to the wall guide
Using a screwdriver or a cordless screwdriver, you can easily get rid of these fasteners.
Once the frame is dismantled, you can remove the back wall from the pallet.
Pallet Disassembly
It is good if the cab tray is on the frame or directly on the floor.But if it is installed on a concrete screed, this is a completely different matter. You'll have to sweat and get a little dirty. Whatever it was, you first need to remove the sealant, and then remove the protective strip, which is fixed along the bottom of the bottom. If the pallet is on the frame, then it can simply be moved away.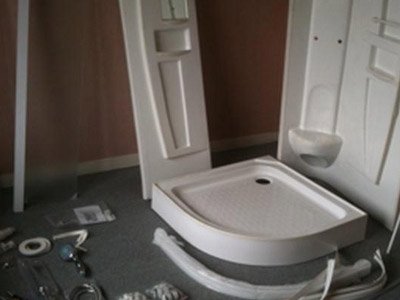
In the case of mounting a low pallet in a screed, it will be possible to try to tear it off as soon as the protective tape is removed. In this case, conventional mounts for a car can be of great help. These are available in almost every household. But everything must be done very carefully.
Do not forget that the bottom of the case is made of plastic, and it is more fragile than metal. When it is possible to separate the pallet and the frame, it should be removed away. To remove the frame from the screed, you will have to work a little with a puncher by switching it to the jackhammer mode.
Often, a high pallet installed in a screed is decorated with tiles or a screen. If you do not have much confidence in your own abilities and experience, it would be better to seek help from more competent specialists.
Not bad helps in the process of dismantling the instructions for assembling the cabin. This document is included in the package and the drawings can give a detailed idea of how and what is connected. Accordingly, it will be much easier to carry out work in reverse order. The main thing is not to rush, be attentive and accurate.
The main stages of dismantling the shower cabin
- Disconnect the box from electricity;
- We shut off the supply of cold and hot water and turn off the equipment from the water supply system (disconnect the flexible hoses). Tees and taps can be left in the same place, they will come in handy if it becomes necessary to install a new cabin;
- We disconnect the box from the sewer. If a double siphon is installed, simply pull the drain pipe out of it. If an adjustable tee was used in the installation of the sewer, remove the clamps or unscrew the threaded connection (depending on the model);
- We disassemble the mixer and remove the shelves, detergent dispensers, towel holder, FM receiver, etc.
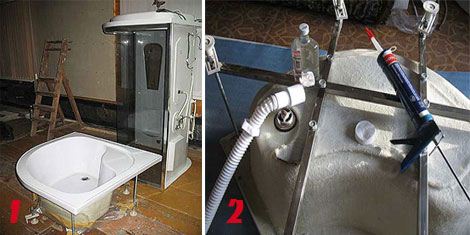
Before disassembling the shower cabin, using a special tool, we process the joints where the sealant is present. To do this, lubricate the joints with the composition, wait as long as indicated on the package, then quickly dismantle the box. If within 10-15 minutes you did not manage to remove all the parts “planted” on the sealant, the product will have to be applied again. If there is no special tool at hand, you can treat the joints with gasoline or thinner and, using a knife, remove the sealant.
You need to dismantle the booth in the following sequence:
Doors hang on rollers mounted on rails. It is necessary to slightly loosen the screw on the rollers located at the top, and then remove the rollers from the lower guides. The doors will be held on top rollers. You should slightly lift the door up and try to remove it. This work is best done by two people, because the weight of the doors is quite significant.
Let's move on to the sidebars. This is one of the most difficult stages of dismantling the shower cabin. Panels are attached to the frame quite simply. The panel is pressed by the central post on one side, and on the other side it is inserted into the wall plank. Top and bottom side panels are held by fasteners.
These fasteners should be unscrewed and try to squeeze the glass into the cabin. You can try to move the rack to the side and try to free one side of the panel. If all the measures taken are unsuccessful, the wall lath panel can be cut with a knife.
Next, we proceed to the dismantling of the frame of the shower cabin. To do this, we unscrew the screws with which the frame was attached to the wall, then remove the sealant using a special tool or a knife and remove the side bars of the frame.
Removing the guides, you will find the screws that tighten the frame. After the screws are removed. Your attention will be presented to the side rails, wall rails, top and bottom arches, as well as the central pillar. We carry out dismantling very carefully, trying not to damage the details of the structure.
The next step is to remove the pallet. If the pallet is placed directly on the floor, it is quite easy to dismantle it. But if the design is installed on the screed, you have to work hard. So, tear off the protective tape around the perimeter of the pallet and remove the sealant. If the pallet cannot be moved, use the mount to tear it off the metal frame.
If all dismantling operations are carried out carefully, the shower stall can be installed in the right place.
http://aquagroup.ru