Expert answers
Uncle from the Future...
It means like this. If the mixer of the old type of connection is rigidly connected to the pipes, then read Michael - without removing it, no matter how. It happens that you have to suffer with the removal. And if a modern-style mixer is connected with a flexible connection, then you don’t need to remove it. With the inclusion of the brain and some ingenuity and resourcefulness, without removing the sink, you can change absolutely any faucet on the sink and sink. (and not almost any, but just any). The main desire (of the one who will do)
NataMK:
Alas, yes! - humble yourself
Edward xz:
look at the sink!
*****DreamWorld*****:
No, not necessarily, I changed it the other day. No problem
ya:
Sometimes it is necessary, depending on the model of the crane
muzon50:
Yes. It's more convenient.
Alex Santa:
Not necessary! I changed myself.
kopernick:
If the sink prevents you from getting close to the faucet from below, then yes.
Valery Maslov:
Which sink, which faucet - there are a lot of nuances. Now save, but how will the flood happen?
Oleg Zhestov:
depending on which mixer, you can not remove it, but you need to dodge
stay away:
I don't know what your plumber wants and what level he is. My husband is a higher construction, not a plumber puts without removing.
anton rooooo:
why is there just unscrew the bolt and disconnect the hose
Michael:
if the faucet is old, then yes, the connection there is completely different, and metal pipes may be connected, and over time everything burns, which is difficult to remove with the sink removed
yuri morozenkov:
and you try to lie down in place of the trash can and screw it in the dark and 2 hoses and a crescent moon. if you need to hold the mixer from above with one hand
Olga Ermakova:
Drive such a locksmith.
Alexander Vasiliev:
NO! just so much more expensive! what kind of mixer? I will teach!
Truculentus:
Can be changed without removal.
Uncle from the Future...
Need a socket wrench
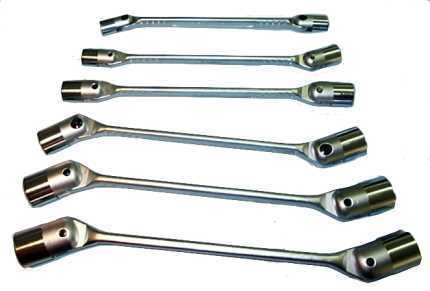
or long ratchet head
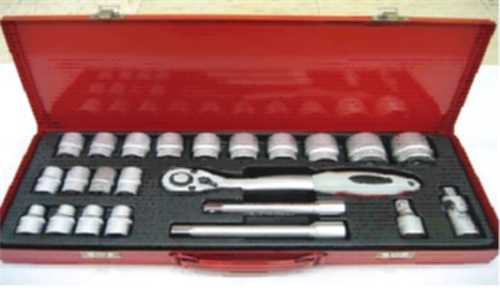
or tubular wrench...

Size 10 or 11 (maybe 9 in rare cases
Dim-Dim:
there the keys are like a tube and on the conche the diameter of the carving and there is a horseshoe
Tom Galchenko:
The nuts are unscrewed with a key of 8 or 9 (I could be wrong). Spin for a long time, it is better to spray WD-40 beforehand.
papasha:
Find a ring key, like a faceted pipe. Previously, these came with children's bikes. And be sure to first sprinkle with VDshka or vinegar on the kraynyak!
lekha:
podzlovchis and everything will turn out, take a wrench and unscrew it, start with the hoses. on the other hand, remove the sink for a short time - once you do it and you will understand everything)))
rustammatsur:
Yes, completely rusted, you will have to sweat, unscrew these hoses from the pipes, it will be easier))))))))))))))))
Vitalban1:
Everything is correct about the keys - sprinkle some more WD40 or a drop of white spirit - it will be easier to use Pliers or pliers, and right behind the thread, it’s easier to turn there, and just a couple of turns in the BODY
Chuck Casemerczak:
It’s easier to remove the sink and then slowly throw everything on the workbench, at the same time you will wash it from all sides. It's much easier than squirming under it. And on the workbench, if you don’t pick up the key, you can eventually cut it out with a grinder.
How to repair a crane box
What to do if the faucet box is leaking? There is only one way out: to repair the crane box with your own hands. Calling a plumber from the housing department (ZHEU) because of such nonsense is not worth it.
In this article, we will tell you how to replace the crane box (or the rubber gasket on it, if we are talking about an old-style product).
Crane box: repair - nowhere easier!
Let's say right away: repair of a ceramic crane box is impossible. But the procedure for replacing a crane box in a new sample mixer is quite identical to the preparatory stage for repairing an old crane box with a rubber gasket.
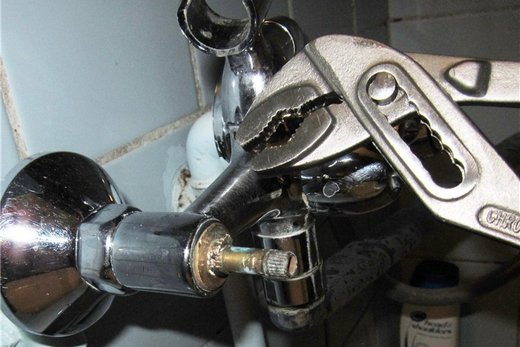
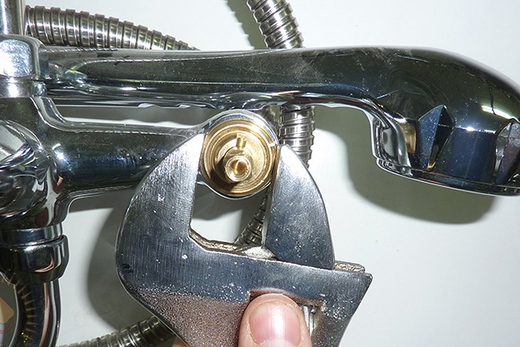 Unscrewing the crane box with a sliding key
- Shut off the water
- Remove the decorative cap covering the screw that secures the valve to the valve stem
- Unscrew the screw that secures the valve to the valve stem.
- Remove valve
- Remove the decorative cap covering the crane box, if any. Use wrench
- Unscrew the crane box.Use wrench. Old Soviet crane-boxes with a square valve seat can be unscrewed with a “seven” wrench, hooking the edges of this “square” with it.
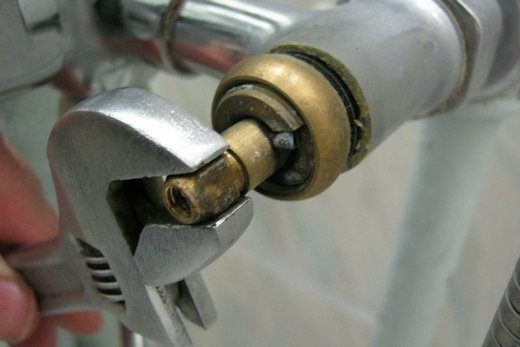 Unscrewing an old crane box with a square “head” for a valve
If we are talking about replacing a crane box with ceramic liners, then this, in fact, ends the process. It remains to screw in a new crane box and perform assembly operations in reverse order.
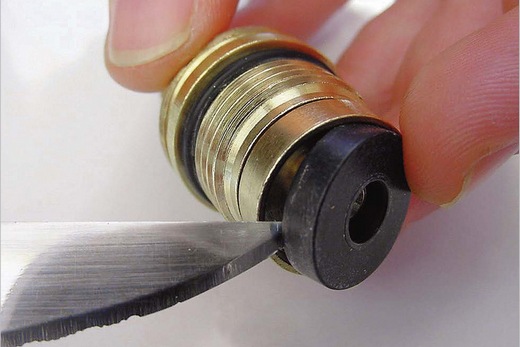 Replacing the gasket in the worm crane box
If you are repairing a worm-type axle box, then at the end of the rod you need to find a rubber gasket and unscrew the screw that secures it. Gaskets for faucet boxes are sold at any plumbing store, but it is easy to cut them yourself from a piece of rubber of a suitable thickness - following the model of an old gasket.
Malfunctions in the operation of air conditioners - how to identify, how to fix
Having fixed the gasket on the rod of the crane box, assemble the device in the reverse order described above. In general, that's the whole story about how to change the crane box.
Now about the difficult: the crane box has become attached
How to remove the crane box if it is "boiled"? And there's no way to turn it off?
So you can unravel the entire mixer. Or just break the thread of the seat of the crane box.
How are you going to install the new one?
 Removing a sticky crane box
1.
If Sillit or WD-40 did not help immediately, then build a bath (say, plasticine) around the threaded connection, pour one or another of these liquids into it and leave it overnight. It will work in the morning!
How to unscrew the sticky crane box if Sillit and WD-40 did not help?
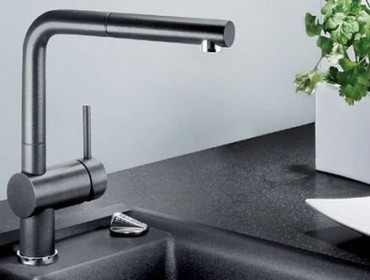 “Which faucet and faucet is better” - an overview of the types of plumbing gadgets will allow the reader to understand the design and specifics of the operation of various devices for adjusting the flow of water
How to fix a faucet if it's leaking. See the procedure here: http://remontspravka.com/faucet-leak-remont/
2.3.
How to change a gasket in a faucet
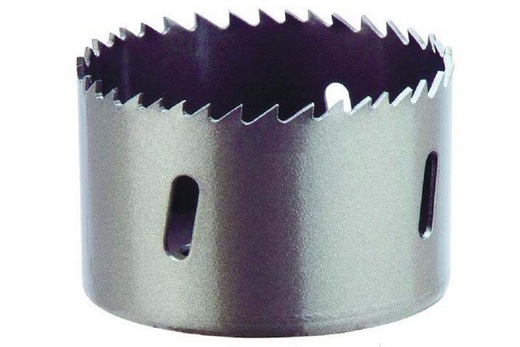 Such a cutter will help remove the crane box
4.
How to change the axle box crane - see the video here:
Best Answers
Spruce oppression:
Triangular file.
FITA:
Try to screw in a thin crutch-plastic wall, into it a self-tapping screw or a screw. Then unscrew this design. but it is better to change the mixer.
Joanna Zalevskaya:
Pick up a screwdriver or chisel and drive it tightly into the broken piece and carefully unscrew it.
Airat Sattarov:
If it is broken from antiquity, then you are unlikely to get it - it has become attached tightly.
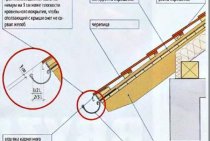
Grandfather Au:
You can try to unscrew the faucet with a 3-4-sided file, it will not help, then take a hacksaw blade, grind its end to half and saw through the thread to the tooth in 3 places - then remove the segments with a screwdriver
Alex Mishin:
Do you mean the flexible hose that connects the faucet to the water supply? And the fitting screwed into the body of the crane broke off? There is a special tool for this - a shank like a tap, the front end is a left-hand taper thread. But the sticky piece of thread would hardly have been able to turn them out either.
Looks like the faucet needs to be replaced...
Best Answers
Marina:
there is nothing complex about it. If you have a faucet built into the sink, then it must first be removed. then you remove the sink, as a rule, it is simply put on the mounts
SElena:
better not, otherwise you will flood the neighbors!
Bird:
heroine! I somehow changed the outlet and hung the chandelier, now I don’t remember, for the life of me, how I did it ... (then I was shocked ... with long-term consequences, you see))))))))))) Yes, myself ... such a handsome man (pictured) and not a single peasant will help? I do not believe!)))
SLikko:
when you have to start, but you will get a lot of impressions !!
Ravza95:
Are you asking for a compliment?
Tatyana Antonova:
You can try, it will not work, call the master. The faucet most likely needs to be removed, it all depends on the design of the sink. Try to buy one as it was, there will be a sample, and do not forget about insulating materials and gaskets, and turn off the water. I would take a chance, but what, it's even interesting, nothing is impossible for a person with intelligence!
Spartacus:
Well, May!)))))))))))))))))))))))) As if she was born yesterday! ((((((((((((((((((
Invite a friend/friend. Give him a bottle. And va.. t and the sink will change. You are only on the plus side. And everywhere.)))))))))))))))))))))))))))))))))))))))
vladimir levadnov:
1.Choose the sink according to the size and fixture... . 2. If the faucet is in the sink, then you need to remove it ... 3. Unscrew the drain pipe from the bottom, from the sink ... 4. If the sink is fixed to the wall, then you need to unscrew it ... ——————** Before starting this thankless task, turn off the water to this tap ...
Tatiana Shikulya:
yes .. you can do it yourself !!)))))))))).. if you suffer from “self-satisfaction” !! ! where do we change the sink? ... from this options for action ... .
easier in the bathroom…. 1. shut off the water and cold. and mountains. there are taps on the riser for this 2. unscrew the siphon under the sink 3. the sink can be removed from the corners on which it hangs
4. install a “squeeze” on a new sink .. and put it in place combining the squeegee with a siphon 5. turn on the water 6. make sure that there are no leaks at the joints of the parts ... .in the kitchen as well .... just make sure the sink fits in the old place. and the faucet must be removed
oh, in short, I'm tired of changing your sink!! .. invite a plumber! 1..this is to the fact that gaskets and squeegees and adjustable wrenches and a bunch of other things are needed to replace the sink, and you just might not have them (
Uncle from the Future...
Where do we change that... In the bathroom or the sink in the kitchen? There, the installation process is slightly different. AND.. . we change the mixer and siphon or leave the same.
Well, in principle - we wind the hoses onto the faucet -> we attach the faucet to the sink or sink -> we tether the assembled siphon -> well, then we pin it all there, where it should be.
If we put the old one, then at first we hook everything that we hook onto a new sink or a sink from the old one .... (in reverse order)
How to remove the crankbox
Before you start working with a water faucet, turn off the water pressure, both hot and cold. If shutting off the water supply inside the apartment is not provided, for this purpose it will be necessary to close the valve in the external riser. After the pressure is turned off, make sure that this is done completely, using the open taps of the mixer.
How will we unscrew the crankbox? Two main tools will help in this: a flat screwdriver and an adjustable wrench. A key of size zero is best.
Work sequence
First, the flywheel is dismantled from the product: the fixing screw is unscrewed with a screwdriver and the plastic plug is removed, due to which direct access to the crane box is opened.
Then you need to start turning the product out of the mounting hole. Sometimes the only tool you need is a 17mm wrench.
However, many ceramic models have locknuts that must be loosened with an adjustable wrench. There are also kranbuks, the stem of which has a square head.
Such products can be unscrewed using a 7 mm key.
How to install Cranbux?
When installing the crane box, the above process occurs in reverse order. First, the product is screwed into the mounting hole, then the plugs are put on and the fixing screw is tightened. It should be remembered that the kranbuks models with ceramic elements should not be tightened too much, it is enough to fix them with a locknut after installing the product in the mixer hole.
Expert answers
Michael:
if you reach out, you need to grab the rim around the hose under the mixer with pliers and turn it off and buy one in the store, just not cheap, screw it back with your hands and pull it with pliers, but not very tightly (sometimes it’s enough to tighten it with your hand0 and then screw it to the pipe with a wrench. To don’t pull the pipe too hard, otherwise you can overtighten the nut and it will burst, perhaps not immediately.Yes, just first unscrew it from the pipe, if the woman doesn’t have an adjustable wrench, then you can use large pliers to wrap around the nut.PS Wake up to unscrew the nut, perhaps if mountains. the water will go hard, make sure that the valve that shuts off the water does not turn, and look at the condition of the pipes and valves, if they are rusty and don’t spin, then it’s better that Maria said correctly, don’t climb yourself
Vitalban1:
Buy a new one - the higher its price, the quieter it works. All plumbing equipment is designed for a maximum of 5 years, buy a new one, than you will suffer with this mixer in six months. the cartridge or bushings will be covered.
Maria:
Call the plumber, otherwise you will flood all the neighbors. And they unscrew it with a special key, and the diameter of the pipes is different, they wouldn’t climb where you don’t know, it will only come out more expensive.
BOSS:
Key number 11. GO!!! What is included in the mixer. Buy the same one that was unscrewed ...
Valery Golda:
turn off the water, choose a nag that is suitable in size, unscrew both hoses, buy the same ones and put them in place
Wanderer:
Hold the PP coupling with a key (Swedish, for example). How should it be poured so that the nut of the flexible connection rusts: I have been standing for 10 years and nothing ...
Siyell:
With such a key and at the point of contact, lay rubber or something dense and non-slip.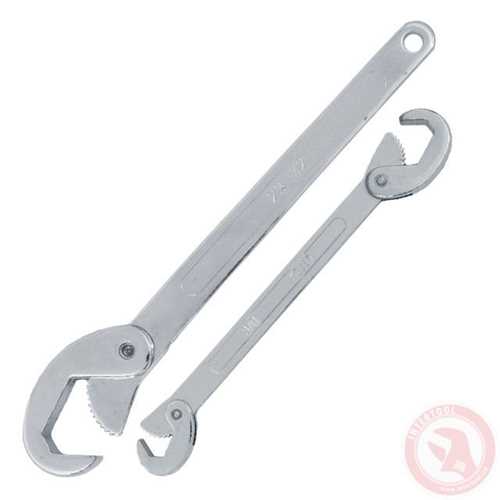
Aibolit:
Once rusted, then if you screw it further, then the hook of the eyeliner will burst. After that, it will be easily unscrewed. The second option is to heat it with a lighter. The metal expands, the gap increases, the nut is unscrewed. VD-shku can be tried, but ineffective
alex weiss:
“Fill” with rust spray, let stand and spray back and forth again, you can heat it - but plastic is dangerous.
Stas Shabanov:
Hold the water pipe too
Sergey Dmitriev:
Two keys need to work. Unscrew the nut with one wrench, hold the thread on the pipe with the second.
Pavel Kharlamov:
How does the pipe spin? Where is the hose screwed to? Here is the eyeliner with one key, the adapter with the other and in different directions chik chik ..
tuev:
I would carefully cut the rayka with a turbine. You can even handle it with a hacksaw. The main thing is to split the nut in half, and it will easily unscrew, or simply be removed. If you damage the thread a little (but only a little!) it’s not fatal. I don’t advise you to heat it, it will melt.
OOO SoyuzDomStroy:
try a belt wrench or a chain wrench
How to replace an eyeliner
When replacement is needed
The hose needs to be replaced if:
the flexible hose broke. Damage to the braid or rupture of the inner hose will result in leakage and, as a result, flooding of the room. The reasons for leakage may be high pressure in the system or mechanical impact;
Connecting hose leakage
a flexible hose leak was detected at the junction with a mixer or a water pipe. The reasons for the formation of leakage may be the natural wear of the gasket or a crack on the fitting (nut).
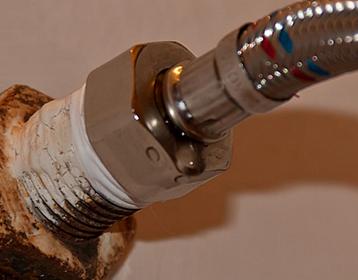
Leak at hose connection
The process of replacing flexible piping
To install a flexible water supply for connecting a mixer, you must:
- turn off the water supply. This can be done using a crane installed in the apartment;
- open the taps of the mixer so that the remaining liquid is glassed;
- Using an adjustable wrench or wrench that matches the diameter of the union nut, unscrew the hose from the water pipe. If the junction is rusted and the hose does not unscrew, then you should not make an effort to remove the eyeliner. In this case, a solvent or WD 40 liquid is applied to the rust, which removes plaque;
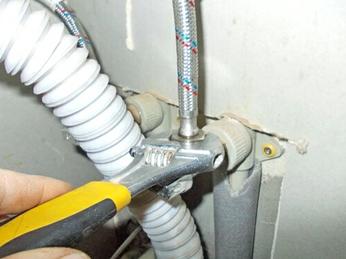
Disconnecting the flexible hose from the water pipe
To avoid flooding with water remaining in the hose, it is recommended to substitute a container under the connection points of the wiring.
-
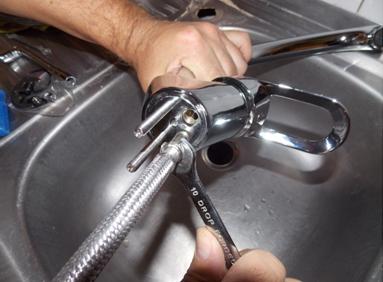
remove mixer. To do this, loosen the nuts securing the device;
disconnect the hoses from the mixer with an adjustable wrench;
connect new connecting hoses to the mixer and install the device in its original place.If the attachment on the hose does not match the connector on the mixers, then additional adapters are installed
When installing the adapter, it is important to take care of the tightness of the connection, which is equipped with a FUM tape or linen thread;
Installation of a flexible hose on the mixer
- fasten the inlet hoses to the outlet of the water pipe.
It is required to fasten the hoses to the mixer and the outlet without much effort, which can lead to the formation of a crack in the union nut or fitting. It is not necessary to use additional means to seal the connection, since the eyeliner already contains built-in gaskets.
- when turning on the water for the first time, it is recommended to check the flexible hose and the connection points for leaks. Average inspection time is 20-30 minutes.
The process of replacing the connecting hoses is shown in the video.
Replacing the flexible eyeliner yourself is not a problem. The main thing is to choose the right hose that meets all the parameters.
Unscrew the rusted screw
If you cannot remove a rusted screw, then use the following methods. For example, tap the threaded connection with a hammer, while substituting a screwdriver from different sides. Due to this, microcracks appear at the points of thread contact, which greatly facilitate the turning out of the screw. If you do not have enough strength to break the screw, or if the screwdriver scrolls in your hands, grab the flat part of the screw with a wrench. This leverage will increase the force transferred to the screw, making it more likely that you will move the screw.
In addition to this method, there are others. For example, use a blowtorch. It can heat a stubborn screw, and then cool it sharply with cold water. Due to such a sharp temperature difference, microcracks form along the thread in the screw. This method is not applicable to every detail, because the thermal expansion and contraction of the material will not allow it to be used further. In addition, a blowtorch will not always help you. Instead, you can use a soldering iron or an industrial hair dryer. With their help, you can quickly solve the problem with small screws.
If the screw still cannot be unscrewed, you can resort to the following method: fill it with kerosene, you can use turpentine. With the screw in a vertical position, make a rim of plasticine or other plastic material for pouring. Pour turpentine or kerosene into the formed recess. It is necessary to wait about an hour or two and try to unscrew the screw. If necessary, repeat the procedure.
A more radical option would be to cut the screw head with a chisel. In this case, a part of the threaded screw is drilled out, of course, if necessary.
Rust on an old bolt can also be dissolved electrochemically. For example, in a plasticine bath that needs to be made around the screw, put some zinc. It must be filled with a small amount of dilute sulfuric acid. After a day, you can easily unscrew the screw.
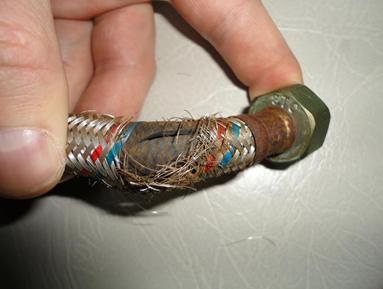
What is flexible hose
Flexible eyeliner is a hose protected by a special braid. On one side of the hose there is a crimp sleeve designed to be connected to the mixer. On the other side there is a union nut, supplemented with a rubber gasket. With the help of a nut, the inlet is connected to the outlet of the water pipe.
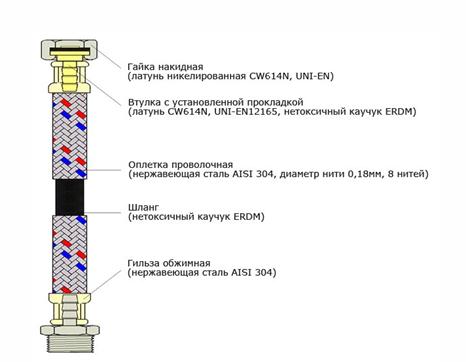
Components of a flexible hose
The supply hose can be made:
- from rubber;
- from rubber.
The rubber hose has an unpleasant odor and cannot be used to supply drinking water.
For braiding can be used:
- aluminum. Hoses with an aluminum braid are designed for the passage of water, the temperature of which does not exceed 80ºС. Working pressure no more than 5 atmospheres.The average service life of the product is 5 years. The main disadvantage of aluminum-wrapped hoses is their high susceptibility to corrosion when used in rooms with high humidity;
- stainless steel. The service life of such a product is increased to 10 years. At the same time, flexible piping is able to withstand water temperatures up to 95ºС and pressure up to 10 atmospheres;
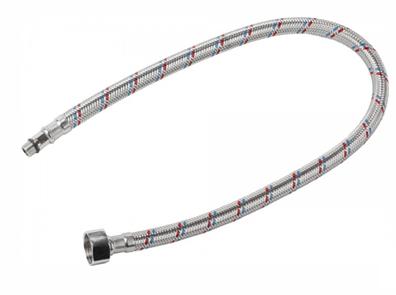
Flexible hose with stainless steel braid
nylon. Nylon braided hose has a long service life (up to 15 years). Installation is possible at water temperature up to 110ºС and pressure up to 20 atmospheres. The cost of such products is higher than other types;
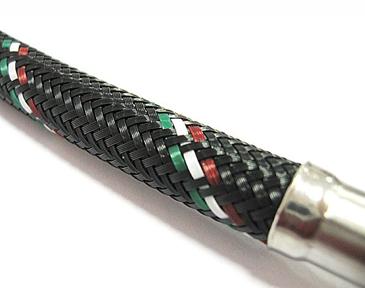
Flexible hose with nylon braid
- galvanized wire. The hoses are characterized by high flexibility and low price, but at the same time they have a short service life;
- one-piece corrugated hose (bellows connection). The eyeliner is quite strong and durable. Differs in high cost.
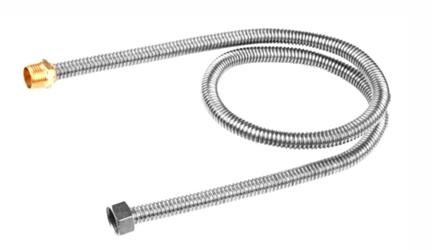
One-piece corrugated hose piping
The most common for domestic applications are stainless steel braided hoses.
I can't turn off the faucet
For example, you need to fix a door lock or a faucet, an old washing machine or a fan. There can be a lot of such examples and the difficulties in repair can be no less. Among all the problems that one has to face in this case, the situation with a torn off or firmly stuck screw can become the most difficult.
In order to unscrew an old screw, you will need a wrench and a chisel, a screwdriver and a hammer, a soldering iron or a blowtorch, kerosene, a solution of sulfuric acid, an industrial hair dryer, zinc, turpentine and graphite grease.
This is interesting: DIY homemade water filter - what you need to know
water faucet
As always, you should first turn off the supply of cold and hot liquids. You can perform these activities with the help of valves focused on pipes. When the valves are closed, you can open the lambs and let out all the liquid accumulated in the mixer.
To repair a water faucet, you will need the following tools:
- screwdriver;
- wrench;
- rubber gaskets;
- tow.
The procedure is as follows:
- Dismantle the valve stem. This is very easy to do with a screwdriver.
- After removing the lamb, take an adjustable wrench and unscrew the crane box. After that, you will be able to find a stem with a rubber gasket. It is this part that most often causes a breakdown.
- you need to remove the old gasket using a screwdriver. If the gasket is attached with a screw, then unscrew it.
- When you have completed the replacement of the old gasket with a new one, take a clean cloth and clean the threads on the letter and in the hole where it will be mounted.
- Wrap a few threads of tow on the crane-boxes, install the box in place. In this case, it should be noted that the tow should be wound counterclockwise, but the box should be twisted in the direction.
- If the cause of the breakdown is the wear of the “saddle” of the crane, then even a new gasket quickly becomes unusable over time. To eliminate the problem that has arisen, it is necessary to use a special cutter. It can be scrolled using a drill. Thus, all the roughness on the "saddle" can be eliminated.
The video shows how to disassemble the kitchen faucet:
Features of parsing the tap in the kitchen and in the bathroom
To date, you can find modern models of faucets installed in the bathroom or in the kitchen. They can be equipped with a timer or sensitive parts. To disassemble such a crane, you should adhere to the following action plan:
Remove the cover that serves to secure the batteries
After that, you can proceed to further dismantle the tap, but only before that it is important to turn off the water and electricity. Disconnect the sensor cable from the control
Now remove the gasket that is located between the control box and the mixing tube. Disconnect the nipples that lead from the heating and cold water supply pipes. Remove the springs and clips that hold the housing on the sink base. Similar activities are carried out when disassembling models with a thermostat and a timer.
When the disassembly has been done correctly, you can proceed to the repair. When the problem of breakdown is in the control unit, it is not recommended to carry out repair work on your own, as fragile elements are located there. Only an experienced specialist will help to solve the problem.
On the video - how to disassemble the faucet in the bathroom and kitchen, dismantling features:
A faucet, like any plumbing fixture, can eventually become unusable. But this does not mean that you should immediately throw it away. First you need to disassemble the device and see what caused the breakdown. If this is a damaged gasket, then it is necessary to change it and reinstall the mixer in its place.