How to install a siphon in a bath How to install a drain in a bathroom
The siphon is one of the most important plumbing devices. Without it, neither sinks, nor showers, nor toilets, nor bathtubs and bidets are installed. But, like any other device, the siphon eventually becomes unusable, wears out and ceases to function normally. How to install a siphon on a bath? Replacing a drain is not such a difficult undertaking to call a specialist about this. All the necessary work can be done with your own hands, if you follow certain rules.
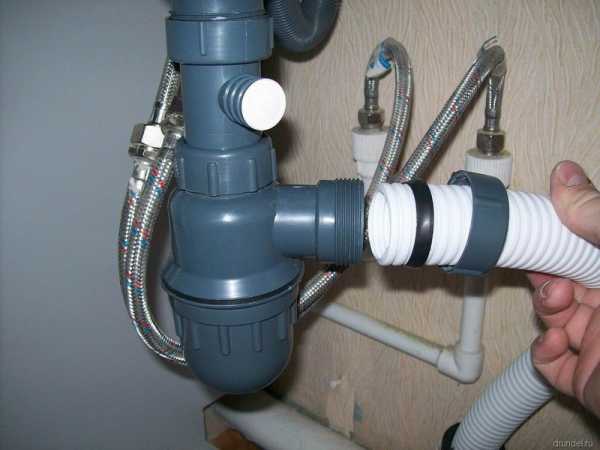
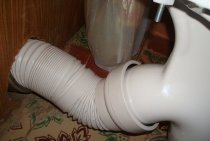
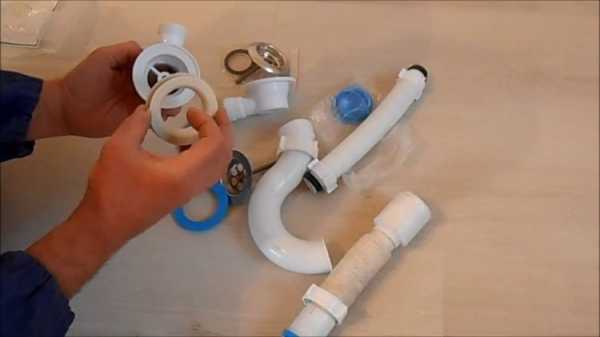
Photo 1. Installing a drain is not as difficult as it seems.
Why do you need a siphon?
The siphon is a transitional link connecting the plumbing drain hole to the sewer pipe. It has two functions: filtering and shutter. Due to the presence of a special knee, during the operation of sanitary appliances, a certain volume of water remains in the siphon. This small amount of water acts as a plug that "traps" sewer odors in the pipe and keeps them out of the room.
The filtration function is expressed in the fact that the heavy particles contained in the effluents settle in the lower part of the bend. Therefore, if a ring or an earring suddenly fell into the drain, you can always get it by removing the plug.
There is an instruction on how to install a drain in the bathroom. This is possible taking into account the characteristics of the sanitary device. Some models require that the replacement of the siphon in the bathroom be made using parts specially made for it. You can also install a drain into the bath with your own hands, but this requires studying at least a standard model of a siphon drain.
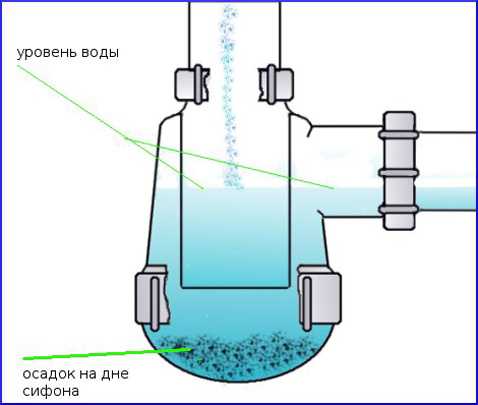 Photo 2. Siphon drains do not allow various contaminants to create blockages in the pipes.
Bath siphon replacement
Have you decided to exchange your old device for a new one? So, first we carry out the dismantling of the structure. Prepare a small bucket or some kind of container to drain the water from the knee of the device. We will also remove the plug, from where accumulated dirt can pour. Therefore, in order to protect the floor in the bathroom, we put dishes under the dismantled structure.
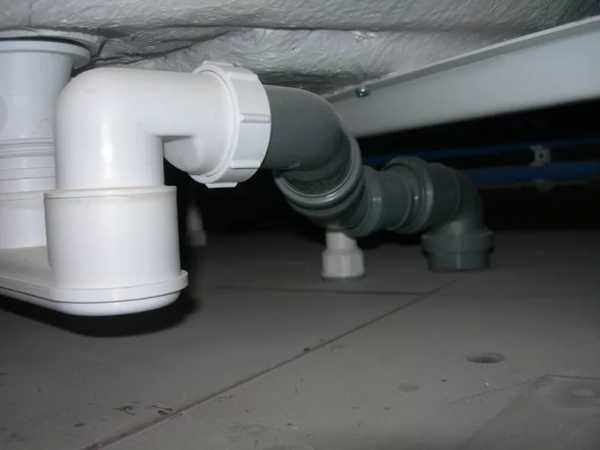
Photo 3. Before replacing the siphon, it is worth preparing the vessels for possible dirt.
How to install a drain in a bath
- We disassemble the old device. The procedure is quite simple and does not require any special knowledge and effort. Only in exceptional cases are the nuts on the siphon tightened to the limit and can be unscrewed with additional tools.
We remove the old siphon with the inlet and outlet pipe. If the design is quite old, then, most likely, the pipes will be, as it were, adherent to the siphon. Therefore, try to disassemble the structure as carefully as possible so as not to damage the sewer pipe system.
We clean the installation sites from pieces of rubber gaskets, rust, dirt and any irregularities. You can use sandpaper and a non-sharp knife.
Try to dismantle the bathtub siphon and prepare a place for a new system in the shortest possible time. After all, all this time the sewer hole remains open, through which your bathroom will be filled with poisonous sewer aromas.
How to replace the siphon in the bathroom yourself
After preparation, you can proceed to install a new drain device. It is carried out in the same way as when installing a bath. In the kit you should find:
- outlet pipe with rubber gasket;
two plastic nuts;
overhead rubber stopper;
stainless steel clamping screw;
rubber cuff-cone;
gasket with overlay for draining;
and a curved tube or flask.
The assembly of the siphon depends on its type. If it is bottled, then we put a rubber gasket on the flask and wind the bottom.The tubular type of the device does not require preparation and assembly, we immediately proceed to the second stage - connecting the overflow to the bath
We pay special attention to the tightening of all elements (but without excessive zeal). Don't forget the rubber seals! After installing the overflow system, we proceed to the connection of the branch pipe with the main drain, also paying attention to the reliability of tightening the connecting elements
 Photo 4. Replacing the bathtub drain will not be a problem if you follow the instructions exactly.
The next step is to install the siphon on the bath. For its fastening you will not need an additional tool - installation is carried out only by hand. Tightening the nuts with wrenches or other tools can create excessive stress in the system. And it is one of the main causes of leaks and cracks in the system.
How to assemble a bath drain device
All models supplied in boxes come with detailed assembly instructions.
Collect the siphon in the bathroom in this order:
- The part attached to the plug is attached to the overflow cover.
- The rubber gasket is inserted into the pipe, after which it is brought from below to the outlet.
- Seals should be directed to the nut with a wide part and the neck - a narrow one.
- A protective element equipped with a seal is inserted into the drain hole from the inside of the bath.
- Both gaskets must be fixed with a screw. In some models, it is possible to find a threaded plug, then it is screwed directly into the pipe.
Drain installation
Before fixing, turn off the water and find out the tightness of the pipelines. If the sewer pipe is made of PVC, a threaded fusion with a gasket is used. In the case of a metal pipe or a mismatch in the diameters, it will be necessary to buy a rubber adapter. The siphon pipe must go into it by at least 5 cm, sealant is also used. After assembling and tightening all connections, check the tightness. To do this, fill the bath until the water passes through the outlet.
Installation of a simple overflow system
Before changing the siphon, you need to put the bathtub and fix it firmly. In normal equipment made at the factory, the height of the product allows you to easily insert the drain. In a simple overflow system, the siphon can be solid or swivel with a nut to fix the position. There is a hole at the bottom of the bathtub to which a bathtub overflow is connected. In the lower part there is an internal thread, and in the upper part there is a grate that protects the siphon.
Installation, replacement of the drain in the bathroom is as follows:
- Start the installation from the bottom.
- The set includes 2 rubber pads. One must be laid on top and, together with the siphon, brought to the bottom of the bath into the drain hole.
- Then you should screw the upper part with the gasket to the bottom and fix it with pliers.
- It is necessary to connect the drain pipe to the sewer.
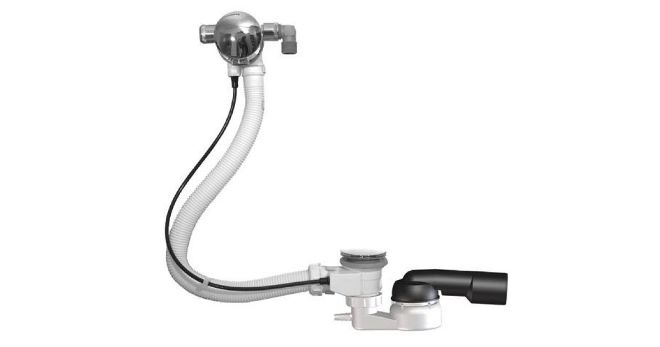
Installation of a semi-automatic siphon
The semi-automatic version is a bathroom drain, complete with a cable connecting the holes. Turning the cover on the overflow will open or close the bottom hole. In this way, the lead outlet from the bath can be kept under control.
The assembly of a semi-automatic drain must be performed in this order:
- find out the correspondence of the outlet and sewer pipes;
- attach the equipment to the drain and overflow holes;
- dock the drain part with the sewerage system;
- tighten threaded connections;
- check for tightness and absence of leaks.
Installation of an automatic siphon
The process of installing such a drain in the bathroom and the sequence of work are somewhat different from installing an ordinary system.
Order of execution:
- The first step is to assemble the main part of the siphon.
- Next comes the connection of the automatic system of this drain.The procedure is almost the same as for a conventional device.
- After installing the siphon on the bath, check the water seal.
Replacing an old siphon in the bathroom assembling a new device
Replacing the siphon in the bathroom can be done by hand. This will require a minimum set of tools and materials.
It is important to choose the right device that removes wastewater and prevents the spread of unpleasant odors in the room.
Features of siphons.
Varieties and features of siphons
Based on the design features, 3 types of bath siphons are distinguished:
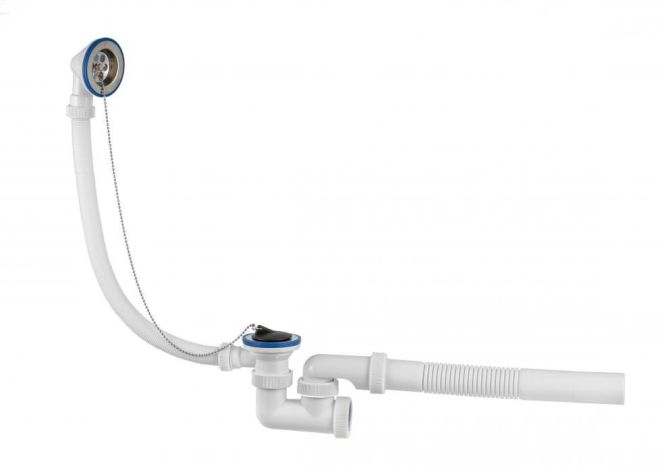
- Bottle. The structure includes a flask in which there is always a certain amount of water. Effluent is discharged to the sump through a pipe of smaller diameter. When the desired level is reached, the water begins to drain into the sewer. Such systems are suitable for installation in country houses. Even if the siphon is not used for a long time, it does not dry out. Several drain hoses can be connected to the flask.
- Tubular. Equipped with flexible or fixed hose, S or U curved.
- Combined. The design includes a corrugated tube and a flask. Such systems are well suited for installation in apartment buildings.
Plastic siphons also have disadvantages:
- Short service life. Some parts fail in the first year of use.
- Insufficient tightness. When assembling systems, it is not possible to achieve a tight fit of the nuts. Therefore, the connections have to be supplied with rubber seals.
Pig-iron plums differ in reliability and durability. Chrome-plated elements give the siphon an aesthetic appearance. Internal surfaces are protected from settling of dirt. The disadvantages include high cost and complexity in installation. Cheaper designs are subject to corrosion, which reduces the life. When replacing such a siphon, repair of the walls may be required.
Necessary materials and tools
In the presence of a complete set, the following materials and tools are purchased:
- screwdriver with a flat head;
- wrench;
- silicone or rubber sealant;
- sealing tape;
- basin for collecting water;
- rag.
A hacksaw may be required to change the length of the pipe. The edges are smoothed with sandpaper.
To install the siphon tools.
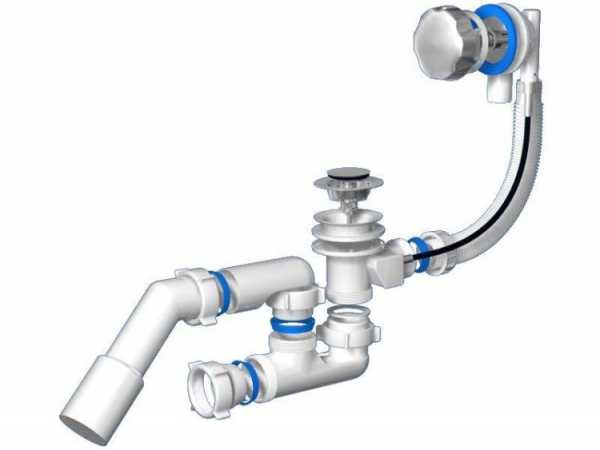
Siphon assembly
The assembly process includes the following steps:
- Flask formation. The bottom is screwed to the cylinder. The connection is sealed with a rubber gasket. Both ends of the drain tube are provided with fixing nuts. This also requires the installation of a seal. One end of the tube is inserted into the upper opening of the flask, the second will be connected to the neck of the siphon. The joints are coated with sealant.
- Overflow installation. The height of the hose must match the location of the bathtub overflow. It is necessary to measure the parameter before starting installation work. If the indicators match, the overflow hose is connected to the desired outlet of the flask. The height of the collection pipe is adjustable. The part is pulled out like a telescope. The required length of the corrugated hose is given by stretching. A bend is formed at the desired point. The outlet and overflow pipe are connected with a nut. It is wound by hand, with moderate effort.
Siphon assembly for a bath.
Before tightening the screws, make sure that the opening of the tub matches the diameter of the hose. When fixing the overflow between the surfaces, the gasket supplied with the siphon is placed.
Installing a new device
You can change the siphon by doing the following:
- Surface preparation. The cast-iron bath near the drain hole is cleaned of contaminants and treated with a degreasing agent.
- Installation of a decorative grill. If the size of the part does not match the diameter of the hole, the gap is closed with sealant.
- Outlet connection. The neck of the siphon is connected to the grate with a screw, which is tightened, ensuring a snug fit of the parts.
- Connecting the structure to the sewer pipe. A chamfer is removed from the bottom of the siphon, which allows the part to be inserted into the outlet. The elements are fixed with a nut, before screwing which a conical gasket is installed. The connection is treated with a sealant. If the outlet diameter does not match the size of the sewer pipe, use a plastic adapter.
The corrugated siphon is supplied with special nozzles that facilitate installation. One side connects to the neck, the other - is displayed in the sewer system. The corrugation is stretched, giving it the desired bend.