From drywall
The surface, which is pasted over with drywall, already has a flat surface. But it also needs to be puttied before performing the exterior finish.
This process is carried out according to the following technology:
- The seams are closed.
- Fixing points are being processed.
- The mixture is applied to the entire surface of the drywall.
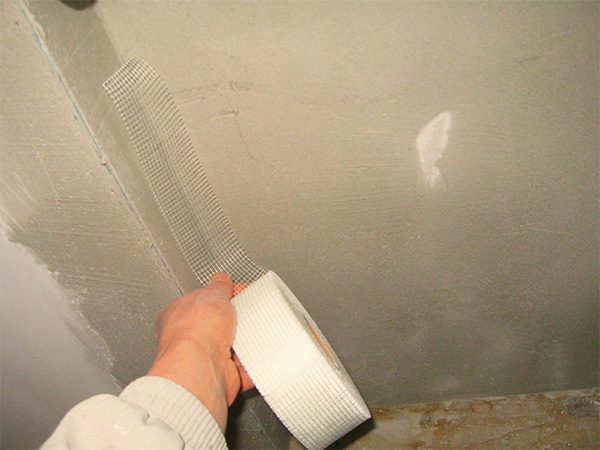
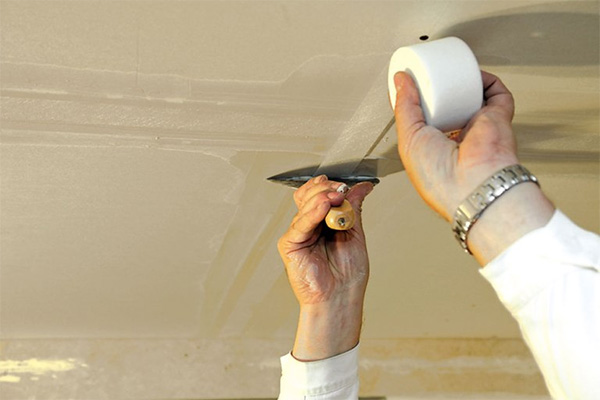
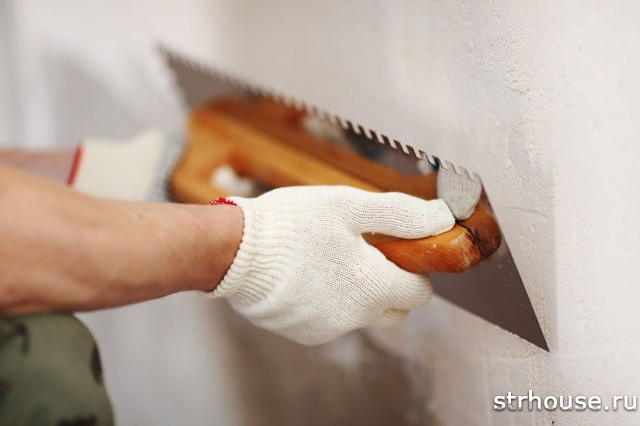
First of all, the seams between the sheets of drywall are sealed. This will require a special tape consisting of a glass mesh ( sickle). It sticks to all joints. Then putty is applied to the sickle, and the excess part that protrudes is immediately removed.
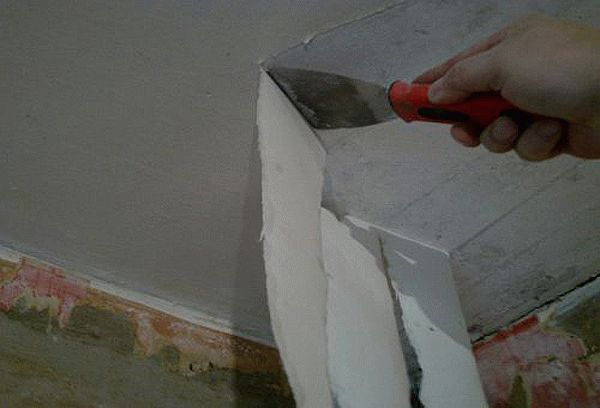
If there is a two-level ceiling, then in the outer and inner corners of the structure it will be necessary to install perforated corners that are buried in putty. Due to this, the most vulnerable places of the ceiling will not deform over time. Corners at times increase the strength of the structure.
You may also need useful information How to make even corners when plastering.
After that, the places of fastening the sheets to the ceiling are sealed. The caps of the screws are a little buried in the material, so there are small pits. They will also need to be covered with putty and smooth these places. With a spatula, you need to carefully level the surface so that a tubercle does not form.
The article Self-tapping screws: types and applications will help you choose the right screws for drywall.
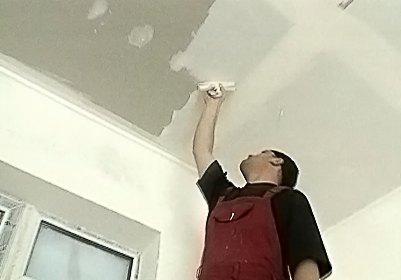
When the patched areas are dry, the stage of full application of the mixture to the entire surface begins. To do this, the mixture is applied to the ceiling with a spatula over the entire surface. Putty should lie in an even layer. Gaps or a very thick layer should not be allowed to form.
Applying finishing putty to the ceiling
The application of finishing putty can significantly improve the quality of the decorative finish and will make it possible to create a good microclimate in the room, since it contains only environmentally friendly components.
Before applying the finishing putty, it is necessary to perform simple preparatory work. To level the surface of the ceiling, it is necessary to process it with a grinding bar with a mesh tucked into it. After that, we prime the surface of the ceiling.
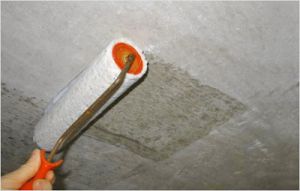
The primer solution is applied to the ceiling with a roller or a wide brush. Let the ceiling dry well. We recommend using ilmax 4180 primer for surface priming.
While the ceiling dries, it is necessary to prepare a solution of finishing putty.
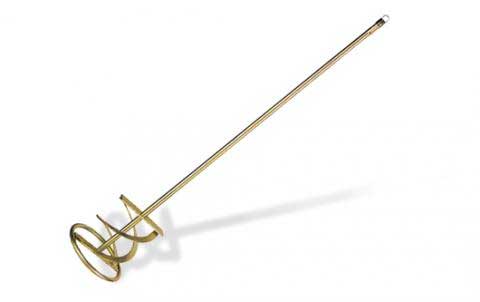
To complete this task, follow the instructions. Then, using a construction mixer with a wide nozzle, mix everything thoroughly until a homogeneous mass without lumps is formed. The mass should be moderately elastic and not fluid.
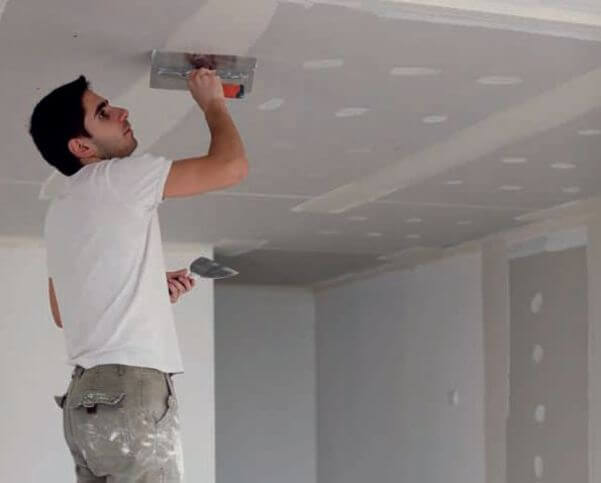
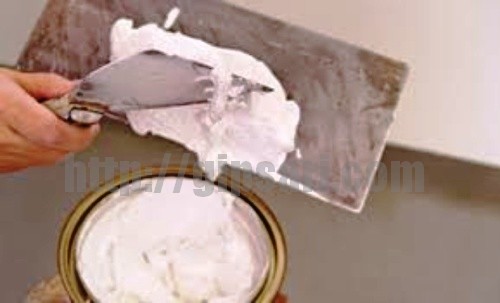
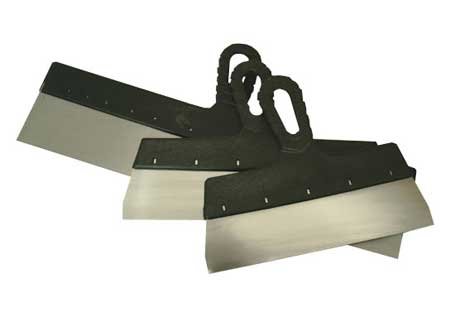
In the right hand we take a wide stainless steel spatula, with which we will apply putty to the ceiling. In the left hand we take a smaller spatula, as before, we need it to apply putty on a large spatula. Also, in the form of a main spatula, you can use Swedish grout, which has a width of not more than 600 mm.
We put putty on the main tool and begin to cover the ceiling with a thin layer of mortar, starting from any corner.
The resulting influxes are smoothed with a spatula. The optimal angle of the spatula to the ceiling is considered to be from 45 to 60 degrees
It is very important to monitor the angle of the spatula, as its change will necessarily entail a change in the thickness of the applied layer.
After applying the putty on the ceiling, it is necessary to allow it to dry thoroughly. Then grind with a paste, for this it is necessary to install a grid on it with a coarseness of at least 120 units.Then we again process the ceiling with a primer and it is ready for painting or wallpapering.
Preliminary preparation
The ceiling with which we have to work is different. In the event that the apartment being renovated is “raw”, it can be a concrete floor, plasterboard construction or plaster.
Such a surface is first primed and then puttied. But in a residential apartment, everything is much more complicated. In this case, you first need to remove the previous layers of finish, then clean it from wallpaper or paint, then level it as much as possible. When carrying out the initial preparation of the ceiling surface for puttying, we will use a primer. This is a special liquid that increases the adhesive properties of putty. In other words, it will not allow the surface to draw water.
At the same time, keep in mind that it is necessary to primer, because this way the putty will better lie on the surface of the concrete ceiling. You need to prime in two layers. Apply the first coat of primer first, then wait a bit and apply the second coat.
Plasterboard plasterboard ceiling
Now consider the main points of proper priming with your own hands:
- First, choose a primer that is suitable for this particular type of ceiling (for concrete floors, drywall, etc.);
- Pour it into a convenient container and apply to the ceiling. Use a small bucket or paint tray for this. Apply the primer with a wide brush or terry roller. I must say that using the roller is much more efficient and convenient. Using a long handle, prime the ceiling from the floor.
Now you can move on to the ceiling putty itself. Depending on the type of surface putty has its own nuances. Consider, as an example, puttying concrete ceilings on our own.
Plasterboard plasterboard ceiling
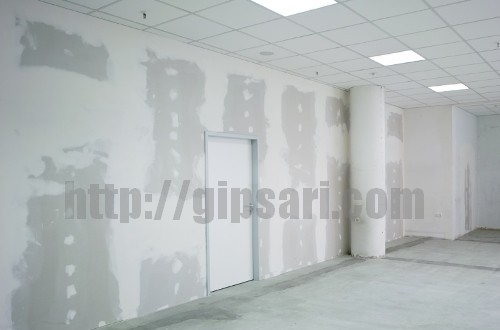
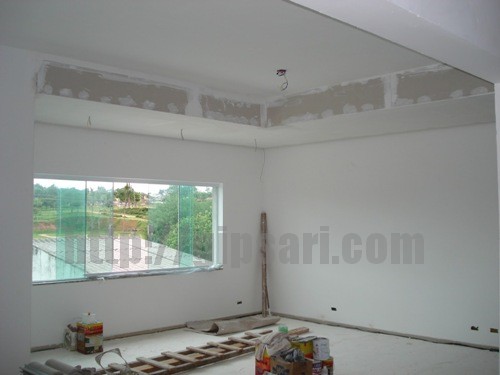
Drywall constructions have a lot of advantages. It completely hides the shortcomings of the main ceiling and the communications laid on it, facilitates the work of creating a perfectly flat surface. But in order for the final finish to look 100%, the plasterboard ceiling must be puttied.
What does the puttying stage give:
- Complete sealing of seams between individual sheets;
- Ideally smooth appearance of the ceiling;
- Improving adhesion to the final layer;
- Reducing paint consumption.
How to putty plasterboard ceiling
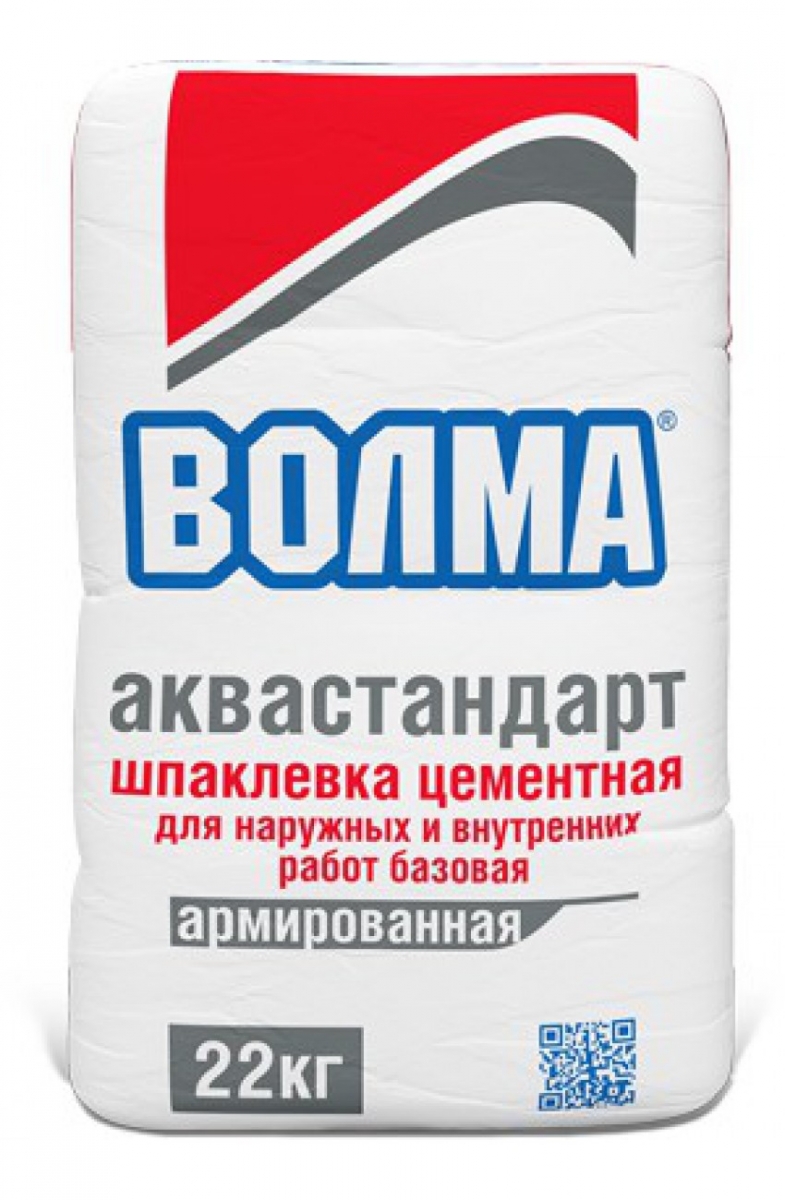
Putty mixes are offered in dry and ready-made form. Ready-made is much more convenient to use, but more expensive. Dry mixes are more economical but require preparation skills, additional containers and mixing tools.
Ceiling preparation
Plasterboard ceiling must be prepared before starting puttying work. The caps of the fastening elements (self-tapping screws) must be “drowned” to a sheet depth of 1 mm. If they stick out, tighten them up. Check for loose cardboard. From such places, the cardboard is carefully removed.

Next, proceed to the priming stage. The primer for drywall constructions must be with a suitable base. For example, acrylic version. Alkyd formulations are not recommended because of the risk of swelling. The primer is applied with a roller and brush, working hard at the seams.

To achieve complete drying of the layer and you can start sealing the seams.
Seam sealing
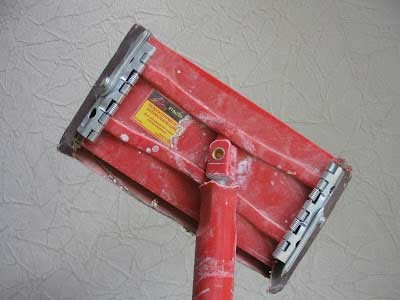
The gaps between the sheets can reach a width of 1 cm. They must be sealed with putty. Then the sickle tape is glued, another layer of putty material is applied on top. Dry the seams completely.
In the same way, only without the use of a sickle, the attachment points are processed with self-tapping screws.
Sealing seams with sickle tape
Working with corners
Gypsum boards in corners may be chipped. To eliminate the shortcomings, use metal corners designed for drywall surfaces. The perforations at the corners are filled with putty to level the surface.
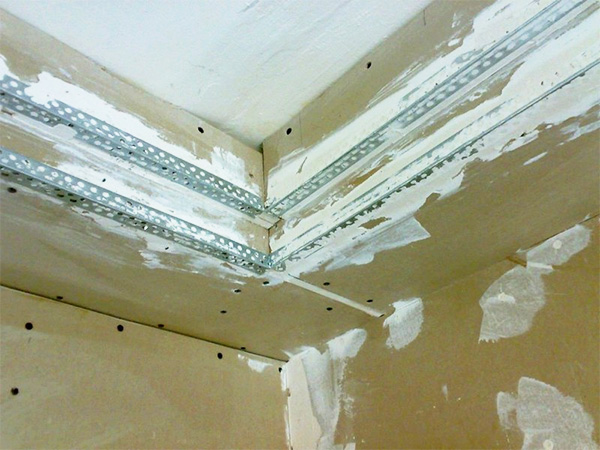
Strengthening the corners
Ceiling putty
The finished base putty is applied to the spatula, and then distributed over the surface of the ceiling with a wide movement. The layer should be thin enough, not to exceed 1-2 mm. It is necessary to process the entire surface of the ceiling at once.
There will be 2-3 layers in total. Each time it is necessary to achieve complete drying of the layer. Before applying each subsequent layer, defects (scratches, irregularities) remaining from the previous layer should be eliminated. Do this with a special grater and sandpaper.
The last coating is made by finishing putty. The quality of the application is checked by highlighting the ceiling with a lamp. The completely dried topcoat is processed with zero-grain sandpaper. Before painting, a layer of liquid primer is applied.
The preparation of the ceiling surface for final finishing with paints and varnishes is considered complete.
Puttying the ceiling with your own hands - how to do it right.
Features of putty and its necessity
Why do you need wall putty? This is a common question of people not related to repair and construction. It is easy to understand them, because at first glance puttying does not differ from wall plastering, but in fact there is a difference and it is big.
The need to use putty is determined by several reasons:
- Painting and pasting - in a dry room, not affected by fungus and not flooded with water, putty makes it possible to level the walls to the required accuracy without resorting to expensive and complex re-plastering.
- Walls after puttying can be finished, repeatedly redone, and also eliminate any errors without compromising the overall final result and the quality of the coating.
- Materials for the work are inexpensive, their consumption is low and they are not difficult to use.
- Puttying the curvilinear parts of the interior is quite simple, which distinguishes it from complex and expensive plaster, which is very difficult to do on your own.
- The cost of work performed by a hired team is quite affordable, and hand-made work is free.
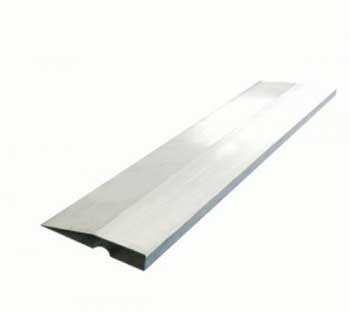
rule
The rule is a perfectly flat metal tool that checks if the wall is well aligned. To carry out such a test, it is enough to attach it to the wall with an edge.
In this case, you need to make sure that the guide is located exactly vertically. If the surface does not have flaws in the form of bulges or, conversely, recesses, then a flat plank will fit snugly against the wall.
Another way to use this tool is to smooth out excess plaster when applying the mixture to the surface. The optimal size of the rule is 1.5 - 2 meters.
Preparing the ceiling for plastering
Everyone who is interested in how to properly putty the ceiling should understand that any finish begins with high-quality surface preparation. If the ceiling structure consists of evenly laid slabs, then at the preparation stage it is enough to remove the remnants of wallpaper, whitewash or glue from the surface. To remove the wallpaper, it is necessary to soak a clean sponge in water and treat a small area, after which the paper and whitewash can be easily removed with a spatula and leave no residue.
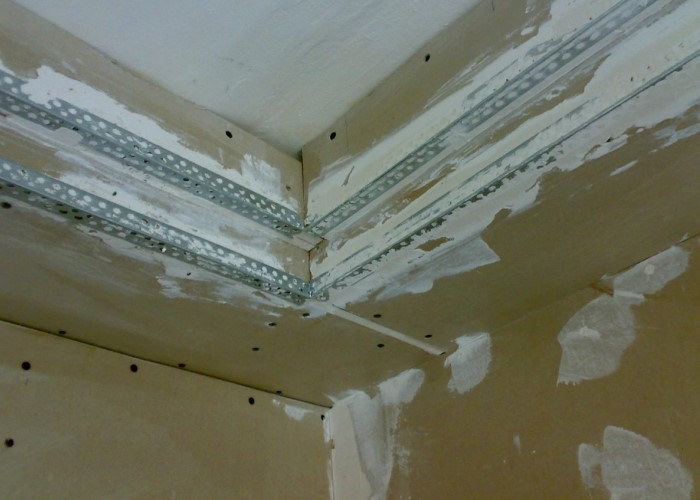
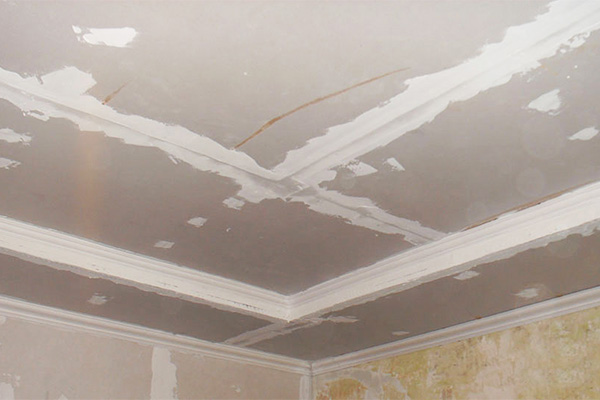
 Removing the old trim from the ceiling
Old paint is more difficult to remove, for this you will have to use a perforator. If the ceiling has been painted recently and the paint is holding tightly, then you can leave this coating on and simply sand off the visible roughness with sandpaper.
In order for the putty to adhere well to the surface, it is recommended to apply two layers of primer to the cleaned ceiling: the first is parallel to the wall with the window, the second is perpendicular to it. In this case, the brush must be held at an angle of 60 degrees to the base of the ceiling and, while making strokes, rotate the tool around its axis. If there are large defects and cracks in the ceiling, then plastering is performed in these areas.This completes the preparation, and you can proceed directly to puttying.
How to putty a ceiling
Starting repairs, we strive to make the walls, ceiling, and floor as a result smooth and beautiful. In new buildings, not to mention standard buildings, the curvature of walls and floors, as well as slopes, is relatively large. To glue wallpaper, lay tiles or just paint to make it beautiful, without leveling the walls, it will not work in any way. There are several options that can help with this, the most popular are plaster and putty. Many people confuse these concepts very easily.
The fact is that the plaster is applied in a thick layer and serves for rough leveling, which allows you to correct very large irregularities and carry out preliminary leveling and in the plane. After the plaster has dried, you can begin to putty. It allows you to make the final alignment of walls and ceilings, is easily sanded, so that the surface becomes very smooth. Alignment of walls for painting is considered the most difficult to repair and is highly valued due to the large expenditure of time and effort.
Previously, the surface must be clean from the remnants of wallpaper, whitewash and dust. It must be carefully primed, thereby removing dust and improving the adhesion properties of the putty to the surface.
Modern putty mixtures are divided into starting and finishing, preparation takes place immediately before work and they are suitable for a certain time (read the instructions carefully). Manufacturers indicate the suitability of the composition from the moment of mixing to the start of setting, when its plastic properties are lost.
Knowing the working time helps to avoid premature drying of the mixture, increased consumption of materials, and reduces the time for preparing fresh batches. You need to knead with a mixer - a special low-speed tool with a special nozzle until a creamy mass is formed - so that there are no lumps. Puttying the ceiling and walls is carried out in several layers, depending on the curvature of the surface.
Puttying the ceiling with your own hands

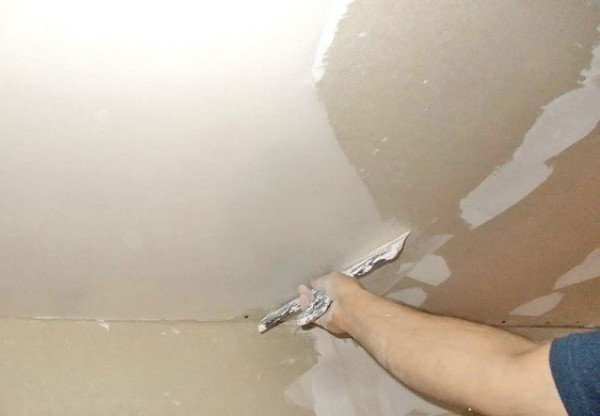
Start: The process of applying putty to the surface is absolutely the same for all types of putties. For work, it is desirable to have two spatulas, one wide, the other narrow. We collect putty with a smaller spatula from the container where the mixture was prepared, distribute evenly over a large spatula. The mixture is applied to the surface as thin and even as possible, leveled with a wide spatula, and remove the residue from the spatula back into the container. It is necessary to feel the pressure on the spatula - this is individual and cannot be described in words. When the initial layer dries, it is necessary to scrape off the sagging that appears. The overflow is everything that rises above the main layer. You can do this with a spatula or sandpaper. In practice, a spatula is better, because when sanding, the surface is covered with dust, which affects the application of the next layer. Pits and scratches are easily repaired with a second layer.
Finish: The layer should be thinner than the first, as it is applied on top of the previous one. We apply a wide strip of putty with a large spatula and remove the excess mass with the next movement, pressing the spatula against the wall or ceiling with force. It is desirable to hold the spatula almost perpendicular to the surface. Then we immediately apply the second strip overlapping the first and remove it again, filling up all the slightest holes and scratches. The movements should be fast enough so that the mixture does not have time to dry out at the edges. If necessary, apply a third, fourth layer, but only after the previous one has dried. It is performed in the same way as the second one. When finished, your walls and ceilings are perfectly smooth and require little to no sanding.
Preliminary preparation for painting includes priming walls and ceilings.This is necessary to remove dust after sanding for uniform paint coverage.
Tool for puttying walls for wallpaper, painting and other types of finishes
Puttying is a very important stage of each repair, because when pasting wallpaper or painting a wall, it is very important on which surface this work will be done. Therefore, starting repairs on their own, each owner will certainly face the question: what kind of tool for puttying the walls will he probably need, and what is not necessary for this process
Therefore, starting repairs on their own, each owner will certainly face the question: what kind of tool for puttying the walls will he probably need, and what is not necessary for this process.
Here's what you can't do without:
- Drill with a special nozzle - a mixer;
- A set of spatulas of various sizes;
- Rule;
- Sandpaper;
- Grinding bar (skinter);
- Primer rollers;
- Mixing container.
It is worth considering in more detail what is required for what and how it is used.
Ceiling preparation
First you need to determine the area with which to work. That is why the preparation of the ceiling is the first stage of repair work. In order for the putty to lie flat and not cause difficulties during application, it is necessary that the material easily sets to the surface of the ceiling. If the ceiling tiles initially lay flat, then the only thing to do is to clean the ceiling from external materials in the form of paint or wallpaper. It does not matter whether there was whitewashing or any other work on the ceiling before, anyway, the stage of cleaning the ceiling surface is always required before applying a new layer of material.
Whitewashing is easy to remove if the ceiling surface is abundantly moistened with water. It is necessary to very carefully and abundantly saturate the ceiling surface with moisture. Then you need to let the ceiling soak with water. After some time, which is approximately twenty minutes, you can begin to clean the ceiling with a spatula from the existing material. If you need to remove the paint, then the task is somewhat more complicated. However, this is a mandatory and inevitable step. It may be worth considering the option of acquiring a paint thinner, if there is such an opportunity and desire. In this case, the work will go faster
But this is far from necessary, the main thing is to achieve a clean ceiling surface, and how to do this is not important.
It is not necessary to clean the ceiling only if the apartment is completely new and with concrete "bare" slabs, on which there were no materials before. Then it would be possible to immediately begin the process of priming. Otherwise, you need to clean the ceiling.
Thorough cleaning of the ceiling surface is important only because it creates a base for the ground material. A primer is the application of a special substance to the surface, which will create the effect of "adhesion" of the ceiling with putty.
Additional tools
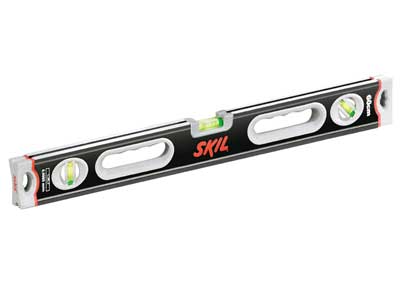
A level will come in handy - with this tool they accurately determine how smooth the walls turned out.
To remove irregularities, the frozen mixture, the surface is cleaned. Do this with sandpaper. If the area of work is large, they prefer a manual skinner. With its help, it is much easier to work, in addition, this simple device is equipped with a mechanism - clamps for fixing sandpaper, mesh, so the skinner will not become unusable after the first task, it will be used in the future.
Be sure to take into account that the putty needs to be diluted and mixed in a container, so you should take care of its purchase in advance. In the case when a large front of work is planned, it is not necessary to knead the entire mixture at once. The putty will dry out in a few hours, if you do not have time to apply it to the wall, it will remain in the container. Therefore, in this case, the mixture is kneaded in parts.
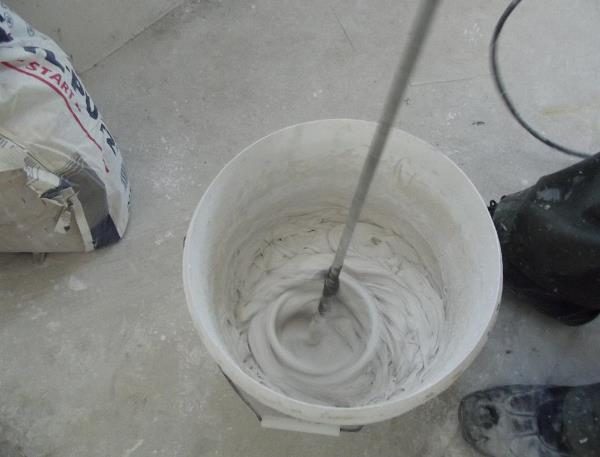 Putty kneading
Solution preparation
For high-quality puttying, it is very important to prepare the right solution, in which there should not be any, even the smallest lumps, since they are difficult to stir and if there are no certain skills in puttying, they will greatly interfere and can greatly complicate the process. According to technology, the starting putty is kneaded as follows: for 12 liters of water - 30 kilograms of putty
Then the mixture is quickly mixed with a construction mixer with a wide whisk until the mixture is homogeneous, the density of the mixture should resemble sour cream
According to technology, the starting putty is kneaded as follows: for 12 liters of water - 30 kilograms of putty. Then the mixture is quickly mixed with a construction mixer with a wide whisk until the mixture is homogeneous, the density of the mixture should resemble sour cream.
Stages of putty
It is very important to follow the correct sequence of applying putty to the ceiling. Conventionally, the entire process of puttying can be divided into several stages:
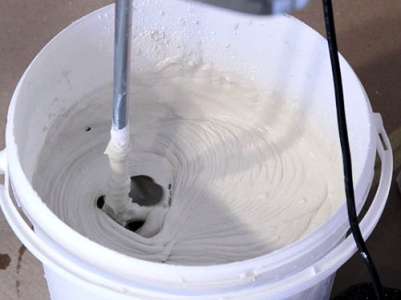
The mixing stage. This type of mixing is best done either with an appropriate construction mixer or with a drill with a nozzle. The main thing in this type of work is to obtain a homogeneous mass without any lumps. During kneading with water, it must be added little by little to the dry mixture. The entire putty mass should be neither too viscous nor too liquid. Its approximate consistency should be similar to a mixture of sour cream.
Applying putty to the ceiling surface. Although the puttying process is approximately the same for any type of work, it is still necessary to take into account some of the nuances
The mixture is always applied first with a small and narrow spatula, paying special attention to cracks and cuts, if any, and remained after the primer. After that, the entire mixture should be applied with a wide spatula, but in a very thin and even layer.
All residues of the mixture cannot be distributed over the surface, but they must be removed and thrown back into the container. The procedure must be done until the ceiling is completely covered with all the substance, however, it is not necessary to apply the mixture abundantly, since this is just the first layer. After that, you need to let the ceiling dry completely and as with the case of the primer - you can not let the dust settle on the ceiling, and therefore you should not get out. To remove all defects, it is worth using only a wide spatula, since dust may also remain after the sanding process
Layers of putty. The number of layers should increase as the uneven ceiling was and how well the primer was made. It is worth leveling the surface horizontally, since uneven areas need to be leveled. It must be remembered that each subsequent layer can be carried out only after the previous layer has dried.
Finish layer. The very last layer of putty should always be the thinnest, as it serves more for leveling than adhesion. This step must be done very quickly, as the mixture cannot be allowed to dry at the edges. Everything is done with a wide spatula and continuously: immediately after the first application, with the next movement, everything superfluous is removed. In this case, you need to press the spatula to the ceiling with a little effort. The instrument itself is held flat and perpendicular to the ceiling. If this step is done perfectly, then no further sanding is necessary.
Last finish. The final stage of finishing the ceiling is processed with fine sandpaper. After the putty dries, you need to apply this type of work in a thin layer, while highlighting with a carrier lamp to identify irregularities. You can also use a grinder.

Do-it-yourself putty
Home Wall repair Do-it-yourself putty applicationDo-it-yourself putty application
The surface of the ceiling, on which paint or whitewash is applied, is not always smooth and even.
Of course, it is possible to whitewash and paint such a ceiling, but this will not smooth out surface irregularities, but only emphasize them. If you want to have beautiful ceilings in your house, then you need to level them with putty after plastering. In order to achieve high quality coloring or whitewashing, puttying should be done in several stages.
For each type of paint, their putty is used, but chalk is an indispensable element in each putty.
It must be dry, sifted through a fine sieve. The consistency of the putty should resemble not very steep dough. Keep in mind that the thicker the putty, the more difficult it will be to level it.
Putty is applied with wooden or metal spatulas. For filling hard-to-reach places, use strips of hard rubber of the required width. The edges of the rubber strips can be straight or curly.
Before starting work, the putty is placed on a baking sheet and covered with a wet rag, cellophane, etc., thus protecting it from drying out.
Getting started, the baking sheet is set approximately at chest level. Picking up small portions of putty with a spatula, it should be applied in a thin layer in separate strokes. After the putty has already been applied, it must be leveled, for which, by pressing the spatula, move it along or across the ceiling, thus leveling the putty layer.
It is required to hold the spatula at a slight angle to the ceiling surface. A thin and even layer of putty is much easier to clean, so it is recommended to press the spatula harder. The stronger the pressure, the thinner the layer of putty to be leveled.

Sometimes you have to apply putty in two or even three layers. The number of layers depends on the condition of the surface. Before applying each subsequent layer, the previous one must be cleaned with fine sandpaper.
Before applying the second layer of putty, it is recommended to prime the first layer, then dry it and only then re-putty. Then the second layer is applied more easily and lays down in a thinner layer.
After applying the putty, it must be cleaned. Stripping is carried out either on dry or wet putty, depending on its type: dry - if the putty is adhesive, wet - if it is semi-oily or varnished. After wet cleaning, the surface is much smoother than after dry cleaning.
You can clean it with a pumice stone or fine sandpaper. Grinding with sandpaper is carried out in different directions or in a circle. The paper must first be folded in several layers or wrapped around a wooden block, which will greatly facilitate the stripping process.
Before you start working with pumice, you must first prepare its surface. To do this, pumice is sharpened or overwritten. The process of cleaning with pumice is no different from cleaning with sandpaper.
If, after stripping, any irregularities or scratches remain on the surface, then re-puttying should be done and the surface should be cleaned again.
Putty tools
Putty tools
Almost no repair is now complete without puttying walls and ceilings. After all, putty is the basis for almost all finishing work. The surface is puttied for wallpaper, for painting, for decorative plaster, etc. Let's take a look at what the minimum set of tools should be for a person who is going to putty the walls on their own.
1. Mixer. that is, a drill with a special nozzle. Mandatory in the case when you buy putty in the form of a dry mix (and this is usually the case), and not the finished mass. With the help of a mixer, putty can be mixed very quickly and without lumps.If you try to stir it manually with some spatula, then nothing good will come of it, you will have to stir for a long time, in small portions, and as a result, unmixed lumps will start to come across.
Such drill attachment it is inexpensive, but a drill should be in the house of every self-respecting owner.
2. A set of spatulas. A spatula of any size can come in handy here, depending on the walls. Both the smallest and the largest 40 - 50 cm will do. If you have only one wide spatula, then you simply cannot putty the wall in problem areas (I mean behind pipes, behind batteries, in which niches, etc.)
3. Brushes and rollers for priming. Since puttying the surface is unlikely to do without a primer (to improve adhesion), so make sure that there is something to prime. The fastest way to do this is with a roller, but the spray can fly quite far, so if you want to do everything carefully, carefully and scrupulously, you can take a wide brush and some smaller one to get into corners and problem areas.
4. Rule. If you are going to putty in a thick layer to level the walls, then in this case you will need a long metal rule. It easily levels the layer of putty and the wall is smooth. Only the starting putty can be applied in a thick layer.
5. Spirit level or plumb line for installing beacons for starting putty. Useful only if you need to level the wall with the help of starting putty.
6. Skins. to rub the putty after drying. The finer the skin, the more beautiful the surface will be after mashing. If you wipe the surface with a small 240th sandpaper, then this will be an ideal option. Only the finishing putty is rubbed with a fine sandpaper. If the putty is starting, then it will be faster and more correct to rub it with a coarse coarse sandpaper. It will be much faster.
7. Manual skinner. A plane with a handle and clamps on which the skin is attached. It is better to overwrite the putty manually, because there is an electric tool for such purposes, but manually it turns out better.
8. Container for stirring putty. You can buy a special one in a hardware store, or you can pick up some old bucket and no longer bother with this issue.
Share this article with your friends:
Primer and its types
Any foundation must be solid.
This axiom also applies to the ceiling surface, whether it be concrete, wood or drywall.
The adhesion of the base and subsequent layers is provided by primers, which also act as a guarantee of uniform application of putty and paint.
Primers are:
- primary (primer);
- improve adhesion between layers.
When choosing them, the humidity of the room, the type of surface (brick, wood, concrete), and other conditions are taken into account.
There are varieties of primers of narrowly targeted action:
- moisture-proof primers with fungicidal and antifungal components;
- super-insulating, neutralizing nicotine, smoke effects;
- ceiling paints.
Primers based on alkyd are designed for primary and subsequent application on wooden surfaces, fiberboard and chipboard.
On a concrete surface that is reluctant to accept moisture, Knauf's mineral-based Betonokontakt is most likely to lay down, specially created for such "intractable" surfaces.
A loose base is best bonded with a deep primer, and universal compounds are applied to a surface of medium absorbency.
A drop of water dries on them from 3 to 15 minutes.
Perhaps the most popular primer for plastered surfaces, concrete, brick in Russia is the Finnish Vetonit TT.
Preparation of wet surfaces in bathrooms, showers and kitchens requires the use of primers with a waterproofing layer that protects against leaks, condensation and mold.
The French base Waterproof Primer 94 fully meets these conditions.
Primers are applied:
- fly brush;
- roller with telescopic handle.
The instrument should be held at an angle of 70°.
The first layer is recommended to be applied perpendicular to the sun's rays falling from the window, and the second layer - perpendicular to the first.
Material consumption is calculated in the ratio of 1 kg per 1 m2.