Installation of a mortise sink
Before installing the sink in the countertop, you need to make a recess under it. To do this, use the template attached to the sink, or trace the outline of the sides and bowl, turning the product over. When marking, you need to leave that part of the countertop intact, which will be under the side, and cut out only the contour corresponding to the bowl of the sink.
For sawing, a hole is drilled into which the jigsaw blade will be placed. It is advisable to drill inside the contour to be removed. So it will be possible to achieve an even cut along the entire contour of the recess. A jigsaw file is placed in the hole and a recess for the bowl is carefully cut out, trying to follow the contour as clearly as possible.
The edges of the hole for the sink must be filed and sanded. Put the bowl and check the accuracy of the notch: with a correctly made cut, the sides fit snugly against the countertop. Carefully cover the saw cut with silicone sealant and dry the countertop.
Install taps in the countertop and bring flexible hoses to them. Apply a layer of sealant to the edge of the recess before installing the mortise sink. To seal the joint, you can use the gaskets that come with the sink. Lay the sink on the countertop, tighten the fastening bolts from the bottom side using the algorithm:
- first, those that are located diagonally on the product;
- after that - fastenings in the middle of its sides.
When tightening along the contour of the sides, excess sealant may be squeezed out. It must be wiped with a rag, and too wide a gasket can be cut off with a sharp knife.
How to install a sink on a countertop
We chose something, it's not so difficult. But do not forget that this beauty also needs to be installed.
In fact, there is nothing particularly difficult in this. If you've ever installed mortise sinks, overhead sinks will seem like a trifle to you. So, as always, it all starts with the preparation of tools. Everything is standard here:
- hacksaw or jigsaw;
- screwdriver or screwdriver;
- wrench;
- sealant and brush;
- pencil and ruler.
First, we make markings on the surface of the cabinet. Most sinks come with handy stencils for this. We cut a hole for the drain and water pipes of a suitable size.
Separately, we collect the sink. Attach the drain pipe. If the mixer is still attached to the sink, install it in the appropriate hole. We fix it tightly using the fasteners that come with it.
Be sure to use rubber pads (they are usually also included in the kit) to avoid damaging the surface. For reliability, lubricate the joints with sealant. We connect flexible pipes to the tap for supplying cold and hot water. The rest of the communications will be summed up later.
Install the sink on the countertop. It is most convenient to use construction glue, which lubricates the drain hole, however, in this case, the sink will be difficult to dismantle if the need arises. So here you can apply fasteners.
Now it's time to connect. Let's start with the plum. We fasten the siphon to it and carry out the corrugated pipe to the sewer. Using a special cuff, we connect them to each other (not forgetting the sealant). We connect the flexible tube coming from the mixer to the water supply.
Also now, many people like to complement the overhead sinks with lighting. It is installed last. The most convenient way is to use an LED strip: it is attached under the sink (silicone glue works well for this) and connected to electricity.
After finishing installing the sink, be sure to check it for leaks. Turn on the faucet for a while and check that there are no drops on the pipes. Otherwise, additionally treat them with sealant.
As you can see, there is nothing complicated. But if there is even the slightest doubt that you can handle this matter, it is better not to take risks and call the master. Because in case of an error, it will be much more expensive to redo it than to collect everything from scratch. Good luck!
Characteristics of overhead sinks
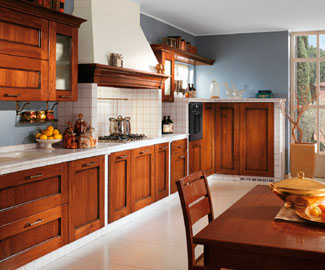
The overhead stainless steel kitchen sink is a tandem of a sink and a kitchen cabinet. The sink is made of sheet iron. Stainless steel is an ideal option, as it easily copes with an aggressive environment (a combination of constant moisture and household chemicals). The kitchen cabinet in this case is a special cabinet without a back wall and shelves. Despite the lack of shelves, the sink underframe has a practical use and is used to store household items.
Overhead sink in the kitchen is most often square in shape. The dimensions of the side walls are standard - from 40 to 60 centimeters. Depth from 15 to 20 centimeters. Three side walls have rounded edges for ease of installation, the fourth - the back - is slightly higher to prevent moisture from penetrating between the sink and the wall.
Despite the apparent simplicity of design, overhead kitchen sinks can have additional elements. For example, a second sink (smaller or the same size) is very convenient for rinsing dishes or food. A special ribbed drying surface adds to the pluses of a countertop sink.
The product is sold both separately and in a set with a curbstone. It is better to prefer the second option. A sink with a stand will eliminate the need to look for a cabinet that is suitable in size.
The surface can be matte or glossy. The matte version is more practical, as it hides muddy stains and pollution is less noticeable.
The main advantage of the overhead option is ease of installation.
The sink looks like a single unit with a headset
What are overhead sinks
Their forms can be visible or invisible, so you will definitely find an option that suits your design. For example, the classic design implies smoothness, roundness and streamlining, smooth lines and conciseness in the decor. But the high-tech style is associated with strict geometry and minimalism.
Forms, as already mentioned, can be almost anything. The standard ones are, of course, an oval and a rectangle with rounded edges. An interesting option that is gaining popularity is the triangle.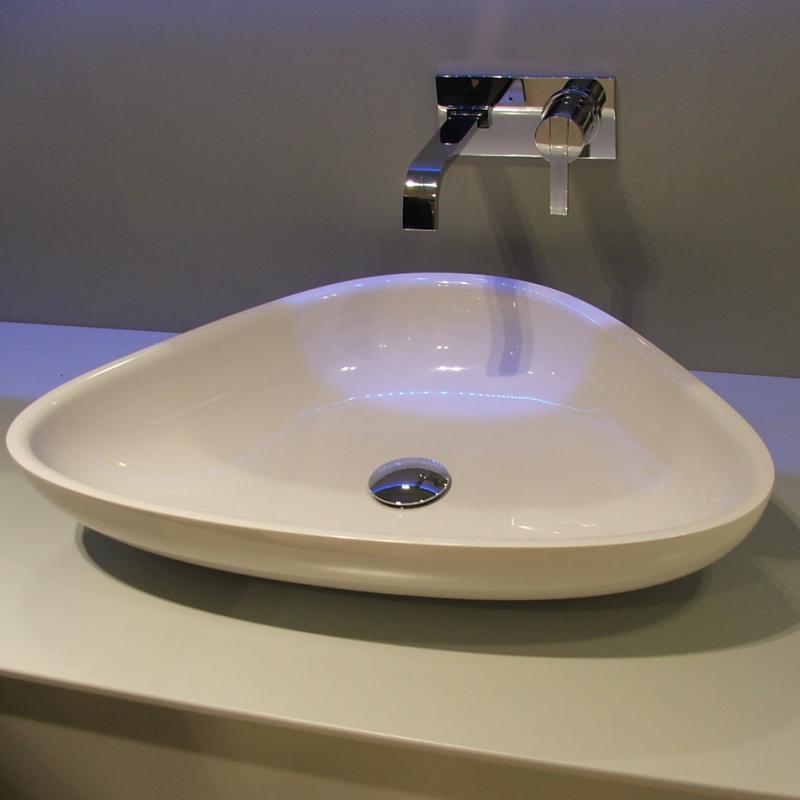
In general, there are no limits for imagination. If you want - there will be a shell, if you want - a flower, a cloud, an inkblot, a drop, anything, even a guitar (yes, this also happens). All this can be found in stores, and if you want something especially extraordinary, you can always order an individual production.
There can also be much more materials than we used to think. Of course, first of all, ceramics, faience and porcelain come to mind. And this is no coincidence, because such sinks are easy to clean, they do not rust and look great. But they also have their drawbacks - ceramic sinks are not very durable and can become covered with cracks during installation and operation.
A cheaper alternative is acrylic (high quality plastic). It is also lighter (for which you can say a lot of thanks to it during installation), and it looks nice in the interior. But it scratches easily and is also fragile.
If you want reliability and durability - buy stone sink from marble or granite. If you don’t want to spend so much money, artificial stone is also suitable.
In terms of materials, there are also original solutions. For example, for eco-style interiors, sinks were made of wood. But I warn you that they will have to be carefully looked after. Non-standard materials also include glass and metal.
We fix the sink with glue
Installation of a surface sink is possible with the use of glue. But this method is only suitable if the underframe almost perfectly matches the sink itself.It will be placed on top, and the ribs will "sit" on the cabinet.
Advice! Do not spare the sealant on the entire contact surface. It plays the role of glue and additionally protects the joints from the penetration of moisture into them.
Installation with wooden blocks
You will have to think about how to fix the surface sink on wooden blocks if there are no mounting brackets at hand or defects are found on the surface of the cabinet frame. So what do we need?
- bars of the right size;
- furniture corners;
- small nails or screws.
The first step is to build a mounting platform in the form of a rectangular frame. It will serve as the top frame of the stand. It is he who will smooth out all the bumps. We send the assembled bars to the overhead sink box and fix them there with steel corners around the perimeter. And we put the already received design directly on the cabinet. We will fix it with the help of the same corners, but from the inside to the walls.
Final work
Important! If, after reading the instructions, the entire procedure is already clear to you, then you can proceed with the installation, otherwise we recommend that you see how to fix the surface sink in the video tutorial. https://www.youtube.com/embed/035o9k38r4E
At the final stage, it remains to attach the siphon to the sewer pipe. And we connect flexible connections from the mixer to the source of cold and hot water supply. Now you can safely open the shut-off valves and use the mounted device. For very lazy plumbers, there is another way out. Fasteners for an overhead sink may look like ordinary hooks for hanging it on the wall. But in this case, appropriate holes must be made on the back of the sink. And you can simply put the cabinet under the sink separately.
Bathroom Sink Features
What is it all about? In simple terms, this is an ordinary sink, which is not built into the cabinet, as we are used to, but proudly rises above it. Approximately it looks like this:
There are many forms and varieties of them, but we will talk about this a little later. The only disadvantage of such a sink is that not all bathroom spaces can afford to accommodate such an elevation. The solution may be to install it not on a cabinet, but on a hinged shelf, then you can place household items under the bottom.
The same varieties that are installed on countertops are convenient in that they do not depend on the strength of the wall and will not require work with it (which means you will not have to spoil the finish if you have one). Unlike the model on a pedestal, which has very limited space for placing important small items, this option has more space due to the free surface of the cabinet. You can put toothbrushes, paste, various creams on it, and there is even space for decorative elements.
Use of mounting brackets
Installing an overhead sink requires a little less time and can also be done using special metal corners. They usually come with it. In total, at least 4 mounting plates are required, which will be fixed on the outside of the cabinet with self-tapping screws. Since the wall of the cabinet-stand rarely exceeds a thickness of 18 mm, the screws in the set are 16 mm long.
The step by step process looks like this:
- We screw in the screws by 5-6 mm.
- We hang a mounting corner on them (with the inner corner part to the cabinet).
- We clamp the screws, but not completely, leaving room for adjustment.
- We put the sink on the stand so that the powerful main fastening screw is fixed in the very depths of the metal corner.
- We clamp the screws until they stop and make sure that the fixation is secure