Do-it-yourself drainage of the area around the house
If the site is located in a lowland or groundwater passes close to its surface, it is necessary to drain the area. It is optimal when the groundwater level passes at a depth of more than 2.5 m from the surface.
If the distance is less than 1.5 m, then the bearing capacity of the soil decreases - it becomes waterlogged and saturated with water. This affects the settlement of the foundation and makes it problematic to build a basement or basement.
To drain the site around the perimeter of the planned house, and preferably along the edges of the entire yard, they dig channels with a slight slope and organize drainage. The optimal width of such channels is 50-70 cm.
The depth is calculated in each case individually, since it depends on how much the groundwater level needs to be lowered. Drainage is laid as follows.
At a distance of 2-3 m from the house, they dig a ditch with a depth equal to the base of the foundation. A layer of clay of 15-20 cm is laid on its bottom, giving it the shape of a tray. Medium-sized stones are carefully laid out on top, forming sides. Large stones are placed on top, forming a vault. Gravel or crushed stone 25-30 cm high is placed on it. Everyone falls asleep with the soil taken out during excavation. Water will seep through the soil into the tray and run off in the right direction.
How to divert melt and storm water from the foundation
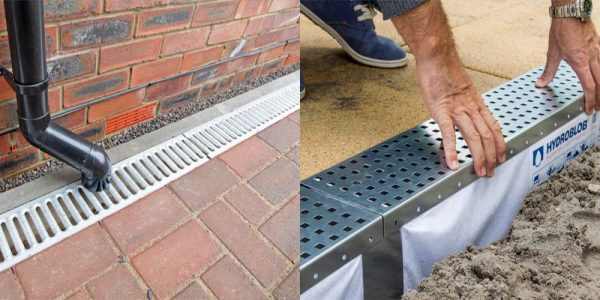
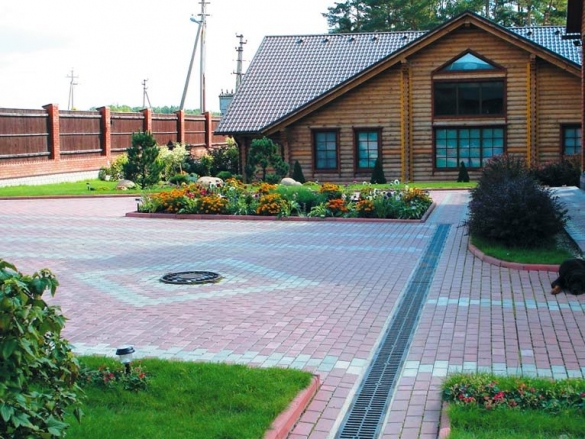
To protect the foundation of the house from rain and melt water, you can use a blind area. Water drainage can be carried out by installing surface drainage trays along the blind area. It is worth remembering that in the spring, the trays will clog very quickly, because the melt water will freely run over the frozen ground without being absorbed into it.
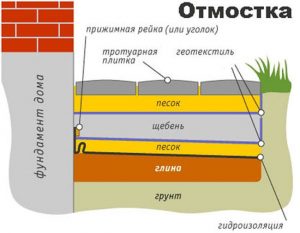 Foundation pavement device
In addition, at night the temperature will drop, the water will freeze, it will be impossible to drain it, and the trays will become useless. It is more expedient to use the device from the trays in the summer: storm water will freely fall from the lawns directly into the drainage device. In addition, you can divert water with your own hands almost free of charge and more efficiently. This method is called watershed creation and landscape modeling.
To create a watershed, you only need a shovel, a rake and a wheelbarrow to transport the earth. First of all, the parameters of the watershed are calculated: shape, length and width. A direct watershed line is drawn in large areas: near a private house, cottage, parking lot.
Objects of small size are limited by a watershed in the form of an arc, at a distance of about four meters from the beginning of the foundation. In this case, drainage is carried out in a ditch or a special drainage well.
After marking the watersheds, you can begin to create them.
Gutter system
The purpose of the gutter roofing system is to collect rain and melt water from the roof of the building and redirect it to the catchment points. If there are no drains or they are arranged incorrectly, then the water flowing from the roof moistens the walls (this is especially dangerous for wooden buildings and sand-lime brick houses that are not finished on the outside), destroys the blind area and undermines the foundation.
If the roof has a large area, and the water flows from it are strong enough, they break garden paths, and the building turns out to be almost half a meter splashed with soaked mud
The main rule when arranging gutters is to divert water as far as possible from the base of the house. After all, if you arrange water collectors immediately under the drainpipes, moisture will go into the ground under the foundation, and only walls and garden paths will be protected! In addition, the soil adjacent to the foundation is usually looser than usual, so water is quickly absorbed into it and seeps to the concrete base. In winter, it freezes, expands and begins to “break” concrete structures.
To prevent this from happening, a blind area up to one meter wide is made along the perimeter of the house and equipped with drainage trays or point storm water inlets that direct water flows into storm sewers, a drainage well, etc. depending on the general drainage system on the site.
Reliable ways to drain water from the foundation of the house
Korovin Sergey Dmitrievich
Master of Architecture, graduated from the Samara State University of Architecture and Civil Engineering. 11 years of experience in design and construction.
The foundation is the foundation, the support of the building, it is on its quality, strength and integrity that the life of the house depends. The integrity of the foundation is broken, first of all, under the influence of water that comes into contact with it during rains, runoff of melted snow, a rise in the level of groundwater (or the constant presence of groundwater at a high level), etc. As a result, the walls of the foundation get wet, damp, overgrown with mold , and moisture gradually gathers around and gets to the upper floors.
All of the above problems demonstrate the importance of the timely operation of drainage from the foundation of the building. Moreover, the drainage of the foundation must be carried out even in the process of creating a residential structure in order to carefully consider the design of the drainage system, calculate the angle of inclination, select suitable materials for drainage and calculate the depth at which structural elements should be located
Protection of the foundation from melt and storm water
Melt water protection
The seasonal formation of surface water is also a big problem. It can be solved with the help of complex protection, which includes a drainage system, a blind area and a drainage system.
Gutter system
The design is designed to collect rain or melt water from the roof of the house. Water flows through special gutters into funnels and is discharged through pipes from the foundation of the building.
Ring drainage helps to divert storm drains from the foundation. It runs like this:
Pipes are laid in an open trench that lead to a public sewer. Pipe laying is carried out on a compacted pillow of their sand and gravel
It is very important that the diameter of the drainage and drain pipes is the same.
Install wells that receive water from drains.
All water is collected in a common well, from which it is removed by pumping, direct discharge into an open reservoir, or absorbed into the soil through a drainage field.
blind area
Water that accumulates on the surface is diverted from the foundation using a blind area. Its arrangement looks like this:
- Markup in progress.
- A layer of soil is removed to a depth of 25 cm.
- Formwork is being installed.
- The soil is covered with a layer of clay and carefully compacted.
- This is followed by a layer of sand of 10 cm, which is also well compacted.
- Small gravel is poured over the sand with a layer of 5 cm.
- At the junction of the blind area with the wall of the house, an expansion joint of 2 cm is necessarily formed.
- The blind area is filled with concrete.
Drainage
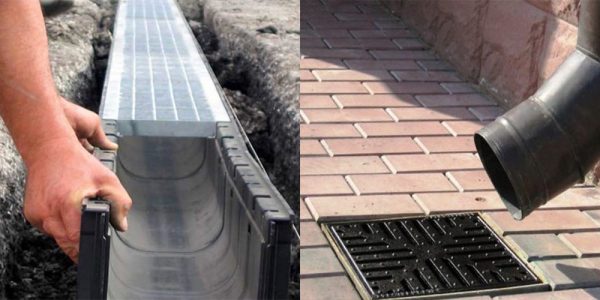
Water from the drainage system and the blind area is diverted through surface drainage. Its arrangement is carried out according to the following scheme:
- On the outside of the blind area, they dig a shallow ditch with a slight slope.
- The bottom of the trench is covered with sand and gravel, creating a sand and gravel cushion.
- Next, special trays are laid and covered with gratings.
Protection of the foundation from groundwater
Groundwater has a constant effect on the foundation, so it is important to create a reliable foundation protection from this negative factor.
Very often, for greater efficiency, complex protection is used: trench drainage and foundation waterproofing. The drainage system is designed to remove water from the foundation, and the waterproofing provides protection against the penetration of moisture into the concrete structures.
trench drainage
The drainage system may be open or closed.
Open drainage is a ditches with width 50 cm and depth up to 1 m. The walls of the ditch are made with a slope of 30 degrees to ensure maximum accumulation of water. The length of the ditch should also have a slope for an arbitrary flow of water.
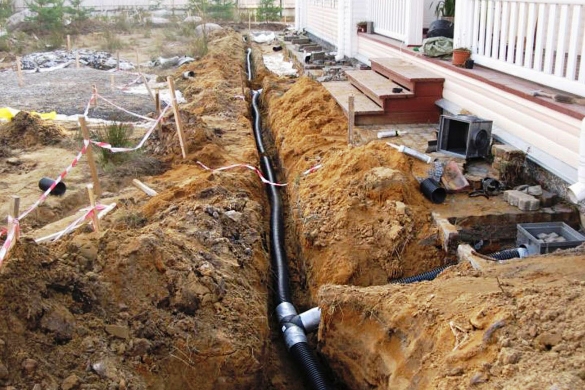
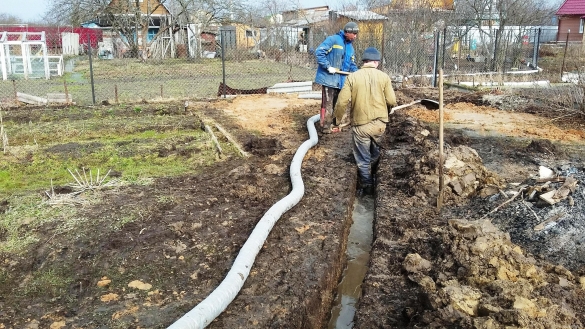
You can make a closed trench drainage with your own hands according to the following scheme:
- A trench about 30 cm wide is dug along the perimeter of the base of the house, the depth should be slightly below the base of the foundation.
- Sand is poured at the bottom with a layer of up to 10 cm, providing a slope.
- The sand is covered with geological textiles, fixed on the walls of the trench.
- Gravel is poured on top with a layer of 10 cm.
- Next, lay the drainage pipes. Many holes are drilled in them, thanks to which water will seep into the pipe and go to specially prepared places. Pipes must have a slope of 1 cm per linear meter.
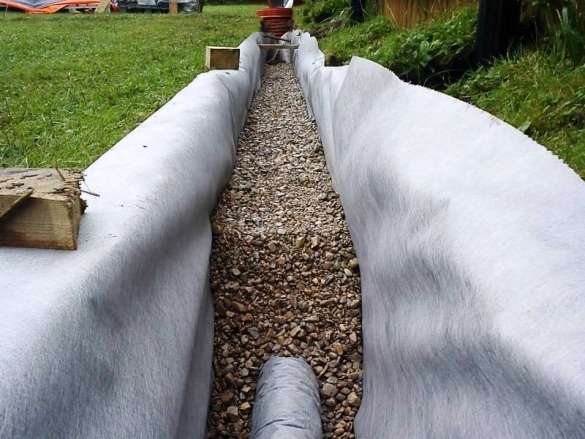
- Pipes are covered with gravel, the layer of which above the pipe can reach 10 cm.
- The gravel is covered with geotextile, the ends of which are sewn together.
- The end of the drainage pipe should be taken away from the base of the house at a distance of at least 5 m.
- The drainage system ends with a water intake, which can be an artificial or natural reservoir.
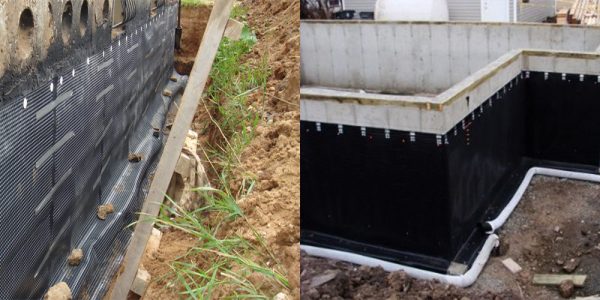
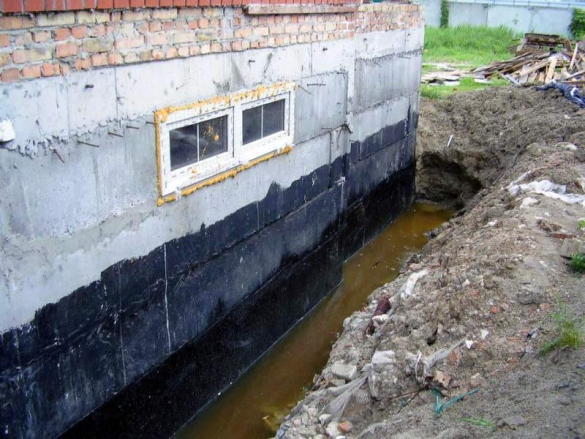
Foundation waterproofing
Waterproofing works protect the foundation of the house not only from groundwater, but also from soil moisture. Waterproofing can be horizontal and vertical. In the first case, the upper part of the base receives protection at the points of contact with the walls. In the second - the side surfaces of the foundation.
https://youtube.com/watch?v=a-26-EskN90
For vertical waterproofing, several options can be used:
- Protect the foundation with a layer of cement-sand mortar.
- Create insulation with bituminous mastic.
- Lay several layers of roofing material or roofing felts.
What kind of water interferes with the life of the developer and the suburban homeowner
About the types of surface and ground water, as well as drainage and storm sewer systems, you can write a separate book. Therefore, we will leave a detailed enumeration of the types and causes of groundwater occurrence outside the scope of this article, and concentrate on practice. But without the minimum theoretical knowledge, to take up the independent arrangement of drainage and storm sewers is to throw money away.
The fact is that even an improperly made drainage system functions for the first few years. Then, due to clogging (silting) of the drainage pipe wrapped with geotextile, which was placed in clayey, loamy, etc. soil, drainage stops working. And the money for the arrangement of drainage has already been spent and, most importantly, the construction of the drainage is associated with a large amount of excavation work with the involvement of equipment.
Therefore, simply digging and shifting a drainage pipe 3-5 years after its laying is difficult and expensive. The site has already been inhabited, landscape design has been made, a blind area has been equipped, a gazebo, a bathhouse, etc. have been installed.
We'll have to puzzle over how to redo the drainage so as not to turn the entire site around.
Hence, the construction of drainage should always be based on data from a geological study of the soil (which will help to find a water-resistant layer in the form of clay at a depth of 1.5-2 m), hydrogeological surveys and clear knowledge of what kind of water leads to flooding of the house or swamping of the site.
Surface waters are seasonal in nature, associated with a period of snowmelt and an abundance of rain. Groundwater is divided into three main groups:
- capillary water.
- Ground water.
- Verkhovodka.
Moreover, surface water, if it is not diverted in time, when infiltrated (absorbed) into the ground, turns into underground water.
Conclusion: surface runoff should be diverted by storm (rain) sewage, and not trying to make surface drainage!
Storm sewage is a system consisting of trays, pipes or ditches dug in the ground, leading water from drains outside the site + competent organization of the relief in the backyard. This will avoid stagnant zones on the site (lenses, pools), where water will accumulate, which simply has nowhere to go, and further waterlogging.
The main mistakes that are made with an independent drainage device:
Non-observance of the correct slope of the laid drainage pipes.If we take the average, then the slope is maintained in the range from 0.005 to 0.007, i.e. 5-7 mm per 1 running meter of drainage pipe.
Using a drain pipe in a geotextile wrap on the "wrong" ground. To avoid siltation, a pipe in geotextile is used on soils consisting of clean medium- and coarse-grained sands.
- The use of cheaper limestone rubble instead of granite, which is washed away with water over time.
- Savings on high-quality geotextiles, which must have certain hydraulic properties that affect the quality of drainage. This is an effective pore size of 175 microns, i.e. 0.175 mm, as well as the transverse Kf, which should be at least 300 m / day (with a single pressure gradient).
Deep drainage system
If the groundwater level on the site is high, and the house has a basement or underground garage, then you will have to install a deep drainage system.
Signs that it is necessary can be considered:
- High humidity in the basement; - Underflooring of the basement; - Rapid filling of the septic tank (cesspool).
It is advisable to equip the underground drainage system of the foundation during the construction of the house. This will be much cheaper than removing moisture from a finished foundation, built without taking into account the actual level of groundwater.
Water is drained immediately into a storm or mixed sewer (by gravity - with a slope of the site is not
The slope can be both natural and artificial - for example, through the use of special concrete pipe-channels with an internal slope or multi-level stepped gutters.
Water collected by surface drainage can also be diverted into the collector, and from there they will fall into the municipal storm sewer or soak into the soil (through the drainage field - a layer of rubble).
Arrangement of a simple drainage system
Drainage trench around the house (ring drainage)
The easiest way to drain water and neutralize the impact of ground moisture on the basement and foundation is to install a fairly wide drainage gutter around the perimeter of the building at a distance of one and a half to two meters from it. Its depth should be below the level of the foundation, its bottom is sloped and filled with cement mortar.
The drainage ditch effectively removes moisture from the base of the house, but water from downpipes should not drain into it.
Closed wall drainage
The blind area is not only water drainage. but also the protection of the foundation
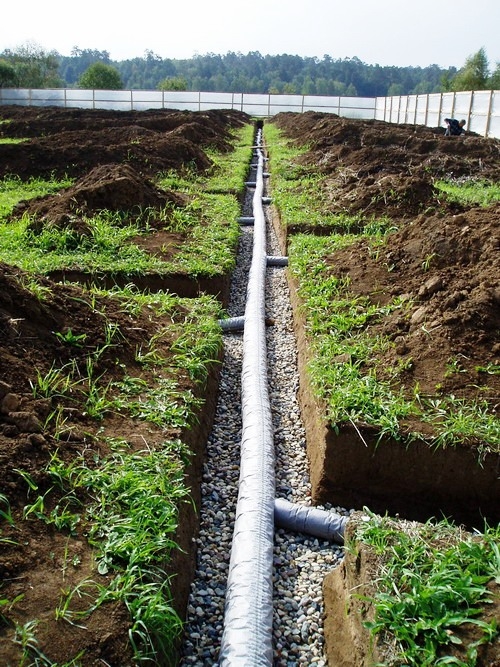
The purpose of this soil drainage system is to remove ground, rain or melt water from the foundation and prevent ground water from rising during snowmelt or heavy rain. It is a closed circuit of perforated (perforated) pipes or gutters with the convex side up, laid at a depth of one to one and a half meters.
Unlike the ring, wall drainage pipes are laid above the level of the base of the foundation. The trench is paved with broken bricks or large crushed stone of several fractions, drains are also covered with crushed stone and wrapped with it in filter material - for example, geotextiles or fiberglass. The filter does not allow the drain holes to become clogged with silt, and the top of the trench is covered with gratings and covered with soil.
At the corners of the building, "rotary wells" are installed - they set the direction of the discharged water. The wells are made of PVC, their diameter is less than half a meter, and their height is from one to three meters.
The ditch with pipes should slope down the slope (and away from the building) and lead water flows below the level of the basement floor. Such a drainage trench pulls, absorbs and removes moisture from approximately an area at a distance of 15-25 meters around it.
Where to divert water?
If the building stands on a slope, as a rule, the drainage trench goes around its “horseshoe” from the side of the hill and has an exit from the opposite side.If there is such an opportunity, water can be drained into a small “technical” reservoir, from where it will be used for household needs - watering the garden, construction and repair, etc.
In other cases, water is either immediately discharged into a general or individual sewer, or enters a storage collector well, where it is absorbed into the soil and discharged by gravity or by a pump to the site.
The arrangement of simple drainage trenches is not difficult, but the arrangement of a full-fledged soil drainage system that connects both the drying of the site itself and the removal of water from the house located on it requires special calculations and professional installation. It is better to entrust it to professionals, since the losses from malfunctions, repairs and alterations will be greater than the costs of the services of specialists.
Varieties of drainage
There are three types of drainage: closed, open and backfill. The easiest and most uncomplicated is an open type of drainage, to put it simply - ditches.
Perform a similar action like this:
- according to the circumference of the entire area, ditches are dug with a depth of up to one meter and a width of fifty centimeters;
- the angle of inclination of the walls of the ditch must be at least thirty degrees - this will contribute to the maximum collection, as well as the removal of excess moisture;
- in order for drainage to be truly effective, the site must have a slight slope.
Pipes must be laid on a well-packed sand layer and wrapped with a specially designed filter resource called geotextile. After the sand is poured, the earth is covered and the turf is laid.
The backfill drainage method, or, as it is also called, the gravel method, is used extremely rarely. But, no matter what drainage method is used, there is still a need for a collector or a natural water intake where water is collected.
Inexpensive do-it-yourself storm sewer
The first thing that comes to mind in order to equip a budget option for storm sewers on the site is to lay special trays.
Trays can be made of concrete or plastic, but the price of them "bites". This forces users of our portal to look for cheaper options for arranging storm sewers and drainage systems from the site.
I need to make an inexpensive storm drain, about 48 m long, along the edge of the fence, to drain meltwater that comes from a neighbor. Water must be diverted to a ditch. I thought about how to make a water outlet. At first it occurred to me to buy and install special trays, but then they will leave “extra” gratings, and I don’t need special aesthetics for stormwater. I decided to buy asbestos-cement pipes and cut them along with a grinder, thereby getting a homemade tray.
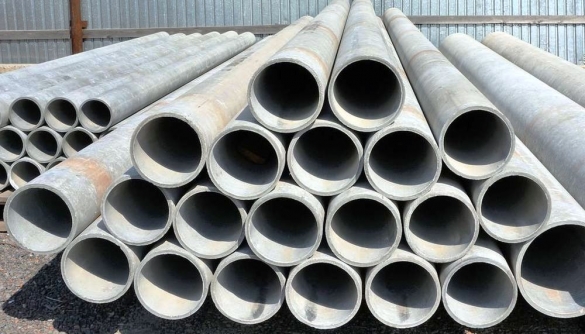
Despite the budgetary nature of this idea, the user was not attracted by the need to saw asbestos-cement pipes on their own. The second option is the opportunity to buy gutters (plastic or metal) and lay them on a prepared base in a concrete layer of about 100 mm.
Portal users dissuaded Denis1235 from this idea in favor of the first option, which is more durable.
Hooked on the idea of an inexpensive storm drain, but not wanting to get involved with cutting pipes on his own, Denis1235 found a plant that produces asbestos-cement pipes, where they will immediately be cut into pieces 2 m long (so that a 4-meter one does not crack during transportation) and ready-made trays will be brought to the site . It remains only to develop a scheme for laying trays.
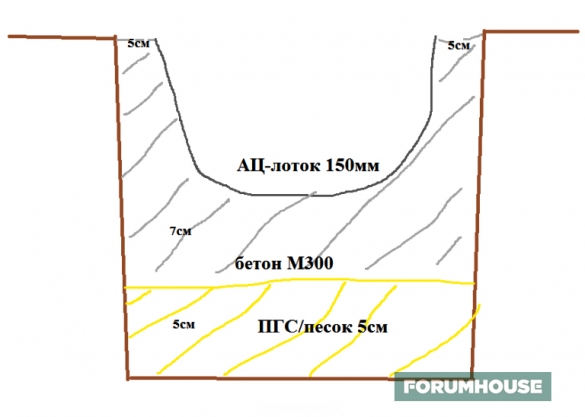
The result is the following pie:
- Soil base in the form of a bed.
- A layer of sand or ASG about 5 cm thick.
- Concrete about 7 cm.
- Tray from asbestos-cement pipe.
As a result, I made a budget shower at the dacha. It took: 2 days to dig a trench, two more days to concrete and install the track. I spent 10 thousand rubles on trays.
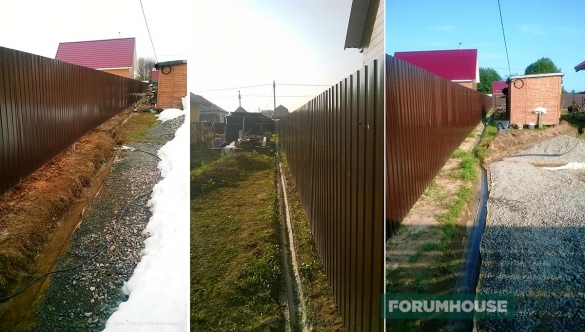
Practice has shown that the track "wintered" perfectly, did not crack and intercepts water from a neighbor, leaving the site dry. Also of interest is the variant of rain (storm) sewage of the portal user with the nickname yury_by.
Because the crisis does not think to end, then I thought about how to arrange a storm sewer to remove rainwater from the house. I want to solve the problem, and save money, and do everything efficiently.
After thinking, the user decided to make a storm drain for water drainage based on flexible double-walled corrugated pipes (they cost 2 times cheaper than "red" sewer pipes), which are used for laying power cables underground. But, because the depth of the drainage route is planned to be only 200-300 mm with a pipe diameter of 110 mm, yury_by was afraid that the corrugated pipe could break in winter if water gets between two layers.

As a result, yury_by decided to take the budgetary "gray" pipe, which is used in the arrangement of internal sewage. Although he had fears that the pipes, which did not have such rigidity as the "red ones", would break in the ground, practice showed that nothing happened to them.
If you step on the "gray" pipe, it turns into an oval, but in the place where I buried it, there are no significant loads. Only the lawn is laid and there are pedestrian loads. Having laid the pipe in a trench and sprinkled it with soil, I made sure that they keep their shape, and the storm drain works.
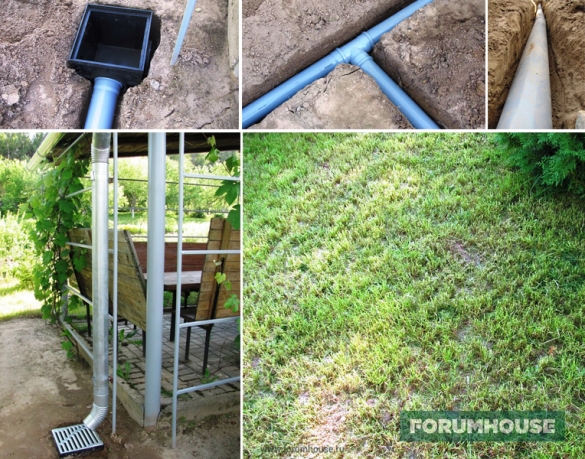
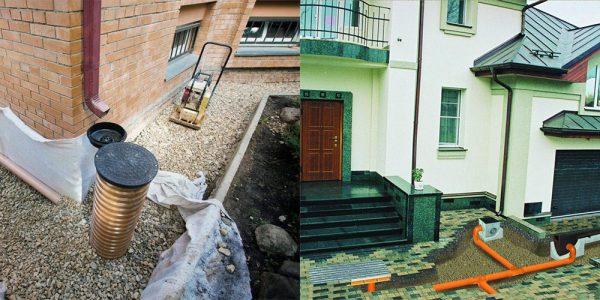
The user liked the option of installing an inexpensive storm drain based on “gray” sewer pipes so much that he decided to repeat it. All the nuances of the process are clearly demonstrated by the following photos.
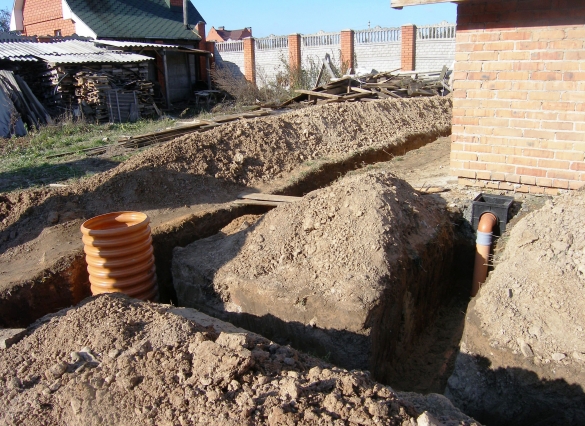
We dig a hole under the drainage well to collect water.
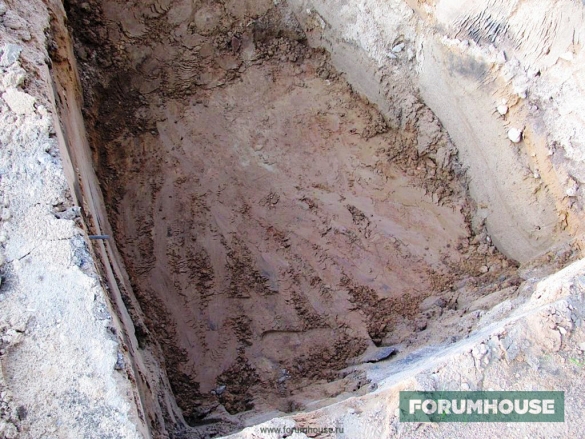
Level the base.
We install a concrete ring.
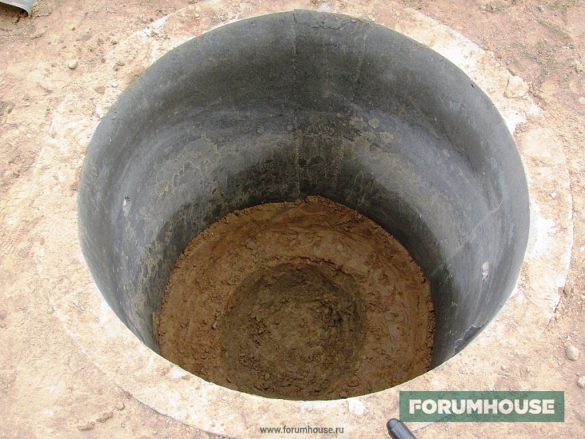
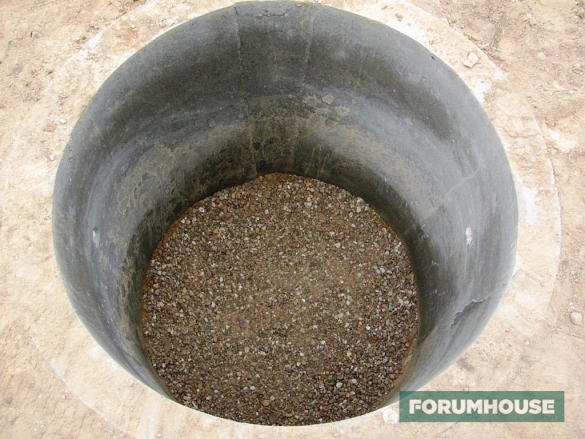
The next stage is to fill the bottom of the well with gravel fraction 5-20.
We cast a homemade well cover from concrete.
Determination of direction
First you need to decide on the direction of the drainage of storm drains. It can be a slope descending into a ravine or to a river. In this case, there will be no problems with the volume of earthworks.
If this is a ravine located behind a hill, then you need to determine the height of the bottom of the ravine or ditch relative to the surface of your site. This will help the simplest geodetic device - "level".
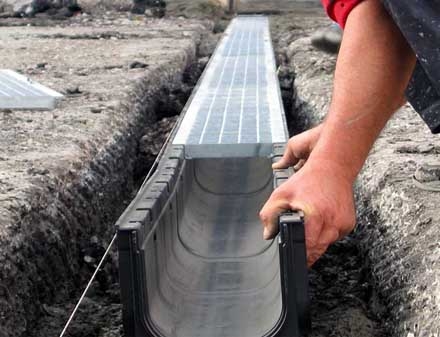
Various fittings for receiving stormwater
With it, you can calculate the depth of all wells and the required slope yourself. But such calculations are needed only for large areas and distances. Usually, the owners of private plots do not have such problems - and so everything is clear where the water flows and where the nearest ditch is.
surface drainage
This water drainage system is designed to drain storm and melt water from the site (perch) and is called surface drainage.
It is easy to protect yourself from melt and storm water:
- It is necessary to dig along the perimeter of a section of a ditch half a meter deep with walls beveled at an angle - they will discharge water into a common gutter behind the lower point of the section. Their bottom is covered with rubble, broken bricks, straw, poles, and covered with earth from above;
- A more rational and reliable way to prevent your site from turning into a swamp, and the foundation to “float” is to arrange a more serious surface drainage system, which involves laying plastic channels or rectangular polymer concrete gutters around the perimeter (linear drainage). Plastic conduits are inexpensive and come in several varieties, but they all look like halves of a pipe cut lengthwise. They allow you to quickly mount the outlet on large areas using special fasteners and adapters. From above, the channels are blocked by protective grilles;
- Polymer concrete gutters are more expensive, but the quality of this material is much higher than that of plastic. They are just as light, but more durable, resistant to abrasion and do not let water through;
- Storm water inlets.These adapter tanks are used to collect rain and melt water from the roof of a building (with a vertical drain) or installed at the "slope crossing point", collecting water flowing down from the entire site (with a side drain). To protect against debris and leaves, cast-iron, steel or plastic gratings are mounted above them.
When arranging surface drainage of the site, it must be remembered that it cannot be connected to the drainage of the foundation, otherwise storm flows can leak under the base of the house and undermine it.
Creating a watershed
Storm and melt water can be directed from the base of the house in another way - by creating a watershed. In this case, the costs will be minimal and the efficiency high. The main purpose of a watershed is to direct overhead water away from a building, collect it in ditches, and drain it away from the site.
There are two options for creating a watershed:
- The boundaries of the future watershed are determined and a channel of a certain depth is dug along its bottom so that there is a slope from the channel towards the ditch for collecting water. Further, from the blind area to the channel, additional channels are dug and the soil between them is removed.
- From the blind area to the border of the watershed, bypassing the work on the formation of additional channels, they remove the soil so that a slight slope from the structure is obtained, which ensures the outflow of water. From the excavated soil, a kind of parapet is folded with a slope from the house.
As a result of the actions performed, the building is on an artificial elevation, due to which precipitation and melt water flow in the direction away from the house.
To prevent softening of the soil adjacent to the structure, it is necessary to create an additional protective layer. You can make a concrete or stone platform, but this requires a significant investment. An excellent solution is to use a grassy lawn. It prevents the penetration of water into the lower layers of the soil, directing it in the right direction.
Drainage of water from the foundation of the house is a necessity, but it is important to properly organize this process. The result of the work carried out will be a comfortable stay in the house, an increase in the service life of the base of the house and its reliability.
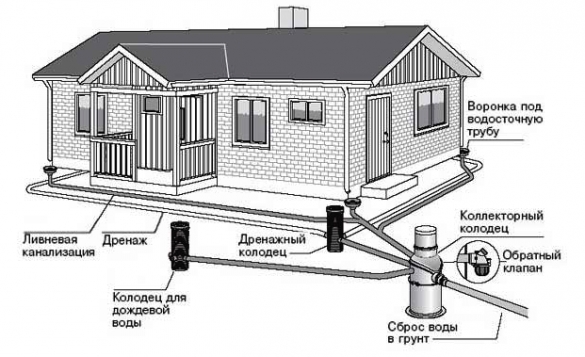
How to organize water drainage on the site
This task is complex, it includes systems that complement each other:
- drainage system;
- surface drainage system;
- drainage system.
With the help of the first two systems, rain and melt water can be diverted. These varieties of groundwater are seasonal in nature and represent a significant problem for houses with a basement. In addition, they can instantly fill the cesspool during the onset of floods.
In the presence of a roofing system, rainwater quickly accumulates and is diverted to the catchment area. If there is no drain, then very soon the rains will simply break the steps, the blind area and all the paths near the building. The remaining melt and storm water is removed using surface drainage.
If the basement is flooded with water, and, at the same time, the cesspool must be pumped out weekly, then deep drainage will have to be performed.