What primer to use
The primer is necessary for better adhesion (adhesion) of the paint to the surface to be painted. It allows you to avoid the appearance of cracks and swelling after the paint dries. If there is no primer, this can happen. Everything will have to be cleaned and re-puttyed. Because in order for the painting of the ceiling with water-based paint to be of high quality, it is necessary to prime the surface well.
The base of the primer must match the base paint. Under acrylic paint, a water-based emulsion requires the same primer, under silicone - based on silicones, etc. Moreover, it is advisable not to save: the quality of this composition depends on how smoothly the water emulsion will lie on the ceiling.
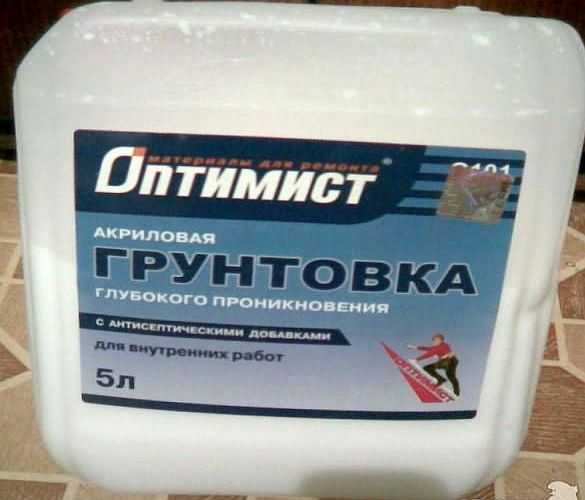
Acrylic primer for the same water-based paint
There is an economical way of priming: the main paint is diluted with water (1 to 2) and the surface is painted over with this composition a couple of times. It's certainly better than nothing, but the primer gives a more secure grip.
Ceiling preparation
We will talk about the remaining two methods a little lower, but for now let's focus on a very important factor - preparation. In Soviet times, one could often see a good slogan at factories: “Comrade, remember: poor quality can ruin any quantity!” This principle with absolute certainty should be applied to the whitewashing of the ceiling.
The final quality of painting depends not only on the finishing operation for applying paintwork materials, but also on the correct preparation of the surface. We will not dwell on each stage of this process in detail, we will simply indicate their order:
- Complete removal of the old finish from the ceiling
- Preservation of traces of leaks, rust and fungus with special primers (if necessary, also waterproofing)
- Priming with deep penetration soils
- Leveling - sealing seams, cracks, shells, puttying the plane
- Re-priming over sanded putty
- Finishing painting (whitewashing)
Skipping any of these steps to save money can lead to much higher costs later on, so don't try to cut your budget here.
How to whitewash the ceiling with water-based paint
One of the most popular ways to whitewash a ceiling is to paint it with a water-based emulsion. Today it is fashionable to use various designs and finishes of shelves. It can be PVC panels, MDF, ceiling tiles, plasterboard patterns on a concrete wall. After puttying such surfaces, it is more expedient to paint the ceilings with water-based paint.
To paint the ceiling we need:
- Water emulsion (manufacturers mass and quality are approximately the same)
- Primer
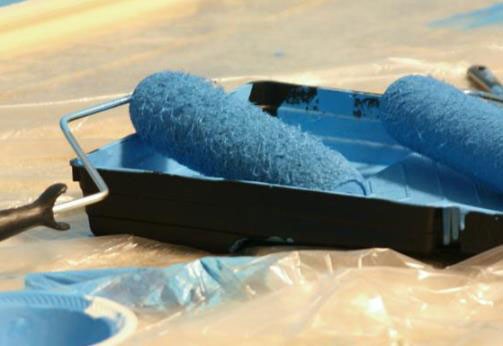
- Roller
- Tray for paint
- Brush set
- masking tape
If you are painting the ceiling in a color other than white, then you will need a color. Select it in the shade of the color you want to get.
How to whitewash the ceiling with water-based paint
The process of leveling the ceiling with a spatula before painting
To do this, this process needs to be divided into several stages:
- The most important is the preparation and priming process.
- Since the surface must be polished and even. For grinding, use a special mesh or very fine sandpaper. They are dressed on a grater and fastened with special clamps.
- Wait until the dark spots disappear after puttying. This will mean that the surface is dry.
- Pour the primer into bowls or a bucket.
- Take a paint roller. The roller can be either foam or wool. You can also use macros for this process.
- Apply liquid to the ceiling with even movements.
- Then allow time to dry.
Getting closer to the painting stage:
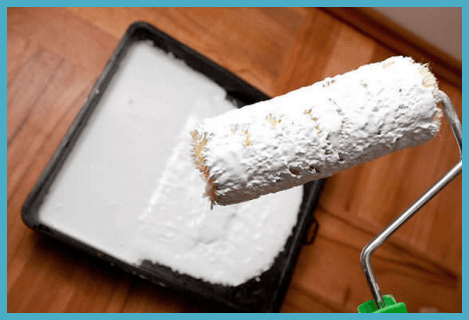
- We recommend choosing a wool roller. Thanks to its texture, the paint lays down evenly.
- Without leaving behind bald patches, streaks and other traces.
The process of painting the ceiling with water-based paint
If you decide to make a ceiling of a different color, add color to the bucket. Thoroughly stir the consistency, bringing it to a uniform color. Before painting, test on the ceiling to see if the shade suits you. Just be sure to let it dry to gain natural color. Can be dyed in different colors. And in order for the color edges not to intersect with each other, use masking tape.
As you have already seen, whitewashing the ceiling is painstaking work. But if you approach this matter with all seriousness, perseverance and follow the instructions, you will succeed.
The times when repairs in an apartment were determined not by the desire of the tenant, but by the materials that were available in hardware stores, are long gone. Today's choice allows you to satisfy the most capricious and refined taste of interior gourmets. However, any finish will last a long time only if the technology for using building materials is fully observed.
Ceiling paint coatings are only slightly inferior to suspension systems, applicable only with a sufficient distance from the floor to the floor panels. Therefore, painting the ceiling, which in simple terms is still called whitewashing, is a relevant and popular operation today.
Any painting technology consists in the method of applying paintwork material to the surface. There can be several such methods, and each of them must ensure both the durability of the further operation of the coating and fully convey its decorative properties.
If we talk about the visual effect, then it very much depends on which particular method of whitewashing the ceiling is chosen. In total, there are three main methods for applying any coatings (paints and varnishes):
- Brush
- Roller
- spraying
Painting with a brush on a large surface is a laborious and lengthy process, and the result is a “C grade”. Although, of course, there are masters who can achieve very high-quality results with a brush. But still, technologies do not stand still, tools also do not lag behind, and a brush in ceiling decoration is used only when priming or painting corners and hard-to-reach areas.
How to prepare a solution
Breeding water-based paint is most often not particularly difficult, which cannot be said about the preparation of a chalk or lime mortar.
The solution is prepared from an approximate calculation that for every square meter of a ceiling painted in one layer, half a liter of the mixture is required. But most often, the component compositions are given on an area of 10 square meters. m. The finished mixture can be stored for no more than 36 hours, and dry ingredients - for several years without damage and loss of their properties and qualities. If possible, the solution is mixed using a construction mixer.
-
To prepare a chalk solution, you will need from 30 to 100 ml of glue (PVA or carpentry), a piece of laundry soap weighing 50 g rubbed on a fine grater, as well as 3 kg of chalk sifted through a sieve (sifting is a necessary step that allows you to remove debris and the largest particles from whitewash material) and 10-20 g of ordinary blue to enhance the whiteness of the color and prevent possible yellowing of the coating. First, soap chips and glue are dissolved in warm water, then chalk, previously mixed with blue powder, is poured in a thin even stream with constant stirring.
The lime mixture is prepared somewhat simpler: 1.75 g of pureed lime, 100 g of table salt and 40-45 g of blue are diluted in warm water. However, such a mixture does not give saturated white light, paying for it with its masking properties.
The amount of water is taken arbitrary. Approximately 1 kg of chalk or lime requires 2 liters of warm water.To determine the optimal consistency of the mixture, the following technique is used: a metal object with a smooth surface (a pin or a knife) is vertically lowered into the solution, if the mixture drains without leaving marks when pulled out, the solution is not thick enough and chalk or lime should be added. In that case, the concentration of the mixture is increased gradually, after each addition, checking the quality of the solution.
The finished mixture is left for 10-15 minutes, after which it is filtered through a sieve or a layer of rags. A well-prepared mixture does not have lumps and, when flowing, paints the metal white. Immediately before whitewashing, the solution is well mixed.
Equipment selection
The most common mistake when choosing a spray gun is buying a cheap device. Such devices are usually simply not adapted for high-quality application of paints and varnishes.
When buying coloring equipment, it is recommended to pay attention to the following points:
The optimal case material is aluminum alloy. The surface should be nickel-plated - this will increase strength and eliminate the likelihood of corrosion processes.
The gun must not have any defects (irregularities, burrs, obvious molding defects).
The handle of the device should be comfortable in the hand. The trigger handle must not have play
The stroke of the handle should not be too tight, otherwise the complexity of the operation will increase.
The main attention should be paid to the outlet nozzle: the hole should have the correct shape, and the needle should move freely without touching the walls.
All connections in the device (seals) must be sufficiently reliable: the principle of operation of the equipment is based on air injection.
The location of the tank for the paint and varnish composition. The tank is usually located at the top or bottom of the machine.
For painting the ceiling, it is more convenient to use an airbrush with a tank located on top. If the container is at the bottom, the gun must be held strictly horizontally (to avoid air being sucked in), and this is not possible when painting the ceiling surface.
According to the air injection option, spray guns are divided into three types:
- Hand sprayers. This equipment is outdated. In addition, pumping air manually is physically difficult, especially when it comes to painting large areas.
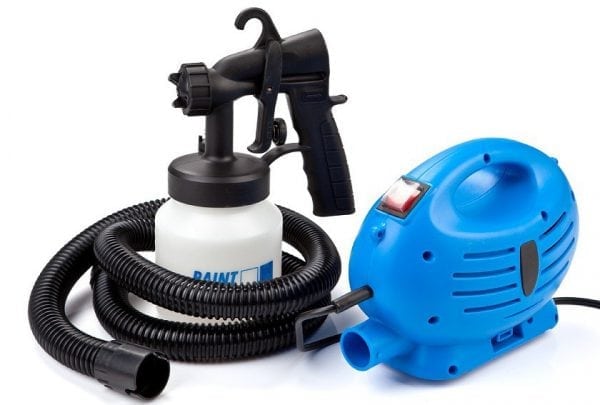
- Pneumatic inflation. Pneumatics is the most used by craftsmen at the present time. The equipment contains a small electric compressor that directs the air flow to the gun.
- Electric air supply. For ceiling painting, this is the best, most advanced type of equipment. The atomizer spreads the paint very accentuated, as a result of which no clouds of paint form in the air. However, the cost of the device is quite high. For the operation of such an airbrush, you will need access to the mains.
Features of spray guns for the ceiling
The reasons why experts recommend using an airbrush when applying paint to the ceiling:
- Automation of the process significantly improves labor productivity. The work that will be done with a roller or brush in a day will be done with an airbrush in 1-2 hours.
- When working with a sprayer, the likelihood of streaks and streaks is much less, since the liquid is distributed evenly over the surface.
- There is no need for a brush, even when it comes to hard-to-reach areas, since with the help of a sprayer it is possible to process any form of surface.
- The device comes with instructions from the manufacturer. Therefore, even if questions arise, the answer to them can be found on the pages of this technical guide.
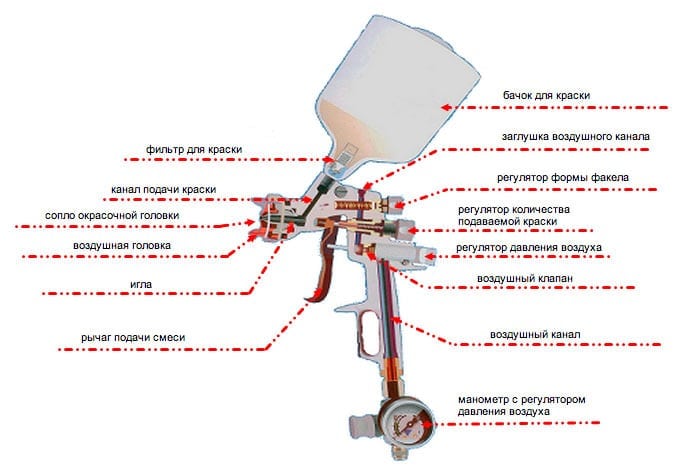
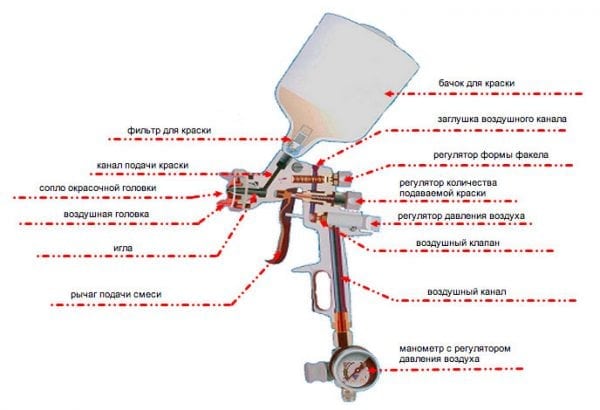 Spray gun device
This method is not without certain disadvantages:
- Compared with a roller or a brush, the cost of an airbrush is high.However, it is worth considering here: if the surfaces to be painted are quite extensive, it is better to buy a spray gun, which will save a considerable amount of time and effort.
- Working with an airbrush is characterized by the release of paint particles into the environment, therefore, measures should be taken to protect the eyes and respiratory organs.
Do-it-yourself preparation of the surface of the ceiling of the walls for whitewashing
Before starting whitewashing, of course, it is necessary to prepare the surface for further work. For example, you wanted to use lime whitewash, and your ceiling or walls are covered with chalk, in which case it would be logical to first remove the old chalk whitewash and only then apply lime.
How to wash off the old whitewash from the ceiling? First of all, it is necessary to moisten the entire surface of the ceiling with water, and then, using a rag and a spatula, clean and wash off the whitewash with soapy water.
If there is a desire to only slightly update the ceiling. those. to repair the whitewashed ceiling, then first carefully examine the entire ceiling for cracks, and then with a spatula you can repair the flaws with cement-based putty.
The seams of the ceiling must be glued with a special mesh-like tape, and then putty. When the ceiling is dry, it must be treated with sandpaper. Next, we apply the primer again, and after it dries (after 24 hours), you can proceed directly to whitewashing.
 How to whitewash the ceiling (walls) with your own hands - whitewashing with lime, chalk and water-based paint
We clean the ceiling
This process is laborious and dirty. We take out everything that can be taken out of the room, and cover the rest with polyethylene.
To remove, you will need: a scraper (spatula) and warm water, to which vinegar or citric acid is added. Do not process the entire area at once, it will dry quickly, and this will only make the job more difficult.
When moisture is absorbed, carefully remove it with a spatula. You can hold (if convenient) in one hand a plastic tray, in which we will immediately collect the peeled pieces.
The remains of whitewash are removed with a wet sponge. We treat the cleaned surface with a special antifungal solution (to prevent the appearance of mold), putty and, if necessary, level it.
After that - cover with a primer. When the primer dries (in a day), you can start whitewashing.
How to whiten
There are two popular options. The first option is to whitewash with chalk, and the second - with lime. These options are hygienic and environmentally friendly. Lime can tighten small gaps and fix them, besides, it has bactericidal properties.
Video: Lime whitewash recipe
Chalk differs from other materials used to cover ceilings - deep whiteness.
Chalk preparation
For whitewashing with chalk, we take: 5 liters of warm water, dissolve 30 grams of wood glue in water, then pour 3 kg of chalk (sifted) and 15 - 20 grams of blue.
Blue is added to avoid a yellow tint and enhance the whiteness of the coating. The prepared composition is enough for about 10 - 12 square meters.
In order to check the density of the solution, we lower the knife blade into it. If it flows down exposing the blade, there is a lot of water in it.
You can add more chalk. The solution should not drain completely from the knife blade. In order not to pour too much, add chalk little by little.
Lime mortar preparation
We take 2 - 3 kg of slaked lime and dilute it in a liter of water. Add pre-soaked 50 - 100 grams of salt, 150 - 200 grams of aluminum alum, 400 - 500 grams of dye (if necessary).
Mix the ingredients thoroughly and add warm water. Bring up to 10 liters. It is advisable to apply lime whitewash on a damp surface, it will lie better and there will be no streaks left.
Preparation of a solution for whitewashing the ceiling with chalk
A solution for chalk whitewash is prepared as follows: for 5 liters. water add 30 gr. wood glue, 15 gr.blue (to make the solution white) and 3 kg of chalk. The prepared solution is enough for 10 sq.m.
You can check the consistency of the solution with a knife. If the solution flows freely over the knife, then the solution has insufficient viscosity. Then you need to add more chalk there, but gradually, in small portions, so that the solution does not turn out to be too thick.
Preparation of a solution for whitewashing the ceiling with lime
A solution for lime whitewashing is prepared as follows: stir 2-3 kg of lime in one liter of water, add 100 gr. salt, 200 gr. aluminum alum. Mix thoroughly, and then dilute with warm water (up to 10 liters). If you want to change the shade, you can add 200-500 ml of dye.
When whitewashing with lime, the surfaces must be moistened, then the lime lays down evenly, without leaving streaks.
How to determine what was whitewashed ceiling or walls before repair
Sometimes we do not know what the walls or ceiling were previously whitewashed, in which case it can be easily checked. We wet any area with water, if the whitewash was lime, then the wet surface will darken and if you rub this place with your finger, it will not be stained.
How to whitewash the ceiling (walls) with your own hands
Use auxiliary tools when whitewashing: brush, roller or vacuum cleaner. It is easiest to work with a roller, and the surface is white and even (experience is still needed for a brush and a vacuum cleaner).
Before starting work, it is necessary to thoroughly stir the solution, and then apply the whitewash with a roller at least two times. Let the first coat dry and then apply another coat.
Advantages and disadvantages of whitewashing with chalk
Like all building technologies, whitewashing the ceiling with chalk has its advantages and disadvantages.
Advantages:
- the room seems higher if the ceiling is whitewashed in snow-white color
- low cost of materials and labor
- environmental Safety
- no special tools required
- ease and speed of application
- the ceiling is a beautiful matte color
Flaws:
- in appearance, whitewash loses to many modern building materials
- the application process is accompanied by dust and drops of the solution, so all furniture and household items are taken out or covered beforehand
- safety precautions must be observed, as dust from chalk can enter the respiratory tract
When applying to the ceiling, you need to wear goggles, gloves, protect your respiratory organs with a respirator, put on a scarf and a work coat. Although chalk is environmentally friendly, it has a fine structure that can irritate mucous membranes and skin.
How to whitewash a ceiling
To carry out whitewashing with water-based paint, you need to purchase the following tools and materials:
- Roller with a handle of sufficient length.
- Brush for painting small and hard-to-reach areas.
- Roller for carrying out a primer.
- Deep penetration solution for primer.
- Protective accessories.
- Water-based paint.
Instructions for coating the ceiling with water-based paint:
The surface is primed with a deep penetration primer, which will improve the adhesion of the paint to the surface of the walls and reduce the absorption of the material.
- Staining begins 60 minutes after the primer (see).
- Water-based paint is applied to the ceiling in two layers. For the first of them, the paint is diluted to a liquid consistency, for the second, an undiluted solution is used.
- Hard-to-reach places are painted over with a brush.
- The paint is applied in the first layer. To do this, it is poured into the tray, the mixture is collected on a roller, which is rolled over the ribbed part of the tray, and staining is performed.
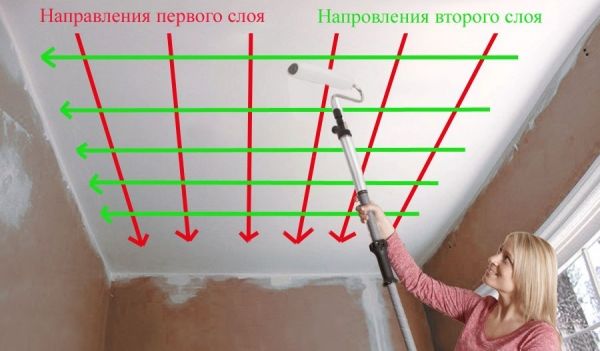
- Painting work starts from one of the corners of the room. The first layer is applied parallel to the window opening. Unpainted areas are tracked, which will give the surface heterogeneity. After the paint has dried, the surface is once again checked for uniformity, for the absence of stains.
- After a day, a second layer is applied perpendicular to the window opening, as in the photo. Using this process technology, it is possible to achieve surface uniformity and high-quality coloring.
The staining process is shown in detail in the video in this article.
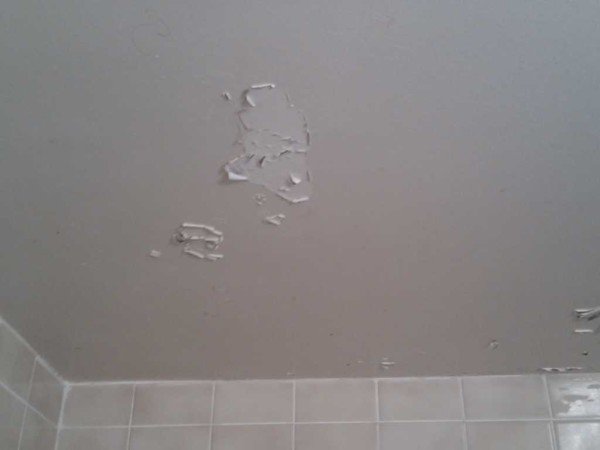
How to remove defects after painting the ceiling
Stains and stains on the surface of the ceiling will break the beauty of any interior. The reason for the formation of spots may be a violation of the coating technology. Of greater importance is the correct choice of roller.
Wherein:
- Without streaks, you can whitewash the ceiling with a tool with long threads.
- It is better not to use velor for this - it absorbs too little paint, working with it is very slow.
- The foam tool leaves bubbles on the surface.
Stripes may remain on the surface of the ceiling.
Reasons for this:
- Insufficient rolling of paint with a roller. To prevent this from happening, it must be rolled over a painted surface, in the absence of paint on the tool.
- Uneven distribution of ink on the roller. You need to try to evenly dip it into the composition and evenly press.
- If wide, slightly different stripes are formed, the cause may be poor mixing of water-based paint.
How to paint the ceiling with a vacuum cleaner
When painting the ceiling, in addition to the roller and brush, you can also use a vacuum cleaner.
The order of work in this case:
Surface preparation, as in the previous case.
- A special nozzle for spraying paint is put on the vacuum cleaner.
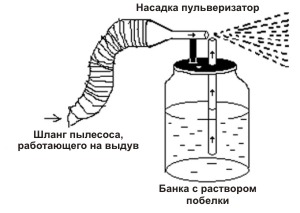
- The paint is stirred in a bucket and poured into a jar.
- The nozzle is attached to the hose of the vacuum cleaner. After securely fixing the nozzle, you can turn on the vacuum cleaner in the network.
- The sprayer is directed from a distance of 30 centimeters to the place of painting.
- Close the hole on the nozzle with your finger so that air does not escape.
- The vacuum cleaner turns on.
- For uniform application, whitewashing should be done in a circular motion.
- To ensure even whitewashing, it is necessary to control the distance; if the sprayer is very close to the ceiling, paint drops may appear.
- You need to start whitewashing from the corner, moving in the opposite direction. Everything should be done carefully and slowly.
High-quality ceiling covering will make any room beautiful and comfortable.
What is a spray gun
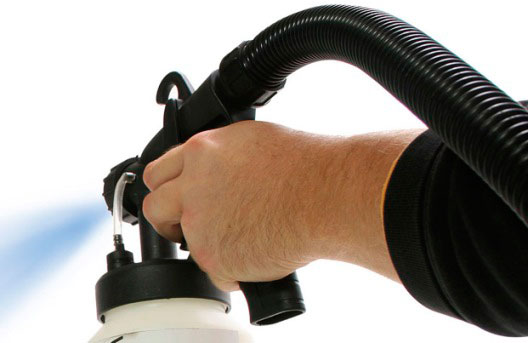
Technique does not like to stand still, as does the creative process of inventors who came up with a fairly simple and inexpensive device that greatly facilitates the process of applying paint to surfaces. This device is called a spray gun.
An airbrush is essentially a spray gun into which air is forced under pressure. Through the nozzle of the sprayer, the air escapes with great speed and force, dragging particles of paint with it, which settles on the surface to be painted.
 Previously, a conventional vacuum cleaner was often used for these purposes. In the configuration of many of them, there were even special nozzles on the hose, which allowed the unit itself to be used as a large pressure supercharger. The nozzle was put on a jar in which the sprayed solution was located.
In the video below, you can see how a vacuum cleaner or spray gun. This method has not lost its relevance even now, so, if necessary, you can easily assemble something similar at home by making an airbrush with your own hands.
Since then, the airbrush has changed outwardly, but the principle of its operation is unchanged. It can be either with manual pumping of the desired pressure, or with an electric motor that provides the desired pressure in the system.
Do-it-yourself whitewashing instruction
After the solution is prepared, you can start whitewashing. Before vacuuming the ceiling surface with a vacuum cleaner, it must be prepared. A special nozzle is used to spray the solution.If we are talking about a "Soviet" type vacuum cleaner, then it should be included, otherwise it will need to be purchased at the store.
Scheme of the spray gun
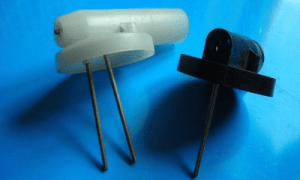
The nozzle is a plastic cover that is put on the end of the vacuum cleaner. It has two tubes: one reaches the bottom of the container with whitewash, and the second is a spray. Standard nozzles are designed for a half-liter can and have a short tube, but if the container is larger, then you can purchase a more impressive nozzle.
- After thoroughly mixing the solution in a bucket, it must be poured into a jar. Then fix the nozzle on the hose of the vacuum cleaner (the hose must be fixed in the hole of the vacuum cleaner from which air is distributed). When the nozzle is fixed, you need to turn on the vacuum cleaner.
- Next, you need to climb the ladder and direct the sprayer towards the ceiling, while the distance between the device and the surface must be at least 30 cm.
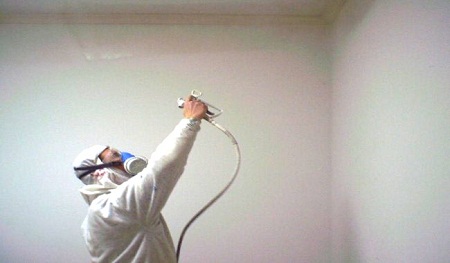
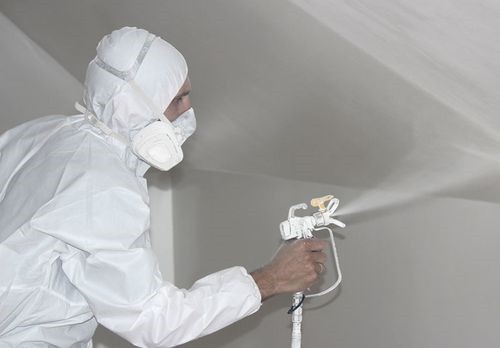
During whitewashing, a large amount of the substance is sprayed, so we must not forget about a protective suit
You need to whitewash in a circular motion, as this will ensure the most uniform application of the substance over the entire surface area.
It is very important to adjust the distance so that the final layer is free of streaks and circles. If you bring the device too close, then drops will appear, which will be very noticeable after drying.
It is best to start spraying from any corner of the ceiling, gradually moving towards the opposite end of the room, and most importantly, it is smooth movements and accuracy. In this case, you can not skip areas, since you need to apply the solution in one layer
Do not be afraid if different parts of the ceiling have different shades, because after complete drying the surface will take on a uniform color.
That's all that could be said about whitewashing the ceiling with a vacuum cleaner. We hope that our article was useful to the reader. If you still have any questions, then you can watch the training video at the end of this article, which can answer all your questions, because as they say, it is better to see once than hear a hundred times.
Solution preparation
While the ceiling dries, you can begin to study the whitewash solution. In this article, we will look at three different preparation options (see How to wash whitewash from the ceiling: surface preparation).
Option one - economy
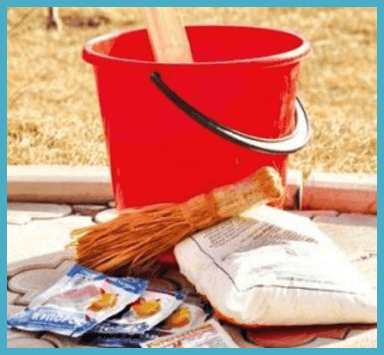
The first option can be classified as economy. To prepare such a solution you will need:
- Chalk;
- Blue;
- Capacity;
- Water;
- Gauze;
- Oilcloth;
- Polyethylene film.
So:
- You need to buy chalk in the store in the form of a dry powder or thick paste. It will be the fundamental material for whitewashing. If the purchased paste turns out to be gray, then you should not be embarrassed, because after whitewashing and complete drying, the surface will definitely become perfectly white.
Despite the fact that the chalk paste is initially gray, the future ceiling will still acquire a crystal white
- The amount of chalk required must be related to the area of the ceiling to be treated. It should immediately be said that it is better to take the material "with a margin", since it practically does not lose its properties. Therefore, it can be taken quite a lot, because it will come in handy for subsequent whitewashing.
- Then you need to calculate the required amount of solution. To do this, we must proceed from the fact that half a liter of finished whitewash is enough to process one square meter of ceiling. It is recommended that you first do a little training to gain skills. This is due to the fact that whitewashing the ceiling surface with a vacuum cleaner does not seem to be a very simple process.
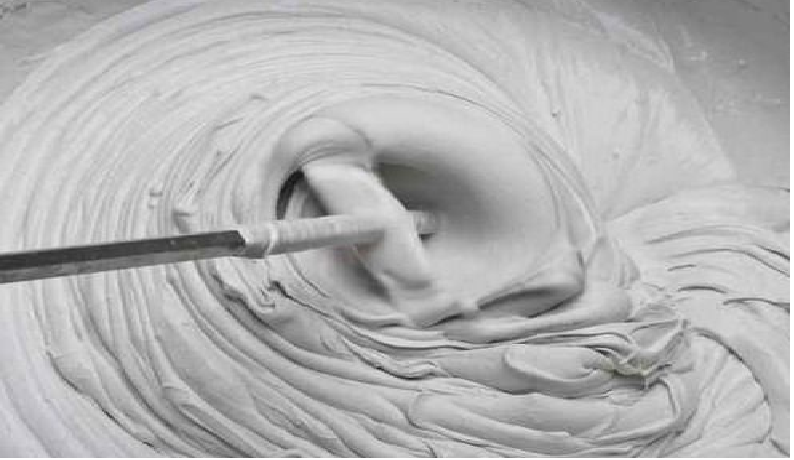
- Before preparing the solution, it is necessary to sift the chalk to remove large pieces and foreign, not ground impurities from it. After that, you need to mix the resulting chalk with water, in a ratio of 1: 1.5 (for example, 2 kg of chalk and 3 liters of water). The resulting mixture must be mixed very carefully to eliminate the possibility of lumps that will worsen the appearance of the ceiling.
Approximately such a consistency will need to be achieved
- Next, you need to filter the resulting solution through several layers of gauze, while periodically rinsing the fabric with water to free the pores. The result should be a thick mass, resembling rustic sour cream in consistency (see Is it possible to glue ceiling tiles on whitewash?). To get a perfectly white color, you need to add a little blue to the resulting solution.
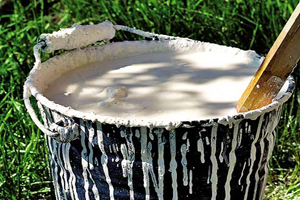
- If the solution turned out to be more than required, then you should not throw it away. It is necessary to leave the whitewash in the same container for several days. As a result, the chalk will settle to the bottom and get the consistency of a paste. This substance will need to be removed in a bag and stored until the next whitewash.
Option two - lime
Now consider a simpler, but at the same time more costly option - a solution of lime. This material has become popular due to its bactericidal properties, as well as the ability to hide small cracks.
The calculations will be as follows: for whitewashing 10 sq. m. ceiling must be diluted in warm water 1.7 to lime and about 40 g of blue
It is very important to achieve the correct consistency, to check it you need to do the following:
- Lower the knife or other metal object, then stick it out.
- If the whitewashing of the glass from the object does not leave a trace, then the solution has the correct consistency.
- Otherwise, it will be necessary to gradually add lime until the solution reaches the desired consistency.
Option three - alternative
Water-based paint allows you to give the ceiling a glossy shade, which looks very attractive.
If a person does not want to spend his time preparing solutions, while he is ready to pay a more impressive amount, there is an alternative option for him. In particular, water-based paint can be used for whitewashing. Due to its properties, it will give the ceiling a more beautiful look, while the preparatory work must be carried out more carefully, since this paint is not able to hide minor surface irregularities.
Whitewashing the ceiling with chalk
You need to purchase quality materials. Chalk for whitewashing the ceiling GOST 17498-72 would be the best option.
The chalk mixture looks whiter on the ceiling than the lime mortar. The surface, previously covered with chalk, is whitened with a chalk composition, treated with lime - lime. If you do the opposite, the composition will not seize and will have an unsightly appearance.
Safety
In order not to harm your health, you must strictly follow all the safety requirements for whitewashing:
- Before starting work, you need to check the strength of the ladder, scaffolding, table. They shouldn't wobble
- Children and animals are taken out of the premises
- Protect the respiratory organs with a respirator. If you inhale chalk powder, irritation of the mucous membranes may occur.
- Wear goggles to protect your eyes from dust.
- Chalk eats into the skin and causes dryness and itching, so you need to wear gloves and a long-sleeved robe
- If chalk gets into the hair, it will be difficult to wash it, it is better to immediately put on a scarf
Preparing for whitewash
The first step is to remove or cover the furniture and floor.
Using a spatula, remove all loose, poorly adhering building materials. The best option is to remove the entire layer of old whitewash with a soap solution and a spatula. You can purchase a ready-made composition for removing old whitewash from the ceiling.
If rust spots appear, they must be cleaned to the ground or painted over with water-based paint.
All cavities and cracks are sealed with putty.
The appearance of the bleached surface will depend on the quality of surface preparation.
whitewashing process
Do-it-yourself ceiling repair with chalk starts from the window. The ceiling is divided in advance into sectors, on which white is alternately applied. For convenience, a long-handled roller is used for application; in this case, you can do without a stepladder.
Step-by-step instruction:
- White is applied in stripes, moving from window to door.
- After applying the first layer, wait for it to dry.
- The second layer is applied perpendicular to the first, so there will be no streaks on the ceiling.
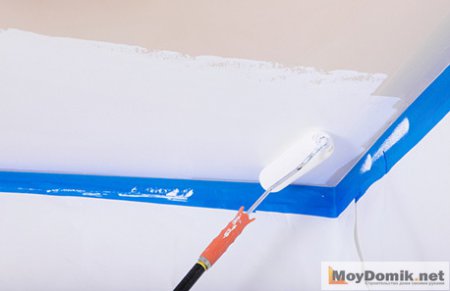
- The joints of the ceiling with the wall must be well smeared with a brush.
The wet surface has a gray ugly appearance, as it dries, it becomes whiter. To achieve the maximum snow-white shade, you need to apply several layers.
During the execution of work, it is necessary to protect the ceiling from drafts. The droplets of water that have come out are distributed over the surface with a roller.
Whitewashing with chalk is relevant due to its environmental safety and low cost. If you follow the safety precautions and the rules for applying white to the surface, you will get an excellent result. The ceiling can be whitened both in a snow-white color, and give the desired shade with the help of blue or color schemes.
Preliminary preparation and processing of the ceiling
Before you start painting with a water-based emulsion, the ceiling must be prepared for subsequent work.
To get a positive result of work, do not paint the ceiling with a water-based emulsion over the old layer. It must be removed with a spatula using an alkaline detergent, and then rinse the ceiling with clean water and allow to dry.
To simplify the task, use this simple trick:
- Moisten the ceiling with plenty of water (you can use a spray bottle or a foam roller for this).
- Repeat the procedure after half an hour. The old coating will be properly saturated with moisture.
- The next step is to create a draft in the room. Open all windows and doors, and bulges form on the surface of the ceiling. You can easily remove such a wet layer of the old coating with a spatula.
After such pre-treatment, errors may become noticeable on the surface of the ceiling. They are quite easy to eliminate: open all the cracks and treat them with finishing putty. After it dries, the surface must be rubbed with sandpaper, and the dust should be wiped off with a damp cloth or removed with a vacuum cleaner.

During the preparation of the ceiling for painting, it may be necessary to eliminate minor errors
Now start priming the ceiling. Use a deep penetration primer for this. When it dries, paint can be applied to the surface.
Spray ceiling whitewashing
Applying paints and varnishes with a sprayer gives the highest quality surface. One of the subspecies of this option is airless spraying.
Airless ceiling whitewashing
Its essence lies in the fact that paintwork materials (in our case, whitewash composition) are supplied to the spray head under very high (250-300 atmospheres) pressure. At the exit from the nozzle, due to a sharp pressure drop, the jet of material "explodes", forming a directed torch.
How airless spray ceiling painting works (video).
The disadvantage of this method is that the airless sprayer is a professional equipment that is used for large volumes of painting, and it is very expensive. It can be rented in some cities.
In addition to the high cost, the consumption of the material will be an order of magnitude higher, because part of it in the form of a paint mist does not reach the surface or is bounced off it.This method of whitewashing is the most “dirty”, but at the same time it gives a very smooth and high-quality surface.
A somewhat similar principle is used when a sprayer is used for whitewashing the ceiling, only here the material is supplied at a much lower pressure from a can (in the case of a separate nozzle for a vacuum cleaner) or a paint sprayer tank, and sprayed under the influence of a jet of compressed air.
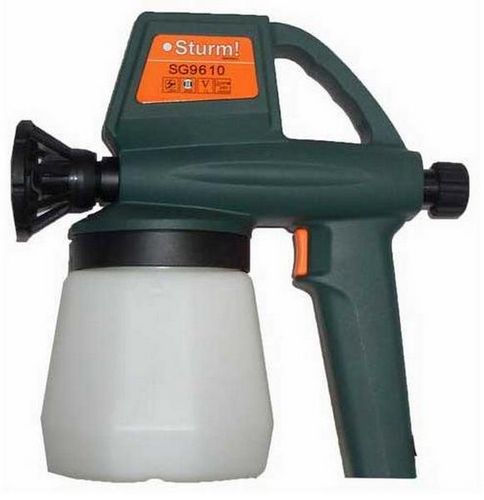
Ceiling whitewash sprayer
If a vacuum cleaner with a reverse air supply function is available, then you can use a special nozzle that will help whitewash. And we are talking not only about the cover that came with the old vacuum cleaners. There are also more modern devices on sale, which, however, already resemble not just a nozzle, but a ready-made spray gun. They are not so expensive, and will not affect the overall repair budget too much.
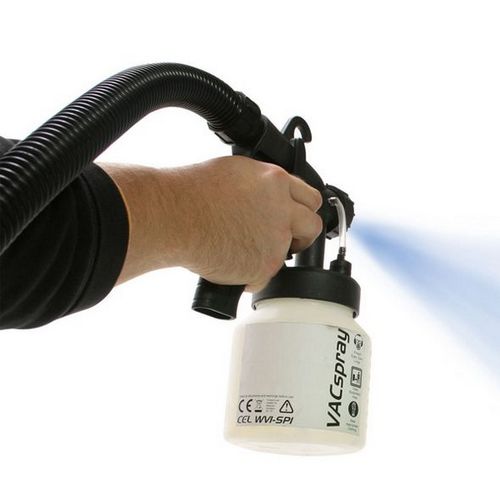
Special attachment for vacuum cleaner
Well, if your house also has an old spray cap, then you can use it. In order for the material to start flowing from the nozzle, you need to close the hole on the cover with your finger. Then the air will not have an exit from the tank, and will begin to squeeze the paint out of the can. The vacuum cleaner stays on all the time. Whitewashing the ceiling with a vacuum cleaner requires some skill, and yet it is more convenient to use modern nozzles that can significantly speed up the process and achieve a better result.