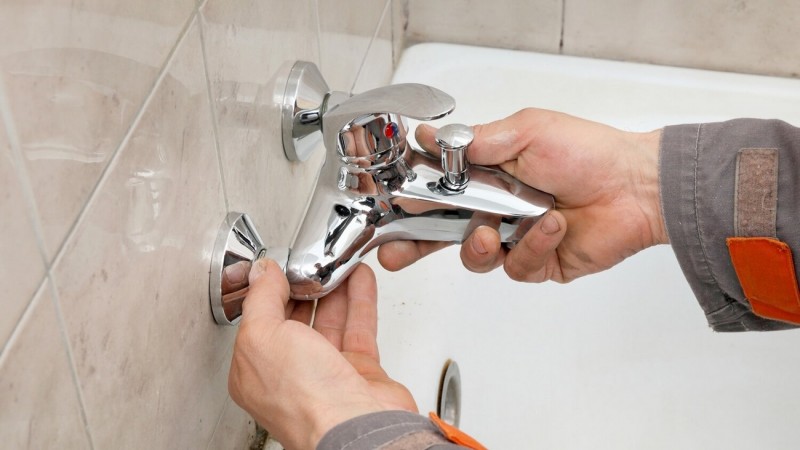
Causes of mixer failures
To start repairing the mixer, you need to know the frequent problems and malfunctions of mixers that may occur during operation.
The second reason may be that the production uses old-style materials, for example, if you use rubber for a gasket, then such a gasket will last less than silicone. The important point is that the silicone gasket is less deformed and does not collapse from drying out.
The most common cause in our time can be called hard and dirty water that goes through pipes. Such water forms deposits in mixers and contributes to the destruction of seals and other parts of the device. Also, this reason contributes to the corrosion of metals.
These were the reasons for the breakdowns of the mixers, and now we need to sort out the specific malfunctions that may occur.
Troubleshooting ball single lever mixer
Ball mixers are durable, but if a breakdown occurs, they cannot be repaired and require replacement. You can eliminate with your own hands only a weak flow of water dispensed and leaks associated with wear of the sealing rubber bands. It is difficult to call a “trouble” with a weak jet a breakdown - the mixer still functions. The reason is a clogged aerator.
Blockage removal procedure
- Remove the aerator from the mixer spout.
- Rinse thoroughly under running water in the opposite direction to the water flow.
- Install the aerator by securing it with the clamp nut.
How to replace rubber seals
- Remove the handle.
- Remove the plastic shield two-piece. The black part is a seal that needs to be cleaned or replaced.
- If the leak persists, remove the ball mechanism.
- Replace bottom seal.
- Replace the ball and secure the seals with the plastic nut.
- Install the handle and check the operation of the mixer.
The device of single-lever mixers
Single-lever faucets are a relatively young development in the field of plumbing that has gained trust and popularity among consumers. Such cranes are also called "one-handed" or "single-grip". In operation, they are very simple: the temperature and water pressure are controlled with one hand. Understanding the features of the mixer device will help you easily cope with its disassembly and repair. Elements of a single-lever mixer:
- control lever (handle);
- jet regulator (spout);
- frame;
- retainer (fastening);
- ceramic cartridge or ball mechanism;
- silicone or rubber gaskets;
- circular nut;
- flexible hoses for water supply.
According to the internal arrangement, single-lever mixers can be:
- Ball. The device of ball lever mixers implies the presence in the design of a hollow steel ball with three holes - a mixing chamber. Two openings accept hot and cold water, which is mixed inside. Third - gives out already warm water. The handle drives the ball. By moving, the ball allows you to adjust the temperature of the water and the pressure of the jet.
- Cartridge. The device of cartridge mixers is similar to that described above. Instead of a metal ball, ceramic cartridges are used here. Repair of such a mechanism is impossible, only a complete replacement of the cartridge. To prevent damage to the element, it is recommended to install special filters on the water supply to the mixer.
The main reasons for the formation of breakdowns of the mixer
Mixer failures are not uncommon, because:
- the quality of water supplied to residential premises from the general water supply system is quite low. The water may also contain some impurities that adversely affect the internal structure of the mixer;
- the use of low-quality consumables: gaskets or rings, clamping nuts, and so on, which also leads to rapid wear and, accordingly, the formation of leaks;
Leakage due to worn O-ring
- low quality of the mixer itself. Often, the cheapest models with a small amount of functionality are installed in the bathroom, which leads to a decrease in the service life;
- incorrect installation of the device;
- factory marriage, leading to the formation of cracks on the body of sanitary equipment.
To reduce the frequency of repairs, it is recommended to purchase faucets from reliable manufacturers such as GROHE, JACOB DELAFON, ROCA, LEMARK or WasserKRAFT.
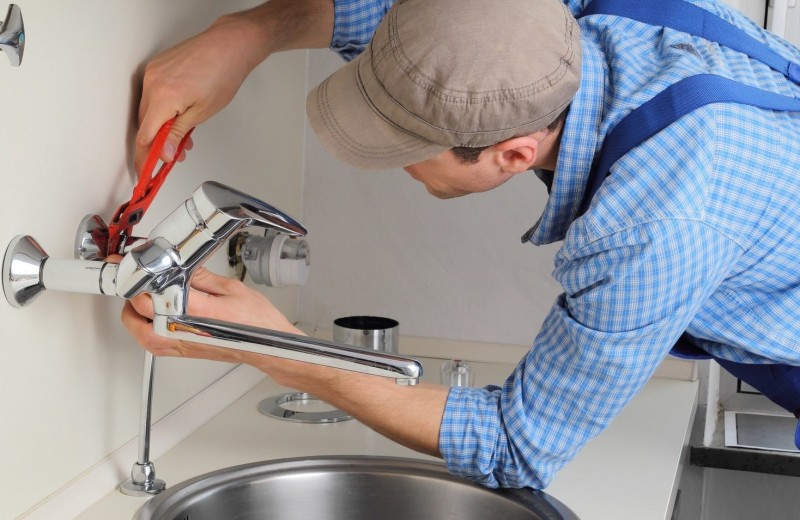
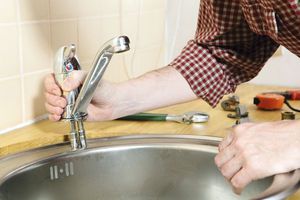
How to remove the old
Before starting work, turn off the water supply to the tap, drain the remnants that are in the pipes. Now you can start replacing the faucet in the kitchen. To remove the old faucet from the sink, unscrew the nut that is screwed onto its body from the bottom of the sink. If the sink is installed in a kitchen cabinet, it is very inconvenient to work. It's better to remove the washer. For this you will have to:
- Open the siphon. There are many designs of siphons, but each has a nut that must be unscrewed. It is hard to confuse it - it has protrusions for a better grip. Unscrew the nut, remove the lower part of the siphon.
- Unscrew the hot and cold water hoses that go to the mixer. The cap nuts are usually removed. To do this, you need a key for 22 or 24.
- Cut the sealant around the perimeter of the sink, if any.
-
Loosen the screws securing the sink to the countertop. You will see the bolts if you "dive" into the table.
Now you can lift and turn the sink. Here you will see a nut that needs to be unscrewed. You will need two wrenches for this job. One is holding the body from the “front” side of the sink, the second is unscrewing the nut.
Sometimes it is very difficult to remove the old faucet in the kitchen: it “sticks”. For this case, kerosene or universal grease in cans of WD-40 is suitable. Both substances have a low density and are able to seep into microscopic cracks. The composition or kerosene is applied to the connection that needs to be disassembled, they wait 10-15 minutes, they try to unscrew it.
If all the tricks did not help, there is a simple method that is suitable if the old mixer is not going to be used anywhere else: you can cut the body along with the nut with a grinder. The method is tough, but after suffering for an hour in an attempt to remove the nut, they resort to it.
If the faucet is installed on the countertop, you will have to work “from the inside” - crawl into the closet with a flashlight, and unscrew the nut in this way.
Repair of a ceramic faucet box
Plumbing repair crane box with ceramic plates is to replace the worn plastic washer:
- Remove the stem retainer from the crane box requiring repair.
- Take the crane box in your left hand, clenched into a loose fist, with the stem from the side of the thumb, and squeeze the body of the product with the ring of the index and thumb.
- Press the thumb or the palm of your right hand on the stem of the crane box with sufficient force, and all the contents will fall out of the body into the loosely clenched left palm.
- Remove the remnants of the pressure washer if it is really worn out and the reason for the need for repair in it (this will be immediately visible in its thickness and appearance, and sometimes only fragments of the washer remain).
- Pick up a copper wire with a diameter of about 1 mm, wrap a ring of wire on the rod of the crane box in the place where the plastic washer was. If necessary, grind it on both sides with fine emery, if the assembled ceramic bushing will be difficult to rotate (you need to check by installing the product on the mixer).
- In some crane boxes, a home-made clamping washer made of 1 mm wire can expand so much that the stem will slip through it and the tightness will be broken.In this case, you will have to connect the ends of the copper ring by soldering, then grind off the excess solder, or take a wire of a larger diameter, and flatten the washer from it to 1 mm. Such a ring will first have to be installed in the body of the crane box, and only then the rod should be inserted.
- Before final assembly and installation of the repaired bushing in the mixer, apply a small amount of waterproof grease to the copper ring.
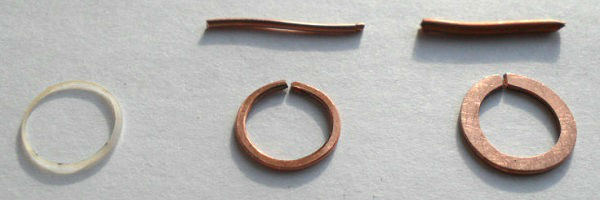 Pressure washers
Left to right: Worn plastic washer; copper wire ring Ø 1.2 mm; wire ring Ø 1.8 mm.
Typical malfunctions and methods for their elimination
According to the principle of operation, all mixers are divided into the following types:
valve devices. The basis of the mixer are two taps designed to supply cold and hot water. Such devices are considered the most common and most reliable;
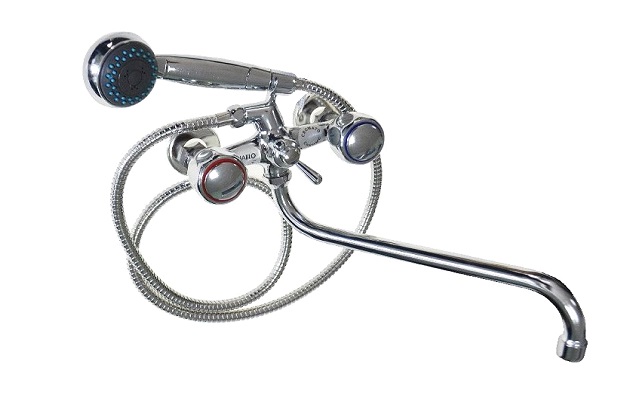
The most popular type of faucets with two valves
single-lever. At the heart of the device is a rotary lever, which regulates both the amount of cold or hot water supply and the total pressure of the liquid. Single-lever mixers are more whimsical to water quality, therefore, when choosing such a device, it is recommended to install additional filters;
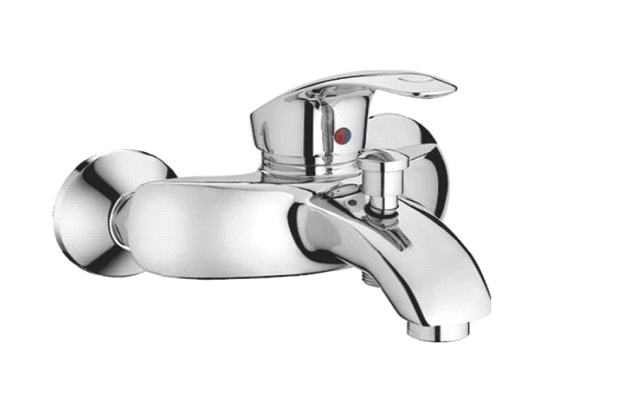
Device with one control lever
sensory. Relatively new type of mixer. The device is turned on thanks to the installed photocell, which reacts to the presentation of hands.
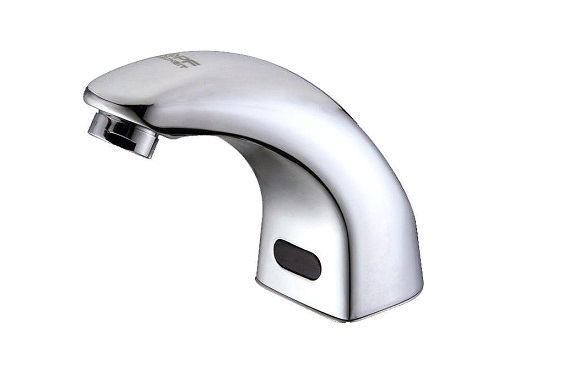
Automatic plumbing device with sensor
Touch-type faucets cannot be repaired at home.
Faucet mixer repair
The most frequent breakdowns of the faucet mixer in the bathroom are:
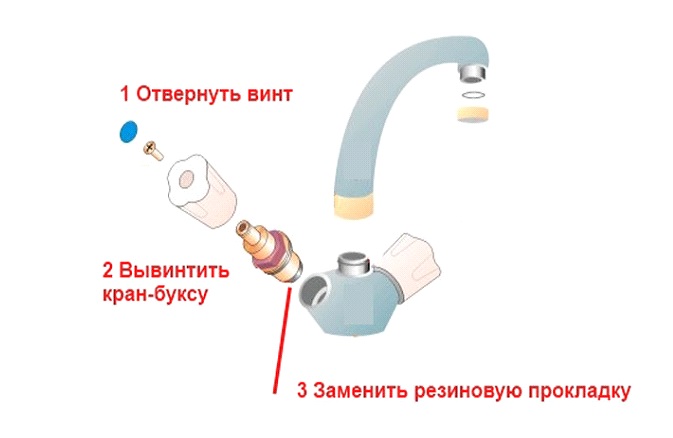
- Faucet leak. The causes of the malfunction may be the natural wear of the gasket or damage to the crane box. Repair of a ball valve is carried out according to the following scheme:
- shut off the water supply to the plumbing device;
- remove the decorative cap (plug) from the leaking faucet, which is most often simply inserted into the groove;
- unscrew the screw located under the plug;
- unscrew the crane box (use an adjustable wrench or wrench of the appropriate size);
- replace the gasket or crane box (in the presence of visible damage to this device);
- reassemble in reverse order.
Repair sequence
- Shower diverter leak. The reasons are also natural wear and tear or poor quality water. Repair of this malfunction is carried out in the following order:
- the water supply to the mixer is blocked;
- the decorative cap and switch are removed;
- with the help of an adjustable (wrench) wrench, the shower nut is unscrewed;
- the gasket is replaced and reassembled in reverse order.

Shower diverter gasket replacement technology
- Leakage at the connection point of the shower hose, shower head or gander. Repairs should be made in the following order:
- the nut fixing the hose is unscrewed (a shower head or a gander, respectively);
- the gasket is replaced and the mixer assembly is assembled.
In some models of mixers, in addition to replacing the gasket, additional sealing of the thread with FUM tape or other similar materials is required.
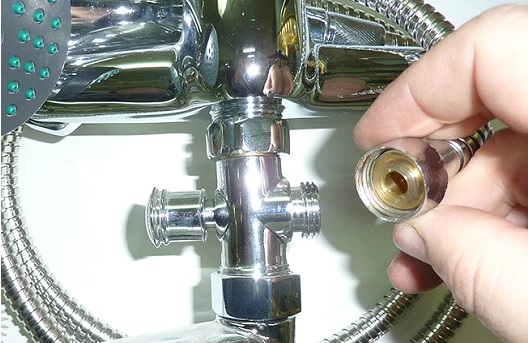
Fixing a leak at a shower hose connection
Single Lever Faucet Repair
Typical breakdowns of a single-lever mixer are eliminated in the following ways:
- Reducing the pressure of the crane jet. The cause of the malfunction is a clogged aerator. To clean the aerator, you must:
- remove the device, which, as a rule, is fastened with a threaded method;
- rinse the strainer under the pressure of water or air;
- install the aerator in its original place.

Faucet aerator cleaning
- Control lever leak. The cause of the malfunction is problems in the operation of the cartridge - a special device in which hot and cold water is mixed.You won’t be able to repair the cartridge yourself, but you can replace the device yourself to fix the leak. The work is done in the following order:
- the decorative cap is removed from the switch housing;
- the screw fixing the lever is loosened;
- the lever body and the decorative element located under it are removed;
- using an adjustable (wrench) wrench, the cartridge is removed;
- a new device is installed and assembled in the reverse order.
It is recommended to select a new cartridge based on the device that has become unusable, that is, after removing the old cartridge.

Scheme for disassembling a single-lever faucet to replace the cartridge
- Leaks at the points of connection of the shower hose, shower head and faucet goose are eliminated according to the scheme of valve faucets.
Ways to eliminate breakdowns of a single-lever mixer are presented in the video.
If you can’t cope with the malfunction of the mixer on your own, then you will need the help of a professional plumber.
Preventive maintenance
 In order to avoid problems with the faucet in the kitchen, it is necessary to periodically carry out preventive repairs.
This procedure will only take a few hours. Thanks to it, it will be possible to avoid serious damage or unexpected replacement of the mixer. First of all, it is necessary to turn off the water supply, having previously collected some water in a bucket.
Then you should loosen the connection of the sink and drain. In some cases, you will have to cut the sealant with a knife between the sink and countertop, and then use a spatula to lift the sink. Thanks to this, you will be able to easily remove the mixer. First you need to unscrew the bolts.
A decorative cap is removed from the handles, and why the screw under it is unscrewed. Next, the mixer is disassembled. All elements must be carefully inspected and then washed using a household cleaner.
Then you should pay attention to all rubber seals. If they are dry or torn, then they should be replaced.
After that, the entire structure is assembled. Such preventive maintenance is carried out 2-3 times a year, depending on the quality of the water.
Many housewives complain that the faucet in the kitchen starts to leak over time. To avoid this problem, it is necessary to responsibly approach the installation of equipment and take into account recommendations for its operation. If water still flows from a tap or pipe, a competent repair should be performed.
Donskikh Vladimir Alexandrovich
In what cases is it possible to repair the mixer
Not all breakdowns of the mixer can be eliminated with the help of repair. Cartridge replacement or other repair is carried out in case of the following breakdowns:
- the cartridge is leaking;
- when turned on at full power, the ball mixer produces a weak pressure of water;
- when turned on, water is simultaneously supplied to the spout and shower;
- broken button switch.
More serious breakdowns are extremely rare, but require the replacement of the entire mixer.
We disassemble the mixer
Almost everyone can disassemble and repair a leaking single-grip mixer. You don't need professional tools for this.
For repairs you will need:
- screwdriver or knife;
- hex wrench of a suitable size;
- pliers.
Procedure
- Use a screwdriver (or a knife) to remove the plugs on the lever, indicating the direction of the handle for supplying hot and cold water.
- Loosen the screw and remove the handle.
- Carefully unscrew the ceramic and ring nut from the housing. This is done with a key or manually.
- Remove the cartridge from the case.
The entire procedure for disassembling the mixer takes an average of 10 minutes and is within the power of everyone.
We eliminate the leak
The cause of the flow of single-lever mixers is often failed cartridges. This happens due to abrasive particles of debris getting into the interdisk space.In this case, the cartridge must be replaced.
When choosing a replacement element, it is worth considering that the holes in the cartridge can be of different diameters (3 or 4 cm). Also, cartridges may differ in latches on the bottom plate. Replacement cartridges with silicone seals are recommended as they are more durable when exposed to water.
After installing a new cartridge in the body, the mixer is assembled in the reverse order of disassembly.
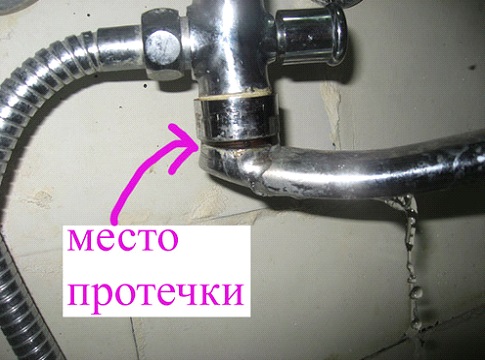
Faucet/Shower switch leak
Often the problem is due to wear of the internal oil seal. To fix the problem, it (the oil seal) must be replaced. Troubleshooting procedure:
- The handle must be in the closed position.
- Remove the flexible shower hose.
- Using pliers, remove the switch button from the faucet.
- Using a rod or screwdriver, unscrew the adapter from the spout.
- Replace worn o-ring.